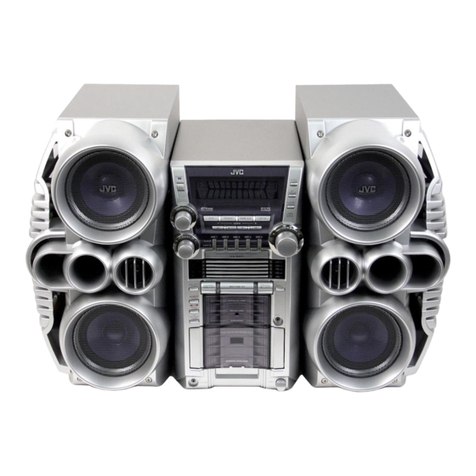
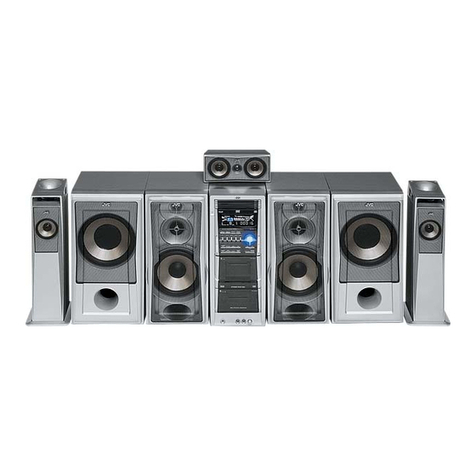
JVC NX-SA1B User manual

EnglishFrançais
LVT2353-001A
[J]
INSTRUCTIONS
MANUEL D’INSTRUCTIONS
For Customer Use:
Enter below the Model No. and Serial
No. which are located either on the rear,
bottom or side of the cabinet. Retain this
information for future reference.
Model No.
Serial No.
COMPACT COMPONENT SYSTEM
SYSTEME DE COMPOSANTS COMPACT
NX-SA1B
NX-SA1[J]11.indd1NX-SA1[J]11.indd1 12.5.159:58:29AM12.5.159:58:29AM

2
English
Caution: Proper Ventilation
To avoid risk of electric shock and fire, and
to prevent damage, locate the apparatus as
follows:
1 Front:
No obstructions and open spacing.
2 Sides/ Top/ Back:
No obstructions should be placed in the
areas indicated by the dimensions in the
illustration.
3 Bottom:
Place on a level surface. Maintain an
adequate air path for ventilation by placing
on a stand with a height of 10 cm (3-15/16”)
or more.
Front view
Side view
Introduction
Auto power save function
When no operation is done in certain
situations for 30 minutes, the System turns
off automatically. This function is on at the
initial setting. For details, refer to page 11.
•
In this manual…
The remote control buttons are used
for explaining the operations unless
mentioned otherwise. However, if the
unit has buttons with the same or similar
names, they can also be used for the
operations.
In this manual, “iPod” means iPod, iPod
touch and iPhone device. When iPod touch
or iPhone device is specifically referred to,
“iPod touch” or “iPhone” is used.
In this manual, “file“ and “track“ are used
interchangeably.
•
•
•
15 cm
(5-15/16”)
15 cm
(5-15/16”)
15 cm
(5-15/16”)
10 cm
(3-15/16”)
15 cm
(5-15/16”)
10 cm
(3-15/16”)
NX-SA1[J]11.indd2NX-SA1[J]11.indd2 12.5.159:58:31AM12.5.159:58:31AM

3
English
Contents
Introduction...........................2
Preparation ............................ 4
Accessories.......................................................4
Preparing the remote control.......................4
Basic connections .................. 5
Connecting the FM antenna.........................5
Connecting the power cord ..........................5
Part names ............................. 6
Unit Top/Front .................................................6
Unit Side/Rear..................................................7
Remote control................................................8
Basic operations .................... 9
Getting started................................................9
Turn on the power..........................................................9
Select a source.................................................................9
Adjust the volume..........................................................9
Setting the clock .............................................9
Adjusting the sound effect ........................ 10
Adjusting the subwoofer volume............. 10
Using the sound mode................................ 10
Changing the display information ........... 10
Changing the brightness of the
indications.................................................. 10
Activating/deactivating the Auto Power
Save (A.P.S.)................................................. 11
Connecting headphones............................ 11
Listening to iPod..................12
Connecting iPod........................................... 12
Playing back.................................................. 12
Viewing video/picture from iPod ............. 13
Listening to a USB device....14
Connecting a USB device ........................... 14
Playing back.................................................. 14
Programming the playing order —
Program Play.............................................. 15
Playing at random — Random Play ......... 16
Playing repeatedly — Repeat Play ........... 16
Listening to FM ....................17
Searching for stations................................. 17
Presetting stations....................................... 17
Listening to an external
device..................................18
Connecting an external device ................. 18
Listening to an external device................. 18
Setting the timer .................19
Setting the Sleep Timer .............................. 19
Setting the Daily Timer ............................... 19
References............................20
Compatible iPod .......................................... 20
Playable files................................................. 20
Maintenance................................................. 21
Trademarks ................................................... 21
Troubleshooting .......................................... 22
Specifications ............................................... 23
NX-SA1[J]11.indd3NX-SA1[J]11.indd3 12.5.159:58:31AM12.5.159:58:31AM

4
English
A rating label is placed on the bottom of the
System.
Select a place which is level, dry and neither
too hot nor too cold–between 5˚C and 35˚C
(41˚F and 95˚F).
Accessories
Check that you have all the following items,
which are supplied for the System.
Remote control (RM-SNXSA1BR) .......................1
Lithium coin battery CR2025 ..............................1
The battery has been installed in the remote
control when shipped from the factory
AC adaptor (AA-R2002) .........................................1
AC power cord..........................................................1
FM antenna................................................................1
If any of these items are missing, contact your
dealer immediately.
•
•
•
•
•
•
•
Preparation
Preparing the remote control
When you use the remote control for the first
time, pull out the insulation sheet.
If the range or effectiveness of the remote
control decreases, replace the battery.
To replace the battery in the remote control
Insert the battery into the remote control by
matching the polarities (+ and –) correctly.
NOTE
The included battery is for checking system
operation. Replace it with a new one as soon
as possible.
CAUTION
Danger of explosion if battery is incorrectly
replaced.
Replace only with the same or equivalent
type.
Store the battery in a place where children
cannot reach. If a child accidentally swallows
the battery, consult a doctor immediately.
To prevent the battery from overheating,
cracking, or starting a fire:
- Do not recharge, short, disassemble or heat
the battery, or dispose of it in a fire.
- Do not leave the battery with other metallic
materials.
- Wrap the battery with tape and insulate
when throwing away or saving it.
- Do not poke the battery with tweezers or
similar tools.
Dispose of the battery in the proper manner,
according to federal, state, and local regulations.
•
•
•
•
•
•
Lithium coin battery
(product number: CR2025)
NX-SA1[J]11.indd4NX-SA1[J]11.indd4 12.5.159:58:31AM12.5.159:58:31AM

5
English
Basic connections
Connecting the FM antenna
Extend the FM antenna when connecting so
that you can obtain the best reception.
NOTE
Make sure the antenna conductors do not
touch any other terminals, connecting cords
or the power cord.
Also, keep the antennas away from metallic
parts of the main unit, connecting cords, and
the AC power cord. Otherwise, it could cause
poor reception.
If you want to get a better reception,
disconnect the supplied FM antenna, and
connect to an outdoor FM antenna (not
supplied) using a 75 Ω wire with coaxial type
connector.
•
•
Connecting the power cord
Connect the supplied AC adaptor to the DC IN
jack on the System. Then connect the supplied
AC power cord to the AC adaptor, and plug it
into a wall outlet.
CAUTION
Disconnect the power cord before cleaning
or moving the System.
To avoid the risk of fire and to prevent
damage,
- Do not use any AC adaptors other than the
one supplied.
- Do not use the supplied AC adaptor for
other equipment.
Be sure to unplug the power cord from the
outlet when going out or when the System is
not in use for an extended period of time.
•
•
•
Do not connect the power cord until all
other connections have been made.
FM antenna
(supplied)
AC outlet
AC power cord
(supplied)
AC adaptor
(supplied)
NX-SA1[J]11.indd5NX-SA1[J]11.indd5 12.5.159:58:32AM12.5.159:58:32AM

6
English
Part names
1STANDBY ON button
2iPod
6button
3USB
6button
4AUDIO IN button
5TUNER button
6DIMMER button
7(Sound Effect) button
84button
9¢button
07button
-DISPLAY button
=VOLUME +/– buttons
~Remote control sensor
!Display
@STANDBY lamp
#Illumination lamp
$TIMER lamp
%Dock for iPod
^Subwoofer
@
~
!
#
$
%
1
2
3
4
59
8
7
6
0
^
-
=
Unit Top/Front
NX-SA1[J]11.indd6NX-SA1[J]11.indd6 12.5.159:58:32AM12.5.159:58:32AM

7
English
&PHONES jack
*AUDIO IN jack
(USB MEMORY connector
)FM 75Ω COAXIAL terminal
_DC IN jack
+VIDEO OUT terminal
&
)
_+
*
(
Unit Side/Rear
NX-SA1[J]11.indd7NX-SA1[J]11.indd7 12.5.159:58:32AM12.5.159:58:32AM

8
English
Part names
~DIMMER
ŸUSB
6
!iPod
6
⁄AUDIO IN
@SLEEP
¤CLOCK/TIMER
#A.P.S.
‹REPEAT/TUNER MODE
$SET
›PLAY MODE
%CANCEL
fiSOUND
^(Sound Effect)
flDISPLAY
&(STANDBY/ON)
‡TUNER
*1
°¡
(7
·UP
)MENU
‚4
_¢
—DOWN
+MUTING
±SUB WOOFER +/–
`VOLUME +/–
fl
&
‡
*
°
(
·
)
‚
_
—
+
±
`
~
Ÿ
!
⁄
@
¤
#
‹
$
%
›
fi
^
Remote control
NX-SA1[J]11.indd8NX-SA1[J]11.indd8 12.5.159:58:32AM12.5.159:58:32AM

9
English
Setting the clock
1Display the clock setting screen.
The hour indication flashes on the display.
A M 1 2.0 0
1 2.0
If you have already set the clock before,
press CLOCK/TIMER repeatedly until the
hour indication flashes on the display.
2Adjust the hour.
/ \
(Press repeatedly)
3Adjust the minute.
/ \
(Press repeatedly)
Finish setting the clock.
To correct a misentry during the process,
press CANCEL.
You can return to the previous step.
NOTE
The clock may gain or lose 1 to 2 minutes per
month. You may need to readjust the clock
periodically.
If there is a power failure, the clock loses its
settings. You need to set the clock again.
•
•
•
Basic operations
Getting started
1Turn on the power.
The STANDBY lamp goes off.
2Select a source.
/ / /
3Adjust the volume.
Adjustable range: MIN, 1— 39, MAX
To turn off the System
The STANDBY lamp turns on.
To mute the volume temporarily
“MUTING” flashes.
To restore the sound, press MUTING or
VOLUME +.
•
NX-SA1[J]11.indd9NX-SA1[J]11.indd9 12.5.159:58:33AM12.5.159:58:33AM

10
English
Adjusting the sound effect
You can enjoy dynamic and realistic sound
effects.
Press the button once to display the
current setting. Press it again to change
the setting.
WOW HD: Suitable for listening in front of the
System.
EH–1 (Normal Enhance Mode):
Widens the sound field in front of
the System.
EH–2 (High Enhance Mode):
Further widens the sound field in
front of the System.
OFF: Cancels the sound effect.
Adjusting the subwoofer volume
(Press repeatedly)
Adjustable range: 1— 5
Using the sound mode
To select the sound mode suitable for your
favorite music.
Press the button once to display the
current setting. Press it again to change
the setting.
ROCK CLASSIC JAZZ POP
FLAT (Canceled)
•
Changing the display information
Each time you press the button, the
information shown changes from the clock
to other information.
The information shown on the display differs
depending on the source.
Tag information can be shown on the display
while an MP3/WMA file is played back.
Ex.: Clock
P M 1 2.3 4
Ex.: When a USB device is played
1 0 2.4 5
Current track number Elapsed playing time
Ex.: When a USB device is stopped
G 1 2 T 7 9 8
Total group number Total track number
To display the clock while the System is on
standby, press 7.
Changing the brightness of the
indications
Each time you press the button, the setting
changes.
DIM 1 DIM 2
DIM OFF (Canceled)
The setting is stored even if the power is
turned off.
•
•
•
Basic operations
NX-SA1[J]11.indd10NX-SA1[J]11.indd10 12.5.159:58:34AM12.5.159:58:34AM

11
English
Activating/deactivating the Auto
Power Save (A.P.S.)
Press the button once to display the
current setting. Press it again to change
the setting.
APS ON
APS OFF (Canceled)
If no operation is performed for 30 minutes in
the following situations, the System turns off
automatically.
- The volume level is set to MIN or muting is
activated.
- “iPod”is selected as the source, and iPod is
not connected.
- “USB” is selected as the source, and
playback is stopped.
During the 30-minute countdown,“APS” is
shown on the display every minute.
Approximately 30 seconds before the power
is turned off, “APS” starts to blink.
The 30-minute countdown restarts when
you perform button operations or connect/
disconnect a device.
This function has priority over the Daily Timer
and Sleep Timer.
This function is on at the initial setting.
•
•
•
•
•
Connecting headphones
Be sure to turn down the volume before
connecting or putting on the headphones.
Connecting the headphones deactivates the
speakers.
The sound effect and sound mode do not
affect the sound through the headphones.
NOTE
If “iPod” is selected as the source, no sound is
heard from headphones.
•
•
•
Headphones
(not supplied)
NX-SA1[J]11.indd11NX-SA1[J]11.indd11 12.5.159:58:35AM12.5.159:58:35AM

12
English
Listening to iPod
Connecting iPod
You can operate iPod through the System.
Do not connect or disconnect iPod when the
System is turned on.
1Push PUSH OPEN to open the dock for
iPod.
2Insert iPod directly to the connector pins.
iPod is charged through the dock when the
System is turned on.
When not connecting iPod, press the dock
for iPod to store it. The dock for iPod cannot
be stored, even by pressing, unless it is
already fully open.
Be careful not to pinch your fingers when
you store the dock for iPod.
CAUTION
You cannot send any data to iPod from the
System.
Take the protect case of iPod off before
connecting.
Keep iPod in a straight position while
connecting/disconnecting it.
Connect iPod firmly.
Do not carry the System with iPod
connected. Doing so might cause damage to
the dock or you might drop iPod.
Do not touch or hit the terminal pins of
iPod or connector pins in the dock for iPod
directly. Doing so might cause damage to
the connector pins.
•
•
•
•
•
•
•
•
•
•
Playing back
iPod is turned on and starts playing.
To pause
To cancel pause, press the button again.
To select a track
/
(Press repeatedly)
To fast forward/reverse
/
(Hold)
Shuffle Playback
Each press switches the selection of iPod
shuffle songs.
Repeat Playback
Each press switches the selection of iPod
repeat songs.
To put iPod in sleep mode
(Hold)
NX-SA1[J]11.indd12NX-SA1[J]11.indd12 12.5.159:58:35AM12.5.159:58:35AM

13
English
To operate the menu of iPod
1Display the menu.
2Select a menu item.
/ \
(Press repeatedly)
To return to the previous menu, press MENU.
NOTE
Depending on the type of iPod, iPod may
operate differently.
Depending on the type of iPod, you can
operate the menu only on the screen of iPod.
Operate iPhone or iPod touch itself in the
following cases:
– When operating the home button.
– When selecting application icons on the
home screen.
– When dragging the slider.
For information on operating iPod, see the
instruction manual for iPod.
Sound distortion may occur when playing
back audio sources with high recording
levels. If distortion occurs, it is recommended
to turn off the equalizer of iPod.
•
•
•
•
•
Viewing video/picture from iPod
You can view video/picture from iPod on an
external monitor.
Before connecting a monitor display, turn off
the power of this System.
1Connect a monitor display.
2Set the video output of iPod.
While the System is turned off...
(Hold)
Main unit
Press and hold the button once to display
the current setting. Press it again to
change the setting.
VOUT ON: Displays video/picture on the
connected monitor
VOUT OFF:Displays video/picture on iPod
3Turn on the power of the System and
monitor, and play back iPod.
Select the monitor input accordingly.
•
•
•
Monitor
(not supplied)
Composite video cord
(not supplied)
NX-SA1[J]11.indd13NX-SA1[J]11.indd13 12.5.159:58:36AM12.5.159:58:36AM

14
English
Listening to a USB device
Connecting a USB device
Disconnect the USB device after stopping
playback. Disconnecting the USB device
during playback may cause some problem of
the USB device and its files.
The USB device is charged through the USB
MEMORY terminal when “USB”is selected as
the source.
CAUTION
When connecting with a USB cable, use a
USB 2.0 cable less than 1 m in length.
Do not use a USB hub.
You cannot connect a computer to the USB
MEMORY terminal of the System.
Electrostatic shock at connecting a USB
device may cause abnormal playback of
the device. In this case, disconnect the USB
device then reset this System and the USB
device.
•
•
•
•
•
•
Playing back
To stop playback
If you press USB 6again after stopping,
the track which was being played is
played from the beginning (“Resume
Play”). Press 7again while stopped to
cancel Resume Play.
To pause
To cancel pause, press the button again.
To select a track
/
(Press repeatedly)
To fast forward/reverse
During playback...
/
(Hold)
or
/
Each time you press the button, the fast-
forward/reverse speed changes as follows:
x5 x10 x1 (normal playback)
To resume normal playback, press USB 6.
To select a group
While stopped...
/
(Press repeatedly)
•
•
•
USB cord
(not supplied)
USB memory
(not supplied)
NX-SA1[J]11.indd14NX-SA1[J]11.indd14 12.5.159:58:36AM12.5.159:58:36AM

15
English
Programming the playing order —
Program Play
You can program up to 32 tracks on the USB
device in any desired order.
You can only make a program when playback
is stopped.
While making a program, you cannot specify
a group to select a track.
1Stop playback.
2Select “PROGRAM.”
(Press repeatedly)
NORMAL (Canceled) PROGRAM
3Select the track to program.
/ \
(Press repeatedly)
4Repeat step 3to select other tracks for
the program.
5Start playback.
To exit from Program Play, select “NORMAL”
in Step 2.
Program Play is canceled in the following
cases:
- When the System is turned off.
- When the source is changed.
- When a USB device is disconnected.
•
•
•
To confirm the programmed tracks
While stopped during or after program
playback...
/
(Press repeatedly)
The tracks in the program will successively
appears on the display in the programmed
order.
To add a track to the end of the program
Select the track to add.
While stopped...
/ \
(Press repeatedly)
To delete tracks in the program
While stopped during or after program
playback...
Each time you press the button, the last
track in the program is erased.
•
•
•
NX-SA1[J]11.indd15NX-SA1[J]11.indd15 12.5.159:58:37AM12.5.159:58:37AM

16
English
Playing at random — Random Play
You can play all the tracks on the USB device in
random order.
1Start playback.
2Select “RANDOM.”
(Press repeatedly)
NORMAL (Canceled) RANDOM
You cannot go back to the previous
tracks using 4during Random Play.
To exit from Random Play, select “NORMAL”
in Step 2.
Random Play is canceled in the following
cases:
- When the System is turned off.
- When the source is changed.
- When a USB device is disconnected.
- When REPEAT is pressed.
•
•
Playing repeatedly — Repeat Play
You can play a track or tracks repeatedly.
1Select the repeat mode.
Press the button once to display the
current setting. Press it again to change
the setting.
RPT 1: Repeats the current track
RPT GR: Repeats all tracks in the current
group
RPT ALL: Repeats all tracks
RPT OFF: Cancels Repeat Play
2(While stopped) start playback.
To exit from Repeat Play, select “RPT OFF” in
Step 1.
Repeat Play is canceled in the following
cases:
- When the System is turned off.
- When a USB device is disconnected.
NOTE
If you select “RPT ALL” during Program Play,
the program is played repeatedly.
•
•
Listening to a USB device
NX-SA1[J]11.indd16NX-SA1[J]11.indd16 12.5.159:58:37AM12.5.159:58:37AM

17
English
Searching for stations
1Select “FM.”
2Select the station.
/
(Hold)
The unit starts searching for the stations
automatically, and the station search stops
when a station of sufficient signal strength
is found.
When you press the button repeatedly,
the frequency changes.
To stop the search manually, press 4/¢
again.
To improve the FM reception
If an FM stereo broadcast is hard to listen to,
you can improve the reception by switching to
monaural mode.
Press the button once to display the
current setting. Press it again to change
the setting.
AUTO: Stereo mode
MONO: Monaural mode
NOTE
When the monaural mode is activated, the
reception is improved. However, the stereo
effect is lost.
•
•
Listening to FM
Presetting stations
You can preset up to 40 FM stations manually.
1Tune in to a station you want to preset.
2Display the preset number.
P - 0 1
- 0 1
Finish the following steps while the
indication on the display is flashing.
3Select a preset number to store.
/
(Press repeatedly)
4Store the station.
To tune in to a preset station
/
(Press repeatedly)
•
NX-SA1[J]11.indd17NX-SA1[J]11.indd17 12.5.159:58:37AM12.5.159:58:37AM

18
English
Connecting an external device
Refer also to the instruction manual for the
external device.
1Set the volume level of the System to
minimum.
2Connect an external device to the AUDIO
IN jack.
•
Listening to an external device
1Select ”AUDIO IN.”
2Start playback of the external device.
3Adjust the volume.
To adjust the audio input level
If the sound from the device connected to the
AUDIO IN jack is too quiet, you can change the
audio input level through the AUDIO IN jack
(without changing the volume level).
Each time you press the button, the setting
changes.
LEVEL1: Ordinary input level.
LEVEL2: Increases the input level.
LEVEL3: Increases the input level more than
“LEVEL2.”
External device
(not supplied)
Stereo mini plug cord
(not supplied)
NX-SA1[J]11.indd18NX-SA1[J]11.indd18 12.5.159:58:38AM12.5.159:58:38AM

19
English
Setting the timer
Setting the Sleep Timer
Each time you press the button, the shut-
off time (in minutes) changes as follows:
S L E E P 1 0
1 0
10 20 30 60 90 120
150 180 OFF (back to the
beginning)
The System is now set to turn off after the
number of minutes you set have elapsed.
To deactivate the Sleep Timer, select “OFF.”
To check the remaining time until the
System shuts off, press SLEEP once.
Setting the Daily Timer
Using the Daily Timer, you can wake up with
your favorite music.
Connect a USB device/iPod to the System,
and make sure that the source works
properly beforehand.
Preset the desired FM station before setting
the Daily Timer.
1Select “PLAY TMR.”
(Press repeatedly)
2Select “ON.”
•
•
3Set the timer contents.
/ \
(Press repeatedly)
You can set the following items:
Hour and minute for the on-time (ON)
Hour and minute for the off-time (OFF)
Playback source
When you select “USB” as the source,
select a track number.
When you select “FM” as the source,
select a preset station number.
Volume
Once you have set the volume,“PLAY SET”
will be displayed and the setting contents
will be displayed in order.
4Turn off the System.
The TIMER lamp lights up.
While the Daily Timer is working, the
TIMER lamp blinks.
Once set, the Daily Timer works every
day.
To correct a misentry during the process,
press CANCEL.
You can return to the previous step.
To deactivate the Daily Timer, press CANCEL
after performing Step 1.
“TIMEROFF” appears.
To set the Daily Timer again without
changing the contents, press SET after
performing Step 1.
“TIMER ON” and the setting contents
appear.
CAUTION
The Daily Timer works only when the System
is on standby.
Auto Power Save is effective even while the
Daily Timer is working.
•
•
•
-
-
•
•
•
•
•
NX-SA1[J]11.indd19NX-SA1[J]11.indd19 12.5.159:58:38AM12.5.159:58:38AM

20
English
References
Compatible iPod
Made for Audio Video
iPod nano (6th generation) *1
iPod nano (5th generation)
iPod nano (4th generation)
iPod nano (3rd generation)
iPod nano (2nd generation) –
iPod touch (4th generation)
iPod touch (3rd generation)
iPod touch (2nd generation)
iPod touch *2
iPod classic
iPhone 4S
iPhone 4
iPhone 3GS
iPhone 3G
*
1Only for still pictures
*
2Only for software version 2.0.0 or later
If iPod does not play correctly, update the
software of iPod to the latest version.
For details about updating iPod, check on the
Apple web site <http://www.apple.com/>.
•
Playable files
This System can play back MP3/WMA files
with the extension <.mp3> or <.wma>
(regardless of the letter case–upper/lower).
This System can play back MP3/WMA
recorded at the following sampling
frequencies and bitrates.
Sampling frequency:
32/44.1/48 kHz
Bitrate: MP3: 32 kbps – 320 kbps
WMA: 32 kbps – 320 kbps
This System can recognize up to 300 folders
and 999 files on a USB device.
DRM (Digital Rights Management) files
cannot be played back.
This System cannot play back a file larger
than 2 Gigabytes.
Some MP3/WMA files may not be played
back and will be skipped. This results from
their recording processes and conditions.
Playing order of MP3/WMA files
– Folders are played back in order of the time
that the folders were created. In a folder,
files are played back in order of the time
that the files were recorded.
– The order of playback may differ depending
on the recording method.
– If you change a folder name or file name,
the order of playback may change.
Tag information (version 1 and version 2) on
an MP3 or WMA file can be displayed.
•
•
•
•
•
•
•
•
NX-SA1[J]11.indd20NX-SA1[J]11.indd20 12.5.159:58:39AM12.5.159:58:39AM
Table of contents
Languages:
Other JVC Speakers System manuals