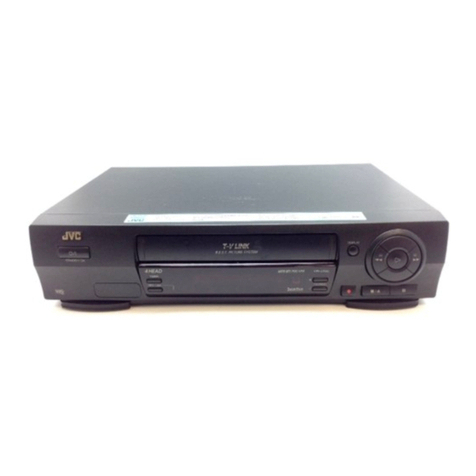
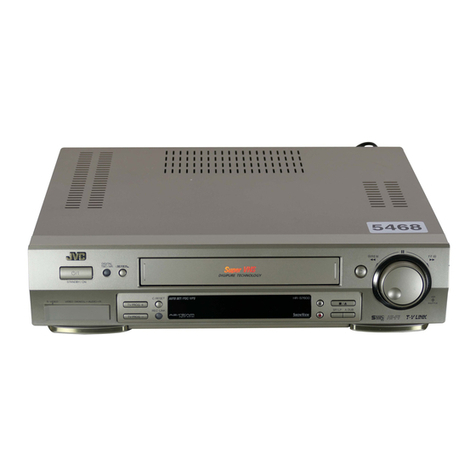
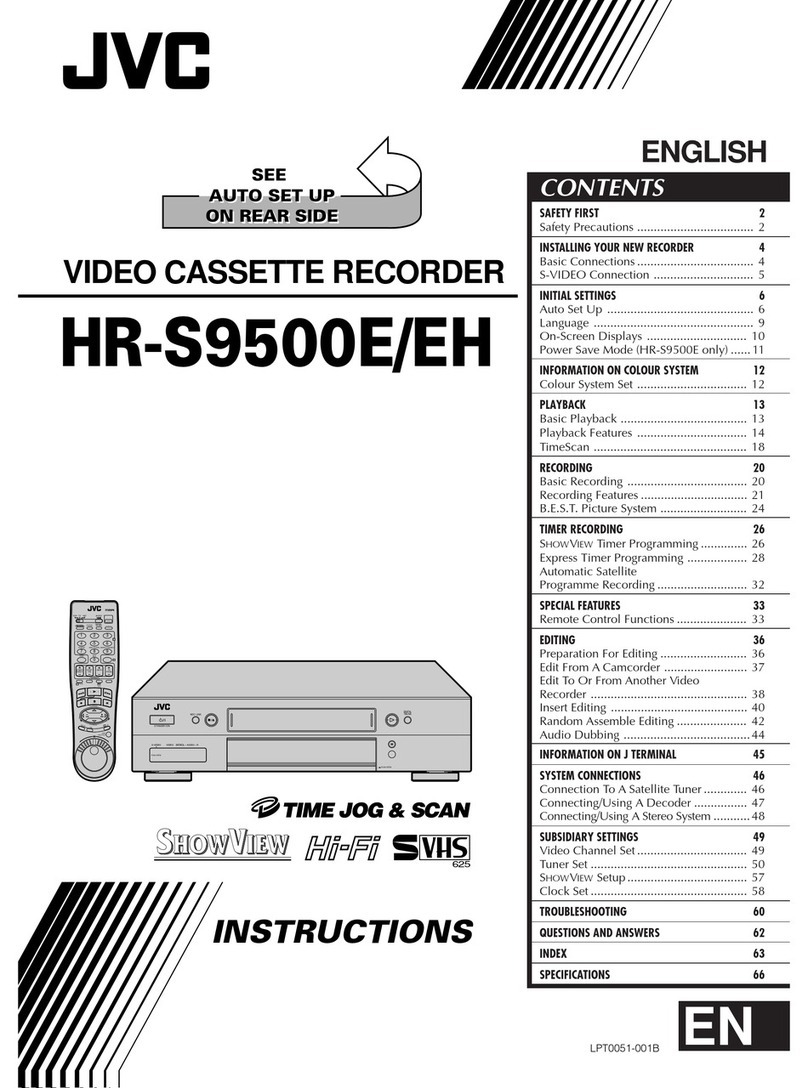
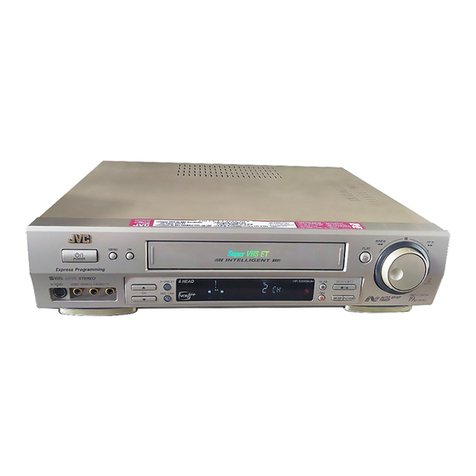
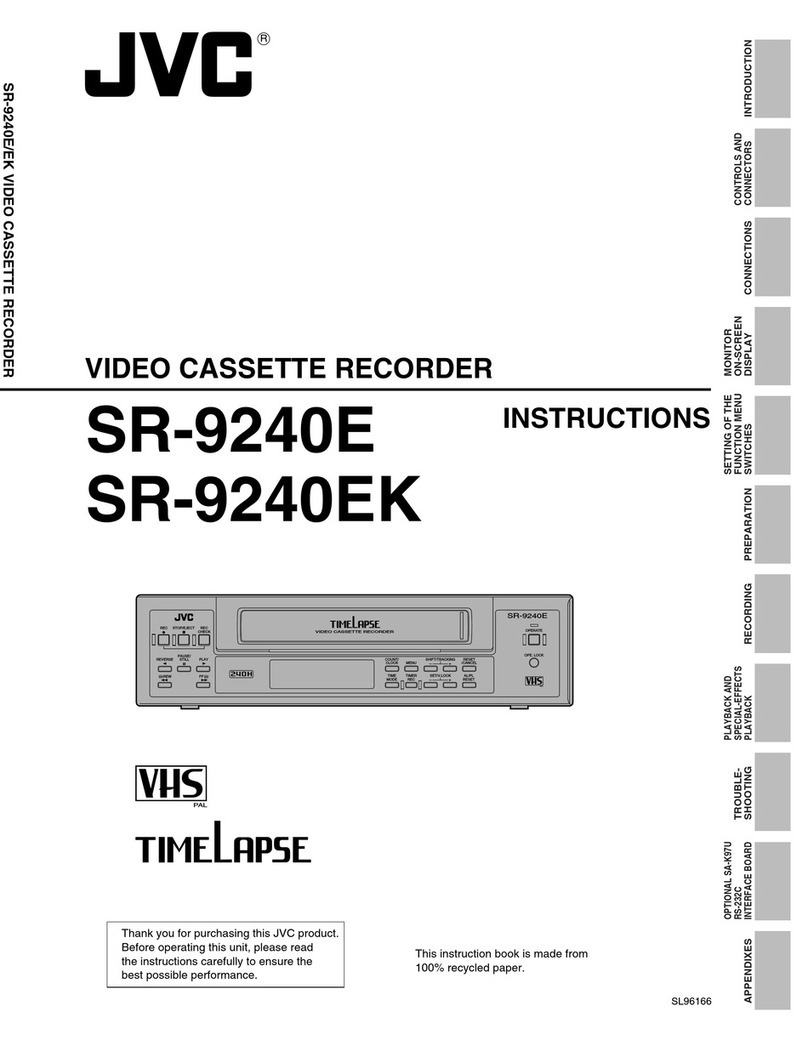
JVC HR-A57U User manual

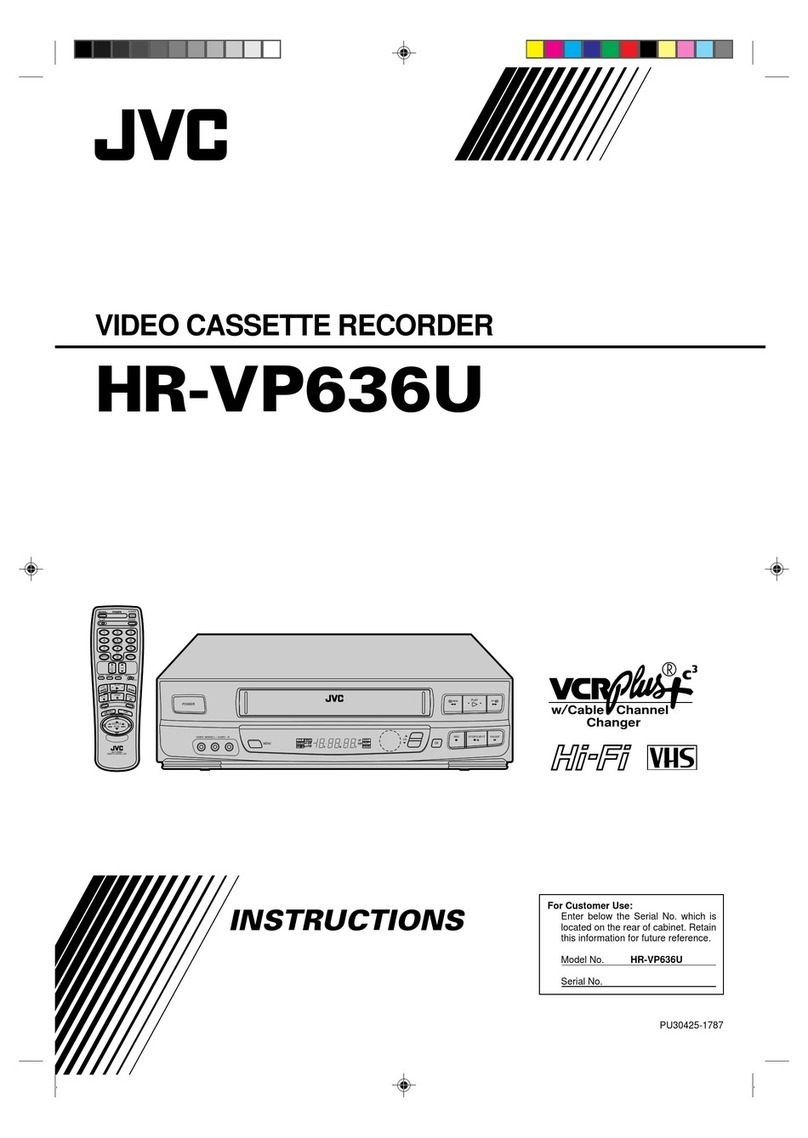
VIDEO CASSETTE RECORDER
HR-A57U
NfN
HR-A37U
INSTRUCTIONS
LPT0497-001 A
COPYRIGHT © 2000 VICTOR COMPANY OF JAPAN, LTD i£&l Printed _n China
1100 IYVSID_BJ
Dear Customer,
Th.mk I _,u Ior purl ha>lrT,_ [he ]\ 1_ \ [ b \ IJ_r, • ,l>-P[t_ le.oldd
B:l_bl: Ll-b pl_.P._ re4. t [11_ _3t_t _ ir31nlrG14[I, ql ir]J pre_ ILi[,.m_ [u
CAUTIONS
CAUTION: TOREDUCETHERISKOFELEC"mlCSHOCK
DONOTREMOVECOVER(ORBACK)
NOUSER-SERVICEABLEPARTSINSIDE
REFERSERVICINGTOQUALIFIEDSERVICEPERSONNEL
Tile h,jltmnt4 II_dl _ lib .irlof he.Id -' n7h_,r _,, ilhln
<in _,lull<l[_i.II trrm7ql_ I_ ir7[eilEid t_, 41_r[ [h_ LI-ei
[o [11_ I_re"_llE _ ut Llrllll_LlIJt_d J411_rr_u'. _.L,It_IL._
_', i[hln tFl_ I_r_bllUE [_ elldu',Ul_ th4t r414_. II_ ul
_LJIIIr i_n[ r11J_111[Llil_ Ell _,_II_,[I[LI[_ 4 rl4_ nt _l_ [Ih
_hl ,, _ [_, F,_i_r,rT_
Tile v\d<im4tlun p< ,ill[ V, ilhln all ulClll<iwI41 h I_dl'J r
I" In[_r7tlb I t_ iI_lL the u_r [u [ll_ FII_-_IIL_ _,t
II11I_ul[dll[ uF_r4[lll _ _11111n141r][_l14rTL_ 14_1\1•111_11
Inqlu• [i,_r7" Ill the 11[_14[Lire i•u,nl_lln, ii1_ [ll_
WARNING:
TO PREVENT FIRE OR SHOCK HAZARD, DO NOT EXPOSE
THIS UNIT TO RAIN OR MOISTURE.
CAUTION:
/111_\ld_o _._s.etI_ i_,l,k-r dl,,.lll G LI-e,t \',lth V 12(3\
qll Iz .r7k
_, prP, ellI _1_ {rlL _ll,_•k- .lllJ lil_ IldzdrlJ_ D( } N( )1 LIn_ 411,
CAUTION:
I( IPRL\ LkT LLE( TPIL bbf( K I,.q\T(" II\\ IL}E BL ",DE ()r
PLLI(,T( )1\ IDL "_L(iT bLILL'_IN',ERT
ATTENTION:
pOLIR L\ HER LD> LII( }C'_[L[LTRIULI[ '_ INTROL)LIIRE L',
L \AIE L \ PLLIS L \PL;L DE L \ H( I_ED\k'_ L \ B )PNL
(()RKE'_P(_ND',NTL DE L \ PRI4E ET P()LI_._.ERILIbOL \LI
/( _ND
Note to CATV system installer: ,
TIII_ r_nllnil_r r_ I,ro_ ,lid t,, _11 tile { _T\ _,,-t_m Irl_t._ll-r
_ltenlic, n tu \ihd_- Ldtl 4(I ol _he N[(" th.ll prr,w,t_ ,@iiIdin_.
_IL,ur3ddull he .onn_da 1othe _IL,LIr7(IIII'_ "_ _,ler11 lit the
CAUTION:
n_rl•.lLIth_rlb t.,14_rrab-th_ eitnipmdlt
Declaration of Conformity
q(dd Nur17h_= I IR _~U
IIR ",>-L I
Ti<d_ N_trl_e I\ C
R_.I_II'.I[_I_P<lrt_ I\C \lll_ru.I-1 _lrI,
_*Jcll_-_ 1730 \.lilt\ R,,.IJ %.\<1111_N I IJ 4 tl
Td_frhune NunlhH b- ; ] 1• _tlljLI
Till- ilet IL_ _ompll_ V, ith Pa [ l • <_tELL RLiI_
( }l lt_ r_l ill lr] 14 ". U[II_• [ {i i [h_ Idlo_' Ill_ tv, Cl I , _lli II[ll ir]_
] i rhl- cl_lc_ I]].1_ I]o[ i _4.Ll._:h.tlmlLll Ill[_riel_nce .irxI ,2 [ill-
Je'.lcel]lU.[<icctl_t.ln, ir][dterrllLr I_•d\bi IlldLILIll]'_
Illt_rlelel]r e[h4t rql4_ •.lLl_,r ur7Je.ll_d i_lJH.l[lun
Failure to heed tile I'ollowin_ lire(autioil_ int'! result Ill itaiilage
to Ihe VCR, Remote or video ca_etle
I _ I,L,< _-the \(K
Ir7 All ellt Ilulln4dlt I)lur7e tu ek[felll_ [clllls_l.l{urP, ,_1
huml_ilk
Ir7dire, [ _Lir7h4h[
Ir] J Ju.,t_ _-iluror]m_n[
117 Jll _llt ilullnlell{ t\i7bl_ qll ill,_ I]].l_f]_[h tld,I. 4f_-
_ell_rd [L_, I
ur7 A_LIIIAr e [hJ[ I_ UIT'{JI)l_ ul ql01_J t<_ \ IIII .itFIll
', _ 1,1.,, e he.l_, Lihj_d_ un the \ LR ol _11 tl7_ Rel]IL.W
4 _ pl.. e .m_thin_ v, hi, h nli,4ht .l_ilf ,,n the [_'1_"t th_
\t R•,r r,r7 [he GmI,W
3 _kbl_\i,,lulbh<_rl._t<_th_ktRJulir_Atran1,,,rl
For Customer Use:
[nWi I_el,,\'. lhe _kidd N_, dn,i _,ell<ll N,, t_hlch Jl_ Io_.lt_J
wr] [h_ 1_4r HI _.IIHrw{ Retdlll thl4 II1tulr11JLh_ll tur tLliLIr_"
felel td71 e
_.lr,dd k.
• ( 4-_t[e_ IllJrl. b I \ I I', I( _r b \ H_ I cJll II{ _ Limb I \_, i111 till.
\lJ_h L,l"-_:[t_ rPL orLl_r I IuV,_\_I b \ fffk r_, r_rlhr_t_ i. I1,_[
I" ,>.II,l= \'. Ith th_s m•,tld
• THIs nl,,J_l I<,_qLiipF_t V, Rh "_1<,PB i_l \ kl_ (,it I _'_1 PL \'_ B \( kl
th.4 rql_4ke, it l_<,._lhl_ t<, I,L_I IJ._•_ __\ PI_ re, orrhn,_ _t ilh
rt-,_Llhr \ I I%r_:%_ki[i, _n
• I I() \ bf4 I_ u<_l/llllllbl_ t, Ith _Xl_tlll 4 \ I b _clCllF,nlult
Im ,JB t _ll FJloJCld m•,Jd rl_<-M,the L'_Em %/ _ 4ul¢ldllle_

IMPORTANTPRODUCT
SAFETYINSTRUCTIONS
Electrical energy can perform many useful functions. But
improper use can result in potential electrical shock or fire
hazards. This product has been engineered and manufactured to
assure your personal safety. In order not to defeat the built in
safeguards, observe the following basic rules for its installation,
use and servicing.
ATTENTION:
Follow and obey all warnings an(] instructions marked on your
product and its operating instructions. For your safety, please read
all the safety and operating instructions before you opelate this
product and keep this booklet for future reference.
INSTALLATION
1. Groundlngor Polarization
CA)Your product may be equipped with a polarized alternating-
current line plug (a [)lug having one blade wider than the
other]. This plug will fit into the power outlet only one way.
This is a safety f_ature.
If you are unable to insert the plug fully into the ouget, try
reversing the plug. if the [)lug should still fail to fit, contact
your electrician to replace your obsolete outlet. Do not defeat
the safety i_urpose of the polarized plug.
(B) Your product may be equipped with a 3-wire grounding-type
plug, a plug having a third (grounding) [)in. This [)Jug wilt only
fit into a grounding-type power outlet. This is a safety feature.
If you are unable to insert the plug into the outlet, contact your
electrician to replace your obsolete outlet. Do not defeat the
safety i_urpose of the grounding-type plug.
2. Power Sources
Opelate your product only from tile type of power SOUlCe
indicated on the marking label, tf you are not sure of the type of
power supply to your home, consult your product dealer or local
power company, if your product is intended to opelate from
battery poweb or other sources, refer to the operating instructions.
3. Overloading
Do not overload wall outlets, extension cords, or integra[
convenience receptacles as this can result in a risk of fire or
electric shock.
4. Power Cord Protection
Power supply cords should be routed so that they are not hkely to
be walked on or [)inched by items place(] upon or against them,
paying particular attention to cords at plugs, convenience
receptacles, and the point where they exit from the product.
5. Ventilation
Slots and openings in the cabinet are provk]ed for ventilation. To
ensure reliable operation of the product an(] to protect it from
overheating, these openings must not be blocked or covered.
• Do not block the openings by placing the product on a bed,
sofa, rug or other similar surface.
• Do not place the product in a builbin installation such as a
bookcase or lack unless proper ventilation ]sprovided or the
manufacturers instructions have been adhered to.
6. Wail or Ceiling Mounting
The product should be mounted to a wall or ceiling only as
recommended by tile manufacturer.
ANTENNA INSTALLATION INSTRUCTIONS
1. Outdoor Antenna Grounding
if an outsk]e antenna or cable system is connected to the product,
be sure the antenna or cable system is grounded so as to provide
some protection against voltage surges and buflbup static charges.
Article 810 of the National Electrical (ode, ANSI/NFPA 70,
provides information with regard to [)roper grounding of the mast
an(] supporting structure, grounding of the lead-in wire to an
antenna discharge unit, size of grounding connectors, Iocatk)n of
antenna discharge unit, connection to grounding electrodes, an(]
requirements for the grounding electrode.
2. Lightning
For added protection for this product (luring a lightning storm, or
when it is left unattended and unused for long periods of time,
unplug ]tfrom the wall outlet an(] disconnect the antenna or cable
system. This will prevent damage to the product due to lightning
and power line surges.
3. Power Lines _(AMPLEOFANIF.NNAOROUNI_NGASPER
All outside antenna NA'ilONAL ELEC'i_ICAI. GOOE, ANSBNFPAT0
system shou[d not be --_
located in the vicinity of ^,_,,A
overhead power hnes or _LEADINWIRE
other electric light or / GROUNDCL._MP
power circuits, or where _
it can fall into such _:======:_:::_ Nr_NNADISCHARBEUNIT
x)wer lines or ckcu]ts. _ _1C-2D)
• _ ELECTRICSERVICE
When mstalhng an _ _eulCTee/_I_ER_CE
outside antenna system, _ GROUNDING
CONDUCTORS
extreme care shoukJ be _ NECSEC_Cg81C'21)
taken to kee I) from GROIJNDCLAMPS
pOWB_SB_VlCEGROUNDIIIG&EC_ODESY_M
touching such po'wer (NEC,_t_T250.PART_
lines or circuits as NeC-ltt,'noluU.mlCILCOOE
contact with them might
be fatah
USE
1. Accessories
To avoid personal injury:
• Do not [)[acethis product on an unstable cart, stand, trip()(],
bracket, or table. It may fall, causing serious injury to a child or
adult, and serious damage to the product.
• Use only with a cart, stand, tripod, bracket, or table
recommended by the manufacturer or sold with the product.
• Use a mounting accessory recommended by the manufacturer
and follow the manufacturer's instructions for any mounting of
the product.
• Do not try to roll a cart with small (asters across threshokls or
deep-pile carpets.
2. Product and Cart Combination PORTABLECARTWARNING
A product and cart combination should IIr/ml_l pmvldEI_/Rm'AC)
be moved with care. Quick stops,
excessive force, md uneven surfaces ID
may cause the product and cart
combination to overturn.
3. Water and Moisture
Do not use this product near water for
example, near a bath tub, wash [)owl,
kitchen sink or laundry tub, in a wet
basement, or near a swimming pool and
the hke.
4. Object and Liquid Entry
Never push objects of any kind into this product through openings
as they may touch dangerous voltage points or short-out parts that
could result in a fire or electric shock. Never spill liquid of any
kind on the product.
5. Attachments
Do not use attachments not reconlmended by tile manHfacturer of
this product as they nlay cause hazards.
6. Cleaning
Unplug this product from the waft ouget before (leaning. Do not
use hquid (leaners or aerosol (leaners. Use a damp cloth for
cleaning.
7. Heat
The product should be situated away from heat sources such as
radiators, heat registers, stoves, or other products (including
amplifiers) that produce heat.
SERVICING
1. Servicing
I{ your product is not opelating correctly or exhibits a marked
change in performance an(] you are unable to restore normal
operation by ff_llowing the detailed procedure in its operating
instructions, do not attempt to service Jtyourself as opening or
removing covers may expose you to dangerous vohage or other
hazards. Refer all servicing to qualified service personneh
2. Damage Requiring Service
Unplug this product from the wall outlet and refer servkfing to
qualified service personnel under the following conditions:
a. When the power supply cord or plug is damaged.
b. If liquid has been spilled, or objects have ffdlen into the
product.
c. If the product has been exposed to lain or water.
d. If the product does not operate normally by folk)wing the
operating instructions. Adjust only those controls that are
covered by the operating instructions as an improper
adjustment of other controls may result in damage and will
often require extensive work by a qualified technician to
restore the product to its normal operation.
e. If the product has been dropped or damaged in any way.
f. When the product exhibits a distinct change in performance
this indicates a need for service.
3. Replacement Parts
_Vhen replacement parts are require({, be sure the service
technician has used replacement parts speci{ied by the
manufacturer or which have the same characteristics as the
original part. Unauthorized substitutions may result in fire,
electric shock or other hazards.
4. Safety Check
Upon completion of any service or repairs to this product, ask the
service technician to perform safety checks to determine that the
product is in safe operating condition.
Howto usetheRemote
Before use, insert two AA size batteries into the Remote with the
polarity (_ and _) matched correctly as indicated on the battery
compartment or on the lid.
Ti_e Remote can operate most of your VCR's functions, as well as
basic {unctions of TV sets, cable boxes and DBS receivers.
• Point the Remote toward the remote sensor on the target
component.
• The maximum operating distance of the remote control is about
Bm.
NOTE:
tf th_ Rc_mot_ does not work propr_rly, romove its batteric_s, wait for
af_w so,rondo, r_plac¢_tll¢_batt¢_ric_sand thegntry aRain.
Videoheadscleaning
Use a dry cleaning cassette -- TCL-2UX when:
• Rough, poor picture appears while a tape is played back.
• The picture is unclear or no picture appears.
• "USE CLEANING CASSETTE" appears on the screen (only with
"SUPERIMPOSE" set to "ON').
Buttons, Connectors
and Indicators
FrontPanel(HR-A57U)
Cassette REVV FF
POWER STOP/EJECT loading slot [CH-]
ViDEO/AUDIO Remote REC PAUSE PLAY
input connectors sensor [CH]
Display Panel Timer mode indk:ator
Play indicator, mode
indicator
indicator I
Channel and auxiliary input/Clock time
FrontPanel(HR-A37U)
Cassette REW FF
POWER STOP/EJECT loading slot
VIDEO/AUDIO Remote REc PAUSE PLAY
input connectors sensor [CH]
Display panel Timer mode indk:ator
Play indicator • mode
indicator
indicator I
Channel and auxiliary input/Clock time

RearPanel(HR-A57U) Remote
AC power (ord ANT. IN
AUDIONIDEO OUT "IV OUT
RearPanel(HR-A37U)
AC power (ord ANT. IN
AUDIONIDEO OUT TV OUT
TV._
TVNCR ~
REVIEW -
Number keys -
CANCEL
[C.RESET].
STOP+/- ~
A.MONITOR
- DISPLAY
,- DAILY(M-F)
•AUX
•TIMER
-DATE+/-
-CH+/-
[ENTER/OSD]
[TVVOL+/-]

On-screendisplay
ff you press OSD on the Remote when "SUPERIMPOSE" is set to
"ON", you can see the current VCR status on the TV screen. Press
OSD again to exit on-screen display.
The indications are not recorded even if the VCR is in the
re(ording mode.
Connections and
Plug&Play Setting
[] Checkcontents
Make sure the package contains all of the a_cessories listed in
_1 _ ? "Specifications".
[] SituateVCR
Place the V(R on a stable, horizontal surface.
.._ CH125 RECORDI_
q_p_-_ THU 12:00 AM /PAUSE/I .,_ [] ConnectVCRtoTV
_j_",t STEREO -WARNING- _SP_-'--(I,_ HR-A57U
I/SAP TIMER RECORDINGI I
IV'l TO STARTSOON _Antenna or cable
(CANCEL) -d A A_
B + + + • E_I_O I'
I INDEX 1_ -,_ :_
Coaxial came
m
t01Channel and auxiliary input
0Day and clock time
0STEREOprogram indication (HR-A57U only)
SAP indication (HR-A57U only)
Audio monitor indications (HR-A57U only)
O _me counter
Index number
Tape position
OCassette mark
{_ Tape speed
{I) VCR operation mode
{I__mer warning display AC outlet
I
_g_u
A(" power cord
Back of VCR
To audio/video _
input connectors /
ide_Lar- inot_p,i°d_ ab'e
TV To 75 ._ terminal RF cable
(supplied)

HR-A37U
Antenna or cable
Coaxial cable_ --
I
A ercor
iiL,
Back of VCR I
AC outJet
To audio/video
(not supplied)
TV To 75 {1 terminal RF cable
(supplied)
RFConnection
Disconnect the TV antenna from the T_Z
Connect the TV antenna cable to the ANY. IN terminal on the
rear of the VCR.
Connect the supplied RF cable between the TV OUT terminal
on the rear of the VCR and the TV's antenna input terminah
AV Connection
(improves picture quality during tape playback.)
If your TV is equipped with audio/video input connectors
Connect the antenna, VCR an(] TV as shown in the illustration.
Connect an audio/video cable between the AUDIO/VIDEO
OUT conne(tors on the rear of the VCR and the audio/video
input connectors on the TV.
• Even if you are using audio/video cables to connect your VCR to
your TV, you must also connect it using the RFcable. This will
ensure that you (an record one show while watching another.
[] PerformPlug&Playsetup
Plug the AC power code into an AC out_et. Do not turn on the
VCR. The clock and tuner (hannels will be set aulomaticaIty. The
time and date can be set automatically by the clock setting data
tlansmitted from one of lhe regular TV broadcast channels. We
carl this TV (hannel the "hust channeJ" and it is a PBSc:hanneJ in
your area.
ATTENTION:
tf you use a cable box, Pfug&Plav will not function; set _e clock
and tuner rhannels sPparatPI)_
During Initial Auto Clock Set
"Aut" blinks.
During Auto Channel Set
The channel numbers are displayed as they are
scanned and set.
Plug&Play Completed
The (urrent time is displayed.
What to do if Plug&Play setting failed
• If an incorrect time is disp[ayed on the display panel, perform
the "Semiauto Clock Set" or "Manual Clock Set" procedure.
• If appears on the chsplay panel, ensure that the antenna
cable is connected correctly. Then turn on and off the VCR; the
Plug&Play setting wilt be automatically reactivated. If Plug&Play
setting is not performed though the antenna cable is connected
correctly, perform "Manual Clock Set" and "Auto Channel Set"
or "Manual Channel Set".
[] SetVCRchannel
The VCR channel is the channel on which you can watch the
picture from the VCR on the TV when only using the RF
connection. PressPOWER to turn off the VCR, then press STOP/
EJECT(11/_---)on the VCR for more than 5 seconds. "Ckt3"
appears on the display paneh PressCH+/- on the Remote to
select "CH3", "C114" or "C[ [ "(OFF), then press OK
• The VCR channel is preset to "Ckt3". Set to "C} 14" if C}13 is
used for broadcasting in your area.
[] Flu01preporatiou for use
Turn on the VCR and the TV, and select the VCR channel 3 or 4
(or AV mode) on the TV. You can now perlorm basic playback or
basic recording.

Initial Settings
LanguageSetting
The default setting is "ENGLIS[ l'.
[] AccessMainMenuscreen,then
InitialSetscreen
Press MENU on the Remote. PressAV to
move the highlight bar (arrow) to "INITIAL
SET", then press OK or D.
[] Selectlanguage
This VCR offers you the language choice to
view n_enus and some n_e$gages in
Enghsh, Spanish or French. Press AV to
move the highhght bar (arrow) to
"LANGUAGE", then press OK or D
repeatedly until the desired language is
selected.
Press MENU to return to normal screen.
fMAIN MENU
FUNCTION gET
INITIAL SET
,=_,_?,,_T ....
ClockSetting
Perform c[o(k setting onty if the (:lock has not been set correctly
by the Plug&Play setting or if you use a cable box.
Preparations
[] AccessMainMenuscreen,then
InitialSetscreen
Press MENU (in the Remote. PressAV to
move the highlight bar (arrow) to "INITIAL
SET", then press OK or D.
[] AccessClockSetscreen
Press AV to move the highhght bar
(arrow) to "CLE)CK SET", then press OK or
fMAIN MENU
FUNCTION SET
I_mAL SET
Settingclocksemiautomatically
-- SemiautoClockSet
You can change the host channel/D.S.T. (Dayhght Saving Time)/
time zone setting manuafly. First follow steps[] to [] in
"Preparations" above, then go to the following steps.
NOTE:
TIic_timc_sc_tpreviously will be mased when "AUTO C_OCK',
"HOST CH", "D.S.I/" or "TIME ZONE" sPtting is changPd.
[] SetAutoClocktoON _Loo_ )
Press OK or D on the Remote repeatedly TIME DArE YEAR/
to move the highlight bar to "AUTO _l:_PU _,, 0asuN
CLOCI<", then press _V so that "ON" is .uslc.,_Aul_asT. :AUTO {CATV)/
TIME ZONE :AUTO
[] Selecthostchannel
You can either select "AUTO" or enter a PBS channel number.
Press OK or D to move the highlight bar to "HOST CI I', then
press _V repeatedly unlit "AUTO" or the desired PBSchannel
number is selected.
[] SelectD.S.T.mode
PressOK or _ to move the highlight bar to "D.S.T.", then press
_ repeatedly until the desired setting is selected.
AUTO: Select if you want to adjust your VCR's clock
automatically by the incoming signal from the host
channel (Auto Daylight Saving Time enables automatic
adjustment of the VCR's clock at the start and end o{
Daylight Saving Time.) Be sure to select the correct time
zone manually in step as
ON: Adiustment will be made by the built-in clock itself.
OFF: Select when Daylight Saving Time does not apply to you.
[] Select time zone
PressOK or _ to move the highlight bar to "TIME ZONE", then
press _\/ repeatedly until "AUTO" or the desired time zone is
selected. Each time you press the button, the time zone changes
as {ol[ows:
"-* AUTO _ ATLANTIC"-* EASTERN"-_ CENTRAL
"-* MOUNTAIN_ PACIFIC_ ALASKA "-* HAWAII
(back to the beginning)
[] CompleteSemiautoClockSet
PressMENU to return to normal screen. Turn off the VCR. "Aut"
will appear on the display panel while the clock is being set. The
current clock time will appear automatically when the (:lock
setting is complete.
Settingclockmanually
- ManualClockSet
First follow steps[] to [] in "Preparations" above, then go to the
{ollowing steps.
[] Settime,dateandyear
Press_ until the desired time appears,
then press OK or D. Set the date and year
in the same way.
• Holding zZV [CHar Ichanges the time
in 30-minute intervals, or changes the
date in 15-day intervals.
[] SolectD.S.f.mode
PressOK or D to move the highlight bar to
"D.S.T/', then press _V to select the
desired setting.
ON: Adjustment will be made by the
built-in clock itself.
OFF: Sele(t when Dayhght Saving Time
does not apply to you.
[] Slarl clock
PressMENU an(] normal screen appears.
CLOCKSET
HOST CH :AUTO (CATV)
DST :AUTO
TIMEZONE :AUTO
CLOCKSET
TIME DATE yEAR
1:00AN 12/24 _SUN
To make corrections any time during the process
Press OK or _ repeatedly until the item you want to change
blinks, then press _V.

TunerSetting
Settingchannelsautomatically
-- AutoChannelSet
Perform Auto Channel Set oMy il:channels have not been set
correctly by the Plug&Play setting.
[] AccessMainMenuscreen,thenTuner
Sel screen
PressMENU on the Remote. Press AV to
move the highhght bar (arrow) to "TUNER
SET", then press OK or D.
[] PerformAutoChannelSet
Press _V to move the highlight bar
(arrow) to "AUTO C[ iANNEL SET", then
press OK or D. The VCR seJectsthe correct
band (TV or CATV) automatk ally during
Auto Channel Set.
• When Auto Channel Set is complete,
"SCAN COMPLETED" appears on
screen.
• If the scan was unsuccessfu[, "SCAN
COMPLETED NO SIGNAL" appears
on screen. Check the connections and
start again.
PressMENU to return to norma[ screen.
MAiN MENU
FUNCTIONSET
TUN[NSET
gA_O CAW
_ET
L AUTO CHANNEL SET
SCANNING
Settingchannelsmanually
- ManualChannelSet
You can add the channels you want or delete the channels you do
not want manualty.
[] AccessMainMenuscreen,thenTuner _. _.u
Setscreen _u,c_0.S_T
Press MENU on the Remote. Press AV to
move the highlight bar (arrow) to "TUNER
SET", then press OK or D.
[] AccessManualChannelSetscreen T_._.S_T
Press _V to move the highlight bar SA,D _
AUTO CHANNEL SET
(arrow) to "MANUAL CI IANNEL SET",
then press OK or _.
[] Addorskipdesiredchannels _.u_[c.A.,[[s.
TOadd channels
Pressthe Number keys on the Remote
to input a channel number you want to
add.
PressOK or D to set to "ADD".
Relleat _ to _ to add other channels.
PressMENU to return to normal s{reen.
To skip d_annels
Press AV or the Number keys to select a c:hanne[ nHmber you
want to skip.
Press OK or _ to set to "SI<IP".
Relleat _ and _ to ski{) other channels. Press MENU to return
to norma[ screen.
Playback
BasicPlayback
[] Loadacassette
Make sure the window side is up, the rear [abe[ side isfacing you
and the arrow on the front of the (assette is pointing towards the
VCR.
• Do not apply too much pressure when inserting.
• The V(R turns on, and lhe counter on the on-screen display is
reset, automatically.
lfthecassettesrecordsalet tabhasbeen removed, playback
begins automatically.
[] Startplayback
PressPLAY (Iz,_).
PressSTOP (11) on the OR PressSTOWEJECT (m /_---)on
Remote. the VCR.
Press PAUSE(11).
• Press PLAY (1_) to resume normal playback.
Press PAUSE(11)t9 pause, then press _ (Or PAUSE(11))
repeatedly.
• Press PLAY (1_) to resume normal playback.
Press REW (41141)Or FF (11_1_-).
• Press PLAY _11_)to resume normal playback.
• If you press and hold REW (_1_1) or EF (1_1_) for more than
2 seconds, simply releasing it cancels the picture search, and
normal pJayback resumes.
Press_ or _ repeatedly.
• Press PLAY (1_) to resume normal playback.
• Each time you press 1_1_1or I_1_, the playback speed changes.
To decrease the speed during picture search, press the Opposite
direction button repeatedly.
• During still picture, press and hoJd I_ to start forward slow
motion pJayback. When you release the button, still picture
resumes. During stiJ{picture, holding PAUSE (11)for more than
2 seconds also starts forward slow motion playback. If you
press PAUSE(11)again, still picture resumes.
Reverse
Reverse
search
3 steps
E_rw_ r_tI!
Reverse Siow Normal Fo_war°J
play motion play search
step 4 s eps

Press REW (4_1) or FF (11_1_).
PressSTOP/EJECT (m/A),
• You can also eject the cassette when the VCR is turned off.
PressPOWER,
PlaybackFeatures
Adjustingtrackingcondition
- trackingadjustment
Automatic tracking adjustment
Whenever you insert a tape and start playback, automatic tlacking
starts working and conBnuousiy anatyzes the signal to enable
optimum picture quality during playback.
Manual tracking adjustment
If automatic tracking cannot eliminate noises welt during
playback, k3ltow the procedures bdow.
[] PressSP/EP on the Remote during [)layback to a(tivate manual
tracking.
[] PressCH + and - to eliminate the noises. Press it briefly for a
fine adjustment, or press and hoM {or a coarse adjustment.
[] PressSP/EP on the Remote again to reactivate automati(
tracking.
Selectingmonitorsound(HR-A57Uonly)
-- AudioMonitor
White playing back a tape on which stereo sound or SAP sound is
re(orded, press A. MONITOR on the Remote. Eachtime you press
the button, sound changes.
HI-FI: Normally select this. Hi-Fi sound is played back.
HI-FIL: Sound on the left I li-Fi channel is p[ayed back.
HI-FIR: Sound on the right Hi-Fi channel is pJayed ba(k.
NORM:Sound on the norma[ track is p[ayed back.
NORMHI-FI: Both sounds on the I li-Fi track and normal track are
mixed and played back.
NOTE:
Th_ above indication appears whc,n "SUPERtMPOSE" is s_t to
"ON'", though th_ monitor sound r hanges in s_qum_r c_.
Automaticoperationsafter rewinding
- NextFunctionMemory
The Next Function Memory "tells" the VCR what to do after
rewinding is complete. Ensure that the VCR is in stop mode.
•For Automatic Playback Start
PressREW (41_1)_ then press PLAY(I_) within 2 seconds.
•For Automatic Power Off
PressREW (41_1)_ then press POWER ,,_,ithin2 seconds.
•For Automatic Timer Standby
PressREW (41_1)_ then press TIMER within 2 seconds.
NOTE:
It is not possib#, to sc,lect tl_, Automatir Timber.Standby function if
_e cassette_ i_col_ sa_ _b is removed.
Playingbacktaperepeatedly(100 times)
-- RepeatPlay
During playback, press an(] hold PLAY (l_) for more thin
5 seconds. The pJay indicator O;>) on the display panel starts
t3[inking sk)wly. To stop playback, press STOP (ll) on the Remote
or STOP/EJECT (ll/_---) on the VCR.
Locatingbeginningofrecordings
-- IndexSearch
Index codes are placed on the tape at the beginning of ea(h
recording when recording on this VCR.
[] WhiJe the tape is not running, press SHUTTLE PLUS I_1_1or
I_1 on the Remote to start search.
[] To a(cess a recording of 2 to 9 index
codes away, press _ or I_1_1
repeatedly until the correct number is
dislllayed (in the s(reen (only if
"SUPERIMPOSE" is set to "ON').
Playback begins automatically when
the desired re(ording is located.
INDEX 1 I
Beginning of the Current Beginning of the
(urrent F position on 2nd next program
fthe tape recorded
_ Previous Next 2nd /
program program next
re(orded re(orded 2 _ 3
-2 -1 1
Locatingbeginningoftimerrecordings
-- InstantReview
PressREVIEW on the Remote after ensuring that the VCR is in the
timer re(ording standby mode.
• Ti_eVCR turns on, and rewinds to the index code indi(atJng the
beginning of the last timer-recorded i)rogram, then begins
playback automatical[y.
• You can access a program of 2 to 9 index codes away from the
(urrent position on the tape. ll:,for example, you have
5 programs recorded and you want to watch the third one, press
REVIEW three times.
• The Instant Review I:unction will also operate if the VER is
tt_rned on.
Skippingunwantedportions
- SkipSearch
PressSKIP SEARCH on the Remote once to 4 tinles during
playback. Each press initiates a 30-second period of high speed
playback (Ull to 2 minutes). When the sllecil:ied portion of the tape
is skipped, normal playback resumes automatically. To return to
normal playback during Skill Search, press PLAY (I_).

Recording
it may be unlawfu[ to record or play back copyrighted material
without the consent of the copyright owner.
Accidental erasure prevention
To prevent a(cidental recording on a
recorded (assette_ remove its record
safety tab. To record on it later, (over
the hole with adhesive tape .... afety tab
BasicRecording
[] Loada cassette
Make sure the record safety tab is intact. Ii not, cover the hole
with adhesive tape before inserting the cassette.
• The VCR turns on, an(] the counter is reset, automatically.
[] Selectrecordingchannel
On the Remote
Press CH+/- or the Number keys.
On the VCR
Press PAUSE[CH]. The channel display on the
display panel starts blinking. WhiJe the display is
blinking, press EF[CH+] or REW[CH-] to seJect
channel After about 5 se(onds, the channel display
stops blinking.
NOTES:
•You can sHect rhanm_[ in thP stop modP,
recording paus_ modP ol dudng rPwind/fast-
forward high-speed searH1.
•tfno cassettP is loadPd, or during recording pause
mod_,, you can select rhannel only by plessing
FF[CH+] or REW[CH-].
•tfyou connPct tile TV and thc_VCR only using thc_
RF connection, press TV/VCR on the Rm_otP so
that the VCR modP indicatol lights on the display
panPI, to view the plogram to be IPcoldPd.
[] Settapespeed
Press SP/EP(////).
[] Startrecording
On the VCR, press REC(11).Or on the Remote, white holding REC
(0), press PLAY (1_).
RecordingFeatures
Specifyingrecordinglength
- Instant.timerRecording(ITR)
During recording, press REC(11) on the VCR repeatedly until the
re(ording length you want appears on the display panel The
re(ord indicator (O) on the display pand starts [)linking.
• Each time you press the button, recording length increases in
30-minute intervals (up to 6 hours).
• The VCR shuts off after re(ording is finished.
• To cancel an ITR, press STOP (111)on the Remote or STOP/EJECT
(1/A) on the VCR.
Watchingoneprogramwhilerecordinganother
During recording...
• If you connect the TV and the VCR only using the RF
¢onnection to view pictures from the VCR, press TV/VCR on the
Remote so that VCR mode indkator goes off from the display
panel. (The TV broad(ast being recorded disappears.)
• If you are using the AV connection to view pictures I¥om the
VCR, change the TV's input mode from AV to TV.
Then, select the (hannel you want to watch, on the TM
SecondAudioRecording(HR-A57Uonly)
This VCR's buittdn MTS decoder enables reception of
Muftichannel TV Sound broadcast. To record a SAP program
re(eived, set "2ND AUDIO RE( ORD" to "ON".
PressPAUSE(11).
• PressPLAY (1_) to resume recording.
• You can select channel in the recording pause mode.
PressSTOP (hi) on the OR PressSTOP/EJECT (11/A) on
Remote. the VCR.

TimerRecording
Up to 8 timer recording programs can be made using Express
timer programing method as far as a year in advance. Remember,
the clock must be set before you can program the timer.
NOTES:
•If aS the 8 programs have already M,rvl s_t, "PROGRAM FULL"
or "Full" appears on tim TV screen or the display panr_L
• After timer r_cording is comph_tr_d, tile VCR tulns off
automaticall)z
• You can progTam the timer mcolding whil_ a regular recording
is in progless; tile mr_nuscreens will not be recorded.
• To timber,record cabh_ or satHlit_, rhannels, be sure to krupp the
cable box or DBS rpceivr_r turned on witb the colr_ct rhannel
sel_,ctr_d.
• Even ira powel failure occurs, the VCR k_c_psyour timer
programs. Howr_ver, the clock tinm, channrq settings, and otber
mr_nu settings am lost. As a result, when tile powel is supplir_d
again to this VCR aftel the power failure, this VCR starts the
Plug&Play setting automatically to restore tbr_clork time and
channel setting, tf tim clork time and rhannel setting are
lestored correctly, each timel program you have made will start
at its start time unless its end time has rqapsed.
ExpressTimerPrograming
Load a cassette with the record safety tab intact. The VCR turns
on, and the counter is reset, automatically.
(1)_C3)
m
-IVC
[] PressPROG. on the Remote to access the Program screen.
PROGRAM 1
START STOP
[] PressSTART+/-, STOP+/-, DATE+/-
or CH+/- repeatedly to enter the start
time, stop time, date or channel
•Pressand hold START+/- or
STOP+/- to increase the time in
30-minute intervals.
•To set the tape speed, press SP/EP
(I/11).
•To timer-record daily (Monday Friday) or weekly serials,
press DALLY (M-F) or WEEKLY. Pressing the button again
makes the "DAllY" or "WEEKLY" display d]sapl)ear.
[] PressOK or PROG..
•If "PROGRAM NOT COMPLETED PROGRAM OVERLAP"
appears, see "Program ovedap warning display'.
[] PressTIMER. The VCR turns off automati(a[[y and "O" is
displayed on the display ilaneh
TousetheVCRwhileitisintimer
recordingstandbymode
Press TIMER, then press POWER. After you use the VCR, press
TIMER again to put the VCR into timer re(ording standby mode.
Checking,cancelingorchanging
programsettings
[] Disengagetimer
PressTIMER, then press POWER.
•When "AUTO TIMER" is set to "ON', you do not have to press
TIMER.
[] AccessProgramCheckscreen
PressPROG. CHECK.
[] AccessProgramscreen
PressPROG. CHECK again. Ea(h time you
press PROG. CHECK, the next program's
Program screen appears.
[] Cancelorchangeprogramsetting
PR START STOP CH DATE
18:SOP 10:00 t2 1_/Z4
2 IO:DOA 10:45 40 1_/Z5
i 11:30P 1:CO 125 12/25
PROGRAM 1
START STOP
OATE
I_1 i'mN
To cancel a program, press CANCEL when the Program screen
you do not want is shown.
To change a program, press the appropriate button: START+/-,
STOP+/-, DATE+/-, CH+/-, and/or SPfEP (1/11) when the
Program screen on which you want to make changes is shown.
[] Returntonormalscreen
PressPROG. CHECK repeatedly until no Proglam screen is
shown.
[] Reengagetimerrecordingstandbymode
PressTIMER. The VCR turns ofl: automatically and "Q" is
displayed on the display panel.
•When "AUTO TIMER" is set to "ON", the timer recording
standby mode automatically resumes when you turn off the
VCR.

Programoverlapwarningdisplay
If "PROGRAM NOT COMPLETED PROGRAM OVERLAP"
appears, you have another proglam overlapping the program you
have just made. The Program Check screen appears and
conflkting programs will start [)linking.
I ]
PROGRAMOVERLAP _ i 9:00P _9:0B 10 _Z/24
Example:
Program 1 (you have just made) and Program 4 overlap each
ether
[] Selectprogramtomodify
Press _V, then press E>.
•You can only sde(t one of the
overJapping programs.
• If you do not mind this overJap, press
PROG. to finish the timer program
setting. The program starting earlier or
pR START STOP OH DATE
18:COP 1D:QQ 12 12/24
2IO:CQA ID:45 40 12/25 _
_3 11:30P 1:00 125 12_B_
program with the lower program number will be recorded.
[] Cancelorchangeprogramsetting [ PROGRA_4
To cancel a program, press CANCEL when START STOP
9:0OPM ._ 1D:OOpM
the Program screen yoH do not want is DATE CH
12/24/00 10 $P
shown. SUN
To change a program, press the
appropriate button: START+/-, STOP+/-,
DATE+/-, CH+/-, and/or SP/EP(I/11)
when the Program screen on which you want to make changes is
shown, then press OK.
• If the overtap is not yet solved, the conflicting proglams will be
shown on the Program check screen. Repeat the above steps
again.
Other Functions
Checkingtapeposition
When you change the VCR operation
mode from the stop mode to fast forward
or rewind mode, or when you perform an
Index Sealch or Instant Review, the tape
position indk ator appears.
The position of "1" in relation to "B"
(Beginning) or "E" (End) shows you where
you are on the tape.
• Set "SUPERIMPOSE" to "ON".
+ ÷ +_t E
Changingdisplayinformation
Each time you press DISPLAY, the dispJay panel
shows the channel number and the clock time
alternatively.
• You can change display in the stop, recording or
recording pause mode, or during rewind/fast
fol_vard high-speed search.
• When "SUPERIMPOSE" is set to "ON" and DISPLAY on the
Remote is pressed, time counter will appear on the TV screen.
To reset the time counter, press C. rESET on the Remote.
Timerwarningdisplay
A warning appears on the TV screen to tell
you that the timer-recording is to start in
5 minutes if you are not in the timer
recording standby mode at that time. Press
TIMEr to put the VCR into timer recording
standby mode. To clear the display, press
CANCEL on the Remote.
-WARNING-
TIMERRECORDINO
TOSTARTSOON
(CANCELI
Functionsettings
You can use the other useful function settings on the Function Set
screen.
[] AccessMainMenuscreen,then
FunctionSetscreen
PressMENU on the Remote. PressAV to
move the highlight bar (arrow) to
"FUNCTION SET", then press OK or _.
[] SelectFunction
TUNERSET
I_ITIALSET
Z;_ ¸_ i i i_: _ !!!!!!!!!!!!
PressAV to move the highlight bar (arrow) to the function you
want to set.
HR-A57U
_!II nl |*_ IIIIII I_]|ltl*l II
PICTURE CONTRDL AUTO• 2ND AUDIO RECORD 0F_
AUTOTINER OFF AUDIO NONITOR HI-FI
SUPERIE_pOSE ON
AUTO Sp_Ep TIMER OFF
VIDEO STABILIZER OFF
HR-A37U
FUNCTtO_
PICTURE CONTROL AUTO
AUTOTibER OFF
SUPERIMPOSE ON
AtJTOSp_Ep TIMER OFF
V_DEOSTABILIZER OFF
BLUE BACK ON
_FIE_S_NNg

[] Changesetting
PressOK or _. The default setting is bold in the following table.
PressMENU to return to normal screen.
•AUTO PICTURE -- ON/OFF
When this function is set to "ON", this VCR checks the condition
of the tape in use during playback, and compensates to provide
the Mghest-possible playback pictures.
•PICTURE CONTROL -- AUTO(NORM)/EDff/SOFT/SHARP
This function helps you to adjust the playback picture quality
according to your preference.
AUTO(NORM): Normally se[ect this. Picture quality is adjusted
automatically. When "AUTO PICTURE" is "OFF", "NORM" will
appear instead of "AUTO".
EDIT:Minimizes picture degradation during editing (recording and
playback).
SOFT:Reduces image coarseness when viewing overplayed tapes
containing much noise.
SHARP: C[earer, sharpel-edged picture when viewing images with
much flat, sanle-co_ored surfaces such as cartoons.
NOTE:
Scqect "EDIT" wb_myou are _diting tap_s. Aft_l you finish c_diting
tbe tapes, sel_ct "AUTO".
•AUTO TIMER -- ON/OFF
•When this function is set to "ON":
The timer recording standby mode is automatically engaged when
the VCR is turned off. [t is temporarily canceled when the VCR is
turned on. You do not have to press TIMER to engage or disengage
the timer recording standby mode.
•When this function is set to "OFF":
You have to press TIMER to engage or disengage the timer
recording standby mode.
•SUPERIMPOSE -- ON/OFF
When this function is set to "ON", various VCR status information
Ion-screen display) appears on the screen.
NOTE:
Wbrm you use this VCR as tile playback VCR for _diting a tap__,be
sure to set this function to "OFF"; otberwis__,tll__VCR status
inlbn_lation (on-screen display) will be record_,d on the edited
tape_.
•AUTO SP-,,-EP TIMER -- ON/OFF
When this function isset to "ON", the VCR automatically
switches to EPmode to allow complete recording if there is not
enough tape to record the entire program while timer-recording in
SP mode.
For Example, Recording a program of 140 minutes in length onto
a 120-minute tape
Approximately 110 minutes Approximately 30 minutes
L SP mode [ EPmode J
NOTES:
•tfyou have programc_d tbc_VCR to time.r-record 2 or morn
programs, do not us_ this function, but H_ang(, th_ tap_ spc,c,d
manually during timm'proglaming.
•TNele may be some noise and sound disturbance where the tape
speed switches from SP to EP mode on tile tape.
•TNis function is not availabl_, during ITR (Instant 1Truer
Recording), and will not wolk propmly on tile following tapes:
TIST) 30, T(gT)-60, T(ST)-90, and T(ST)-120.
•VIDEO STABILIZER -- ON/OFF
_Vhen this lu_ction is set to "ON", you can automatically correct
vertical vibrations in the picture when playing back unstaMe
recordings made on another VCR.
NOTE:
To watH_ recordings with close, caption ol whm_you finish
vif_wing a tapf_,s_t this function to "OFF".
•BLUE BACK-- ON/OFF
VVhen this function is set to "ON", the TV screen becomes all blue
in the following cases:
• When receiving a channel not in use.
• When stopping playback.
NOTE:
WNm_ you want to mceiv¢_an unstabh_ ¢llanncq witll poor signals,
sc,t this function to "OFF".
•2ND AUDIO RECORD -- ON/OFF (HR-A57U only)
• "When this fundion is set to "ON";
If aSAPprogram isreceived, tile SAP audio is recorded on both
the normal and I li-Fi tracks. The main audio is not recorded.
If a non-SAP program is received, the main audio is recorded on
both the I li-Fi and normal tracks.
• When tbls function is set to "OFF", the SAP audio canr_ot be
recorded.
NOTES:
WIIm_ the rllanncq is rbanged on thc_VCR;
•Tile "STEREO" indication appeals on tll_.screen for about
5 s¢.conds if the.proglam is a st_,l¢.obroadcast.
•TNe"SAP" indication appears on tbr. screen for about 5 seconds
if tbe plogranl is a ,SAPbroadcast.
•Both indications appear when a stmc.oprogl_m_ is accompanied
by .SAP sound.
•AUDIO MONITOR- HI-FI/HI-FI L/HI-FI R/NORM/MIX
(HR-A57U only)
This VCR can record two sound tlacks simultaneously (norma_
and Eti-Fi) on a I li-Ei stereo tape. You can select the sound track(s)
to listen to white playing back a [ li-Fi stereo tape. [n addition,
when playing back a prerecorded tape containing two sepalate
audio programs on the I li-Fi tracks, you can choose either one by
selecting either "[ [l-F[ L" or "HI-El R".
HI-F[: Normally select this. I li-Fi sound is played back.
HI-FIL: Sound on the left [4i-Fi channel is played back.
HI-FIR: Sound on the right [ ii-Fi channel is played back.
NORM: Sound on the normal track is played back.
M]X: Both sounds on the Eti-Fi tlack and normal track are mixed
and played back.
NOTES:
•Whil_ playing ba_k a monaural tap_, sounds on tll_ normal
track will be heard regardless of this stetting.
•IfRF connection is used fol viewing pictures on the TV sound
will b_.monaural even tbough you select "HI-D".
•Yuu can also use the A. MONITOR button on the_R¢.mot¢_to
sel_,ct tbe d_.sired monitor sound.

Editing
You can use your VCR as the playback or recording VCR. You can
use a camcorder as the playback VCR and your VCR as the
recording VCR. Refer also to the other components' instruction
manuals k_r connection and its operations.
[] Make connections
Example: When using this VE-Ras the playback VCR
t t t To AUDIO/VIDE(} OUT
Audio/video cable
(not supplied)
_1r _ _ To audio/video input
• When using this VCR as the recording VCR, connect this VCR's
audio/video input connectors to the audio/video output
connectors on the other VCR. If the playback VCR is monaurah
connect the audio output connector on the playback VCR to the
left audio input connector on this VCR.
[] Loadcassettes
Insert the playback cassette into the playback VCR and the
cassette to be recorded on into the recording VCR.
[] SelectinputmodeonrecordingVCR
Select the correct externat input on the recording VCR.
On this VCR (when using this VCR as the recording VCR);
Select "F-1" when connecting the other VCR to the audio/video
input connectors on the front paneL
PressAUX or CH+/- on the Remote. You can select the input
mode also by pressing PAUSE[CH], and then FF[CH+] or
REW[CH-] on the VCR. See step [] in "Basic Recording".
[] Selecteditmode
Set the edit mode to "ON" for the VCRs if such a mode is
equipped.
• On this VCR, set "PICTURE CONTRE)L" to "EDIT".
[] Startplayback
Press PLAY(1_) on the playback VE-R.
[] Startrecording
Press REC(O) on the recording VCR.
Specifications
AC 120 V_,, 00 I Iz
GENERAL
Power requirement
Power consumptRm
[I IR-A57UI
Power on
Power off
[I IR-A37UI
Power on
Power off
Temperature
Operating
Stolage
Operating position
Dimensions (W x I I x D)
Weight
Format
Maximum recording time
SP
EP
18W
2.0 W
16W
2.0 W
5°C to 40_C (41°F to 104°F)
.....20°C to 60°C (4 F to140_F)
Horizontal only
360 mmx 94 mm x 247 mm
(14-3/16" x 3-3/4" x 9-3/4")
3.0 kg (6.6 Ibs)
: VI IS NTSC standard
: 210 min. with S%210 video cassette
: 630 rain. with S%210 video cassette
VIDEO/AUDIO
Signal system
Recording/Playback
system
Signal-to-noise ratio
[ lorizontal resdution
Frequency range
[I IR-A57UI
Normal audio
I li-Fi audio
[I IR-A37UI
Normal audio
input/Output
NTSC-type color signal and EIA
monochrome signa[, 525 lines/
60 fields
DA-4 (Double Azimuth) head helica[
scan system
45 dB
230 lines
70 I Iz to 10,000 I Iz
20 I Iz to 20,000 Hz
70 I Iz to 10,000 I Iz
RCA connectors (IN x 2, OUT x 1)
TUNER
Tuning system
ChanneI coverage
VEIF
UI IF
CATV
RF output
Frequency-synthesized tuner
Channels 2 13
Channets 14-69
113 Channels
Channel 3 or 4 (switchable; preset to
Channel 3 when shipped) 75 ohms,
unbalanced
TIMER
Clock reference : Quartz
Proglam capacity : 1-year programmable timer/
8 proglams
Memory backup for timer is not supported.
ACCESSORIES
Provided accessories : RF cable(F-type),
Infrared remote control unit,
"AA" battery x 2
Specifications shown are for SP mode unless specified otherwise.
E.& O.E. Design and specifications subject to change without
notice.

FORSERVICING(OnlyinU.S.A.)
HOW TO LOCATE YOUR JVC SERVICE CENTER
TOLL FREE: 1-800-537-5722
http://www.jvc.corn
Dear Customer,
In order to receive the most satisfaction from your purchase, please read the instruction booklet before operating the
unit. In the event that repair is necessary, or for the address nearest your location within the Continental United States,
please call 1-800-537-5722 for your nearest authorized servicer or visit our website at www.JVC.com. Remember to
retain your Bil! of Sale for Warranty Service.
-- JVC
JVC SERVICE & ENGINEERING
COMPANY OF AMERICA
DIVISION OF JVC AMERICAS CORP.
Sophisticated electronic products may require occasional service. Just as quality is a keyword in the engineering and
production of the wide array of JVC products, service is the key to maintaining the high level performance for which JVC
is wodd famous. The JVC service and engineering organization stands behind our preducts.
NATIONAL HEADQUARTERS
JVC SERVICE & ENGINEERING COMPANY OF AMERICA
DIVISION OF JVC AMERICAS CORIR
10 New Maple Avenue
Pine Brook, NJ 07058-9641
ACCESSORIES
may contact your local JVC Deale_
From the 48 Continental United States cal! tol! free:
1-800-882-2345 or on the web at www.JVC.com
Don't service the product yourself.
CAUTION I
Toprevent electrical shock, do not open the cabinet.
There are no user serviceable parts inside.
Please refer to quafified service personnel for repairs.

WARRANTY(OnlyinU.S.A.)
LIMITED WARRANTY CONSUMER VIDEO 1-90
JVC COMPANY OF AMERICA warrants this product and aII parts thereof, except as set forth below ONLY TO THE ORIGINAL
PURCHASER AT RETAIL to be FREE FROM DEFECTIVE MATERIALS AND WORKMANSHIP from the date of original retail
purchase for the period as shown below. ("The Warranty Period")
PARTS LABOR
1YR 90DAYS
THIS LIMITED WARRANTY IS VALID ONLY IN THE FIFTY (50) UNITED STATES, THE DISTRICT OF COLUMBIA AND IN
COMMONWEALTH OF PUERTO RICO.
WHAT WE WILL DO:
If this product is found to be defective, JVC will repair or replace defective parts at no charge to the original owner. Such repair and
replacement services shall be rendered by JVC during normal business hours at JVC authorized service centers. Parts used for
replacement are warranted only for the remainder of the Warranty Period. All products and parts thereof may be brought to a JVC
authorized service center on a carry-in basis except for Television sets having a screen size 25 inches and above which are covered
on an in-home basis.
WHAT YOU MUST DO FOR WARRANTY SERVICE:
Return your product to a JVC authorized service center with a copy of your bill of sale. For your nearest JVC authorized service
center, please call toll free: (800) 537-5722.
If service is not available locally, box the product carefully, preferably in the original carton, and ship, insured, with a copy of your biII of
sale plus a letter of explanation of the problem to the nearest JVC Factory Service Center, the name and location of which will be
given to you by the toll-free number.
If you have any questions concerning your JVC Product, please contact our Customer Relations Department.
WHAT IS NOT COVERED:
This limited warranty provided by JVC does not cover:
1. Products which have been subject to abuse, accident, alteration, modification, tampering, negligence, misuse, faulty installation,
lack of reasonable care, or if repaired or serviced by anyone other than a service facility authorized by JVC to render such service,
or if affixed to any attachment not provided with the products, or if the model or serial number has been altered, tampered with,
defaced or removed;
2. Initial installation and installation and removal for repair;
3. Operational adjustments covered in the Owner's Manual, normal maintenance, video and audio head cleaning;
4. Damage that occurs in shipment, due to act of God, and cosmetic damage;
5. Signal reception problems and failures due to line power surge;
6. Video Pick-up Tubes/CCD image Sensor, Cartridge, Stylus (Needle) are covered for 90 days from the date of purchase;
7. Accessories;
8. Batteries (except that Rechargeable Batteries are covered for 90 days from the date of purchase);
There are no other express warranties except as listed above.
THE DURATION OF ANY IMPLIED WARRANTIES INCLUDING THE IMPLIED WARRANTY OF MERCHANTABILITY, IS LIMITED
TO THE DURATION OF THE EXPRESS WARRANTY HEREIN.
JVC SHALL NOT BE LIABLE FOR THE LOSS OF USE OF THE PRODUCT, INCONVENIENCE, LOSS OR ANY OTHER
DAMAGES, WHETHER DIRECT, INCIDENTAL OR CONSEQUENTIAL (INCLUDING, WITHOUT LIMITATION, DAMAGE TO TAPES,
RECORDS OR DISCS) RESULTING FROM THE USE OF THIS PRODUCT, OR ARISING OUT OF ANY BREACH OF THIS
WARRANT_ ALL EXPRESS AND IMPLIED WARRANTIES, INCLUDING THE WARRANTIES OF MERCHANTABILITY AND
FITNESS FOR PARTICULAR PURPOSE, ARE LIMITED TO THE WARRANTY PERIOD SET FORTH ABOVE.
Some states do not allow the exclusion of incidental or consequential damages or limitations on how long an implied warranty lasts,
so these Iimitations or exclusions may not apply to you. This warranty gives you specific legal rights and you may also have other
rights which vary from state to state.
JVC COMPANY OF AMERICA
DIVISION OF JVC AMERICAS CORP 1700 Valley Road
Wayne, New Jersey 07470
REFURBISHED PRODUCTS CARRY A SEPARATE WARRANTY, THIS WARRANTY DOES NOT APPLY. FOR DETAILS OF
REFURBISHED PRODUCT WARRANTY, PLEASE REFER TO THE REFURBISHED PRODUCT WARRANTY INFORMATION
PACKAGED WITH EACH REFURBISHED PRODUCT
For customer use:
Enter below the Model No. and Serial No. which is located either on the rear, bottom or side of the cabinet. Retain this information
for future reference.
Model No.: Serial No.:
Purchase date: Name of dealer:
Other manuals for HR-A57U
1
This manual suits for next models
1
Table of contents
Other JVC VCR System manuals