8
Video
Cinch
Audio
Cinch
AV-
Ausgang
Audio
Cinch
Audio Cinch
Video
Cinch Video Cinch
DC-Buchse
DC-Buchse
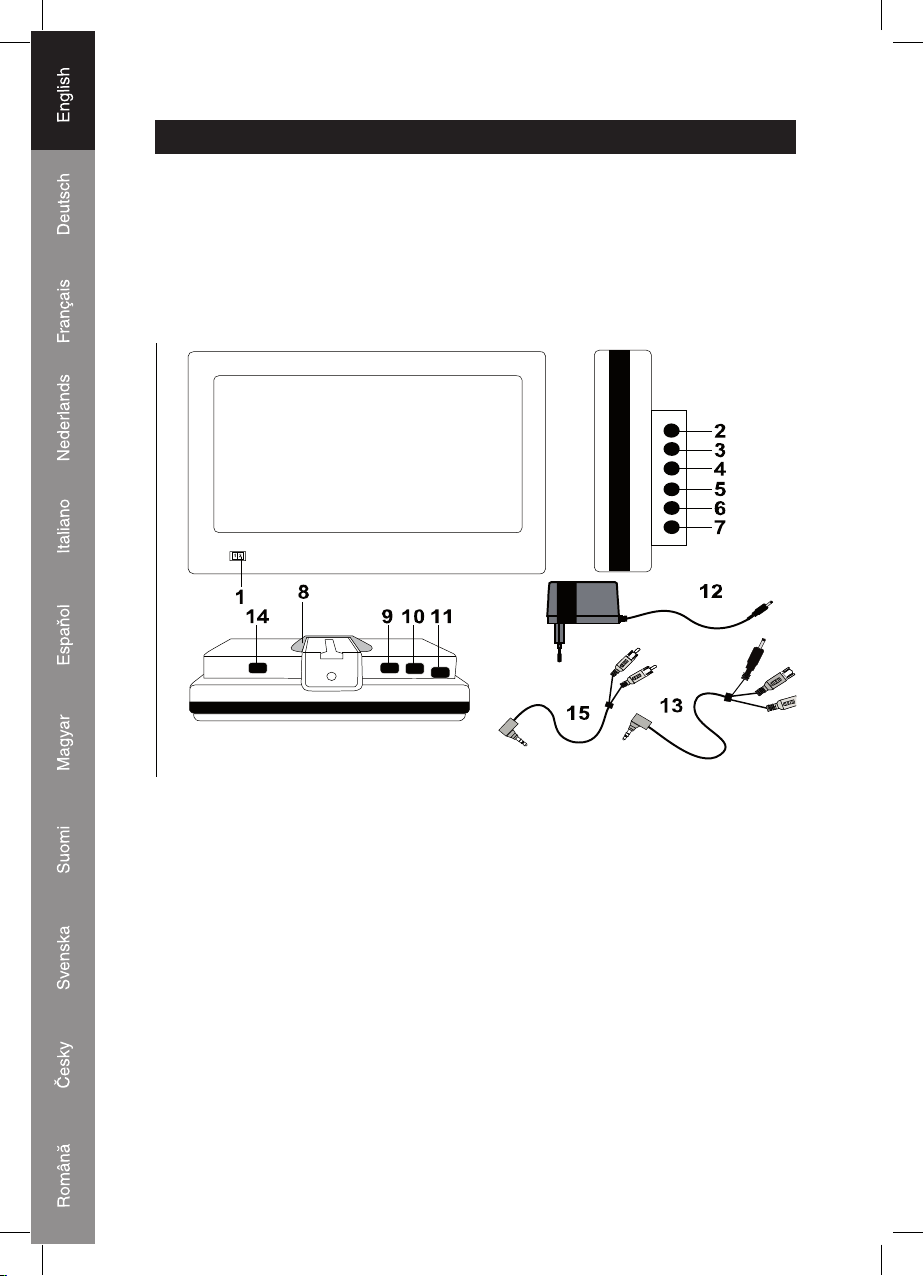
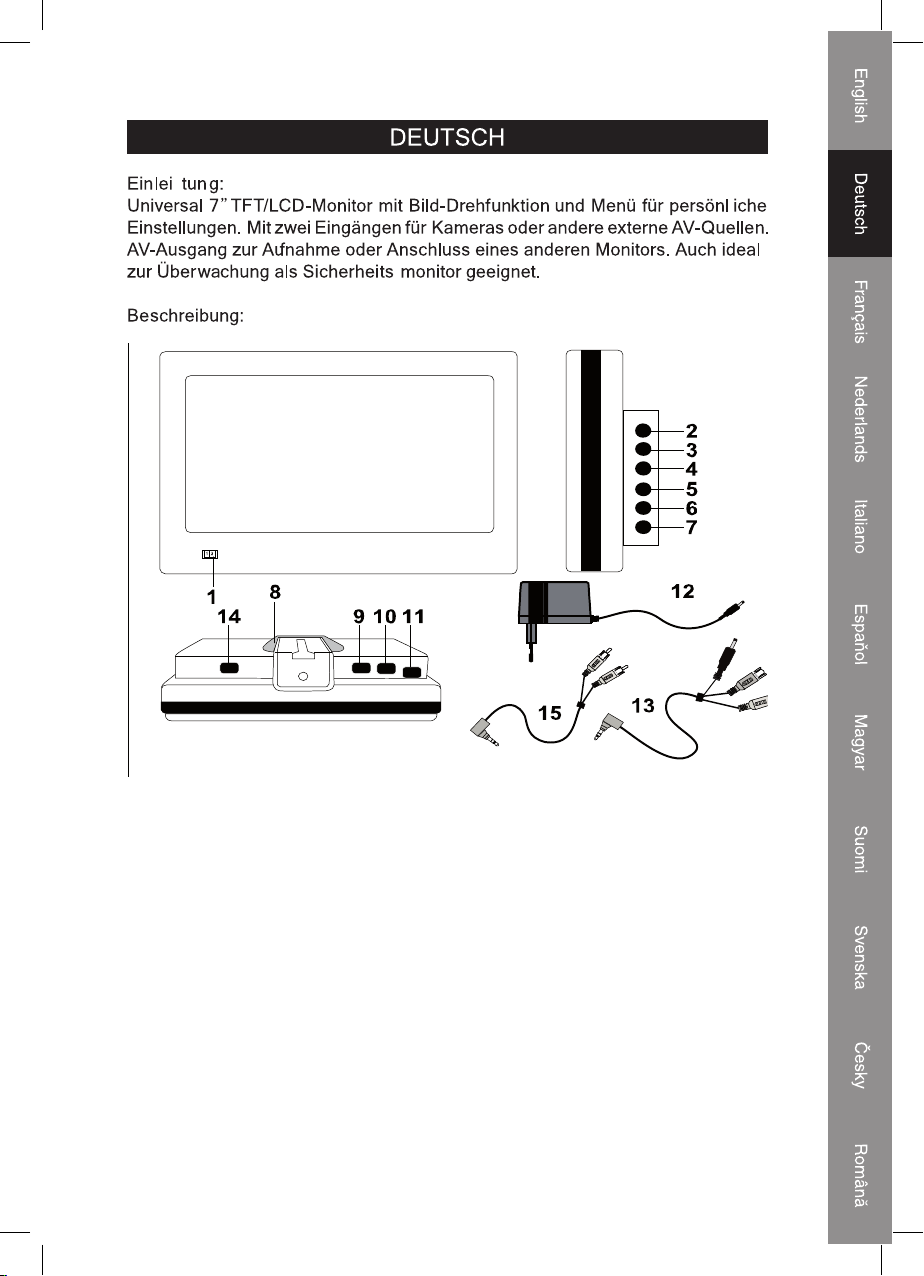
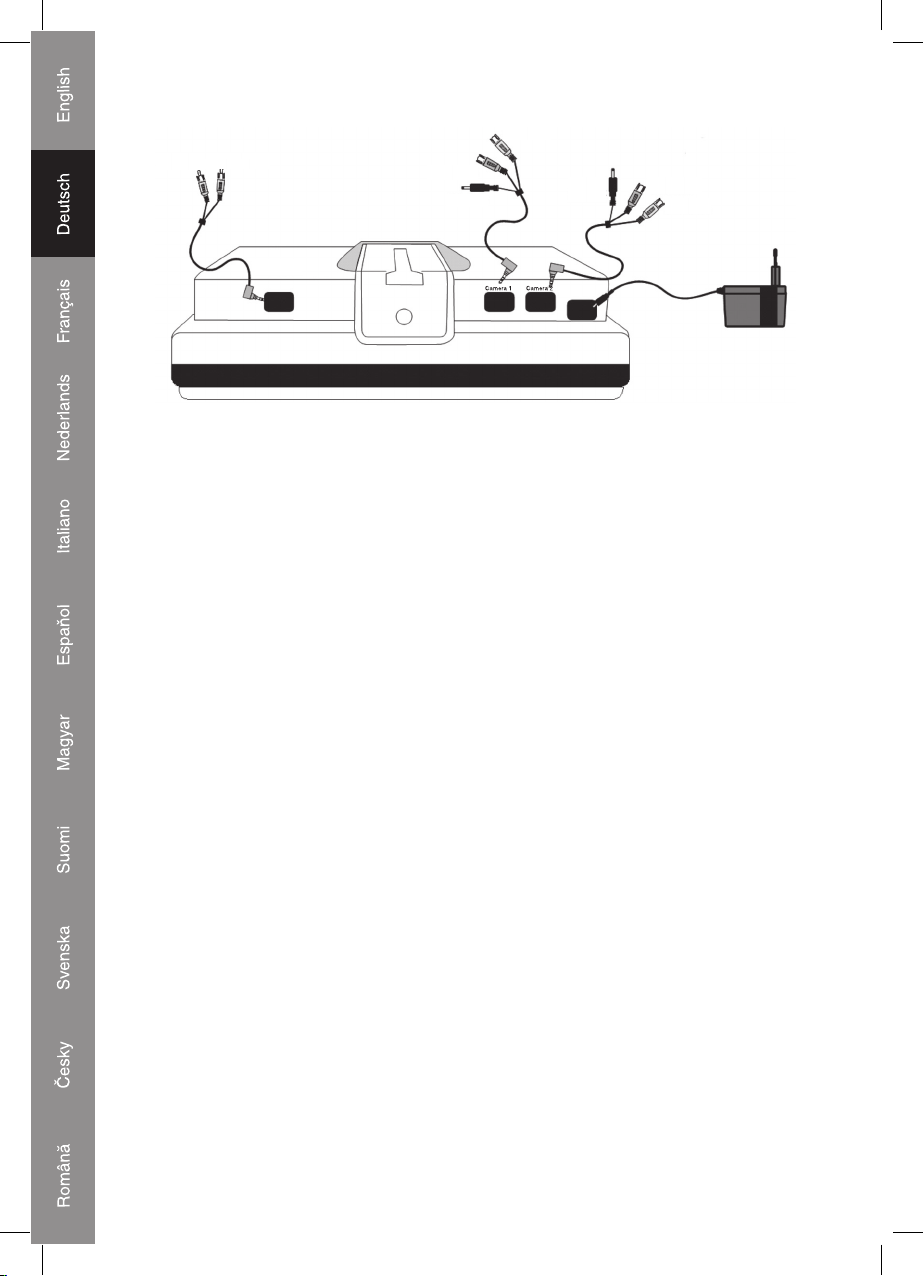
Anschlüsse:
1) Verbinden Sie das AV-Ausgangskabel mit einem TV-Gerät oder Monitor. Gelb
steht für das Videosignal. Weiß steht für Audio (Mono).
2) Verbinden Sie das AV/Kamera-Eingangskabel mit einer Kamera oder anderen
Videoquelle.
Hinweis: Der DC-Klinkenstecker ist ein optionaler DC-Ausgang für Kameras,
die über 12 V versorgt werden.
3) Schließen Sie das AC/DC-Netzteil an eine 220/230 V Steckdose an.
Bedienung:
VOL+
a. Hebt den Lautstärkepegel an
b. Hebt den Wert im OSD (On Screen Display) an
VOL-
a. Senkt den Lautstärkepegel ab
b. Senkt den Wert im OSD (On Screen Display) ab
FUNC (Funktionstaste)
Das System bietet eine Vielzahl an OSD-Funktionen, mit denen Sie manuell
das beste Bild einstellen können. In jedem OSD ist es möglich, den Wert durch
Drücken der Tasten “VOL+” und “VOL-” einzustellen.
a. Drücken Sie diese Taste einmal, um BRIGHTNESS (Helligkeit) einzustellen
b. Drücken Sie diese Taste zweimal, um CONTRAST (Kontrast) einzustellen
c. Drücken Sie diese Taste dreimal, um SHARPNESS (Schärfe) einzustellen
d. Drücken Sie diese Taste viermal, um COLOR (Farbe) einzustellen
e. Drücken Sie diese Taste fünfmal das SEITENVERHAELTNIS (16:9, 4:3)
einzustellen
f. Drücken Sie diese Taste sechsmal, um VIDEO (PAL/NTSC) einzustellen
g. Drücken Sie diese Taste siebenmal, um OSD BRIGHTNESS (OSD-Helligkeit)
einzustellen
h. Drücken Sie diese Taste achtmal, um LCD H. AMPLITUDE (Abtastzeile)
einzustellen