K-sun Green Machine User manual

GM_horizontal_ vertical stacked oset
GM_horizontal
4-color process identity
Version 4.10
QUICK START GUIDE

2
BEGIN HERE
Machine Set Up
1. Tighten the ribbon.
2. Open the cover.
3. Insert the cartridge, close cover.
4. Connect the adapter.
Check the manual for using AA batteries or Sanyo
enloop rechargeable batteries. See Manual page 18.
5. Turn on your machine.
6. Feed and cut the tape.
- Press Shift and Print Key.
Insert the cartridge
with its label side up.
Straighten the
tape end.
Push the tape
end through
the tape guide.

3
Display Set Up
1. Backlight. Turn on the backlight by pressing Shift + Light Key .
(to turn off backlight repeat Shift + Light)
OR
2. Display. Press the Light or Dark Keys. Just continue to press
them until you nd a comfortable level.
$$ MONEY SAVING TIP: Turning off the backlight helps save battery life.
Graphic Preview Setup
Press and hold the Shift with Preview Graphic Key . As you create your label you can watch in
screen. You can see length/image before printing.
$$ MONEY SAVING TIP: Before printing Press Graphic and watch your label “print to screen”.
You can review for content, layout, spelling errors before printing and wasting tape.

4
Handy Key Tips
(backspace) During any operation use this key to undo or go to a previous selection or choice.
Also press backspace key to stop printing.
(shift/backspace) Use the shift key with the delete key to clear machine.
Screen will say “Text all delete” Exec? Press the return key.
(arrows) Use up and down arrows in menus to review choices.
(return) Use to select a choice.
Use to start a new line.
Note: To delete “all” when using Patch, Wrap and Flag features continue to press the backspace key through
the menus and back to original label.
Note: Your machine defaults to inches, English menu. If you need to change this or other basic settings
consult the Manual Page 17.

5
Now let’s make a simple label.
(Your serial number for the back page of this book. -Consult your box for the serial number)
Your display should show 1 (for line 1) and a ashing cursor.
Enter the serial number. Return.
Your display should show 2 and a ashing cursor.
Enter today’s date. Do not return.
Press the Graphic Key and review the spelling.
Now press Print.
If you have used a 3/8” or larger tape you can now professionally round the corners of the label using the
PeelGuard®trimmer. This is located on the right hand side of your printer.
2G0001293
09/10/2011

6
How to use the PeelGuard®trimmer.
$$ MONEY SAVING TIP: Use this feature to create professional labels and prevent them from being peeled
off of surfaces.
For 209 (3/8”), 212 (1/2”) and 218 (3/4”).
Rounds off one corner at a time.
1. Set one side of the label against either the right or left
guide of the PeelGuard®and insert the label as far as
it will go.
2. Pull out the label when you hear the clicking noise
several times.
3. Set the other side of the label against the guide and
round off the corner in the same manner.
For 224 (1”)
Rounds off two corners at the same time.
1. Set both sides of the label against the PeelGuard
and insert the label as far as it will go.
2. Pull out the label after you hear the clicking noise
several times.
3. Repeat for the 2nd edge of the label.
Congratulations! You made your rst professional label.
Place this label on the back of this book.

7
Change the Font
Using the Font key.
To use the font you want, press the Font key repeatedly until the
font you want appears.
Fonts appear in the following order:
Hint: The graphic display will change to reect the font you have selected.
Change the Text Size
Using the Text Size key.
Enter your text.
Press the Text Size key repeatedly until the font size you want appears. Watch the blocks for graphic
display changes.
Here illustrates the sizes for one line:
The text size of the line with the cursor can be checked on the right side of the display.
Hint: The graphic display will change to reect the text size you have selected.
Roman

8
Create 2 Lines, Different text sizes on each line.
(Also can use this technique for 3 lines or 4 lines depending on the tape size.)
On Line 1 type “GREEN”, Return.
On Line 2 type “MACHINE”, Do not return.
Now press Text Size Key until you get the desired length, style.
Review in Graphic Preview before printing.
Press Print.
Center Text on Label
On Line 1 Type “GREEN MACHINE”, Do not return.
Press Edit Key.
Arrow to Layout, Return.
Arrow to Center, Return.
Screen will say “Area?” “Whole Label”, Return.
Press Graphic Preview key before printing.
Press Print.
Create Vertical Label
On Line 1 Type “GREEN”, Do not return.
Press Edit Key.
Arrow down to Vertical, Return.
Arrow to On, Return.
Screen will say “Area?” “Whole label”, Return.
(Watch graphic preview to conrm vertical.)
GREEN
MACHINE
GREEN MACHINE
G
R
E
E
N

9
Margins
Press Edit Key and arrow down to margin.
Set the left and right margin of the labels. Provide visual balance to your labels.
$$ MONEY SAVING TIP: Margin settings can help you save tape. The GREEN MACHINE®provides many
choices to help you save tape and still provide essential visual balance to your label.
Minimum Cuts off small leader, and places 1 mm margin in front and behind text.
Short Cuts off small leader, and places 3mm margin in front and behind text.
Middle Does not cut off leader, and places 10mm margin in front and behind text.
Long Does not cut off leader, and places 18mm margin in front and behind text.
Text width/3 Cuts off small leader. Then based on width of tape you are using the margin is set smaller
automatically. The margin is around one third of tape width.
For instance if you use 1” width tape, the margin will be 1/3”.
Tape Width Based on width of tape you are using, the margin is set. If you use 1” tape,
the margin will be 1”.
Note: It is easy to view a change in the margin settings. Just preview in the graphic display!
GREEN MACHINE®
GREEN MACHINE®
GREEN MACHINE®
GREEN MACHINE®
GREEN MACHINE®
GREEN MACHINE®

10
Patch Panel
PANEL A
For use with equal text data. For instance if all labels are 1 digit (1, 2, 3) or all labels are 2 digits
(A1, B1, C1, D1) up to 5 places, for example (A1-01). You can enter up to 10 labels at a time.
For this example we are going to make 4 labels, one inch apart, that will read.
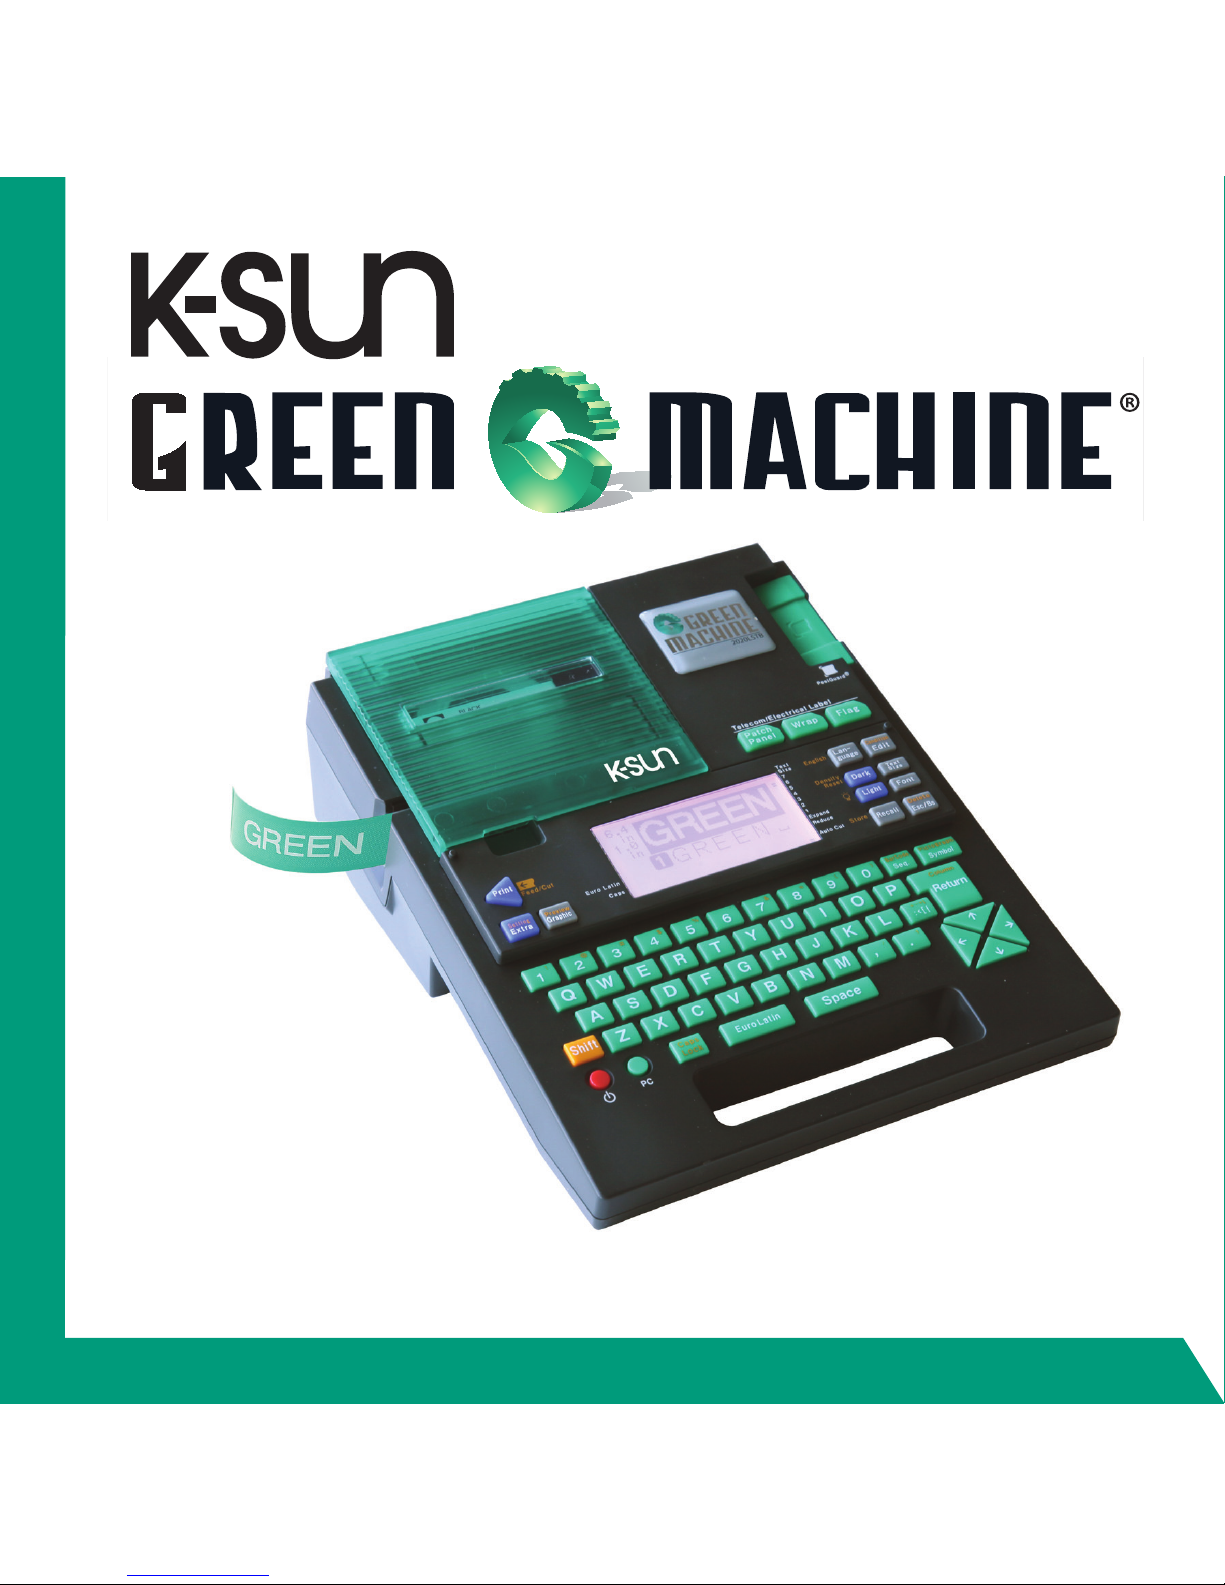
Choose 9mm, 209, 3/8” tape.
Choose Patch Panel, A, Return.
Choose Length 1.1”, Return.
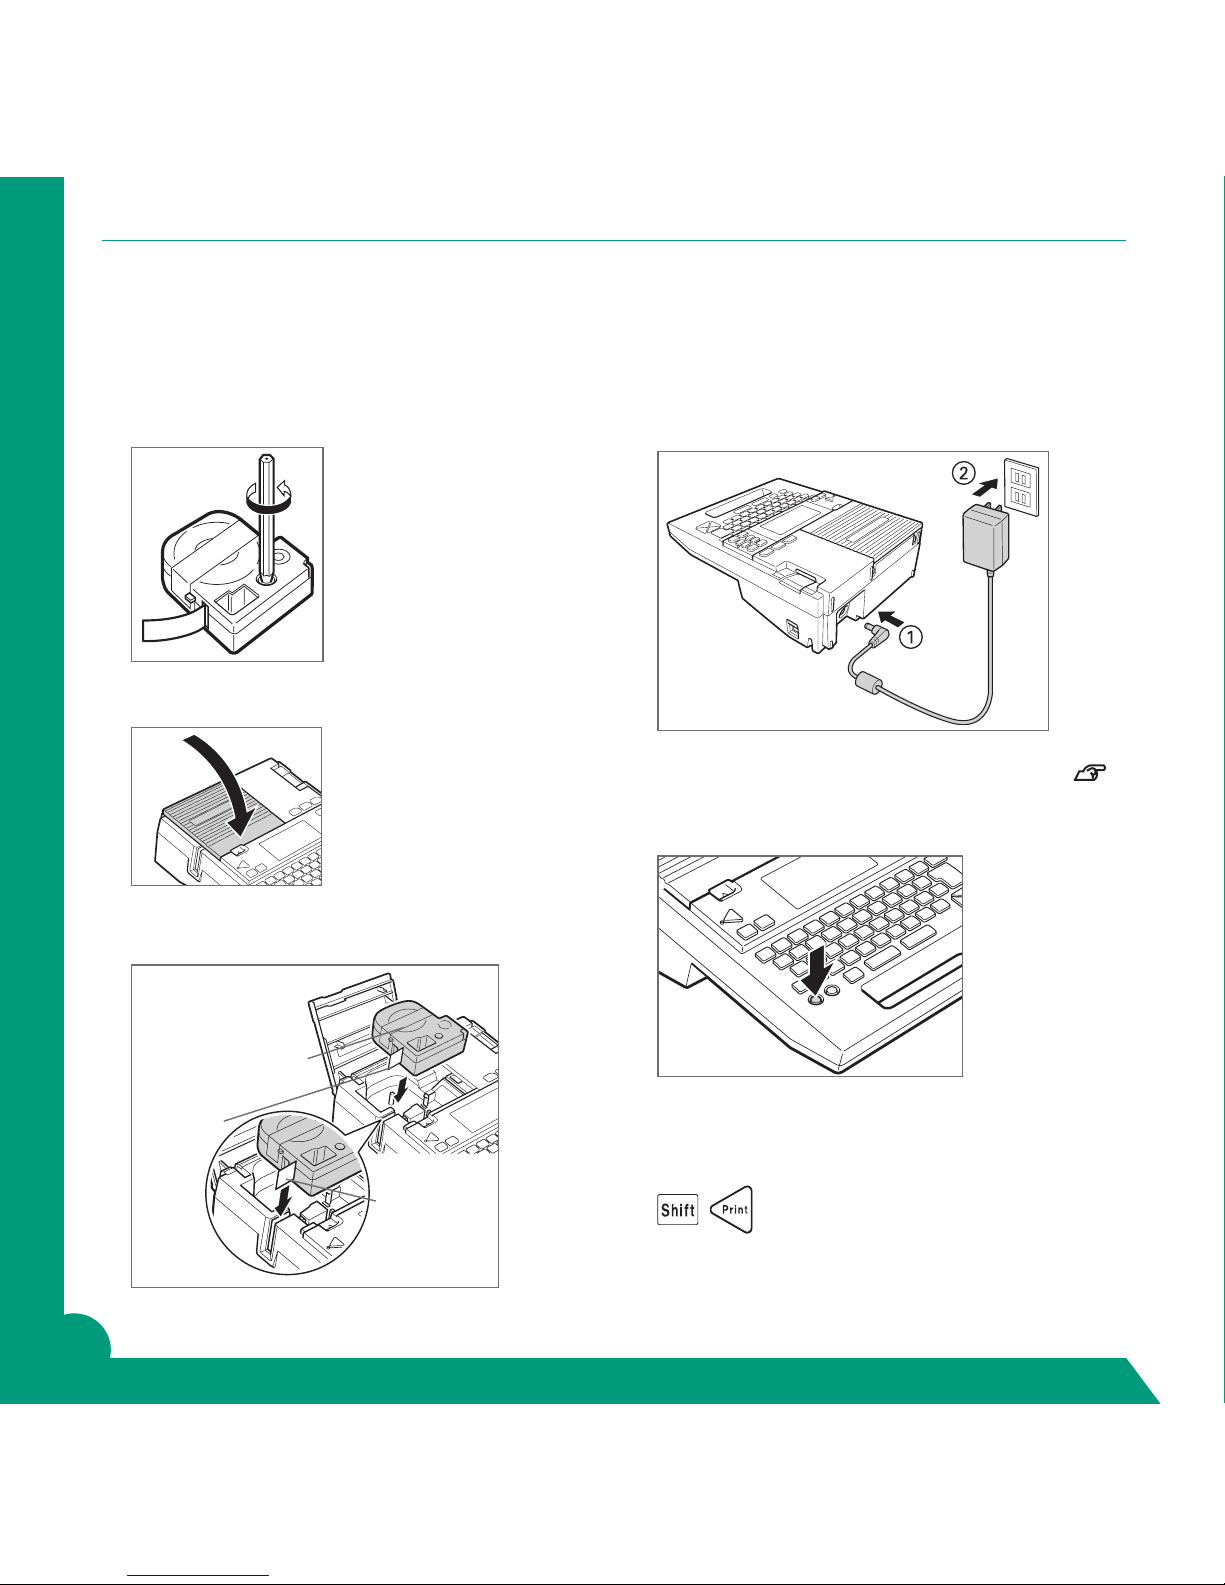
On Label 1 type “A1-01”, Return.
On Label 2 type “A1-02”, Return.
On Label 3 type “A1-03”, Return.
On Label 4 type “A1-04”, Do Not Return.
Press Print.
PANEL B
For use when printing equal data and you need to sequence either a number or letter in the label.
Note: Only one sequence of either number or letter is possible.
For this example, we are going to sequence numbers.
Choose a 9mm, 209, 3/8” tape.
Choose Patch Panel, B, Return.
Choose Length 1”, Return.
At Label 1 type A, then press Sequence key.
At Start Enter 1, Return.
Repetition: This feature allows you to print more than one label but for this example we will choose 1 time,
Return.
Sequence 2 Figure: The feature adds the space, so as you sequence two digits the spacing will
accommodate two digits. For this example, leave On, and then Return.
Now press the Extra button and choose Repeat print, Return.
At Set number, Return and enter 12, Return.
Now arrow down to Print exec?, Return.
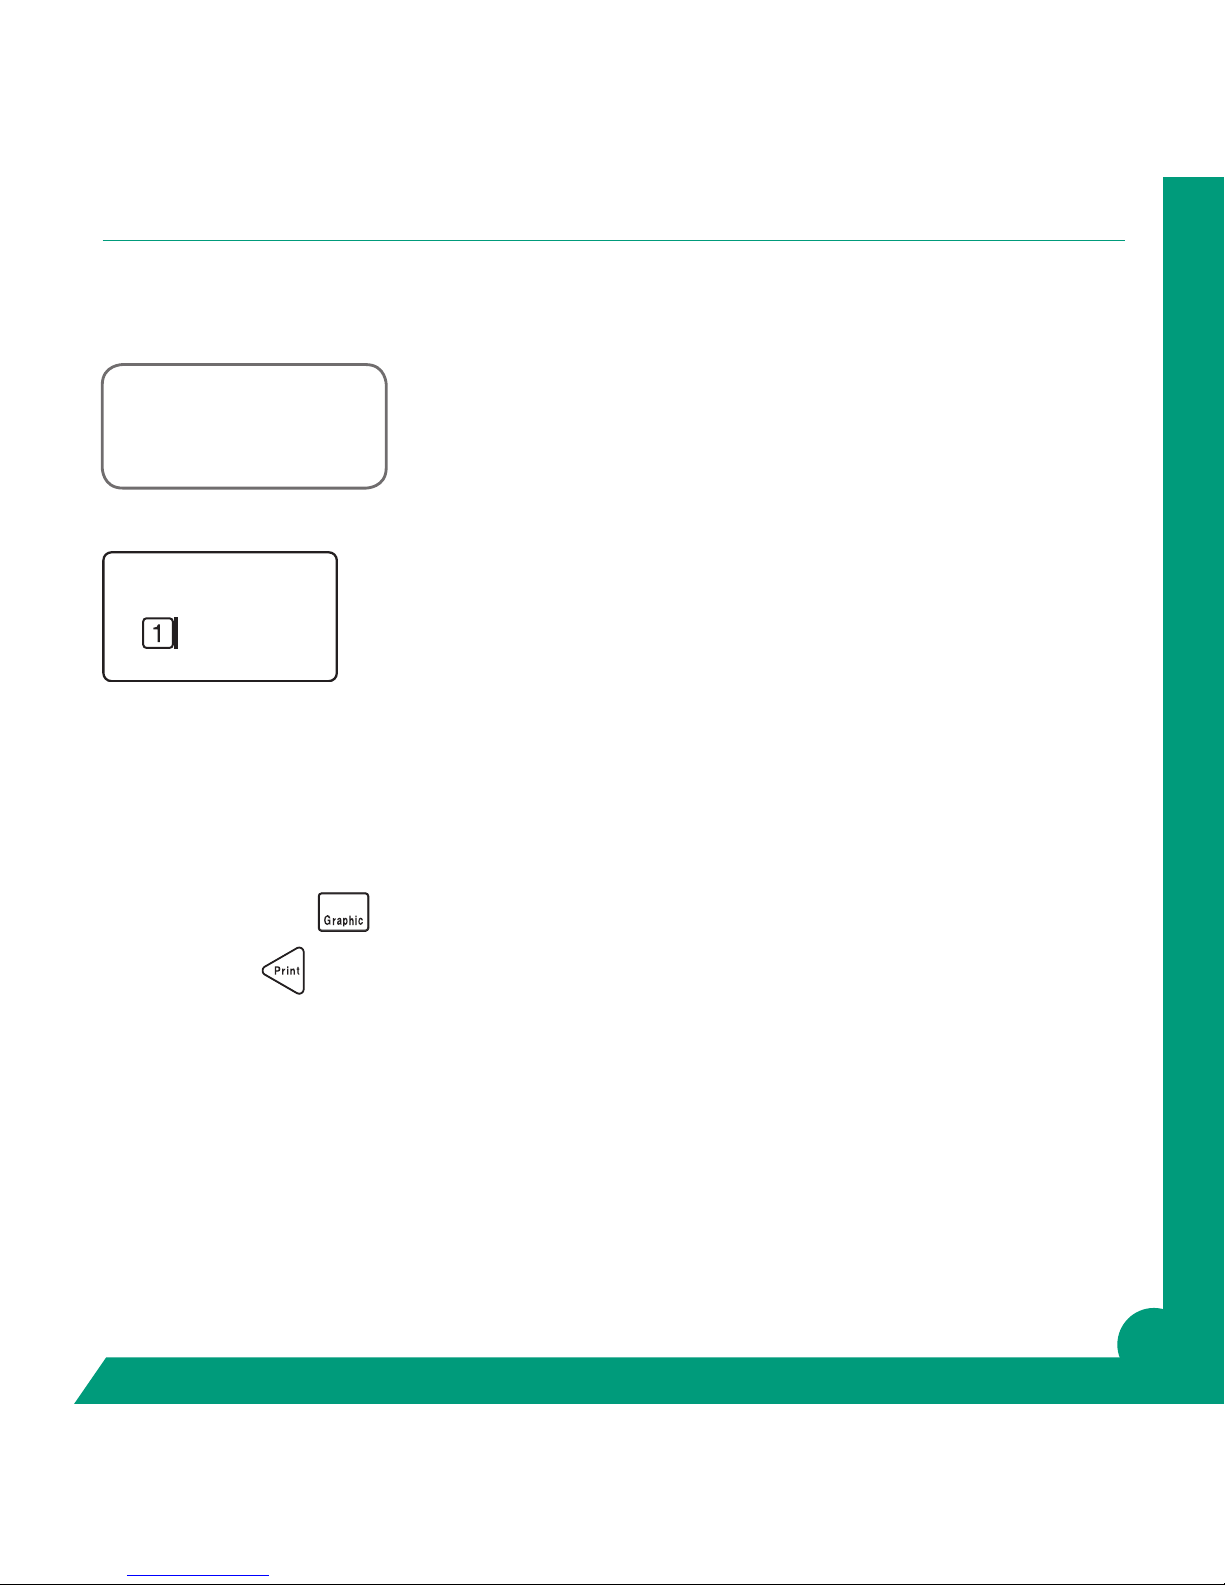
A1-01 A1-02 A1-03 A1-04
A1 A2 A3 A4 A5 A6 A7 A8 A9 A10 A11 A12

11
Wrap
Labels can be made to wrap around cables in two directions: vertical or horizontal. The horizontal feature is for
use with the 224SL Self-Laminating Overwrap Tape.
Vertical Wire Wrap - 2”wire wrap on a 1” tape.
Choose a 24mm, 224, 1” tape. Choose Wrap, Vert, Return. Choose Length, 2”, Return.
On Line 1 type “12345678”, Return.
One Lines 2 thru 10 repeat typing “12345678”. You will not be able to return at line10.
Press Preview to see your label before printing. Press Print.
Note: To add more numbers to a line, especially when working with smaller tape widths, use the Symbol key,
which will default to “Double Figures”. Press Return. This feature will condense the space of two digits to one
space. At input enter two digits. Press Return.
Horizontal Wire Wrap – use with 224SL Self Laminating Wrap.
Choose the 224SL tape. Choose Wrap, Hori., Return. On Label 1 type “123456”.
(on each label you can enter up to 20 digits, symbols and up to 10 labels)
Press Print.
To make additional labels with either same text or different text:
Choose the 224SL tape. Choose Wrap, Hori., Return. At Label 1 type “123456”, Return.
At Label 2 type “Server”. At Label 3 type “Firewall”. At Label 4 type “Printer”
Press Preview to see your labels before printing. Press Print.
123456
123456 Server Firewall Printer

12
Flag
Labels can be made to wrap around cables in two directions: vertical or horizontal. To make a ag label, attach
a cable to the center of the label (printed line) and fold the label in half. The same information will be printed
on each half of the label.
Vertical Flag
For this example we are going to create a 3” Vertical Flag label on a 1” tape.
Choose a 24mm, 224, 1” tape.
Chose Flag, Vert., Return.
Choose Length 3”, Return.
On Line 1 type “12345678”, Return.
On Line 2 type “12345678”, Return.
Press Preview to review your label.
Press Print.
Note: To add more numbers to a line, especially when working with smaller tape widths, use the Symbol Key,
which will default to “Double Figures”. Press Return.
This feature will condense the space of two digits to one space.
Note: Regardless of length, the maximum number of lines is 2.
Horizontal Flag
For this example we are going to create a 2.2” Horizontal Flag
label on a 1” tape.
Choose a 24mm, 224, 1” tape.
Choose Flag, Hori., Return.
Choose Length 2.2”, Return.
On Line 1 type “123456780”, Return.
On Lines 2 thru 8, repeat. You will not be able to return at Line 8.
Press Preview to review your label.
Press Print.
1234567890 1234567890
1234567890 1234567890
1234567890 1234567890
1234567890 1234567890
1234567890 1234567890
1234567890 1234567890
1234567890 1234567890
1234567890 1234567890

13
Entering Euro/Latin Characters
Enter European and Latin characters easily by pressing the Euro/Latin key.
Enter “Televisi” and then “o”.
Press the Euro/Latin key several times to select the ó, and press return key. Enter the “n”.
You can also use the arrow keys ▲▼ to select the desired character.
See page 126 in your manual for all available Euro/Latin characters.
Entering Symbols or Pictographs
Symbols and pictographs add interest and explanations to your label. Easily select a symbol by pressing the
Symbol key or Shift + Symbol.
A complete guide to the symbols or pictographics in the GREEN MACHINE®are found in your manual on
pages 121-124.
Press and hold Shift key and press Symbol/Picto Key.
The Pictograph menu appears.
Using your Up Down arrows scroll to the “Public Signs” category, Return.
Now using the forward arrow , press to the phone pictograph, Return.
Enter a space using Space Key.
Now enter “Dial 911”. Do not return.
Press Preview/Graphic Key to view your label before printing.
Press Print Key to print.
Dial 911

14
Settings for Use with Shrink Tube
Adjusting Print Density
Print density is adjustable in seven levels. Adjust the print density if you nd that the printing is too light or
dark. Usually use “0”, but with Heat Shrink Tube you can use up to +3.
Press the Shift Key while holding down the Setting/Extra Key.
Your screen will show Print setting.
Using arrows highlight Print density. Return.
Using arrows to +3. Return.
Adjusting Autocut
The GREEN MACHINE®automatically cuts off the label after printing it. However, it is possible to turn off
this feature.
Press the Shift Key while holding down the Setting/Extra Key.
Your screen will show Print setting.
Arrow to Auto cut. Return.
Screen will show ON or OFF.
Make sure ON is highlighted and return.
To turn off, repeat steps but choose OFF.

15
Mirror Printing
Reverses the image, text to mirror image. This is especially useful for displays on glass.
Works best with a clear-based tape.
Enter the text and press the Setting/Extra Key.
The “Extra Print” menu will be displayed.
Arrow up or down to mirror print. Return.
Screen will show ON or OFF.
Make sure ON is highlighted and return.
To turn off, repeat steps but choose OFF.
Recalling the Print History
The GREEN MACHINE® will keep up to 5 les of unstored, recently created labels in memory. Use this
feature if nd you need just one more label or should have stored a created label.
To recall the print history:
Press Shift and the Recall key.
Your screen will show the word “File”.
Arrow to Print history. Return.
Your screen will show “Print history”.
Arrow to Recall. Return.
Using the Up Down Arrows toggle thru the most recent labels.
When you nd the label you need, Return.
Screen will conrm Recall OK? Return.
Now you can print your label!
For more information in storing label les and recalling stored les see Manual page 89.
GREEN MACHINE
GREEN MACHINE

16
Cleaning the Print Head
Clean the print head when printing becomes faint or a blank line appears in your label.
Printing becomes faint when dirt or dust adheres to the print head.
Lightly rub the print head with a cotton swab moistened with medical alcohol (isopropyl).
Serial Number
In Service Date
K-Sun Corporation
370 SMC Drive, PO Box 309
Somerset WI 54025
p. 800-622-6312 or 715-247-4440
f. 800-522-9108 or 715-247-4003
3/2013
Printed on Recycled Paper
Other manuals for Green Machine
1
Table of contents
Other K-sun Label Maker manuals
Popular Label Maker manuals by other brands

Datamax
Datamax E-class E-3202 Programmer's manual

Brady
Brady BradyPrinter i5100 user manual

Epson
Epson TM-T88V Setup Instruction

Kingsley
Kingsley KIP-20 Operation and maintenance manual

Xiamen Hanin Electronic Technology
Xiamen Hanin Electronic Technology iDPRT iE4P user manual

Brother
Brother P-touch PT-2460 user guide