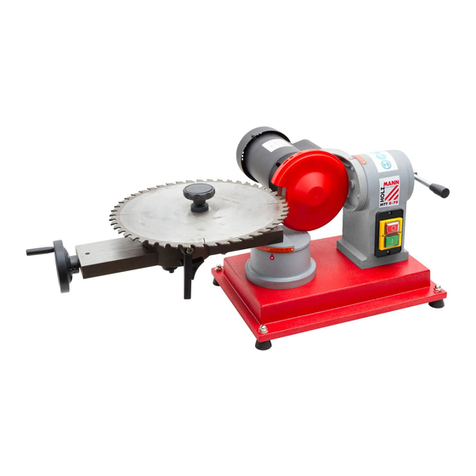
Kaindl BSG 60 User manual

OPERATION MANUAL FOR
DRILL GRINDING MACHINE
BSG 60
Original manual
Please keep for futher use!
Kaindl-Schleiftechnik REILING Gmb , Remchinger Str. 4, D-75203 Königsbach-Stein, Germany
Tel.: +49 7232/4001 -0, Fax.: +49 7232/4001 -30, Internet: www.kaindl.de, E-Mail: info@kaindl.de

CONTENT
EC-Declaration of conformity 3
Set up / Safety advice 4
Start up /Safety icons 5
Technical data / Connection designation 6
Description of components 7
Accessories 8
Operation 9
Clamping and alignment of right hand spiral drill bits 9
Grinding of right hand spiral drills 10
Web thinning of spiral drills 10
Grinding of left hand drills 11
Cross- or facet shape 12
Carbide drills for stone 13
Grinding of sheet metal drills 13
Grinding of NC-drills 90° 13
Grinding of stepped drills 118° 14
Grinding of stepped drills 90° 14
Grinding of spot facers 14
Grinding of cutters with 2 cutting edges 15
Dressing of the grinding wheel 15
Special accessory
Countersink sharpening device SVR 31 16
Alignment of countersink 17
Change of the cam of the SVR 31 18
Special accessory for BSG 60
Sinker and milling cutter grinding device SZVR MK3 19
Mounting and dressing of grinding wheel 25
Mounting of grinding wheel 26
Change of grinding wheel 27
Spare part list 28
Repairs / Warranty 29
2

EC-DECLARATION OF CONFORMITY
The manufacturer: Kaindl-Schleiftechnik
Reiling Gmb
Remchinger Straße 4
75203 Königsbach-Stein
Germany
declares that the machine
Drill grinding machine
described herein: Type:
BSG 60
refers to the security and health requirement EC-Machine instruction (2006/42/EC)
of the following EC instructions: EC-Instruction EMV (2004/1 08/EC)
Applied harmonised norms:
EN ISO 12100; EN ISO 13857; EN ISO 13732-1;
EN 60204 Part 1; EN 61000-6-1; EN 61000-6-2;
EN 61000-6-3; EN 61000-6-4
Changes in design, which affect the technical data, listed in this instruction
manual and the directe use, therefore change the mache substancially, make this
declaration of conformity invalid!
The documents were collected by: Reinhard Reiling
Kaindl-Schleiftechnik
Reiling Gmb
Remchinger Straße 4
75203 Königsbach-Stein
3

1. SET UP
The machine is packed in a box placed on a pallet. Unpack the machine at the final
working place. Before starting, please check the machine for transport damage.
Use the drill grinding machine only in dry rooms.
Environmental temperature from +5 to +50°C, Humidity: up to 90%, not condensing
The BSG 60 is a table machine, may attention to a safe stand on your work table.
The place has to grant a vibration-free running of the machine.
Check if the grinding wheel is turning free (eventually move back the prism support) in
case you don´t pay attention to this, the grinding wheel pay be damaged. For continuous
operation, please attach a suitable dust exhaust.
During all grinding work, wear safety glasses. Please read this manual. For damage
caused by lack of knowledge or not following the operation manual, we do not assume
any responsibility.
The drill grinding machine BSG 60 is exclusively determined for occasional grinding of
spiral, step-, wood-, Forstner-, sheet metal-, and stone (carbide) drills and countersinks.
The directed use includes also reading this operation manual, as well as keeping all
containing directions of use - especially the safety information. For all material- and
personal damages, arising by not intended use, note the manufacturer, but the operator
is responsible.
The use as a table machine for manually guided grinding of workpieces, such as chisel,
sheet metal, screws driver, etc. is not allowed!
1.1 EN IRONMENTAL CONDITIONS FOR SET UP
4
1.2 SAFETY AD ICE
1.3 DIRECTED USE
1.4 PREDICTABLE WRONG APPLICATION

Remove preservation (grease film).
Independing with which type of motor the machine is equipped with, please check:
a)
is your electric current identical to the data on the nameplate of the motor.
b) when you have a 400 V phase motor, pay attention to a correct connection
of the rotating field.
c) Sound check, Mounting and dressing of the grinding wheel
(see page 25)
On the back of the machine you find the electric switch with positions:
I - ON, 0 - OFF (400 V phase motor).
In this manual, the following safety symbols are used. These symbols shall attract the
attention of the reader to the text beneath. These symbols indicate to existing danger for
life and health of persons!
2. EXPLANATION OF SAFETY ICONS
5
Eye protection during
grinding against
kicked around
particles
Gerneral danger
When moving the
machine, disconnect from
electric current.
Laser beam
warning
1.5 START UP
CAUTION!!!
Lens cover always must
be kept close when not in
use! (danger of fire from
sunbeam)

3. TECHNICAL DATA
DIMENSIONS
Length 570 mm
Depth 320 mm
eight 400 mm
Weight 52 Kg
Range/Basic version 3-40 mm Ø
Special accessory 40-60 mm Ø
Grinding wheel 200 x 40 x 51 mm Ø
Noise emission < 70 dB (A); Emission- acoustic pressure at workplaces
(ear level) as per DIN EN ISO 11 204
Operating conditions Sharpening of a SS drill Ø 40 mm
Standard version Special version
Motor 230 V 400 V 11 0 V
Design IMB 1 4 IMB 1 4 IMB 1 4
Voltage 230 V 400V 11 0V
Frequency 50 z 50 z 60 z
Power 0,37 KW 0,37 KW 0,25 KW
Revolutions 2840 RPM 2800 RPM 2800 RPM
Protection IP 54 IP 54 IP 54
Run out time of mounted grinding wheel 30 seconds.
Connection designation after DIN 57530 VDE 0530 Part 8
Y- connection Triangle switch
6
ELECTRONICAL DATA
Power connector
L1 , L2, L3
S 1 00
SN 652 724
BS 7094

7
43
6
1 2
21
9
1 0
1 6
1 3
11
2
1
1 4
7
1 5
4. DESCRIPTION OF COMPONENTS
1. Optical lens LED lighted 12. Prism feed
2. Grinding wheel protection 13. Support plate with fixation threats
3. Grinding wheel 14. Motor, 230 V, 50 Hz
4. Clamping lever for eccentric clamping 15. Main switch
5. Clamping lever for prism 16. Star knob locking screw
6. Clamping prism 17. Stepless clearance angle adjustment
7. Prism support with scale 18. Fixationscrewforclearanceangle
8. Bracket for prism support adjustment
9. Nozzle for dust exhaust 19. Motor feed
10. Support block (with clamping lever) 20. Clamping lever for support block
11. Tip angle adjustment 21. Adjustment screws for roller bearing slide
5
8
1 7
1 8
1 9
20

5. ACCESSORIES
8
Extra prism
Clamping range Ø 40-60 mm Item No. 10602
Countersink sharpening device SVR 31
incl. collet 10 mm Item No. 10583
Stop dog for long drills Item No. 10623
Cutting rost for cutters Item No. 10622
Morse trapper sleeves
for short MK-Drills, MK 1 Item No. 14483
for short MK-Drills, MK 2 Item No. 14484
for short MK-Drills, MK 3 Item No. 14485
Magnetic depth stop for cutters Item No. 10621
Nozzle for dust exhaust Item No. 10646
Cutter and countersink attachment SZVR
incl.10 mm collet, MK3-Support,
Cam for 3-flute countersink,
Index plate for 2-,3-, and 4-flute cutters
Laser adjustment Item No. 12280

6. OPERTATION
For drills from
3-20 mm
use the prism including the inner jaws. For drills from
20-40 mm
remove the inner jaws.
Removing of the inner jaws:
Loosen the 4 pcs socket head cap screws with a suitable
key SW 2,5 (see picture 2).
Mounting of the inner jaws:
Place the inner jaws inside the prism in the way that the
graduation marks are in line with the outer marks (1 , picture 1 ). The numbers on the jaws
shall not be visible. Softly tighten the fixation screws (picture 2) do not tighten too strong.
9
Loosen clamping screw (2) and pull out the pin (1 ) to the stop dog and fix again.
Depending on the diameter, let the drill project outside the prism (picture 3). Drills from
Ø 3-35 mm
, cutting edge to graduation notch. Drills from
Ø 35-40 mm
, cutting edge to
total length of the pin. Then align the cutting edge parallel to the slantwise graduation line
(picture 4).
For getting a parallel clamping of small drills, we propose to clamp a second drill of same
diameter on the back of the prism. For drills with bigger diameter also use the prism
elongation for the cylindrical part (picture 2, Pos. 1 ). Move back pin (1 ) and fix the screw.
Broken drills, first pre-sharpen till they are flat.
6.1. CLAMPING AND ALIGNMENT OF
RIGHT HAND SPIRAL DRILL BITS
Picture 1
Picture 2
Picture 3 Picture 4
1
1
2 3
1
2
12
3-35
3-40 (40-60)

7. GRINDING OF
RIGHT HAND SPIRAL DRILLS
1 0
Adjust prism rest to
118°
and support to scale value
0
(picture 1 ).
For the clearance angle adjustment, open fixation screw and adjust with the eccentric
locking screw to the value listed below (picture 2). The smaller the scale number, the
smaller the clearance. Take off the star knob screw.
Now start the motor and swivel the prism with drill by carefully moving forward the slide in
direction to the grinding wheel. Note the number on the scale and move back. Open the
small lever and turn the prism for
180°
. Finally check if the basic alignment, saying that
the cutting edge, is still parallel to the graduation line. If not - adjust the drill and repeat
the process again.
For additional web-thinning, do not remove the drill out of prism, adjust the clearance
(picture) to
0
and lock the prism support with the star knob screw in
hole C
. Move the
grinding wheel with motor to the right. Open the clamping lever on the prism rest and turn
to the line
A
(picture 3). Now go forward and sharpen approx. 1 /1 0 of drill diameter using
the left side of the grinding wheel behind the cutting edges inside the drill. For correct
positioning, you must turn prism- and motor feed. The width of the cross cutting edge
should be approx.1 mm for a drill of dia 1 0 mm. Note the both numbers of prism and
motor feed, turn the prism for
180°
and repeat the procedure.
8. WEB THINNING OF SPIRAL DRILLS
Clearance angle
Drill, Ø Scale grade
3 - 40 1 ,5 - 2,5
40 - 60 2,0 - 3,0
11 8°
0
11 8°
0
A
Picture 1 Picture 2
Picture 3 Picture 4 Picture 5

9. GRINDING OF LEFT HAND DRILLS
Let project the drill outside the prism depending on
diameter (same as for right hand drills).
Align one
cutting edge to the line
(as shown on the picture,
Pos. 1).
For adjusting the correct clearance angle,
remove the stepless clearance angle
adjustment from boring (1 , picture 2) and screw
it in boring (2). Boring 1 is for right hand- and
boring 2 for left hand spiral drills.
Provide for left hand drills: the higher the
number, the smaller the clearance angle.
11
For web thinning of left hand drills use boring No. 1 . Turn the prism rest to Pos.
A
and fix
with the star know screw in hole
A1
(picture 4). With the clearance angle adjustment you
determine how steep the web thinning should be.
Clearance angle
Drill, Ø Scale grade
3 - 1 4 3,3 - 3,9
1 5 - 40 2,7 - 3,3
40 - 60 2,2 - 2,8
Thinning the left hand drills
Drill, Ø Scale grade
3 - 20 2,0 - 2,6
21 - 40 2,7 - 3,3
41 - 60 3,2 - 3,8
Bild 1
Picture 2 Picture 3
Picture 4
1
2
Picture 1
1
1
2 3

10. CROSS-OR FACET SHAPE
Main cutting edge:
The drill is aligned as a right hand cutting spiral drill
to the right graduation mark (picture 1 ). For the
cross facet shape align the drill always to the total
length of the pin (picture 2). Now sharpen the main
cutting edge same way on both sides as described
on page 1 0.
1 2
Picture 3
Web thinning (cross facet shape):
For web thinning, dress the right edge of the grinding wheel with approx.
30° - 45°
by
hand (picture 3).
After finishing the grinding procedure, let the drill fixed in the prism. Put clearance angle
to
2,5 - 2,7
(picture 4) fix the prism with the star knob screw in hole
C
(picture 5). Turn the
top angle to approx.
150°
. Now move with the grinding wheel, starting at the outer edge
of the drill till the center of the drill's chisel edge (picture 6). Note the feeding mark and
move back from the grinding wheel. Reverse the prism for
180°
. Now repeat the last
steps and move to the noted feeding mark.
Picture 1
Picture 2 Picture 3
Picture 4 Picture 5
Picture 6
30-45°
11 8°
2,5-2,7
1 50°

Let project the drill
min. 40 mm outside
the prism and align one cutting edge to
graduation line
2
(picture 2). Fix the diamond dresser in the prism and dress the inside of
the wheel to
60°
(picture 3). Adjust prism
support to
180°
. Clearance angle as per your
request. Adjust the star knob screw in hole
B
.
With the motor feed pass from left to right by
swiveling the prism.
Grinding the center tip:
Let the drill fixed in prism. Prism support to
118°
, adjust prism base between
-30 and -A
(picture 4, page 1 0). Clearance angle
adjustment between
2 and 3,5
and lock star knob screw in boring
C
. By moving motor-
and prism feed, move to the cross-cutting edge and sharpen the form like a pyramid.
Notice marks on both scales (motor- and prism feed) turn the prism and repeat the
grinding operation.
11. CARBIDE DRILLS FOR STONE
Only sharpen with diamond- or silicone grinding
wheel. Let project the drill
approx. 30 mm
outside the
prism. Align one cutting edge parallel to the straight
graduation line (picture 2, Pos. 2). Prism support to
118°
and base adjustment to
130°
. Clearance angle
to graduation
2
(depending on your type of your drill,
more or less). Fix star knob screw in boring hole
B
.
By using the motor feed, grind from the outside to the
inside over the tip. Turn prism
for 180°
and repeat
grinding procedure.
For correcting the main cutting edge, keep drill fixed
inside the prism, only fix the unit in boring hole
A1
.
Repeat grinding procedure as before.
1 3
12. GRINDING OF SHEET METAL DRILLS
GRINDING OF NC DRILLS 90°
Let project your NC drill
15 mm outside
the prism
and place cutting edge parallel to drill grinding
adjustment (picture 2, Pos 3). Adjust the prism
support to
90°
and clearance angle adjustment to
3,2
(more or less). Move prism feed by swiveling and
sharpen one side. Turn prism and sharpen the second
side.
11 8°
2
1
1
2 3
1 30°
Picture 1
Picture 2
Picture
3
Picture 4

First step:
Adjust prism support to scale mark
118°
. The fixation and alignment is same
as described in page 1 0 (right hand drills).
Second step:
Adjustment as first step and sharpen
over the right edge at the
straight angle of the grinding
wheel. Clearance angle as per
your request.
13. GRINDING OF STEPPED DRILLS
WITH 2CUTTING EDGES 118°
14. GRINDING OF STEPPED DRILLS 90°
First step:
The grinding is same as for right hand drills.
Second step:
For this you have to "hollow out" the right side of the grinding wheel from
the outside to the middle, in order the angle of edge of wheel is less than
90°
. Then
adjust the second step. Adjust prism support to
180°
, clearance angle to
0
. Fix star knop
screw in boring
A
. By means of motor feed form the outside to the inside and move back
when finished. Reverse the prism and repeat the grinding procedure.
15. GRINDING OF SPOT FACERS
ollow out the grinding wheel as described for
90° stepped drills
. Let the spot facer
project around
35 mm
outside the prism and align one cutting edge parallel to the
straight marking line. Use magnetic depth stop and cutting rost (page 8). Adjust
clearance angle to
0
and lock knob screw in boring
A
. Grind from the inside to the
outside by use of the motor feed. Move back and align the next cutting edge.
Do not change prism feed position.
For back grinding
fix the star knob screw in hole
B
and repeat the
grinding procedure as
before.
1 4

1 5
16. GRINDING OF CUTTERS WITH
2CUTTING EDGES
Fix the cutter and align one cutting edge
parallel to the straight marking line (see page
1 3, picture 2). For short cutters, fix another of
same diameter in the backside of the prism.
Grinding of the main cutting edge
Adjust prism support to
180°
. The base
adjustment to
0
or
1-2 scale lines
on the right
beneath. Place clearance angle adjustment to
0
. Fix star knob screw in boring
A
.
Grinding of the clearance surface
Now fix the star knob screw in hole
B
and
repeat grinding procedure as for the main
cutting edges.
For cutters with more than 2 edges (max. 4
cutting edges) you will need the magnetic depth stop and the cutting rost for cutters
(Accessories, page 8).
17. DRESSING THE GRINDING WHEEL
Fix the rotating dresser in the prism and
place prism support to
118°
. Lock with
star knob screw in boring hole
A
. Place
clearance angle adjustment to pos.
3,5
.
Place prism rest to
0
(Picture 2). Move
the prism feed in direction to the
grinding wheel till the diamond softly
touches the grinding wheel and starts
turning. Now move with the motor feed
to the left or the right, till the grinding
wheel is cleaned and sharp again.
Attention:
Please only move carefully with the
prism feed (
max. 2-3
scale lines).
1 80°
0
0°
11 8°
0°
Picture 1
Picture 2

1 6
For sharpening countersinks, you need a
special accessory to the BSG 60 the
countersink sharpening device SVR 31 .
First fix the support plate in boring
A
. Then
adjust the stepless clearance angle
adjustment to No.
2
.
This grants that the imagined line goes
through the center of the clamping prism
and meets the center of the grinding wheel.
(For older models you may have to change
the clearance angle). The prism support
place to
90°
. Now put your countersink in the collet of the SVR 31 and align one cutting
edge as shown in picture 2, page 1 7 to the graduation line.
Move the prism to the stop on the prism
support and fix the locking pin. Then fix the
SVR 31 with the guiding plate (picture 3)
on top in the prism. Prism range
20 - 40
mm
. By turning the handwheel of your
SVR 31 clock-wise and carefully moving
the prism feed, sharpen the cutting edges
of your countersink.
A clean and parallel dressed grinding
wheel is recommended.
18. SPECIAL ACCESSORY
COUNTERSINK SHARPENING DE ICE S R 31
90°
Picture 1
Picture 2
Picture 3
0°
andwheel Guiding plate + oil daily
The threated pin only tighten softly

1 7
19. ALIGNMENT OF THE COUNTERSINK
SVR 31 Basic adjustment: Cam for countersinks with 3 cutters and 10 mm
collet + nut.
For cross countersinks you need a one step cam (special accessory).
The adjustment is made as shown on picture 1 .
ATTENTION:
Adjustment of the countersink hole on center of back flush with the
alignment mark.
Alignment of cross-countersinks Alignment countersinks
OPTIONALLY A AILABLE
Cam for
cross-countersinks Collet
6/8/1 2 mm
Adjust clearance angle to mark No.
2
Screw star knob screw in hole No.
A
Picture 1 Picture 2
Picture 3
Picture 4
wrong right

1 8
20. CHANGE OF THE CAM OF THE S R 31
In case you have to change the cam of your SVR 31 loosen the threaded pin with an
allen key SW 3,0 (see picture).
Place the SVR 31 with the handwheel on a flat surface.
By hand, press down the body (against spring tension). With your other hand, draw the
cam
beside the roller bearing
, upside out of the body.
The inset of the cam is done reversely.
Please pay attention that threaded pin is mounted on the provided notch.
Draw the cam beside the
roll bearing upside out
threaded pin
receiving body

1 9
21. SPECIAL ACCESSORY BSG 60
SINKER AND MILLING CUTTER GRINDING DE ICE
SZ R
Collet nut
Collet
Support
Lubrication
nipple
Threaded pin
Guiding curve
andwheel
Roller
bearing
Fixation screw
Laser guiding pin
Adjustment laser
Grid pin
battery case

After the SZVR is snapped in, softly
press against the grid pin by turning the
handwheel. So long as the grid pin snaps
in align. This grants that the alignment
position of the countersink is attained.
Press the ON button of the laser and turn the countersink in its collet until one cutting
edge is in line to the laser beam. Then fix the collet nut. Loosen the grit pin and the SZVR
snaps back to it's start position.
20
22. FIXATION AND ALIGNMENT OF COUNTERSINK
SZVR Basic version: Curve for countersinks with 3 cutting edges + curve for
cutters
.
Place your countersink in the suitable collet and let project
approx. 10 mm
outside.
Then softly tighten the collet nut.
Now press the body of the SZVR downwards until it snaps in
(Pay attention, that the grid pins can snap in, eventually turn a little).
Press body of SZVR downwards
till it snaps in.
Other manuals for BSG 60
1
Table of contents
Other Kaindl Grinder manuals