manuals.online logo
Brands
  1. Home
  2. •
  3. Brands
  4. •
  5. Kaise
  6. •
  7. Measuring Instrument
  8. •
  9. Kaise SK-7810 User manual

Kaise SK-7810 User manual

KAIStt CORPORAT!ON
4220a2a Hayashinogo,Ueda City,Nagano Pref,386‑01」 apan
TELEPHONE:UEDA(0268)351600(REP)
TELEX:3327409 KAISE」
FAX:(0268)35‐ 1603
Pr nted in」 apan
∝Юl‐ 2
halse C(
INSttRUCT10N MANUAL
Digital
LEAKAGE CLAMP METER
MODEL SK‐ 7810〜30mA+〜300mA+〜60A
MODEL SK‐ 7815 〜
mA +〜A + 〜
V
渕 粒
KA:SE CORPORAT10N
FOR SAFETY MEASUREMENTS
Prior to use,to avoid an electrical shock hazard to the ope「 ator and′o「 damage tO the
nstruments,read carefu‖ ythe WARNINOS wnhthe symbo ∠ゝ‖
sted n 14 SAFETY
PRECAUT:ONSJ, 15 MEASuREMENT PROCEDURESJ and「 6 MA:NTENANCEI
ofthis instruction manual
lmportant Symbol
∠ゝ
:The symbo nsted in IEC 1010 and IS0 3864 means'Caulon(refer 10 instruc10n
manuaり'
∠N WARNING:The symbol n this manual advises the user of an eiectHca shock haz―
ard that could resultin serious irllury Or even death
∠N CAU¬ ON:The symbolin this manual adv ses the user of an electncal shock haz―
ard that cou d cause inlury o「 matena damages
∠ゝ
ヽ
″ARNING
High POwe「 Line is very dangerous and/o「 lethal to measure H19h PoWer Line
sometimes includes High surge VOltage that could pOssibly induce dangerOus arcs Of
explosive shorl in the instrument and could result in serious illury tO the operator
VVhen measuring dange「ous voltages of High Power Line o「 High VO tage Cirouit.
always place the instrument away from your bOdy w thOut holding it with yOur hands
Do nottouch the Clamp Meter, ts Test Leads,or any part ol the circuit wh‖ e itis on
CONTENTS
l lNTRODuCT:ON 一一一‑ 2
1 l GENERAL ‑ 2
1 2 FEATURES …
2
1‑3 UNPACKlNG ANDINSPECT10N一 ‑2
2 SPEC:F:CAT:ONS ‑3
2 1 GENERAL SPECIFICAT10NS ‑ 3
2 2 MEASURING SPEClFICAT10NS‑ 6
3 NAMEILLuSTRAT10N 7
4 SAFETY PRECAUT!ONS ■
1
4‐ l WARNINGS …
…
11
4‐ 2 CAUT10NS IN HANDLING 13
5 MEASUREMENT PROCEDURES 13
5 1 PREPARAT10N FOR USE 13
5 2 AC LEAKAGE CURRENT(〜 mA)
MEASUREMENTS ‑ 14
5 3 AC CURRENTl―A)MEASUREMENTS 16
5 4 AC VOLTAGE(〜 V)MEASuREMENTS
(SK 7815 only) 17
6 MA:NTENANCE 18
6 1 WARRANTY STATEMENT 18
6 2 BATTERY REPLACEMENT 18
6‐ 3 CALIBRAT10N 19
6‐ 4 REPAIR 19
1.INTRODUCT10N
1‑l GENERAL
ヽИ
odels SK‑7810 and SK 7815 are compact,
「
uggedandeasy to handle D19italLeakageClamp
Meters w th 3200 count display
8olh models have many prominent ieatures One
ofthem is the new Comparatorihat warns the
limit orleakage current by buzzor
The models are very reltable and userulinstru―
menisfortechniciansandengineerst。 lest elec
t「 cal appliances equipments and iac口 ities
l‑2 FEATURES
l Easy‑lo‐ read LCO:3200 count display w th
units and symbols
2 Comparator(setting l mA to 20mA):8uzZer
sounds t・7hen an inputis oreaterthan the set
ting value
3 DH Key MAX′ MiN Key:DH Key lxes ds‐
play MAX′ MIN Key measures maximum and
minimurn values
4 0UTPUTTerminals(SK‐ 7010only):prOVides
analo9 output(。「
recorders
5 AC Voltage Measurements(SK‐ 781 5 only):
can measure up to 600V AC
6 RangeSelection:SK‑7810hasmanua rang
ing SK‐ 7815 has autoranging
7 LowPass Filter(LPF):Higherfrequencymore
than 150Hzis cul o│
8 Auto PowerSave:This funcl on saves battery
consumptiOn when switch― off is forgotten
O Safety Design:autholzed with CE Markin9 as n
passed EMCD and LVD ofIEC 1010 1 Tests
l‐ 3 UNPACKING AND:NSPECT:ON
Before unpacking,examine the shipping carton
for any sign of damage unpack and inspectthe
instrumentandaccessor esforanydamagefrom
mechanical shock,water leakage. o「 other
causes lf any damage Or missing item is fOund,
consultthe local deaier ior replacement
Make certaln t肩 雨
肩7Jllowい ol●市
S are[nduded h the box]
l DignaI Leakage Clamp Meter
2 Two1 5V R6P(AA)Batteries
3 1nstruction Manual
4 Carry ng case
5 0ne palr of Test LeadS 100‐ 32(SK‐781 5 only)(comples w th lEC spec)
2.SPECiFiCAT:ONS
2‑l GENERAL SPEC:F:CAT:ONS
1 0:SPLAY:
a NumeriCal Display
b units and symb01s
2 0pERATING PRINCIPLE
3 RANGE SELECT!ON
4 SAMPLING RATE
5 0VERLOAD!ND:CAT:ON
3200 count LCD.8 8mm high
mA,A,V(SK 7815).〜 ,DH.MAX,
PH and DecimaI Point
Dual Slope integrat on
SK 7810 Manual ranging
SK 7815 Autoranging
2 1imes/sec
MIN,COMP,AUTO(SK‐7815),BAT,
:‐ OL― symbol shows(Except on 60A)
8 MAX′ MIN VALUに MEASuREMENTS:Max mum and minimum read ngs are stored and d splayed by 19 POwER SuppLv :Tw01 5V R6P(AA)batteles
MAX/MIN Key 20 POWER CONSuMPTloN:approx 5mVV(60mVV lor buzzer operalon)500 hOur con nuous opera10n
9 COMPARATOR(l mA to20mA) :workS On 30mA and 300mA ranges of SK‐ 7810.onヽ mA range of 21 AUTO POWER SAVE :Powerturns or autOmalca‖ y(entersin s eep cOnd lon of 0 05mW batte″
6 BATTERY WARNING :BAT symbo shows when b3ttery voltage is ess than 2 5V± 01V
7 0iSPLAY HOLD :DH symbolshows and d splay s he d
SK 781 5 Buzzer sounds ifinpui value exceeds the setting limit value
10 F:LTER SELECT!ON :LPF(Low PaSS F‖ ter)Cuts Off higherfrequency than approx 150H2
11 0UTPUT TERMINAL(SK・ 7010 only):AC currentis converted io DC mV by average rec1lcalon
and de ivered
30mA range
300mA range
60 A range
Output Resistance
17 STORAGE TEMPERATURE&HUMiDITY:‑20℃ ^60C lessthan 70%RH in non― condensing
18 SAFETY LEVEL :IEC」 010‐ 1 0vervoltage Category III,class H,回 EMCD Test passed
consumpt on)after abou1 30 minutes of Power― on o「 the other switch opera‐
ton
POWER HOLD(PH)Turn On POWER Swnch wnh DH Key being pressed PH symbOl
shows on LCD and contnuous measurements longer than 30 minutes
are ava‖ able
22 0VERLOAD PROTECT:ON:rerertO Measu間ng Specificat ons
23 CONOuCTOR D:AMETER:MaX 30mm ψ
24D:MENS!ONS&WElGH了 :212× 42X30mm.220g
(SK‑781 5 only),lnstruclon Manual
10mV′ lmA Acc=2・/.Fs
lmV/1mA Acc± 2%Fs
imV/1A Acc i5%Fs
approx 200 0
12 TEMPERATURE COEFFiCIENCV:underO c to18 c,and28 cto40 c s = Accuracy under 25 ACCESSORIES :Two1 5V R6P(AA)Batte es,996 Carry ng Case,One par Test Leads
23c± 5c)× 01′ C
13 1NFLUENCE OF EXTERNAL MAGNETIC FIELD: essthan 2mA aga nst100A AC conductorc ose 26 0PT10NAL ACCESSOR:ES:880 L ne Separator 932 0utpui Cord for ReCOrder.940A19alor Chps
to the outside Of Clamp Head
14 MEASuR:NG LINE VOLTAGE:lessthan 600V AC
15 DlELECTRiC STRENGTH:2kV AC fori m nute(between the case andthe meta of Clamp Head or
ouTPuT′ NPUT Term nals)
16 0PERAT:NG TEMPERATURE&HUMiDiTY:Ocヽ 40C,leSS than 80%RH nnon‐condensing
4
2‐ 2 MEASUR:NG SPEC:FiCAT:ONS(23c± 5c.lesS than 80%RH n non condensing)
l SPECIFICAT:ONS OF MODELSK‐ 7810
AC CunRENT(― mA.ヽ ハ
)Ave′ age Rec11ソ Ing
Range Accuracy 50′ 60H2 Ro301ution ‖8x,mum
V81ue
30 00mA L, 0%■ 5dgt 00,mA 32mA Fllo′ ln use11 0・ .[ed91 8doeo at 50′ 6oHz
F′ oqvency C卜lacto● sics 1 0・ . 3d91 aodeO at
50Hzヽ 400Hz
300 0mA 0'mハ 320mA
600A(0ヽ 500A)
(501ヽ 600A) = 1 0%● 5dq: 01ハ 60A
Jう 0・ ●
■:009t Ove‖ oad P,。 (eclo● 100A1600V L ne fo1l m● uto
2 SPEC:FiCAT:ONS OF MODEL SK‐ 7015
^O CuRnEIITく ヽ
mA) Average n ectryin9
3.NAMEILLUSTRAT:ON
SK‑7810
DH Key
MAXMIN Key
POVVER SW tCh
Display(LCD)
COMP Key +‑OUTPUT
Termina
POWER
N Key
swnch
COMP Key
DIsplay(LCD)
〜V COM
Term nal
Accuracy 50′ 60Hz
Flte, ■uso:10● /.13d9tadded a1 50160H2
鷺
。
q。 lo"cMttdOlCS 1 0% 0,

訳5。 H= 00H
Ove■ oad Po(oclon 100A(600V L ne)io′ :mn,te
in o,o 10・/.1 3091 add'd a 5o760Hz
Freqoency c haraolensics(o・ /..3d9t adO● O at
AvoragO Rochfy
AC VOLTAGE(― V)
Range Accu,3Cy 50′ 60H2 Ro301ution ‖
驚:」ml NO・
3000V 120・7● '509t 600V l馳津
品
1:鷺1:∬ lfll」 島∬器
∞ "
1 0veload Proloclon AC 000V lo'm nute
600V lV
6
Test P,Od
l POWERSw■ ch :lurnsonoroffpOwerandselectsNM(Normal Mode measurements)or LPF(M ea‐
stlrements through Low Pass Filer)
2 FUNCT10N Switch:selects AC 30mA,300mA or60A on SK‐ 7810,and AC mA,A,V on SK‑7815
3 DH Key :Pressth s Key Once(forless than l second)DH signshowson LCD and ad s‐
played value is held
To cancel DH Key,press it once agaln
4 MAX′M:N Key(cOmmOn w h DH Key):PressthsKeyonceformorethan2seconds MAXMINsymbo
and a measurerrentvalueshovv on LCD The LCD display changes、vith every
pressofthis Keyasfollo.vs To cancelthis Key′ pressthis KeyfOrmorethan2
seconds at any step
5 COMP Key :comparator funct on is ava‖ able using this Key and DH Key
a Rangesto be usedi30mA and 300mA ranges on SK‑7810,〜 mA range on SK‑7815
b Valuesto be set:Press COMP KeytO setup a desired value ofl mA lo 20mA
c Siart of Measurement:Press DH Key aFterseting up the des red value
:Buzzer sounds if measur ng input value exceeds the value being set
NOTE: f COMP Key is pressed during measurements, the set up value is dis―
played for one second
iPress COIИ P Key lor more than 2 seconds COI´ P symbol turns off and this funct on
is canceled
NOTE:COMP Key does notoperate when MAX/MIN Koy s on AIso,MAX/MIN funclon
does not operate、vhen COMP Keyis on
6 十
‑OUTPUT(SK‐ 7810):OUTPUT Terminals forrecorder Any nput s not a‖ owed
7〜 V COM(S昨 7815)nput Term na s for AC Vonage rneasurements
8 CLAMP HEAD:Open CLAMP HEAD and clamp On a single conductor
9 Test Leads(SK‐7815 oniy):AIways use Test Leads that comples with lEC spec ncalons fOr safety
lnsert BIack Test PIug Of Test Leads into COM Terminal and Red Test PIug of
Test Leads into〜 V Terminal when measuring AC Vo tage
△
WARNiNG:in case of cu「 rent measurements,re move■ st Leads from TermhJs for
saFety
d 」
udge
e Cancel
4h press less than lsec)
10 DiSPLAY(LCD):
PH
Iヨ AT
AUT0
︼H﹂
│
│
4.SAFETY PRECAUT10NS
CorrectKnowledgeaboutelectrcmeasurements
isnecessarybecauseelectricmeasurementsare
somet mes very dangerous work TO eliminate
pOssib ty Ofinjury to Operator and damage to
the instrument, the ro‖ Owing precaut ons and
measurement procedures must be taken Mis‐
use, abuse and carelessness canno( be pre―
vented by any written word and is fu‖ ythe oper‐
alor s respOnsib‖ ity Observing thefo‖ owing pre―
cautions,take saie measurements
4‐ 1.WARN:NGS
∠ゝ
Warning l Checks of Test Leads and
Oody:Belore every measuremenl,do notfan to
confirmthatthebodyOfthisinstrumentandhan‐
dle insulators Ofthe attached testleads have no
cracks norany other damage onthem
Make sure thatthe body and the handle insula‐
10rs are free of dust,grease and moisture
PH
BAT
:POllyER HOLD symbol Turn on POWER Swnch with DH Key be ng pressed
and cont nuous measurements longerthan 30 minJtes becomes avallable
: Battery vvarning
PH symbO shOws
〜
:Alterna ve Current(AC)
AUTO(SK 7815 on y):Autoranging
DH :Display HOld
MAX MIN:Maximum and Minimum measuremenis are On
MAX :Max mum value
MIN :M nimum va ue
COMP :Comparato「 Measurements
v i unit Of v01tage
mA,A I Units oi Current
10
│
│
G農 ロ
X CraCkS
ρ 0
X Poor nsu a10n
唸
X Broken wre
Fi9 1
△
warning 2 High Vonage Limns(sK‐ 7815):
Do not attemptto measure vo tage greaterthan
600V rms use extreme care when measur ng
High Power Line even itis less than 600V rms
∠ゝ
warning 3 Care Of High Voitage Mea・
sureme nts(SK‐ 7815):When measunng high
vo tage, alvvays put the instrument avvay f「 om
your body、 マthout holding it、vth yOur hands put
A‖ gator Chp on the Black Test Prod or CoM side
and connect t to earth side of the c rouli being
measured and hold the Red Test Prod of^V
side w th one r,and and connectit to the Other
side oF the c rou t
AIso,take Sarety distance from the po、 ver source
o「 the circu t to prevent any part of your body
irom louching high vo tage Refer to F19 2
△warning 4 Correct Selection c,FUNC‐
T10N Switch:l17hen mak ng measurements,
always confrm that FUNCT10N Switch s sello
correct pOs tiOn
△warning 5 TeSt Lead Disconnec● on and
Remova:or Clamp Head:Prior to chanOing
FUNCT10N Switch to the other pOs tiOn during
measurements,or opening Battery case Lid for
replacemenl of batteries,always disconnectTest
LeadS from the circu t being measured,and or
remove Clamp Head frornthe c rcu t being measured
12
Fig 2
Avoid severe mechanical shock or vibrat on
4‐2 CAUT10NS iN HANDLiNG
∠N CAUT10N l Do notpolsh the metercase,or
attempt to clean it w th any cleaning fluid,
9aSO‖ ne,benzine,etc l子 necessary, use sni
con ol or antistat c′ luid
∠ゝ
CAUT10N 2 Avo d severe mechanica shock
or vibrat on, extreme temperature or very
strong magnet c fields
∠
ヽCAUT:ON 3 Remove the batte es when nOt
in use fOr an extended time since the exhaust―
ed batteries might leak electrolyte and corrode
the internal components
∠N CAUT10N 4 The po nts of Test Prods are
sharp and dangerous Do not get hurt 、v th
them
∠ゝ
WARNING 5 Do nol bt the cЫ ttren use the
instrument or tiose people whO have no
knowledge and exper ence of electrc measure―
Fig 3
5.MEASUREMENT PRO‐
CEDURES
5‐ 1.PREPARAT10N FOR USE
l lNSTRuCT:ON MANUAL:Read the instruc‐
l on manual carefulty and rarniliarize yourself
wllh the specifications and functions o(the
instrument Especia‖ y read and observe strict
lythe 14 SAFETY PRECAUT10NSJ
2 BATTER:ES:Two 1 5VR6P(AA)battenes are
rurnished w"h this instrument Remove Battery
Case Lld from Rear Case and insta‖ the batteries
making sure ofthe polarty Replace the bateries
when BAT symbol shows on LCD during mea‐
surements Rcfer to 16 MAINTENANCE 6‐1
BATTERY REPLACEMENTJ
3 POWER Switch on:Set POWER Swnchfrom
OFF to NM pOsition guzzer sounds and all
segments are displayed on LCD forone second
NOTE:ln this case,lf LCD is nollurned on.
batter es mighi be set in tlle wrong
13
pOlanty or battery contacts might be bad
4 0VERLOAD INDICAT10N:F measurement val‐
ue exceeds 3200 counts the maximum input
value,―OL― symbO!is displayed on LCD ‐
OL―
symbOl is not displayed on 60A range of
SK‑7810 and On〜 A and〜 V range of SK‐ 7815
To avo d personaliniury and nstrument dam―
age, do not attempt to make measurements
that might exceed the spoolled maximum input
values
5 AuTO POwER SAVE(no sign):POWerturns off
(gOeS intO sieep condition,0 05mW consumption)
aner 30m nutes of any switch Operalon(except
betveen NM and LPF of POWER Switch)
POWER HOLD:To make connuous measure―
ments tonge「 than 30 minutes, set POWER
swnch On wnh p「 essng DH Key DH symbol
sho、 vs On LCD and pOweris held To cancel
POWER HOLD,turn ofr pOwer Once
6 SYMBOL MARK
The fo‖ owing symbOIs shown on the instrument
and in the instruction manual are listed in IEC
1010 and lso 3864
△i Caulon(rerertO nstruclon manua)
= : Direct Current(DC)
〜
: Anernattng Cu「rent(AC)
DC and AC
Dlode
Earlh(G「ound)Terminal
Fuse
Double lnsu at on
󰿯 + 薔母回
5‑2.AC LEAKAGE CURRENT(〜mA)
MEASUREMENTS
To avoid electr c shock hazard and/or damage
to the instrument,do nol attemptto measure AC
curre n,that might exceed lhe maximum input
current or the range being used Line vo tage
must beleSs than 600V AC
l SetPOWER S■ tch to NM PosinOn SetitiO
LPF Pos tiOn if necessary to out off higher
frequency than 1 50Hz
2 SetFUNCT10NSwncht030mAo「 300mA range
on SK‐ 7810,and lo〜mA range on sK‐ 7815
3 0pen CLAMP HEAD and clamp on a conducto子
a ln case of Ground Line:Clamp on a single
conducto「
b in case oF Single―phase Two‐ wires:ClarnP
on the two wires
o lncaseofSingle― phase Three‐ wiresorThree‐
phase Three‐ wiresi Clamp on the three wires
d ln case of general c rcu t:Clamp On a single
conductor
4 Readthe currenton LCD
NOTE:ヽ″hen measurng on 30mA range o「
〜
mA range,the reading accuracy wi‖
be affected if a high current conduc‐
tor more than 50A is close to the oul―
side of Clamp Head
5 DH Key:TO hold display,press this Key DHsym―
bolturns on and the display is held To cancel
this Key,press it again
6 MAX/M:NK● ソ(DH Key)TO measure maximum
and minimum values, press this Key for 2
seconds and longer MAX MIN symboiturns on
and a measurng value is shown The second
press Ofth s Key(leSS than l sec)shows
MAX symbOiand a Maximum va ue ‖then
The thi「 o preSS Ofthis Key(leSS than i sec)
shows MIN symbol and a M nimum value l‖
then The display repeats with every press Of
this Key later To cancelthis Key,press it
ro「 2 seconds and longer Refer to
「
4 MAX′ MIN Keyl on page 8
7 COMPK●ソ
:The r「 st press ofthis Key tuins
on COMP symbOland shows 1 00mA.the Lim蔵
Numeral Set a desired L mit Numeral by press
ing the Key ,(a measuring value exceeds the
L mit Numeral・ bu22er SOunds Rerer to
「
5 COMP KeyJ on page 9
F195
8 0UTPUT Terminals(Sκ ‐
7810 only):Analo9
outputtorecordersisavaable Connect OUT
PUT Terminals with INPUT Terminals of a
recorder using the optiona1 0utput Cord lor
Recorder Referto the r。 11。 wingigure
NOTE:No input is a‖ Owed fOr OUTPUT
Terminals
5‐ 3 AC CURRENT{〜 A)MEASUREMENTS
△
WARN:NG
To avoid electric shock haZard and′ or damage
to theinstrument do nOt attemptlo measure AC
current that m19ht exceed 60A,the maxlmurn
i口 put currenl oithe range Line VOltage musi be
less than 600V AC
l Set POVVER Swilch to NM PositiOn fneces
sary,setit toに PF pos tiOn
2 Set FUNCT10N Sw ch io 60A range on SK‐
7810,and to〜 A range on SK‑7815
3 0pen CLAMP HEAD and clamp On a single
conductor
NOTE: ftwo or more conductors are placed
within the CLAMP HEAD,the mea‐
surement cannot be made
4 Readthe currenton LCD
5 DH Key,MAX′ MIN Key and OUTPUT Termi
nals(SK‑7810)are aval ablein the same way
as in「 52 AC LEAKAGE CURRENT(― mA)
MEASuREMENTSJ But,COMP KeydoesnOt
operate on this range
5‐ 4.AC
MENTS VOLTAGE(〜 V)
(SK‐ 7815 only) MEASURE‐
△WARNING
Maximum input Voitage of〜V rangeis600V AC
To avoid electric shock ha2ard and′ ordamage i
to theinstrument,do notattemptio measure vo11‐ │
age that
care not
vo tage
might exceed 600V AC Use extreme l
oo∝ h my n olyow ψ
O‖¨
│
」
l Set POWER Switchio NM pOsition lineces‐
sary,set it,o LPF pOsition
2 SetFUNCT10N Swnch10〜 v range
3 insert Black Test PIug inlo COM Terminaiand
Red Test Plug into〜 V Terminal
When measuring dangerotls voltage more than
100V, turn off pOwer tO the ci「cut to be
measured and oonnect Test Prods to the circuit
using A‖ igator c‖ ps Do nottouch the Clamp
Meter,its Test Leads or any part of the Circuit
wh‖ e nis on RerertO「 wARNING 3 Care of
High v。ltage Measurementsl on page 12
4 Connect Red and Black Test Prodsto the c「 ‐
Cuit(power:ine)being measured The con‐
nection should belN PARALLEL withthe c r‐
cuit being measured
5 Readthe Voitage on LCD
6 DH Keyand MAX′ MIN Key are avanableinthe
same Way asin i5‐ 2 AC LEAKAGE CUR
RENT(〜 mA)MEASUREMENTSJ But,COMP
Key does not operate
Fig 6
7 When measurements are
Test Prods from the o rcut
Swich to OFF pOstion
18
finished, remove
and set POVVER
6.MA:NTENANCE
6‐ l WARRANTY STATEMENT
The warranty statementorthe Dig talLEAKAGE
CLAMPMETERSSK‐ 7810 and SK‐ 781 5 are print
ed on the last paoe ofthe manual Read itcare‐
fu‖y before requesting warranty repa r
6‐ 2 BATTERY REPLACEMENT
1 1f BAT symbOl shOws on LCD.replace the baueles
2 Unscrew the screw of Battery case Lid and
remove it
3 Take outthe worn―ool batter es from Battery
Case and palce fresh two 1 5V R6P(AA)or
any equivalent bater es
△WARNING
To prevent eleclric shock hazard, tllrn off power,
and remove Clamp Head and Test Leads before
removing Battery Case L d
Replace Batterv Case Lid and screw the screw
NOTE: lf the instrumenl ls taken out of ser‐
vice for an extended time,remove the
bateles from Baterry Case and store
separately
Casc Lid
Battery Rear Case
Fig フ
6‐ 3 CALIBRAT10N
Inorderiomaintainthespecficatonsdescribed
in page 3to 6, tiS recommended thatthe instru‐
ment may be ca brated once each year and′or
after it is repaired
Calibration service is ava‖ ableatKAISEAυ THO
RIZED SERVICE AGENCY through youriocal
dealer at a cos(basis charge
6‐4 REPA:R
Repa rservice warranty ornon warranty,is ava‖ ‐
abealKAISEAUTHORIZEDSERVICEAGENCY
th「oughyOurlocaldealer,VVarranty repairis exe‐
cuted free oi charge,but non warranty repairis
charged on the cost basis Packtheinstruments
securely in its or ginal carton iogether w th
descriptiOns Of your name,address,telephone
number,problem encountered and the service
required,and ship prepald to yourlocal dealer
When the instrument does not operate proper―
ly.the fo"Owing steps should be taken before
returning the instrument ior repair,warranty or
non‐ warranty
l Check the battery connection and the polarty
2 CheCk the batteries ifthey are alve and usable
3 Make Sure that POVVER Switch and FUNC
T10N Switch are selected correctly
4 Make Sure that the measuring input value is
withinthemaxlmumspecifiedoneoftherange
belng used
5 MakesurethatthebodyofthiSinstrumentand
the handle insulators Ofthe test leads have
no cracks no「 any o(herdamage on them
6 Be careFuloi noise from the eqtlipment under
test orthe ambient env ronmentin which the
instrument is being used The instrumentis
fully shielded against noise,but mayread error
due to very strong noise
WARRANTY
The Dig tal L● ::k′ 19o C arilp Meler(SK‑7810/7815)is warranted in its entirety against any defects of
material or workirlal〕 sh p under normal use and service within a period ol six months aFterthe date of
purchase ol lllo i1lstruir〕 ont by the or ginal purchaser This warranty,s exlended by KAISE AUTHO‐
R12ED DEALER on,y lo original purchaser or original user ofthe instrumenl on cond tion thatthe vVar―
ranty Registrat on Card is completed and returned to the author zed dealer within two wooks afterthe
purchase ofthe iilsirumoni new from the dealer The ob 19ation undert,lis warranty to be executed by
KAISE AUTHORiZED DEALEn is lm ted lo repairing Or replacing the D 9nal Leakage Clamp Meter
(SK‐ 7810/7815)roturned iniact to it,with iransportation charge prepald,and which to lls satis(act on
iSiudged by n to have been thus defeclve KAISE AUTHOR!ZED DEALER and KA:SE CORPORA‐
T:ON the manulacturer sha‖ nol otherwise be liable for anソ damages orloss.cOnsequent al or olher―
wise The lore9oing warranty is exclusive and in lieu of a‖ olher warranties including any warranly ol
merchantability whether expressed orimplied
This warranty sha‖ not apply to anソ instrument。「
olher art cle or equipment which sha‖ haVe been
repaired or anered Outs'de KAiSE AUTHOR12ED SERViCE AGENCY.nor which has been stlblect to
misuse,neg‖ gence or accident,incorrect wiring by users orinsta‖ at on or use notin accord vv th instruc―
l ons furnished by the manuracturer

This manual suits for next models

1

Other Kaise Measuring Instrument manuals

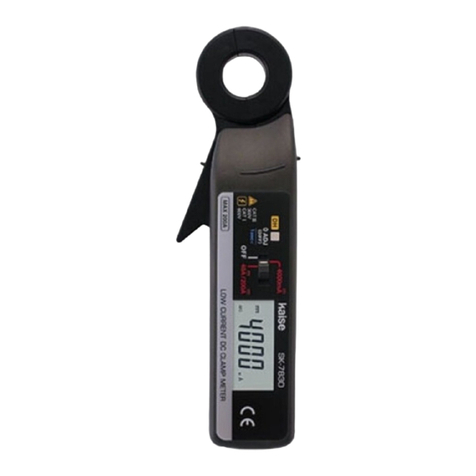
Kaise SK-7830 User manual

Kaise

Kaise SK-7830 User manual

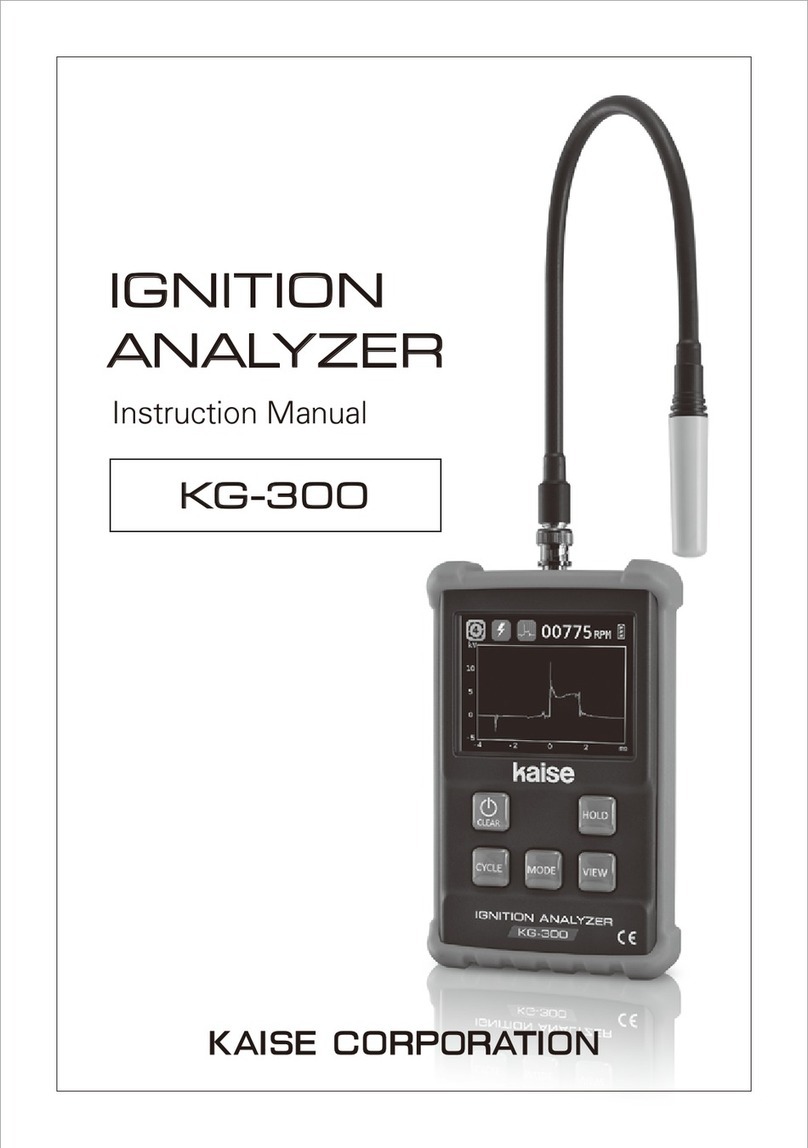
Kaise KG-300 User manual

Kaise

Kaise KG-300 User manual

Kaise SK-8402 User manual

Kaise

Kaise SK-8402 User manual

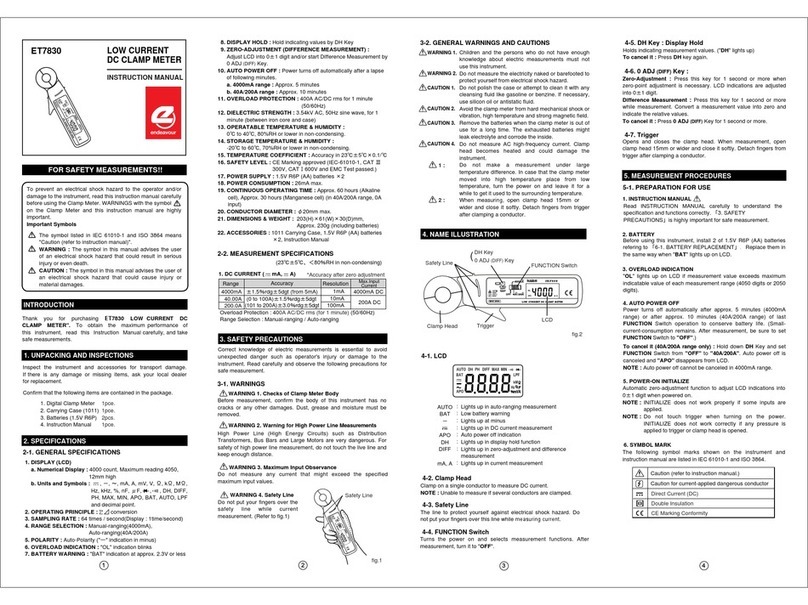
Kaise ET7830 User manual

Kaise

Kaise ET7830 User manual

Kaise SK-8535 User manual

Kaise

Kaise SK-8535 User manual

Popular Measuring Instrument manuals by other brands

MYPIN LC Series instruction manual

MYPIN

MYPIN LC Series instruction manual

CALEFFI GE 130 Series Installation and commissioning manual

CALEFFI

CALEFFI GE 130 Series Installation and commissioning manual

Geokon 4500MLP instruction manual

Geokon

Geokon 4500MLP instruction manual

ION GASCLAM 2 Software manual

ION

ION GASCLAM 2 Software manual

Omega PRESSURE GAUGES DPG3000 user guide

Omega

Omega PRESSURE GAUGES DPG3000 user guide

GAGEMAKER IT-5100 Operation manual

GAGEMAKER

GAGEMAKER IT-5100 Operation manual

LVM Hobbico Pro Series instruction manual

LVM

LVM Hobbico Pro Series instruction manual

CARLO GAVAZZI EM24 IS user manual

CARLO GAVAZZI

CARLO GAVAZZI EM24 IS user manual

Hanna Instruments HI97738 instruction manual

Hanna Instruments

Hanna Instruments HI97738 instruction manual

Proceq ZGM 1130 instruction manual

Proceq

Proceq ZGM 1130 instruction manual

sisel ENDA EI741A quick start guide

sisel

sisel ENDA EI741A quick start guide

emaux WT500PR user manual

emaux

emaux WT500PR user manual

X-Rite RM200QC quick start guide

X-Rite

X-Rite RM200QC quick start guide

Paramount Fitness PARALEVEL A Startup manual

Paramount Fitness

Paramount Fitness PARALEVEL A Startup manual

PCE Instruments PCE-TG 75 user manual

PCE Instruments

PCE Instruments PCE-TG 75 user manual

Endress+Hauser RID16 Brief operating instructions

Endress+Hauser

Endress+Hauser RID16 Brief operating instructions

HCI TPM-W204 user manual

HCI

HCI TPM-W204 user manual

Shark 200T quick start guide

Shark

Shark 200T quick start guide

manuals.online logo
manuals.online logoBrands
  • About & Mission
  • Contact us
  • Privacy Policy
  • Terms and Conditions

Copyright 2025 Manuals.Online. All Rights Reserved.