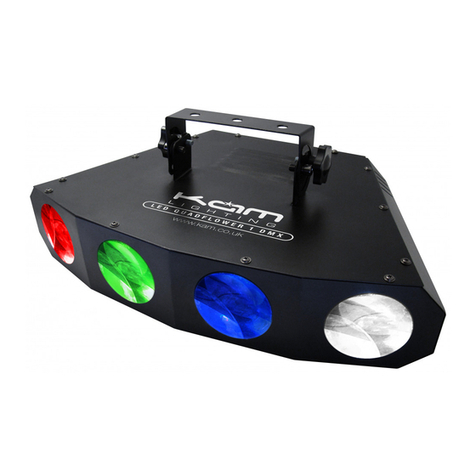
KAM Tri-LED Trooper User manual

Tri-LED Trooper
Tri colour LED DMX lighting effect
15 lens tri coloured Y shaped LED effect with DMX
Tri colour LED unit that produces stunning sweeping effects
7 colour output
15 angled glass lenses for dispersion
Motor controlled moving light beams
Sound-to-Light and DMX modes
DMX512 compatible
4 channel DMX512 operation
Fan cooled operation
Tough metal chassis
Adjustable hanging bracket
Mains fused IEC
M A N U A L V E R S I O N 1 . 0
1 2 . 0 7 . 1 0
For the latest instruction manual updates and information on the entire Kam range visit:
www.kam.co.uk
Kam products are manufactured by: Lamba plc, Unit 1, Southfields Road, Dunstable, Bedfordshire, United Kingdom LU6 3EJ
Telephone: (+44) (0)1582 690600 • Fax: (+44) (0)1582 690400 • Email: [email protected] • Web: www.lambaplc.com
If this product is ever no longer functional please take it to a recycling plant for environmentally friendly disposal.
Due to continuous product development, specifications and appearance are subject to change.
© Copyright Lamba plc 2010. E&OE.

Thank you for purchasing this KAM product, we are sure that it will serve you for many years to come.
To optimise the performance of this product, please read these operating instructions carefully to familiarise yourself with the
basic operations of this unit. After you have read the instructions, please retain them for future reference.
This unit has been tested at the factory before being shipped to you.
To prevent or reduce the risk of electrical shock or fire, do not expose the unit to rain or moisture. To prevent a fire hazard, do not
expose the unit to any naked flame sources. Unplug this apparatus during lightning storms or if it is unlikely to be used for long
periods of time.
When installing the unit, please ensure you leave enough space around the unit for ventilation. Slots and openings in the unit are
provided for ventilation to ensure reliable operation of the product and to protect it from overheating. To prevent fire hazard, the
openings should never be blocked or covered.
Always handle the power cable by the plug. Never pull out the plug by pulling on the cable. Never touch the power cable when
your hands are wet as this could cause an electric shock. Do not tie a knot in the cable. The power cable should be placed such
that it is not likely to be stepped on. A damaged power cable can cause a fire or give you an electrical shock. Check
the power cord periodicaly, if you ever find that it is damaged, replace it before using the unit again. Contact your retailer for a
replacement.
The voltage of the available power supply differs according to country or region. Be sure that the power supply voltage of the area
where this unit is to be used meets the required written on the unit.
The lightning flash symbol inside a triangle is intended to alert the user to the presence high voltage within the unit’s
enclosure that may be of sufficient power to constitute a risk of electrical shock to persons.
Caution: to prevent the risk of electric shock, do not attempt to open the unit. No user-serviceable parts inside. Refer all
servicing to qualified service personnel.
The exclamation mark inside a triangle is intended to alert the user to the presence of important operating and
maintenance instructions in the literature accompanying the appliance.
Any modification carried out on the unit may invalidate the unit’s warranty.
If applicable, only use the stand, tripod or bracket specified or sold with the apparatus.
Select the installation location of your unit carefully. Avoid placing it in direct sunlight or locations subject to vibration and
excessive dust. Do not use the unit where there are extremes in temperature (below 41ºF / 5ºC or exceeding 95ºF / 35ºC).
Unpacking and safety: Please unpack your new product carefully, your new product should reach you in perfect condition. Please
check that no damage has occurred during transit. If any damage is found, do not operate your unit. Please contact the retailer
you purchased it from immediately. If there is any damage to the mains cable do not use the device. Always disconnect the unit
from the mains supply when carrying out any servicing or cleaning of the unit.
The serial number for this equipment should be located on the rear or underside of the unit. Please make a note of this number as
you will need it for your warranty, it is a good idea to keep a copy of the serial number for your own records.

OPERATION
Standalone mode
Set the unit to sound or auto mode using the dipswitches.
Sound activation: set dipswitch 9 to the on position, use the knob on the side of the unit to adjust the sound
sensitivity.
Auto mode: set dipswitch 8 to the on position.
The LED-Tri Trooper effect uses 4 DMX channels.
Stand alone mode using dipswitches
Function
DIP
1
DIP
2
DIP
3
DIP
4
DIP
5
DIP
6
DIP
7
DIP
8
DIP
9
DIP
10
Mode
Red
1
0
0
0
0
0
0
0
0
0
Auto (Master)
Green
0
1
0
0
0
0
0
0
0
0
Auto (Master)
Blue
0
0
1
0
0
0
0
0
0
0
Auto (Master)
Strobe slow
0
0
0
1
0
0
0
0
0
0
Auto (Master)
Strobe - Medium
0
0
0
0
1
0
0
0
0
0
Auto (Master)
Strobe - Fast
0
0
0
0
0
1
0
0
0
0
Auto (Master)
Colour roll
0
0
0
0
0
0
1
0
0
0
Auto (Master)
Auto
0
0
0
0
0
0
0
1
0
0
Auto (Master)
Sound-control
0
0
0
0
0
0
0
0
1
0
Sound-control (Master)
Master/Slave
0
0
0
0
0
0
0
0
0
1
Auto (Master)
Dipswitches 4-7 will only work when dispswitches 1-3 are selected, using a combination of 1-3 switches will colour
mix.
Master slave
When master slaving units without DMX controller, set the master unit as required, sound or auto mode, using
dipswitches as described, set all slave units with dipswitch 10 on only, these will follow the master unit.
DMX address
Set dipswitch 10 to the on position to activate DMX address mode. Use dipswitches 1-9 to set DMX starting address.
Note: to operate channel 2-4, channel 1 must be in the 0 position.
Channel
DMX
Function
CH1
0-19
Blackout
20-39
Red
40-59
Green
60-79
Blue
80-99
Green & Blue
100-119
Red & Blue
120-139
Red & Green
140-159
Red/Green & Blue
160-179
3 colour chase with rotation
180-255
7 colour chase with rotation

CH2
000-004
Blackout
005-028
Red
029-057
Green
058-084
Blue
085-112
Green & Blue
113-140
Red & Blue
141-168
Red & Green
169-197
Red/Green/Blue
198-224
3 colour chase
225-255
7 colour chase
CH3
000-004
Static
005-255
Slow to fast strobe
CH4
000-004
Static
005-127
Manual rotation movement
128-255
Auto movement variations
Setting the DMX-Starting address
DIP-switch no.
1
2
3
4
5
6
7
8
9
Projector number & channels
DMX-starting
address
1
2
4
8
16
32
64
128
256
Using a combination of the dipswitches will allow the required DMX starting address from 1-512. For example, if DMX
starting address 24 is required set dipswitches 4 + 5 to the on position, this addesses the values of 16 + 8 together
and so on.
Please make sure that you do not have any overlapping channels in order to control each device correctly and
independently from any other fixture on the DMX data link. If two, three or more devices are addressed similarly, they
will work similarly.
Specifications
Power supply
90-250 V AC, 50 Hz ~ 60 Hz ~
Power consumption
33w
Current
0.28A
Sound control
via built-in microphone
DMX-512 connection
3-pin XLR
Dimensions (LxWxH)
280 x 280 x 270 (mm)
Weight
3Kg
Maximum ambient temperature
45
Maximum housing temperature
50
Fuse
F1A, 250V
Number of channels
4
Number of LEDs
2 x 9W
Other KAM Light Fixture manuals
Popular Light Fixture manuals by other brands

Falconeyes
Falconeyes PockeLite F7 mini manual

IMG STAGE LINE
IMG STAGE LINE TWIST-1200 instruction manual

Delta Light
Delta Light RANDOM 124 ANO user manual

ND?R
ND?R UNS70DIM-CCT Installation

BRIGHTLIGHT
BRIGHTLIGHT NEON CLASSIC ECTRICAL AND PHYSICAL INSTALLATION GUIDE

Lightmybricks
Lightmybricks 43197 installation guide

Triton Blue
Triton Blue Q-BEAM200 user manual

Thorn
Thorn EP 445 LED quick start guide

Chamberlain
Chamberlain Secure Home SH-9392AU Installation and operating instructions

RSA Lighting
RSA Lighting LYNX LX3002TRMH installation instructions

Tellur
Tellur TLL331341 user manual

Cooper Lighting
Cooper Lighting PM121cb Specification sheet