manuals.online logo
Brands
  1. Home
  2. •
  3. Brands
  4. •
  5. Kamco
  6. •
  7. Water Pump
  8. •
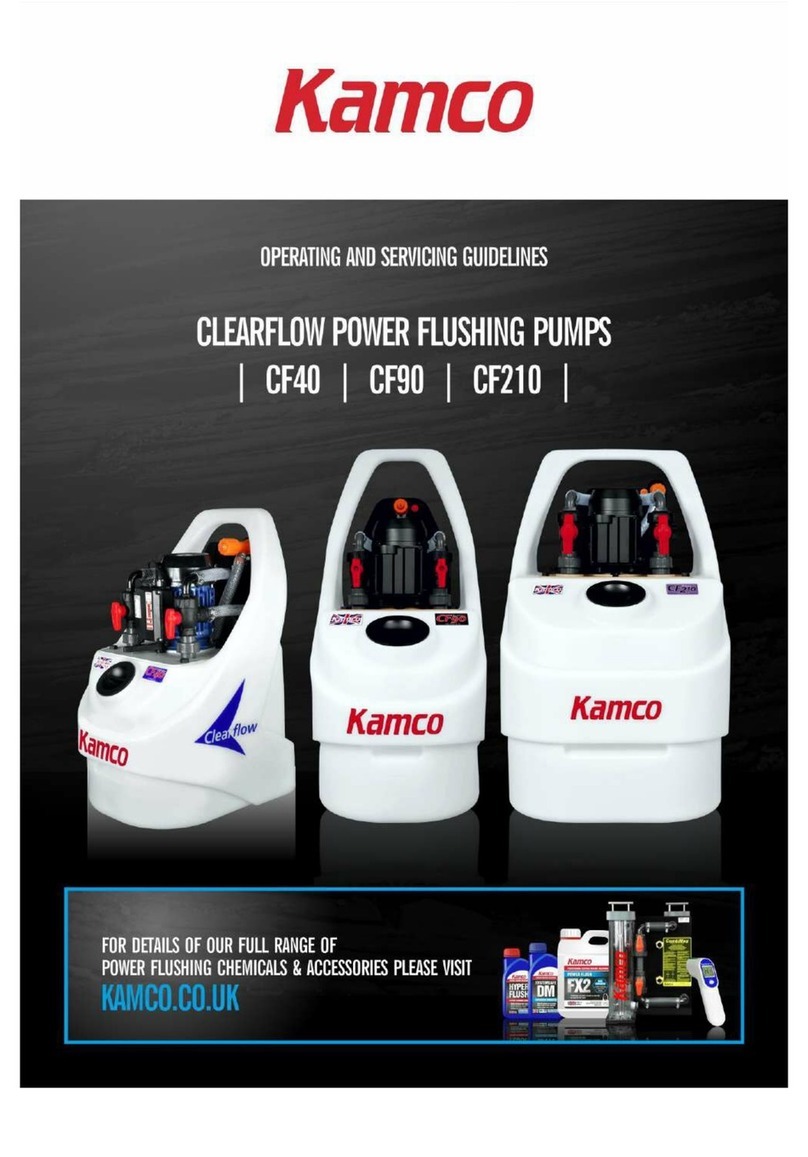
  9. Kamco C90 User manual

Kamco C90 User manual

CHOICE OF DESCALING CHEMICAL AND
QUANTITY REQUIRED:
If the cooling coil is made of steel, or
stainless steel, use either SCALEBREAKER
SR or SCALEBREAKER FX, dependent on
the type of fouling. Scalebreaker FX will
remove both hard water deposits and
corrosion deposits, whilst Scalebreaker
SR is effective only on hard water scale.
SCALEBREAKER HD may be used with
copper coils, but should not be left in
circuit for more than two hours.
Do not use SCALEBREAKER HD with
stainless steel.
Calculate the amount of descaling
chemical required. As a guide, if
the volume of water in the cooling
circuit is approximately 100 litres,
use 10 litres descaling chemical (i.e. a
10% solution by volume). A weaker
solution may be used, but will take
longer to remove a given amount of
scale.
Heat may be applied into the coil, if
practicable, or it may be possible to
start descaling when the water in
the coil is still warm, to a maximum
of 50oC, and this will speed up
descaling.
NB. When descaling with any acid,
some hydrogen gas may be evolved.
Hydrogen is a ammable gas, and
the working area should be well
ventilated. Avoid smoking nearby,
or any other means of ignition.
PROCEDURE
1. Ensure an adequate water supply
to dilute or neutralise any chemical
leaks, or the spent descaling
chemical, so that disposal does not
contravene local regulations.
2. Isolate water inlet and outlet
connections to the cooling coil,
capping them off if necessary.
3. Couple ow and return hoses from
descaling pump to the water inlet
and outlet of the cooling coil to be
descaled.
4. If it is anticipated that descaling
is to be a routine maintenance
procedure, consider installing valved
tee-pieces in the ow and return
connections to the coil, terminating
in 1/2” or 3/4” BSP male threads. This
will enable immediate coupling of
the descaling pump across the coil
whenever descaling is required.
5. The pump connection to the lowest
connection onto the cooling coil
should be through a valve, as a
precaution. Failing this, if the
descaling pump is mounted below
the coil, power failure to the pump
would result in the head of water
overowing the pump tank, unless
prevented by closing the valve.
(Scalebreaker FWF models have integral
valves suitable for this.)
6. Connections should be made so that
there is a closed circuit between
the pump output hose, through the
cooling coil to the return hose.
7. Venting of the carbon dioxide gas
evolved during descaling is achieved
through the pump tank ller cap
aperture. The cap should be screwed
on by no more than one quarter of
a turn. This is sufcient to vent the
gas, but at the same time reduces
fumes and prevents splashes.
8. Connect the pump to a suitable
earthed power supply. As the pump
will be used in a damp location, a
residual current circuit breaker plug
should be used.
9. The ow reverser handle points in
the direction of ow of the liquid. If
the handle points towards the hose
connected onto the normal water
inlet connection to the coil, that
will be the direction in which the
descaling pump will pump, and the
other hose will then be the return to
the pump tank.
10. Prior to adding descaling chemical
to pump tank, rst ‘prove’ the circuit
with fresh water alone. Add water
to pump tank to approx. 4” (10cm)
above minimum liquid level, switch
on descaling pump, and immediately
Kamco Limited
Unit 9, Curo Park, Frogmore, St Albans. AL2 2DD. United Kingdom
Tel: +44 (0)1727 875020 Fax: +44 (o)1727 875335
E-mail: [email protected] www.kamco.co.uk
Guidance notes on descaling cooling coils
open the isolating valve (see point 5)
to allow circulation to commence. If
water level drops initially, add more
water to pump tank, and check that
all connections are tight.
11. To commence descaling, slowly
add descaling chemical into pump
tank. Once liquid is returning into
the tank from the coil, check to see
if there is a build up of foam on
top of the liquid in the pump tank.
This may happen when there is a
large build up of reactive limescale
in the coil. If this is excessive, add
FOAMBREAKER carefully to the tank
to reduce the foaming.
12. As circulation commences, bubbles
will be seen in the return hose to
the pump, indicating that limescale
is being dissolved.
13. Continue circulation through the
cooling coil and descaling pump,
briey reversing the direction of
ow periodically.
14. Check all connections regularly for
tightness and leaks, and if foaming
is excessive, carefully remove
descaling pump tank cap and
add more FOAMBREAKER to the
descaling pump tank.
15. Scale removal can be considered
complete when bubbles are no
longer seen in the return pipe,
and the descaling solution is still
sufciently strong to remove hard
water deposits.
16. SCALEBREAKER descaling chemicals
contain a built-in colour change to
monitor strength.
A simple check may be made by
dropping a sample of limescale into
the solution, and observing if there
is any effervescence.
17. For more accuracy, a pH meter, or
pH indicator paper, may be used
to check the pH of the descaling
solution. Once the pH has risen
to 3.5 to 4, its ability to dissolve
limescale is effectively spent, and
more descaling chemical or a fresh
solution will be required.
18. If, after descaling has ceased, the
pH of the descaling solution is
still below 5, then the remaining
solution must be neutralised to
bring the pH level above 5, and
as close to 7 as practicable. This
may be done by slowly adding
NEUTRALISING CRYSTALS or
Neutralising Liquid to the tank of
the descaling pump until there is
no more effervescence when the
crystals are added. If foaming is a
problem when adding Neutralising
Crystals, add FOAMBREAKER
antifoam.
19. After draining off the spent
descaling chemical, ush the coil
with fresh water. Many natural
waters are slightly alkaline, and
water ushing may be all that is
required. Alternatively, circulate
a 1% solution of NEUTRALISING
CRYSTALS through the coil for 15
minutes, drain, and then ush with
clean water once more.
If you have a Scalebreaker FWF type
descaling pump, this has an integral
fresh water ushing facility:
When descaling is complete, the spent
descaling solution may be pumped to
waste along the dump hose as follows:
If the ow reverser lever is to the
left, twist the right-hand dump valve
through 180o to show the word ‘dump’,
ensuring that the left-hand valve
remains in the ‘circulation’ position.
(If the ow reverser lever is to the
right, twist the left-hand dump valve
through 180o to show the word ‘dump’,
ensuring that the right-hand valve
remains in the ‘circulation’ position.)
When ‘dumping’, the water level in the
pump tank will fall by the same volume
as is being dumped.
Open the mains
water supply valve and adjust to allow
fresh water to enter the tank at the
same rate as water is exiting the dump
hose. Make sure that the tank water
level remains at least 10 cm (4”) above
the minimum mark.
Continue dumping until fresh water is
leaving the end of the dump hose.
Turn the valve which is in ‘dump’ mode
through 180oto restore full circulation
through the pump and the system.
Close the water supply inlet valve once
the level in the reservoir has stabilised
between minimum and maximum
markers.
Allow fresh water to circulate through
the descaled equipment for ten
minutes.
IMPORTANT: When working with
acidic descaling chemicals, always
wear suitable protective clothing and
goggles. Refer to instructions on labels
of descaling chemicals, and refer to
Material Safety Data Sheets.
Caps should be kept securely on all
chemical containers whilst not in use.
To avoid splashes, operators should not
stand directly over the open neck of
either chemical containers or the lling
neck of the descaling pump whilst
pouring or adding chemicals.
Legal disclaimer: It is stressed that
these are guidance notes only, and
the above information is based on
the present state of our knowledge
of caloriers in general. It is given
in good faith, but due to the
diverse and varied nature of such
equipment, the user must satisfy
himself that the above procedure is
viable in the prevailing situation.

Other Kamco Water Pump manuals

Kamco CLEARFLOW CF90: QUANTUM Instruction and safety manual

Kamco

Kamco CLEARFLOW CF90: QUANTUM Instruction and safety manual

Kamco CF40 Evolution Owner's manual

Kamco

Kamco CF40 Evolution Owner's manual

Kamco SCALEBREAKER Series User manual

Kamco

Kamco SCALEBREAKER Series User manual

Kamco CF30 User manual

Kamco

Kamco CF30 User manual

Kamco C20 User manual

Kamco

Kamco C20 User manual

Popular Water Pump manuals by other brands

Wilo TOP-S Installation and operating instructions

Wilo

Wilo TOP-S Installation and operating instructions

Dover PSG Wilden PS800 Engineering, operation & maintenance

Dover

Dover PSG Wilden PS800 Engineering, operation & maintenance

teel 4RJ45 Operating instructions & parts manual

teel

teel 4RJ45 Operating instructions & parts manual

SPX POWER TEAM Р12 Series operating instructions

SPX POWER TEAM

SPX POWER TEAM Р12 Series operating instructions

CET PFP-20HPKHL-MR Instruction handbook

CET

CET PFP-20HPKHL-MR Instruction handbook

Armstrong AGE4D Installation and operating instructions

Armstrong

Armstrong AGE4D Installation and operating instructions

Reefe 22597 Exploded View & Instruction Manual

Reefe

Reefe 22597 Exploded View & Instruction Manual

BADU JET Vogue Operating and installation instructions

BADU

BADU JET Vogue Operating and installation instructions

Intex Krystal Clear C1500 owner's manual

Intex

Intex Krystal Clear C1500 owner's manual

Alentec & Orion 52510 user manual

Alentec & Orion

Alentec & Orion 52510 user manual

EINHELL BG-DW 1300 N operating manual

EINHELL

EINHELL BG-DW 1300 N operating manual

POMPE ROTOMEC TR Series Use and maintenance manual

POMPE ROTOMEC

POMPE ROTOMEC TR Series Use and maintenance manual

EarthQuake WP4310 Operator's manual

EarthQuake

EarthQuake WP4310 Operator's manual

AMT 489 Series Specifications information and repair parts manual

AMT

AMT 489 Series Specifications information and repair parts manual

Pfeiffer Vacuum HIPACE 350 operating instructions

Pfeiffer Vacuum

Pfeiffer Vacuum HIPACE 350 operating instructions

Lemmer 3033 owner's manual

Lemmer

Lemmer 3033 owner's manual

Lincoln 1340 quick start guide

Lincoln

Lincoln 1340 quick start guide

Trillium 10-WSP Installation, operation & maintenance instructions

Trillium

Trillium 10-WSP Installation, operation & maintenance instructions

manuals.online logo
manuals.online logoBrands
  • About & Mission
  • Contact us
  • Privacy Policy
  • Terms and Conditions

Copyright 2025 Manuals.Online. All Rights Reserved.