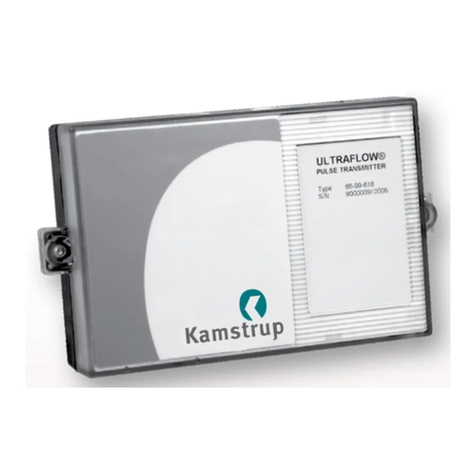
Kamstrup READy MTU Operating instructions

Kamstrup A/S • 55122662_C1_US_06.2020
READy MTU
Warning!
Read instructions before installation
Installation and operation guide

Installation & operation guide
Kamstrup A/S • 55122662_C1_US_06.20202
READy MTU
Disclaimer
All information provided in this document is copyright of Kamstrup. Licence is granted to the user to freely use and distribute
the information in complete and unaltered form, provided that the purpose is to use or evaluate Kamstrup products.
Distribution rights do not include public posting or mirroring on Internet websites. Only a link to the Kamstrup website can be
provided on such public websites.
Kamstrup shall in no event be liable to any party for direct, indirect, special, general, incidental, or consequential damages
arising from the use of this information or any derivative works thereof. The information is provided on an as-is basis, and thus
comes with absolutely no warranty, either express or implied. No right or licence is granted under any intellectual property
right, hereunder copyright, patent or trademark, of Kamstrup to any other party. This disclaimer includes, but is not limited to,
implied warranties of merchantability, fitness for any particular purpose, and non-infringement.
Information in this document is subject to change without notice and should not be construed as a commitment by
Kamstrup. While the information contained herein is believed to be accurate, Kamstrup assumes no responsibility for any
errors and/or omissions that may appear in this document.
Copyright Information
Copyright ® Kamstrup A/S
Industrivej 28
Stilling
DK-8660 Skanderborg, Denmark
All Rights Reserved
The graphics and content in this document are the copyrighted work of Kamstrup and contain proprietary trademarks and
trade names of Kamstrup.
Third parties
This document may contain links to other parties. Kamstrup makes no warranty or representation regarding any linked
information appearing therein. Such links do not constitute an endorsement by Kamstrup of any such information and are
provided only as a convenience. Kamstrup is not responsible for the content or links displayed by third parties.

Installation & operation guide
Kamstrup A/S • 55122662_C1_US_06.2020 3
READy MTU
Contents
1 Symbols used in this document 4
1.1 Warnings in this document 4
2 Abbreviations 6
3 FCC caution 6
4 Canadian compliance statement 6
5 Technical data 7
5.1 Product introduction 7
5.2 System overview 7
5.3 Electrical data 7
5.4 Mechanical data 7
5.5 Material 8
5.6 Communication 8
5.7 Transmission interval 8
5.8 Input 8
5.9 Data security 8
6 Before you begin 8
6.1 Precautions 8
6.2 What is in the box 9
6.3 Accessories 9
6.4 Deployment process summary 9
7 Before field deployment 9
7.1 Import READy MTU from Kamstrup Encryption Key Service 9
7.2 Import non-Kamstrup meters and customer information in READy Manager 9
7.3 Create a group of non-Kamstrup meters for READy MTU installation 10
7.4 MTU modes and LED blinking scheme 10
8 Field deployment 11
8.1 Installation 11
8.2 Configuration of READy MTU 14
8.3 Default or preconfigured 14
9 Operation 21
9.1 Normal operation 21
9.2 Alarms/info codes 21
9.3 Device exchanges 22
9.4 Fallback and log readings 23
9.5 Reconfiguration 23
9.6 Decommissioning 26
9.7 Kamstrup support 28
10 Storage 28
11 Disposal 29
11.1 Disposal by Kamstrup A/S 29
11.2 The customer sends for disposal 29
11.3 Disposal by the customer 29
11.4 Instructions for disposal 29
12 Ordering details 30
12.1 Type number 30
12.2 US AMI MTU configuration is described below: 30
12.3 Other MTU ordering data 31
12.4 Accessories 31

Installation & operation guide
Kamstrup A/S • 55122662_C1_US_06.20204
READy MTU
1 Symbols used in this document
Indicates a hazardous situation which, if not avoided, could result in death or serious injury.
Indicates a hazardous situation which, if not avoided, could result in moderate injury, damage the product, or
lead to loss of data.
Indicates a hazardous situation which, if not avoided, may seriously impact operations.
1.1 Warnings in this document
Battery safety:
Fire, explosion and severe burn hazard.
Please follow these guidelines in order to avoid injury to yourself and others:
• If not disposed of properly, the battery may cause fire or chemical burn
• Do NOT recharge, disassemble, crush, expose to water, heat above 212 °Fahrenheit (100 °Celsius), or
incinerate the battery
• Keep away from children
Must be installed to provide a separation distance of at least 20 cm from all persons.
The contents of this guide and the quick guide included with the device must be followed at all times when
installing, configuring or handling the device in general. If this guide is not followed, Kamstrup cannot be held
accountable for any malfunctions or misuse of the product.
Do not install outside Lightning Protection Zone 0C. 10 ft/3 m height and depth around the building.
Use only approved accessories with this device. Unapproved modifications or operation beyond or in conflict with
these instructions for use may void authorization by the authorities to operate the device.
Ensure that READy MTU is in transport mode when transported by air freight or during decommissioning.
Ensure proper disposal of the product.
Do not disassemble the product as the IP68 sealing will be void, and do not tamper with the internal battery and
electronics.
READy MTU is designed to operate at temperatures of -30 °C…65 °C (-22 °F…149 °F). Using the device outside the
intended operating temperature range may cause deterioration of battery life or in worst case operating failure.
Must NOT be co-located in conjunction with any other antenna or transmitter.
Do not try to modify or repair the device. Attempts to modify or repair will void the warranty.
Ensure that READy App and READy Manager are synchronized before you proceed with the installation.

Installation & operation guide
Kamstrup A/S • 55122662_C1_US_06.2020 5
READy MTU
Read the guide prior to installation and taking the device into use.
The product may only be installed by trained personnel.
Wire terminations must be properly sealed with a non-conductive gel material to prevent water intrusion
(otherwise, this configuration should not be used in a pit environment).
Kamstrup does not recommend using gel connectors in pit environments.
Kamstrup recommends mounting READy MTU in/under non-metallic meter pit lids only. If installing under metal
lids, make sure to use the pit antenna.
Mount READy MTU as high as possible in the pit, without the antenna being in contact with the pit lid.
Mount READy MTU as high as possible. The MTU should be mounted at or above ground level. Mount READy MTU
as high as possible. The MTU should be mounted at or above ground level.
Always install READy MTU in the protection cover (accessory) when the device is installed in sun-exposed areas.
Mount READy MTU at least 6 inches away from any metal objects, including pipes, conduit, and downspouts.
When mounting multiple MTUs in the same location, leave at least 4 inches between the MTUs if mounting side
by side and at least 3 inches between MTUs if mounting one above another.
Do not mount READy MTU so that it is transmitting towards a nearby building or fence.
Do not mount READy MTU directly under AC power or telecommunications wires.
Mount READy MTU as high as possible near an exterior wall. The MTU should be mounted at or above grade
(ground level).
Mount READy MTU at least 6 inches away from pipes and conduit and several inches below the ceiling.
Mount READy MTU at least 5 feet away from any large metal objects. (e.g. refrigerators, HVAC ducts, furnaces,
and hot water heaters).
Do not mount READy MTU in a basement with a metal ceiling.
Do not mount READy MTU directly under AC power wires, circuit breaker panels, or telecommunications wires.

Installation & operation guide
Kamstrup A/S • 55122662_C1_US_06.20206
READy MTU
2 Abbreviations
MTU: meter transmission unit
LPZ: Lightning Protection Zone
MDM: meter data management
EO: encoded output
CIS: customer information system
3 FCC caution
This device complies with part 15 of the FCC Rules. Operation is subject to the following two conditions:
(1) This device may not cause harmful interference, and
(2) this device must accept any interference received, including interference that may cause undesired operation.
This equipment has been tested and found to comply with the limits for a Class B digital device, pursuant to part 15 of the FCC
Rules. These limits are designed to provide reasonable protection against harmful interference in a residential installation.
This equipment generates, uses and can radiate radio frequency energy and, if not installed and used in accordance with the
instructions, may cause harmful interference to radio communications. However, there is no guarantee that interference will
not occur in a particular installation. If this equipment does cause harmful interference to radio or television reception, which
can be determined by turning the equipment off and on, the user is encouraged to try to correct the interference by one or
more of the following measures:
• Reorient or relocate the receiving antenna
• Increase the separation between the equipment and receiver
• Connect the equipment into an outlet on a circuit different from that to which the receiver is connected
• Consult the dealer or Kamstrup for help
4 Canadian compliance statement
This device complies with Industry Canada license-exempt RSS standard(s). Operation is subject to the following two
conditions:
(1) This device may not cause interference, and
(2) This device must accept any interference, including interference that may cause undesired operation of the device.
Cet appareil est conforme aux normes CNR exemptes de licence d’Industrie Canada. Le fonctionnement est soumis aux deux
conditions suivantes:
(1) Cet appareil ne doit pas provoquer d’interférences et
(2) Cet appareil doit accepter toute interférence, y compris celles susceptibles de provoquer un fonctionnement non souhaité
de l’appareil.
Complies with the Canadian ICES-003 Class B specifications.
Cet appareil numérique de la classe B est conforme à la norme NMB-003 du Canada.
This device complies with RSS 247 of Industry Canada. This Class B device meets all the requirements of the Canadian
interference-causing equipment regulations.
Cet appareil est conforme à la norme canadienne RSS 247. Cet appareil numérique de la Classe B respecte toutes les
exigences du Règlement sur le matériel brouilleur du Canada.

Installation & operation guide
Kamstrup A/S • 55122662_C1_US_06.2020 7
READy MTU
5 Technical data
5.1 Product introduction
READy MTU is a one-to-one meter data transmission unit that connects to meters utilizing the Sensus UI1203 Encoded Output
protocol. Data from READy MTU is forwarded to the READy Manager MDM system via Kamstrup’s AMI system.
5.2 System overview
READy MTU connects to an encoded output meter and sends data to READy Collector and READy Manager.
5.3 Electrical data
Battery safety:
Fire, explosion and severe burn hazard.
Please follow these guidelines in order to avoid injury to yourself and others:
• If not disposed of properly, the battery may cause fire or chemical burn
• Do NOT recharge, disassemble, crush, expose to water, heat above 212 °Fahrenheit (100 °Celsius), or
incinerate the battery
• Keep away from children
Do not disassemble the product as the IP68 sealing will be void, and do not tamper with the internal battery and
electronics.
Battery D-cell battery
Battery liftetime Up to 20 years at tBAT < 40 °F
Up to 16 years at tBAT < 55 °F
Up to 8 years at tBAT < 130 °F
5.4 Mechanical data
READy MTU is designed to operate at temperatures of -30 °C…65 °C (-22 °F…149 °F). Using the device outside the
intended operating temperature range may cause deterioration of battery life or in worst case operating failure.
Protection class IP68 rated (waterproof/submersible)
Weight Approx. 525 g / 1.15 Lbs incl. stub antenna
Dimensions Ø 91.6 mm x 106 mm (Ø 3.6” x 4.2”)
Ø 91.6 mm x 149.8 mm (Ø 3.6” x 5.9”) incl. antenna

Installation & operation guide
Kamstrup A/S • 55122662_C1_US_06.20208
READy MTU
5.5 Material
Housing Polyphenylene sulfide (PPS) with fiberglass (40 %) reinforcement
Top ring Polycarbonate (grey)
5.6 Communication
Wireless fallback reading
and configuration 902 MHz – 928 MHz (license free)
Kamstrup AMI 450 – 470 MHz (FCC licensed)
Antenna External
Magnet sensor Activation of MTU radio and installation mode
5.7 Transmission interval
Must be installed to provide a separation distance of at minimum 20 cm from all persons.
Must NOT be co-located in conjunction with any other antenna or transmitter.
Meter reading interval Hourly top of the hour
Transmission Every 3 hours
5.8 Input
Single meter/register input Sensus UI-1203 3-wire encoded
Wire length 5 ft Nicor/Itron/flying wire
5.9 Data security
READy MTU is part of the complete end-to-end data encryption of the READy suite.
Data is AES 128 bit end-to-end encrypted when in transit from READy MTU to READy Manager.
6 Before you begin
6.1 Precautions
The contents of this guide and the guide included with the device must be followed at all times when installing,
configuring or handling the device in general. If this guide is not followed, Kamstrup cannot be held accountable
for any malfunctions or misuse of the product.
Do not try to modify or repair the device. Attempts to modify or repair will void the warranty.
Ensure that READy App and READy Manager are synchronized before you proceed with the installation.
Read the guide prior to installation and taking the device into use.
The product may only be installed by trained personnel.
NOTE: Kamstrup recommends using READy Bluetooth optical read-out head to activate the magnet sensor of READy MTU.
Magnet power 8.6 lbs/3.9 kg (N35).

Installation & operation guide
Kamstrup A/S • 55122662_C1_US_06.2020 9
READy MTU
6.2 What is in the box
The content of the box depends on the chosen accessories:
• READy MTU
• MTU mounting screw
• Quick guide
6.3 Accessories
READy MTU can be ordered with the following accessories:
• 5 ft cable with flying wire, Nicor or Itron plug
• Wall antenna (packed separately)
• External stub antenna
• 3” pit antenna for installation in pit lids (packed separately)
• Wall/pit bracket
• Protection cover for installation in sun-exposed areas (packed separately)
Dimensions: 198 mm x 166 mm x 114 mm (7.8” x 6.5” x 4.5”)
6.4 Deployment process summary
1. Before field deployment
- Import READy MTU(s) in READy Manager
- Import non-Kamstrup meters and customer information (optional)
- Create a group containing non-Kamstrup meters that will be retrofitted with READy MTU
- Charge READy Converter and mobile device
2. Field deployment of default or preconfigured MTU
a. Default configured MTU: install, activate, and configure READy MTU using READy App and READy Converter
b. Preconfigured MTU: install and activate READy MTU. No additional configuration is required
3. The installation and configuration are complete
7 Before field deployment
Before field deployment, make sure that your READy Manager system is prepared for collecting data from encoded meters via
READy MTU by following the steps in this section.
7.1 Import READy MTU from Kamstrup Encryption Key Service
READy MTU is automatically imported into READy Manager if you are logged in with your My Kamstrup account and the Import
new devices checkbox is ticked.
If not logged in, you can import READy MTUs directly from Kamstrup Encryption Key Service found in My Kamstrup.
Click the Import devices button on the start-up page of READy Manager.
More information can be found in the READy Manager guide under Automatically importing information for new devices or
Manually importing information for new devices.
7.2 Import non-Kamstrup meters and customer information in READy Manager
Kamstrup recommends that you import the ID/serial number that is sent on the encoded output as the meter
serial number in READy Manager. If not, you are required to overwrite the serial number of the encoded output
with the serial number imported in READy Manager for your specific device.
Import non-Kamstrup meters and customer information in READy Manager by selecting Import customers on the start-up
page of READy Manager.
More information on CIS import can be found in the READy Manager guide under Automatically importing customer data or
Manually importing customer data.

Installation & operation guide
Kamstrup A/S • 55122662_C1_US_06.202010
READy MTU
7.3 Create a group of non-Kamstrup meters for READy MTU installation
It is recommended to create a group of non-Kamstrup meters that will be retrofitted with READy MTU that can be synced with
READy App.
Create a group:
1. Select the Meters view in READy Manager.
2. Select New group. Name the group.
3. Select the meters that are to be part of the group and add the meters to the group.
Find more information in the READy Manager guide under Organizing meters in reading groups.
7.4 MTU modes and LED blinking scheme
7.4.1 MTU modes
7.4.1.1 Transport mode
When you receive READy MTU, the device is in transport mode. In transport mode, the radio is deactivated. The magnet sensor
for activating the MTU is active.
By influencing the magnet sensor for 3 seconds, the LED on the front of READy MTU turns on. The MTU checks if a meter is
connected on the encoded interface before turning on the radio. If no meter is connected, READy MTU remains in transport
mode.
Remember to enable transport mode when decommissioning READy MTU. See section 9.6 Decommissioning.
7.4.1.2 Installation mode
After activation, READy MTU starts up in installation mode. The LED turns on and a connection beacon is sent out every 4
seconds.
Installation mode is active for 5 minutes after activation.
After the installation mode period has ended, READy MTU enters normal mode.
When operating in normal mode, installation mode can be triggered by holding the magnet to the front of READy MTU. This will
also reactivate the LED.
7.4.1.3 Operation mode
In operation mode, READy MTU can at all times be accessed via READy App. A connection beacon is sent every 30 seconds
during normal operation. The LED is not active in normal mode.
7.4.2 LED blinking scheme
1 time every 5 seconds Everything is OK.
READy MTU is reading the encoded output and sending data
via AMI.
3 times every 5 seconds Something is wrong.
READy MTU is not reading the encoded output or sending
data via AMI.
5 s5 s
5 s5 s

Installation & operation guide
Kamstrup A/S • 55122662_C1_US_06.2020 11
READy MTU
8 Field deployment
Use only approved accessories with this device. Unapproved modifications or operation beyond or in conflict with
these instructions for use may void authorization by the authorities to operate the device.
Do not install outside Lightning Protection Zone 0C. 3 meters or 10 ft height and depth around the building.
Wire terminations must be properly sealed with a non-conductive gel material to prevent water intrusion
(otherwise, this configuration should not be used in a pit environment).
Complete all cable connections before activating the device using the magnet sensor.
8.1 Installation
READy MTU is intended to be installed in vertical position indoors and outdoors in residential, commercial, and industrial
environments. The device is intended to be installed either at ground level, above ground on a wall, or in pits (flooded
environment, underground). As READy MTU is IP68 rated, the device is resistant to harmful dust and can be submerged.
8.1.1 Encoded output wiring diagram
Kamstrup does not recommend using gel connectors in pit environments.
Wiring diagram
Open end Data:
VCC/CLK:
GND:
Green
Red
Black
Function Kamstrup Sensus Neptune Itron Integral
DATA Green Green Red Red
PWR/Clock Red Red Black Black
GND Black Black Green White
(“Las Vegas style”)
Itron - Integral Nicor
Connector pinouts

Installation & operation guide
Kamstrup A/S • 55122662_C1_US_06.202012
READy MTU
8.1.2 Antennas and connectors
When using a pit or wall antenna, please use the grey antenna cover when attaching the antenna to READy MTU.
When using the stub antenna, please use the black antenna cover when attaching the antenna to READy MTU.
8.1.3 Pit
Kamstrup recommends mounting READy MTU in/under non-metallic meter pit lids only. If installing under metal
lids, make sure to use the pit antenna.
Mount READy MTU as high as possible in the pit, without the antenna being in contact with the pit lid.
You can use the pit antenna or the wall bracket with a rebar or similar to install READy MTU in pits.

Installation & operation guide
Kamstrup A/S • 55122662_C1_US_06.2020 13
READy MTU
8.1.4 Wall exterior
Mount READy MTU as high as possible. The MTU should be mounted at or above ground level.
Always install READy MTU in the protection cover (accessory) when the device is installed in sun-exposed areas.
Mount READy MTU at least 6 inches away from any metal objects, including pipes, conduit, and downspouts.
When mounting multiple MTUs in the same location, leave at least 4 inches between the MTUs if mounting side
by side and at least 3 inches between MTUs if mounting one above another.
Do not mount READy MTU so that it is transmitting towards a nearby building or fence.
Do not mount READy MTU directly under AC power or telecommunications wires.
Finish the field configuration of READy MTU before installing it in the protection cover.
Use the protection cover in sun-exposed areas. When installed in areas without sun exposure, the wall/pit bracket can
potentially be used.

Installation & operation guide
Kamstrup A/S • 55122662_C1_US_06.202014
READy MTU
8.1.5 Wall interior
Mount READy MTU as high as possible near an exterior wall. The MTU should be mounted at or above grade
(ground level).
Mount READy MTU at least 6 inches away from pipes and conduit and several inches below the ceiling.
Mount READy MTU at least 5 feet away from any large metal objects. (e.g. refrigerators, HVAC ducts, furnaces,
and hot water heaters).
Do not mount READy MTU in a basement with a metal ceiling.
Do not mount READy MTU directly under AC power wires, circuit breaker panels, or telecommunications wires.
Use the wall bracket to install READy MTU in interior environments.
8.2 Configuration of READy MTU
Required:
• Android device
• READy App (synchronized with READy Manager)
• READy Converter
• Magnet
8.3 Default or preconfigured
If your READy MTU has been ordered preconfigured, please follow section 8.3.1 Configuration of preconfigured MTU.
If your READy MTU has been ordered default configured, please follow section 8.3.2 Configuration of default configured MTU.
If in doubt, follow 8.3.2 Configuration of default configured MTU.
8.3.1 Configuration of preconfigured MTU
A preconfigured MTU requires that the device serial number imported in READy Manager equals the device ID
read on the encoded output.
Complete all cable connections before activating the device using the magnet sensor.
If the device serial number imported in READy Manager does not equal the ID read by the MTU on the encoded output, please
follow the installation and configuration instructions for default configured MTU in section 8.3.2 Configuration of default
configured MTU.

Installation & operation guide
Kamstrup A/S • 55122662_C1_US_06.2020 15
READy MTU
1. The LED starts blinking 3 times every 5 seconds.
NOTE: Finish all cable connections before activating
READy MTU.
2. When the LED blinks 1 time every 5 seconds, everything
is OK.
READy MTU is reading the encoded output and sending
data via AMI.
The LED automatically stops blinking after 5 minutes. No further configuration is needed.
The configuration of a preconfigured MTU can at all times be read and changed by following the steps in section 9.5
Reconfiguration.
8.3.2 Configuration of default configured MTU
A default configured MTU requires configuration using READy App.
The reading on the encoded output must match the imported meter ID/serial number in READy Manager. If the
IDs do not match, you can overwrite the encoded output reading to ensure data flows to the correct meter.
1. Sync READy Manager and READy App before
proceeding to step 2.
2. Activate READy MTU by pointing a magnet at the
designated spot.
3. The LED starts blinking.

Installation & operation guide
Kamstrup A/S • 55122662_C1_US_06.202016
READy MTU
4.
5.
Turn on READy Converter.
Open READy.
READy
Read meters Info codes
Find meter
Send/Receive
8
6. Go to the menu item Installation.READy
Installation Read log
Exchange
Update devices
7. Pair with READy Converter.
Table of contents
Other Kamstrup Transmitter manuals
Popular Transmitter manuals by other brands

LumenRadio
LumenRadio LRINSTX8 user manual

Lectrosonics
Lectrosonics Dante M2T/E01 instruction manual

PCB Piezotronics
PCB Piezotronics IMI SENSORS 682C03 Installation and operating manual

CYP
CYP CH-1103TX Operation manual

Williams Sound
Williams Sound Hearing Helpe T863 Instructions for use and care

DELTA DORE
DELTA DORE TYXIA 2330 manual