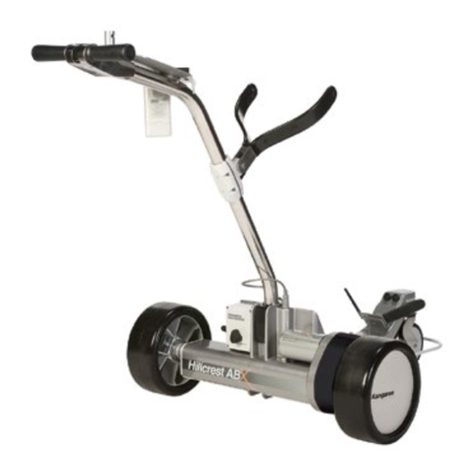
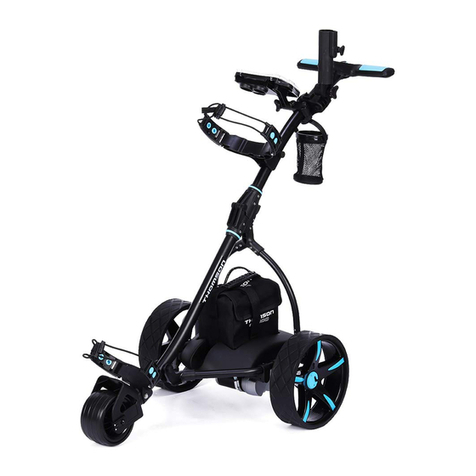
Kangaroo Hillcrest series User manual

HillcrHillcr
HillcrHillcr
Hillcrestest
estest
est
Owners Manual
Please Read Carefully

Damage in shipment by U.P.S.:
1. You MUST notify U.P.S. immediately so that they can
inspect the damage. U.P.S. will return the damaged
merchandise to us.
2. Notify our company as to the nature of the damage, parts
missing, etc. We will then assume responsibility for
disposition of the damages with U.P.S.
Important Note: Do not destroy any of the cartons in which
the merchandise was shipped. No claim for damage in shipment
can be made unless the original cartons are available for
inspection.
Damage in shipment by Parcel Post:
1. Take the damaged merchandise, in the original carton,
to your local Post Office as soon as possible after damage
is discovered; also request a damage claim form.
RETURN ADDRESSES
Eastern and Central Time Zones:
KANGAROO PRODUCTS COMPANY
111 Kangaroo Drive, Box 607
Columbus, North Carolina 28722
(828) 894-8241
email [email protected]
Pacific and Mountain Time Zones:
KANGAROO NEVADA COMPANY
1012 Mallory Way, Box 1449
Carson City, Nevada 89702
(775) 883-6212
email [email protected]
INSTRUCTIONS ON REPORTING
SHIPPING DAMAGE

If you’re online, be sure to visit our Owners CyberClub. It’s a secure site designed
specially for Kangaroo Owners, and you’ll need a password to enter. To sign up, point your
browser to http://www.kangaroogolf.com/welcome.htm
You’ll find additional technical information, parts lists, and maintenance advice in the
CyberClub. Best of all, it’s available for you 24 hours a day. You can order many parts
securely via the Web. Because of the extensive information available through the Owners
CyberClub, we suggest you check there first to answer questions about your motorcaddie.

The control cable plug aligns with the receptacle by a lug and corresponding notch arrangement. Always
handle the plug when connecting or disconnecting the control cable. Pulling on the wire can cause damage.
Also, keep the plug and receptacle clean.
CABLE PLUG AND RECEPTACLE
HILLCREST ASSEMBLY
FRONT WHEEL ALIGNMENT: Each Hillcrest motorcaddie is precisely aligned to run
straight during final testing. Rough shipping or hard use can sometimes cause misalignment of
the front wheel. If you experience directional problems, first test your Hillcrest on level
pavement while experimenting with different weight distributions in your golf bag. If the
problem appears to be in the front wheel alignment, correction can be made by loosening the
screws at the ends of the front axle and repositioning wheel and axle in the slotted screw holes.
The slot on the left is horizontal and on the right is vertical (direction as viewed from behind
Hillcrest). Adjust left side first. Try Hillcrest. If more adjustment is required, do the right
side. Re-tighten securely.
1. While using the battery tray hand-hold to steady the chassis, guide the lower front wheel tubing
into the receptacle in the chassis as shown on opposite page. Secure the draw-latch.
(See draw-latch details next page.)
2. Insert the upper handle tubing into the chassis, as shown, and secure the draw-latch.
NOTE: At this, or some previous point in assembling your caddie for use, establish the habit of
making sure the control switches are in the “OFF” position before the battery cables are
connected.
3. Study the control cable plug and receptacle diagram below. Connect the cable plug.
4. Set the battery into the battery tray and connect the battery cables. The red cable clips to the
red (+) terminal and the black cable connects to the plain (-) terminal. If the cables are accidentally
reversed, your Hillcrest will not respond until the polarity is corrected. The Hillcrest is equipped
with reverse polarity protection.
5. The upper bag support is designed to fold up for transport and storage ease. Pull it down on its
stop rest and the Hillcrest is ready for your golf bag. Opening of upper bag support yoke can be
adjusted to grip your golf bag by grabbing ends of yoke and bending it more open or closed, as
needed.
This yoke is attached to the upper handle tubing at the best position to hold most golf bags
securely. If you have an unusual bag, or a personal preference for its position, the yoke can be
moved up or down the tubing to any point you like. The clamp is secured with four 5/32" allen-type
machine screws and a suitable wrench is provided with your Hillcrest. Re-tighten securely. Your
Hillcrest comes with an assortment of allen-type wrenches. They are provided for adjusting the
upper bag yoke, keeping screws tight, and for adding accessories.
DRAWLATCH OPERATION
HILLCREST ASSEMBLY

CONTROL DESCRIPTION
Normal Operation:
1. Check desired speed setting.
2. Turn ON-OFF switch to OFF. You can vary the speed control to suit your own pace.
3. To stop, turn ON-OFF switch to OFF. There’s no need to change the speed control when stopping and re-starting.
The speed control has a very wide range and can operate down to very slow speed, so be sure that the switch is OFF
when the motorcaddie is stopped.
Note: If you choose to stop the Hillcrest by turning the speed control to slow without activating on/off switch, it is
normal for the power to shut off after a given time.
Distance Control Operation:
With all controls off:
1. Set white line on speed control wheel to “Distance” mark. (You MUST do this to obtain consistent results.) (Ref.
Photo)
2. Estimate distance and set distance knob to appropriate mark. Each mark approximately 10 yards, counting from the
left. All measurements are APPROXIMATE.
3. Turn ON-OFF switch and distance control to OFF. (Note that the distance control has an audible “click”, ON and
OFF.) Your Hillcrest is now ready for normal operation, or, if desired, repeat distance operation.
Overcurrent Protection:
An electric motor draws current to meet the load placed on it. If the load is too great, there is danger that excess
current will be drawn, damaging controls, wiring or the motor itself. An example of this could be a motorcaddie stopped
by shrubs or trees, unable to roll, with the power still on.
Your Hillcrest is equipped with an overcurrent protection circuit. It will turn itself off in any circumstance that causes
current draw to approach the danger level, 45 amperes.
In this even, reset your Hillcrest by turning it OFF, manually, at the ON-OFF switch. After you have corrected the
problem, cleared the obstacle, etc. turn your Hillcrest back ON and continue normal operation.
Runaway and Circuitry Protection:
The Hillcrest will shut itself off if left switched ON for an excessive period of time (about 4-1/2 minutes). The reason
for this is to shut it off in a possible runaway situation. It also allows the solid state circuitry a cool-down period. To
avoid activation of this safeguard, it is recommended that the ON-OFF switch be switched OFF each time you stop.
Merely turning the speed way down will not reset this internal timer and will cause the Hillcrest to unexpectedly shut off.
Turn the ON-OFF switch to OFF and then back to ON to restart the Hillcrest if it shuts itself off, no harm done.
- 4 -
Control Layout Speed setting shown at “distance”
mark for distance control use.
Speed Control
Thumb Wheel
Distance Control
on-off
Switch

Graphics for Pinned on Wheels

Hillcrest Wheel Removal
The wheels on your Hillcrest are designed to be easily removed and replaced. Each wheel is held in place on
the end of the axle by a spring-loaded retaining tab located on the inner side of the wheel. This retaining tab
fits into a groove formed on the axle by the space between the drive hub and a circular clip installed on the
axle. (See Fig. 3)
To install wheel onto axle, pull the wheel Release Tab (See Fig. 2) on inside of wheel outward, toward the tire
on the wheel, and HOLD it in that position. This may be best done by placing the palm of your hand against
the tread of the tire and placing your index or middle finger tips under the Release Tab, your fingers extending
down the inner side of the tire, and then pulling outward with your fingers. While holding Tab in the
RELEASED position (pulled), place the wheel onto the end of the axle, taking particular care to engage
Drive Pins (Figs. 1 & 3) into the Drive Pin Holes (Figs. 1 & 2). It will probably be necessary to rotate the
wheel on the axle until pins and holes line up. When the wheel is on axle, up against the hub, with drive pins
engaged, RELEASE the Release Tab. This will allow the Locking Tab (Fig. 2) to seat into the Drive Groove
(Fig. 3). The wheel should now be securely mounted on the axle. Pull wheel outward on the axle to be sure
locking device is properly engaged. Wheel should NOT slide off of axle.
IMPORTANT WARNING: NEVER tow your Hillcrest backwards. Any damage resulting from towing the
Hillcrest is NOT covered by your warranty.
To REMOVE wheels, pull Release Tab outward toward tire and slide wheel off of axle.
Drive wheels may be used on either side of the Hillcrest. There is no left or right.
FREE-WHEELING FUNCTION
The drive wheels on the Hillcrest freewheel in the forward direction. When the Hillcrest is being pushed
foward, the drive wheels will turn freely. This means that the wheels will turn freely without the axle or
motor/gearbox/differential turning or their accompanying resistance. This may be used for moving the
Hillcrest when not under its own power. This Hillcrest has NO free-wheeling provision in the reverse
direction. DO NOT TOW this Hillcrest backwards!!
BRAKING FOR STEEP DOWNHILLS
Turn your Hillcrest around backwards with the power switch OFF. Let it follow you backwards down a steep
hill, as you guide it. The gear drive ratio provides resistance for braking when occasionally needed. Should
the operator require braking more than just occasionally, he should consider the optional friction-type hand-
operated hill brake or even the Hillcrest AB with AutoBrake model motorcaddie.

IMPORTANT WARNING: NEVER tow your Hillcrest. Any damage due to failure to observe this warning is NOT covered
by your Warranty.
Graphics for Quick
Remove Wheels

Technical Specifications
Motor: High torque, 2-pole armature/permanent magnet, 12-volt DC.
Drive Train: Double reduction, sealed maintenance-free self- lubricating gear drive with differential and
direct-drive hubs.
Controls: All solid-state motor control, 45 amp capacity, all circuitry under overcurrent and reverse
polarity protection. Oscillator-controlled timer mode.
Battery: 31 amp-hour, thick grid deep cycle type, sealed unit, no maintenance. Size 5-1/2" x 7 1/2" x 6 1/
2". Weight: 24 lbs./10.9kg.
Charger: Solid-state electronic, automatic tapered cycle. Input: 110-120 volt AC. Output: 6 amp 14.6 volt
DC. All circuitry under overcurrent and reverse polarity protection.
WEIGHTS AND DIMENSIONS
Handle Assembly:.................................9 lbs./4 kg
Front Assembly:...................................5-1/2 lbs./2.5 kg
Chassis & Wheels Assembly:............27 lbs./12.3 kg
Total Assemble Weight:......................41-1/2 lbs./19.kg
Handle Assembly Length:..................41.25 inches/105.7 cm (straight line)
Tire Width: (drive wheels)....................4 inches/10.2 cm
(front wheel)................... 3 inches/7.7 cm
Wheel & Tire Diameter: (drive wheels)......................10 inches/25.4 cm
(front wheel)..........................6 inches/15.3 cm
Chassis & Wheels Assembly Width:..........................30 inches/77.2 cm
Assembled Caddie Length:............................................51.5 inches/130.8 cm
Assembled Caddie Height: (at grip)............................37 inches/93.7 cm
Turf Compression At Each Wheel
(With battery and loaded with 30 pound bag)
Pounds per square inch: Front: 2.5 Left: 4.3 Right: 4.7
Comparison: Average man’s tread, (165 lbs., size 10 shoe): 5.4
HillcrHillcr
HillcrHillcr
Hillcrestest
estest
est

OWNER MAINTENANCE
Don’t oil it!
The Hillcrest motorcaddie has been designed and manufactured to be essentially maintenance free.
The drive assemblies need no adjustment and are self-lubricating. The control system is well de-
signed, with quality parts and full protection circuitry. There are no user serviceable components.
Your Hillcrest will give you miles and years of service and good looks with minimum maintenance. If
you discover a problem with your Hillcrest, see the Warranty and Service Procedure below.
Keep it clean!
The only type of owner maintenance required for the Hillcrest is to keep it clean. Use soap or mild
detergent and water, rinse with clean water. You can let your Hillcrest dry in the sun, but the stainless
steel tubing should be wiped dry for the best luster. Never use an abrasive cleaner. You MUST be
sure that the handle plug is inserted into its receptacle in the chassis to prevent entry of water into
control system.
For good looks...
It is a good idea to use a quality automotive wax on the stainless steel to prevent fingerprints and
smudges from showing up. Although the Hillcrest tires are made of a compound that is unaffected by
conditions that deteriorate ordinary rubber compounds, you may use a cleaner/preservative such as
Armorall, or a similar product, to keep a like-new appearance.
WARRANTY AND SERVICE PROCEDURE
In creating the Hillcrest motorcaddie, we began with our own considerable wealth of ideas and
experience accumulated over many years of motorcaddie design and production. We joined forces
with the best industrial design team we could find. Everyone involved put an incredible amount of
thought and research into technologies, materials and components. And we secured first rate
suppliers, leaders in their own right.
If, in spite of all our care, you have a problem with your Hillcrest, have a mishap or, in years ahead,
require some type of service, please follow this procedure:
1. Print or type a note describing the problem. Be sure that your name and address are enclosed and
double-check it for accuracy and legibility, please. If you have a seasonal second address, please
make us aware of that address as well. Always include a daytime telephone number.
Your Hillcrest carries a one-year warranty on parts and labor. Repair work done under warranty
remains under the original warranty. Any out-of-warranty service is warranted for 60 days. If the
service is not under warranty, please specify whether you’d like us to bill you or bill to your Visa,
MasterCard or Discover, including all account numbers and the expiration date of your card.
2. Pack your motorcaddie in the original carton or a sturdy substitute container. Enclosed your
descriptive note with name, address, phone number and billing instructions, if appropriate. It is a
good idea to make a copy of the note and send it to us through regular mail so that we can anticipate
your motorcaddie’s return.
3. Send your motorcaddie by United Parcel Service or Parcel Post. See the section inside the front
cover of this manual for the proper Kangaroo service address for your particular locale. We’ll
correct any problem immediately, in most cases reshipping your motorcaddie to you within 48 hours
of our receipt of it.
Thank you for choosing the Hillcrest motorcaddie. We wish you many happy rounds of golf!

WARRANTY
KANGAROO PRODUCTS CO. LIMITED WARRANTIES
Your KANGAROO MOTORCADDIE is manufactured to rigorously upheld specifications
necesary for this type of product in order to provide dependable service to the golfer. It
incorporates years of research and development involving construction and evaluation of countless
prototypes.
The KANGAROO “HILLCREST” model is guaranteed to the original purchaser against
defective materials and workmanship for a period of one year from the date of purchase,
providing a signed and dated WARRANTY CARD is sent to KANGAROO PRODUCTS CO..
within 15 days of the date of purchase.
The company will repair or replace, at its option, free of charge, any motorcaddie or part thereof
found to be defective when returned to the factory for inspection (shipping charges are the
responsibility of the customer). Written confirmation or request for repairs or replacement must
accompany all returned merchandise.
IMPORTANT: Damage or failure due to accident, abuse, misuse or neglect is specifically
excluded under this warranty.
The battery purchased through KANGAROO PRODUCTS CO. for use on the KANGAROO
MOTORCADDIE is guaranteed on a pro-rata basis (credit is allowed for the unused period of
the warranty) for a period of 12 months from the date of purchase when proper battery
maintenance procedures are followed. You must read and understand the Battery Instructions
included with the battery.
The battery charger purchased through KANGAROO PRODUCTS CO. for use on the
KANGAROO MOTORCADDIE is guaranteed by the manufacturer to be free from defects in
materials and/or workmanship for a period of 12 months. Defective chargers should be returned
to KANGAROO PRODUCTS CO. for repair/or replacement under warranty.
NOTE: This warranty is not valid for sales or usage outside the United States of Amerca.
This guarantee is in lieu of all other guarantees, expressed or implied, and we cannot authorize any
person to assume for us any other obligation or liability in connection with the sale of this product.
Features and manufacturer’s specifications are subject to change without notice.
This product is manufactured for use solely as a golf bag carrier on golf courses. Other
use voids the warranty and releases manufacturer and its sales agents from liability.
Table of contents
Other Kangaroo Golf Trolley manuals