KAP Trader MB NTG 5.5 User manual

- MODEL : MB NTG 5.5
MB NTG 5.5 Installation Manual
- DATE : 2017.04.10

External connector
a b c d e
f g h i j
a Power/CAN Cable f HDMI Input
b Uart for UPAD g HDMI Power 5V
c K-Pad h NAVI Input
d AV Cable i LVDS Out
e Dip Switch j LVDS In

Connector Pin Assignment
123 4 5 6 7 8 9 10
1 BATTERY
2 GROUND
3 POWER OUTPUT
4 N.C.
5 MON CAN HIGH
6 MON CAN LOW
7 IR - APPLE TV
8 IR - AUX BOARD
9 PAS CAN HIGH
10 PAS CAN LOW
※POWER & CAN
1
23
45
67
89
1011
1213
1415
1617
1819
2021
22
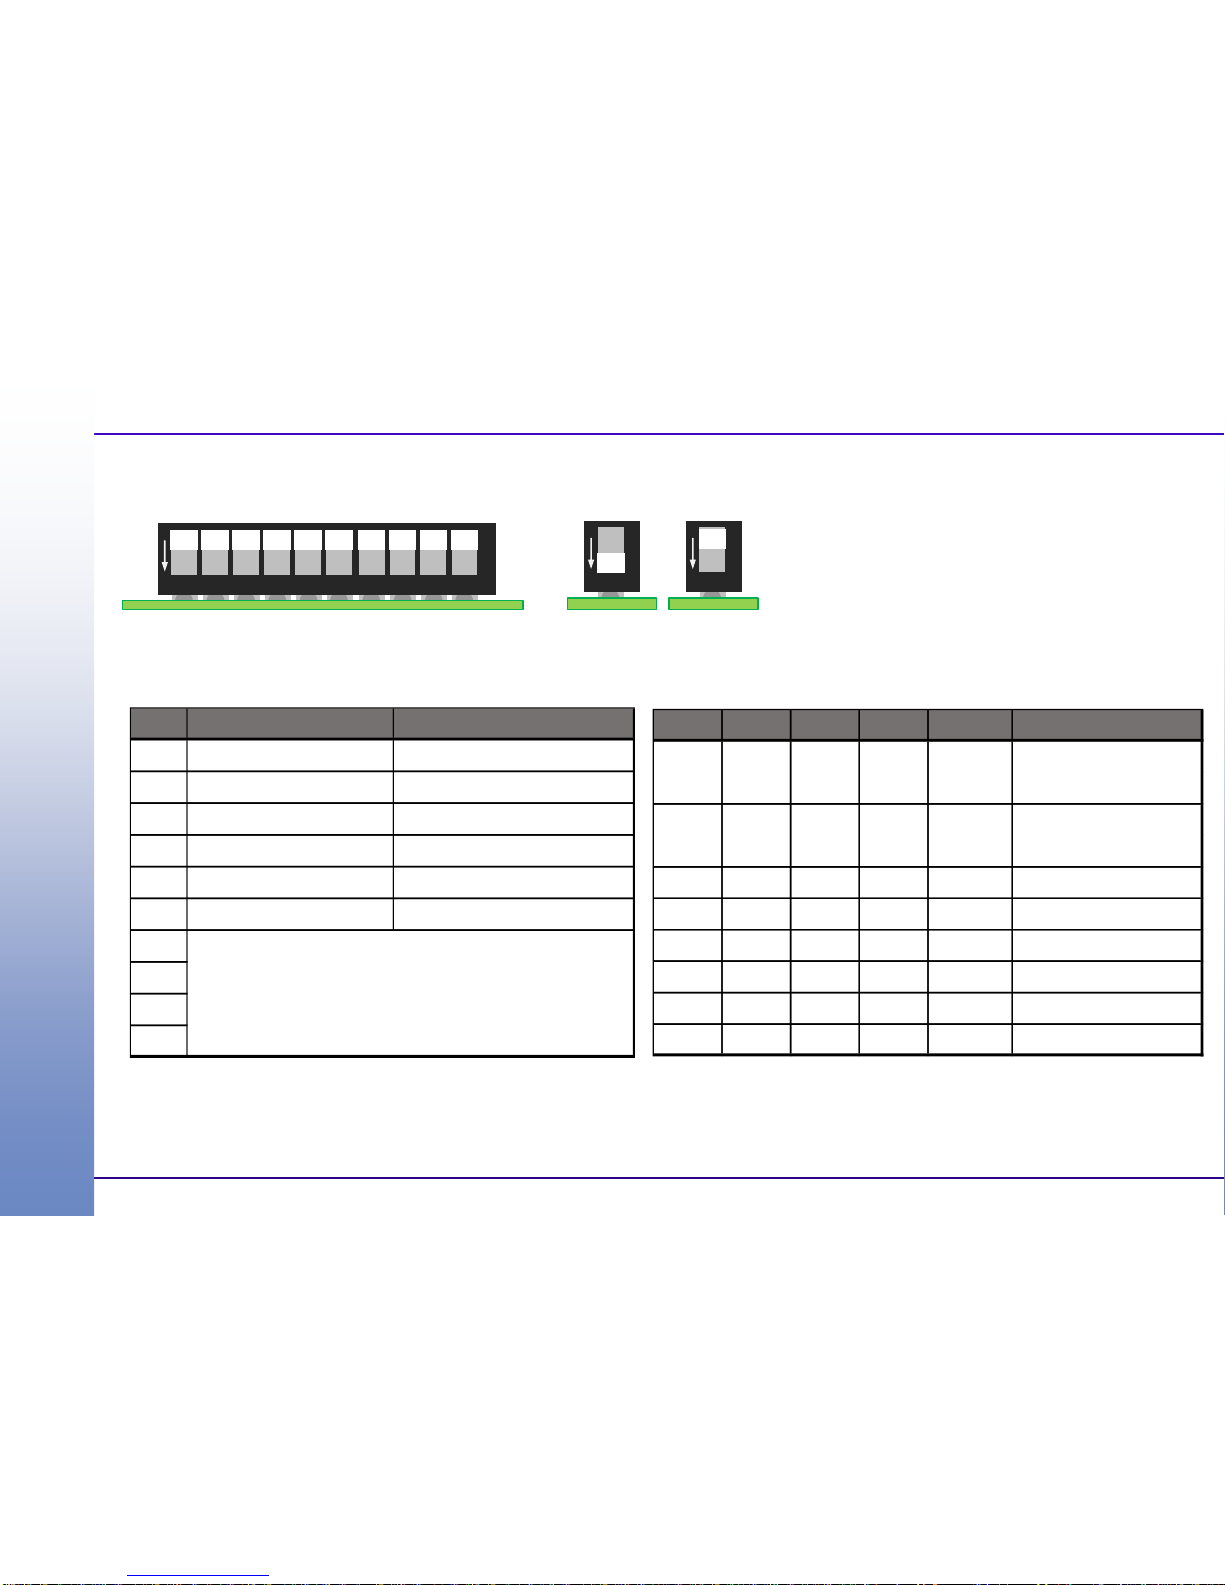
1 REAR CAM VIDEO INPUT 2 GND (REAR CAM VIDEO)
3 REAR CAM POWER OUTPUT 4 GND (REAR CAM POWER)
5 IR - DVB-T 6 N.C.
7 NAVI AUDIO IN R 8 GND (NAVI AUDIO IN R)
9 NAVI AUDIO IN L 10 GND (NAVI AUDIO IN L)
11 AUDIO OUT R 12 GND (AUDIO OUT R)
13 AUDIO OUT L 14 GND (AUDIO OUT L)
15 FRONT VIDEO INPUT 16 GND (FRONT VIDEO)
17 AV VIDEO INPUT 18 GND (AV VIDEO)
19 AV AUDIO INPUT R 20 GND ( AV AUDIO INPUT R )
21 AV AUDIO INPUT L 22 GND ( AV AUDIO INPUT L )
※AV IN / OUT

Components
MB NTG 5.5 Quad Lock Cable AV Cable LVDS Cable(IN) LVDS Cable(OUT) FAKRA Connector
?
Audio-X U-PAD USB Cable UART Cable Stereo Cable K-Pad
(AUX AMP) AA Type
?
ExtensionCable For Amp
BURMESTER IN/OUT ExtensionCable for BURMESTER

Navigation & HDMI Connection Diagram
IR for APPLE TV
12V OUT
TS9003-40P-21-4
AMP IN
AMP IN
AMP OUT
NAVI
Audio Out
USB
USB
HDMI
HDMI
Navi Audio In
Aux Out
HDMI
HDMI
HDMI

Audio-X (AUX AMP) Diagram for Burmester
To Interface
KSP22H
AMP INPUT
AMP OUTPUT
DIP SW
3.5Φ
POWER
EXTENSION CABLE
RR+
RR-
FR+
FR-
FL+
FL-
RL+
RL-
BURMESTER IN RR+
RR-
FR+
FR-
FL+
FL-
RL+
RL-
BURMESTER OUT
3
2
3
1
3
0
2
9
2
8
2
7
2
6
2
5
2
4
2
3
1
0
9876
2
2
2
1
2
0
1
9
1
8
543
1
7
1
6
1
5
21
1
4
1
3
1
2
1
1
Pin. Color
8
Green/Black RR+
20 Blue RR-
5
Green/Black FR+
17 Green FR-
14
Blue/Black FL+
13 Blue FL-
7
Pink/Black RL+
19 Gray RL-
OEM Con.
Speaker
※ Get out MOST Cable from Connector of OEM
※ Insert MOST Cable to Quad Lock Cable supplied
Connector of OEM
MOST Cable of OEM
Quad Lock Cable supplied
Color Description
RED RR+
WHITE RR-
PURPLE FR+
GREEN FR-
BLACK FL+
YELLOW FL-
BROWN RL+
BLUE RL-
To U-PAD

After Assembly for Burmester
AMP IN
AMP
OUT
After Assembly
RR-RR+ RR+ RR-
AMP IN AMP
OUT
Rear Right Speaker
RL+RL-RL-RL
+
AMP IN AMP
OUT
Rear Left Speaker
FL+FL-FL- FL+
AMP IN AMP
OUT
Front Left Speaker
FR-FR+ FR- FR+
AMP IN AMP
OUT
Front Right Speaker

Use to tweezers to remove the violet cap from ivory connector.
Gently lift the lock to remove “A” cable.
Insert the LVDS cable supplied to connector of OEM.
AA
Insert the LVDS cable of OEM to FAKRAconnector supplied.
Connect the cable to the interface.
How to connect the LVDS cable to Interface 12.3-inch

Use to tweezers to remove the violet cap from blue connector.
Gently lift the lock to remove “A” cable.
Insert the LVDS cable supplied to connector of OEM.
A
Insert the LVDS cable of OEM to FAKRAconnector supplied.
Connect the cable to the interface.
How to connect the LVDS cable to Interface 8.4-inch
AA

Dip Switch Information
ON OFF
Pin No. ON OFF
1 HDMI Mode Skip HDMI Mode
2 Navigation Mode Skip Navigation Mode
3 External Rear View Camera Original Rear View Camera
4 External Front View Camera Skip External Front View Camera
5 AV2 Mode Skip AV2 Mode
6 CAN Mute function ON CAN Mute function OFF
7
8
9
10
Selection of Car Model
ON1 2 3 4 5 6 7 8 9 10
No. 6 No. 7 No. 8 No. 9 No. 10 Car Model
E-Class ( W213 )
( 8.4-inch screen )
OFF
OFF
OFF
ON
ON
E-Class ( W213 )
( 12.3-inch screen )
OFF
OFF
OFF
OFF
OFF
1 1

1
2
3
Button Function Operation
Press the button for 2 seconds HDMI -> NAVI -> FRONT -> AV -> OEM
Press the buton 2 times OEM -> NAVI
Press the buton 3 times OEM -> FRONT
Press the buton 4 times OEM -> AV
2 Press the button for 2 seconds OEM -> FRONT
Push up for 2 seconds Change screen mode
Push down for 2 seconds Aux Mode On Off
4 Move Wheel Change volume on Aux mode
5 Press the button up, down, left, right Control Remote on AppleTv, DVB-T
1
3
Activation by Original buttons 12.3-inch
45

Button Function Operation
Press the button for 2 seconds HDMI -> NAVI -> FRONT -> AV -> OEM
Press the buton 2 times OEM -> NAVI
Press the buton 3 times OEM -> FRONT
Press the buton 4 times OEM -> AV
2 Press the button for 2 seconds OEM -> FRONT
3 Push down for 2 seconds Aux Mode On Off
4 Move Wheel Change volume on Aux mode
5 Press the button up, down, left, right Control Remote on AppleTv, DVB-T
1
Activation by Original buttons 8.4-inch
12
3
45

Screen Mode (All mode) only 12.3-inch
※3 screen mode
Wheel move up 2 second
< Normal Mode > < Original Size Mode > < Full Screen Mode >

APPLE TV2 Connection Diagram
MOLEX MOLEX
POWER/CAN MODE RGB IN AV IN/OUT DIP SWITCH
LVDS OUT
HDMI IN 5V USB
POWER NAVI IN UART I/F LVDS IN
MB NTG 5.5
MultimediaInterface
Open the cover of Apple TV 2.
There is IR on the back of “A”.
A
1234
1DO NOT USE.
2 IR - APPLE TV2
3DO NOT USE.
4 GROUND
123 4 5 6 7 8 9 10 1234
HDMI
HDMI
※Change the HDMI mode to Apple TV in settings menu

APPLE TV2 Control
※Control APPLE TV2 by Touch command Wheel
Selection move
(up/down/right/left) Enter

DVB-T Connection Diagram for HDMI
MOLEX MOLEX
POWER/CAN MODE RGB IN AV IN/OUT DIP SWITCH
LVDS OUT
HDMI IN 5V USB
POWER NAVI IN UART I/F LVDS IN
MB NTG 5.5
MultimediaInterface
Open the cover of DVB-T2.
There is IR on the “A”.
A
1
23
4
1 IR - DVB-T2
2DO NOT USE.
3DO NOT USE.
4 GROUND
HDMI
1
23
4
1
23
45
67
89
1011
1213
1415
1617
1819
2021
22
HDMI 1 2
3 4
※Change the HDMI mode to DVB-T in settings menu

DVB-T Control
※Control DVB-T by Touch command Wheel
Selection move
(up/down/right/left) Enter

POP UP Control Menu (HDMI / AV mode)
Wheel move to up/down/right/left
or Enter, Control menu will pop up.

Click
Touch two times Scroll
Slide two fingers up or down
the touch pad to scroll
Drag
Touch two time and sliding
How to use U-Pad
cursor

How to use AUDIO-X (AUX AMP) BOARD
Push the button down
for 2 second.
Turn the dial
to adjust the volume.
Table of contents