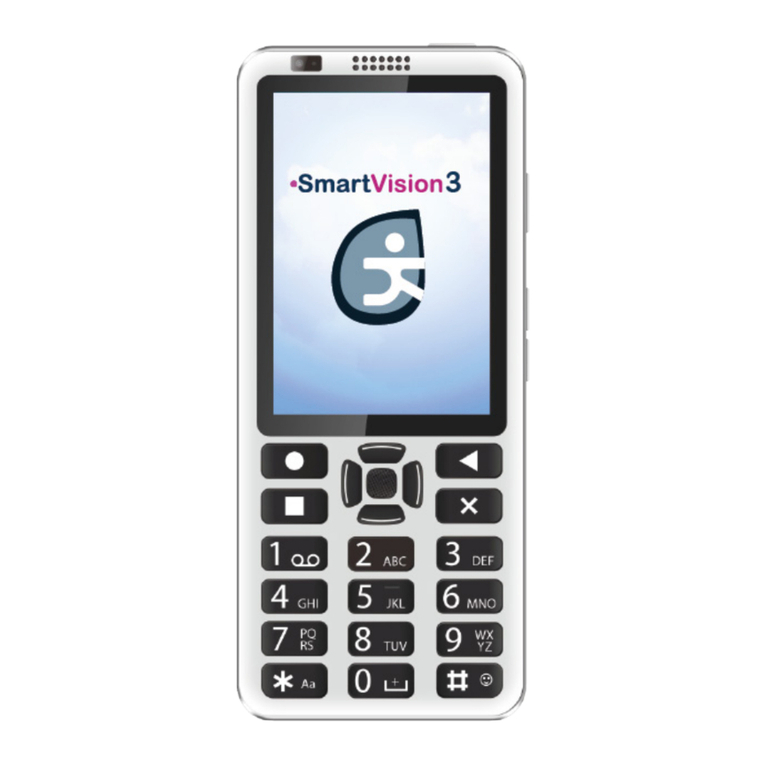
Kapsys SmartVision3 User manual

SmartVision3 - User Manual Page 1 on 52
SmartVision3 User Manual (10323)
Contents
SmartVision3 User Manual...........................................................................................................1
Read before first use....................................................................................................................8
How to read this document...........................................................................................................8
Box content ..................................................................................................................................8
Product Description......................................................................................................................9
Front face..................................................................................................................................9
Upper side ................................................................................................................................9
Right side..................................................................................................................................9
Lower side ................................................................................................................................9
Left side....................................................................................................................................9
Back side..................................................................................................................................9
Activation....................................................................................................................................10
Introduction.............................................................................................................................10
Open the SIM tray...................................................................................................................10
Charging the battery ...............................................................................................................10
Wired charging........................................................................................................................11
Wireless charging ...................................................................................................................11
Switch the phone on / off ........................................................................................................11
Restart the phone...................................................................................................................12
Standby mode.........................................................................................................................12
Quick setting at launch............................................................................................................12
Unlocking the SIM card PIN code...........................................................................................12
Getting started............................................................................................................................12
Navigate the phone with the keypad.......................................................................................12
Navigate the phone with the touchscreen...............................................................................13
Change phone volume............................................................................................................14
Write with the phone...............................................................................................................14
Write with voice recognition....................................................................................................15
Delete text...............................................................................................................................15
Edit text...................................................................................................................................15
Keyboard shortcuts.................................................................................................................15
Accessibility................................................................................................................................17
Introduction.............................................................................................................................17
Talkback Accessibility.............................................................................................................17
Kapsys Accessibility................................................................................................................18

SmartVision3 - User Manual Page 2 on 52
Notification shade.......................................................................................................................18
Introduction.............................................................................................................................18
Consult a notification...............................................................................................................18
Delete a notification ................................................................................................................18
Manage notifications...............................................................................................................18
Quick Settings............................................................................................................................18
Introduction.............................................................................................................................18
Recent Apps...............................................................................................................................19
Introduction.............................................................................................................................19
Open a recently used app.......................................................................................................19
Close a recently used app ......................................................................................................19
Home screen..............................................................................................................................19
Introduction.............................................................................................................................19
Add an app to the home screen..............................................................................................20
Remove an app from the home screen...................................................................................20
Move an app to the home screen ...........................................................................................20
Quick access ..........................................................................................................................20
Apps...........................................................................................................................................20
Introduction.............................................................................................................................20
Open an app...........................................................................................................................20
Find an app.............................................................................................................................20
Download an app....................................................................................................................20
Delete an app .........................................................................................................................20
Set app permissions ...............................................................................................................21
Agenda.......................................................................................................................................21
Introduction.............................................................................................................................21
Add an event...........................................................................................................................21
Stop an event alarm................................................................................................................21
Edit an event...........................................................................................................................22
Delete an event.......................................................................................................................22
Delete all events .....................................................................................................................22
Search for an event ................................................................................................................22
Assistant.....................................................................................................................................22
Banknote recognizer ..................................................................................................................22
Introduction.............................................................................................................................22
Updating data .........................................................................................................................23
Identify a banknote .................................................................................................................23
Book reader................................................................................................................................23
Introduction.............................................................................................................................23

SmartVision3 - User Manual Page 3 on 52
Import documents...................................................................................................................23
Main screen............................................................................................................................23
Read a document ...................................................................................................................23
Delete a document..................................................................................................................24
Add a document in the list of favorites....................................................................................24
Remove a document from the favorites list.............................................................................24
Create a new Daisy book........................................................................................................24
Add a recording to a preexisting audiobook............................................................................25
Calculator...................................................................................................................................25
Introduction.............................................................................................................................25
Perform a calculation..............................................................................................................25
Calendar.....................................................................................................................................25
Introduction.............................................................................................................................25
Camera.......................................................................................................................................25
Introduction.............................................................................................................................25
To take a picture.....................................................................................................................25
Take a video...........................................................................................................................25
Chrome.......................................................................................................................................25
Introduction.............................................................................................................................25
Clock ..........................................................................................................................................26
Introduction.............................................................................................................................26
Add an alarm ..........................................................................................................................26
Stop an alarm .........................................................................................................................26
Edit an alarm...........................................................................................................................26
Activate / Deactivate an alarm................................................................................................26
Delete an alarm ......................................................................................................................26
Color detector.............................................................................................................................26
Introduction.............................................................................................................................26
Announce colors.....................................................................................................................26
Find a color.............................................................................................................................26
Contacts.....................................................................................................................................26
Introduction.............................................................................................................................27
Import your contacts ...............................................................................................................27
Create contact ........................................................................................................................27
Edit a contact..........................................................................................................................27
Delete contact.........................................................................................................................27
Delete all contacts ..................................................................................................................27
Find a contact.........................................................................................................................27
Add a Favorite Contact...........................................................................................................27

SmartVision3 - User Manual Page 4 on 52
Call a contact..........................................................................................................................27
Send a message to a contact .................................................................................................27
Share a contact.......................................................................................................................28
Export your contacts...............................................................................................................28
Drive...........................................................................................................................................28
Introduction.............................................................................................................................28
Duo.............................................................................................................................................28
Introduction.............................................................................................................................28
Files............................................................................................................................................28
Introduction.............................................................................................................................28
FM radio.....................................................................................................................................28
Introduction.............................................................................................................................28
Listen to the radio ...................................................................................................................28
Gmail..........................................................................................................................................29
Introduction.............................................................................................................................29
Configure your account...........................................................................................................29
Read an email.........................................................................................................................29
Open an attachment from an email.........................................................................................29
Write an email.........................................................................................................................29
Reply to an email....................................................................................................................29
Delete an email.......................................................................................................................29
Gmail..........................................................................................................................................29
Introduction.............................................................................................................................29
Configure your account...........................................................................................................29
Read an email.........................................................................................................................30
Open an attachment from an email.........................................................................................30
Write an email.........................................................................................................................30
Reply to an email....................................................................................................................30
Delete an email.......................................................................................................................30
Google........................................................................................................................................30
Introduction.............................................................................................................................30
Google TV..................................................................................................................................30
Introduction.............................................................................................................................30
Kapten........................................................................................................................................30
Introduction.............................................................................................................................30
Disclaimer...............................................................................................................................30
Map download ........................................................................................................................31
Navigation modes...................................................................................................................31
Pedestrian and car navigation ................................................................................................31

SmartVision3 - User Manual Page 5 on 52
During navigation....................................................................................................................32
Direct guidance.......................................................................................................................33
Map discovery.........................................................................................................................33
Pedestrian track......................................................................................................................34
Manage K-Tags......................................................................................................................34
Free navigation.......................................................................................................................35
Parameters.............................................................................................................................35
Light detection............................................................................................................................37
Introduction.............................................................................................................................37
Detect a light...........................................................................................................................37
Lookout.......................................................................................................................................37
Introduction.............................................................................................................................37
Magnifier.....................................................................................................................................37
Introduction.............................................................................................................................37
Enlarge text.............................................................................................................................37
Maps ..........................................................................................................................................37
Introduction.............................................................................................................................37
Messages...................................................................................................................................37
Introduction.............................................................................................................................37
Send a new message .............................................................................................................37
Read and reply to a message.................................................................................................38
Forward a message................................................................................................................38
Delete a message from a chat................................................................................................38
Delete a chat...........................................................................................................................38
NFC............................................................................................................................................38
Introduction.............................................................................................................................38
Write an NFC tag....................................................................................................................38
Read an NFC tag....................................................................................................................39
Note............................................................................................................................................39
Introduction.............................................................................................................................39
Create note.............................................................................................................................39
Read a note............................................................................................................................39
Edit a note...............................................................................................................................40
Delete a note ..........................................................................................................................40
Delete all notes.......................................................................................................................40
Search for a note ....................................................................................................................40
Photos........................................................................................................................................40
Introduction.............................................................................................................................40
Play store ...................................................................................................................................40

SmartVision3 - User Manual Page 6 on 52
Introduction.............................................................................................................................40
Quick Support.............................................................................................................................40
S.O.S..........................................................................................................................................40
Introduction.............................................................................................................................40
Activate/Deactivate the SOS function.....................................................................................40
Setting the SOS function.........................................................................................................41
Settings ......................................................................................................................................41
Introduction.............................................................................................................................41
Description of categories ........................................................................................................41
Connect to Wi-Fi.....................................................................................................................42
Connect a Bluetooth device....................................................................................................42
Activate the fingerprint sensor ................................................................................................42
Update the system..................................................................................................................43
Sound recorder...........................................................................................................................43
Introduction.............................................................................................................................43
Record a voice memo.............................................................................................................43
Play a voice memo .................................................................................................................43
Rename a voice memo...........................................................................................................43
Delete a voice memo..............................................................................................................43
Telephone ..................................................................................................................................44
Introduction.............................................................................................................................44
Pick up a call...........................................................................................................................44
Hang up a call.........................................................................................................................44
Reject a call............................................................................................................................44
Make a call..............................................................................................................................44
In-Call Options........................................................................................................................45
Web radio...................................................................................................................................45
Introduction.............................................................................................................................45
Listen to a radio......................................................................................................................45
Youtube......................................................................................................................................45
YouTube Music ..........................................................................................................................46
Technical specifications..............................................................................................................46
FAQ............................................................................................................................................46
Do I have to pay for software updates? ..................................................................................46
How do I know when an update is available?.........................................................................46
I can’t download the update, what should I do? ......................................................................47
How can I acquire the Kapten and Audiobook apps on my SmartVision3 Initium?.................47
My phone switches to standby mode too fast, can I change the delay before I go into standby
mode?.....................................................................................................................................47
SmartVision3 - User Manual Page 7 on 52
How do I get information about battery status, wireless network, date, and time and received
messages? .............................................................................................................................47
I can't enter text with the SmartVision3 keyboard ?................................................................47
Can I completely disable the touchscreen? ............................................................................47
How to increase the display size of the information displayed on the screen? .......................47
Does the voice command work without an Internet connection ?...........................................48
How can I transfer files (music, texts ...) in my SmartVision3 via my computer? ....................48
Is it possible to increase the memory of my SmartVision3?....................................................48
Can I connect a Bluetooth headset to the SmartVision2?.......................................................48
In case of problem......................................................................................................................48
Introduction.............................................................................................................................48
My phone does not turn on / I have a black screen: ...............................................................48
My phone turns itself off:.........................................................................................................48
My phone heats up during charge: .........................................................................................48
My phone heats up during use:...............................................................................................49
My phone has a low battery life: .............................................................................................49
My phone is not charging properly:.........................................................................................49
My phone is not connected to a network:................................................................................49
SIM card error / No phone feature can be accessed: .............................................................49
Unable to make or receive a call:............................................................................................49
I cannot access my voicemail.................................................................................................50
SmartVision3 asks me for a code when starting the phone....................................................50
I changed the Talkback settings and my phone no longer responds correctly........................50
Legal Notice and Warranty.........................................................................................................50
Use precautions and recommendations..................................................................................50
Safety and health....................................................................................................................51
Warranty.................................................................................................................................51
About specific energy absorption rate.....................................................................................52
Restrictions in 5GHz band......................................................................................................52
Customer service....................................................................................................................52
Trademarks.............................................................................................................................52

SmartVision3 - User Manual Page 8 on 52
Read before first use
Please read this manual carefully, so that you can use your SmartVision3 correctly and
safely.
The descriptions are based on the default settings of your SmartVision3.
Depending on your location, network operator or device software characteristics, some
contents may differ from your device.
High-quality contents requiring intensive usage of the processing unit and memory may
affect the overall performance of the device. Applications related to these contents may not
function properly depending on the device characteristics and conditions of use
KAPSYS cannot be held responsible for performance problems relating to third party
applications provided by providers other than KAPSYS.
A connection to a Wi-Fi or mobile network may be required to use certain applications or
functions.
Data services such as sending or receiving messages, downloading or uploading data,
automatic synchronization or the use of location services may incur additional charges,
depending on your operating network subscription. For large data transfers, it is
recommended to use the Wi-Fi.
The applications provided by default with this device may change or no longer be available
without notice.
The information published in this document is subject to change without notice. KAPSYS
reserves the right to modify the contents of this document without obligation to notify any
person or entity whatsoever. KAPSYS assumes no responsibility for technical or editorial
errors, omissions in this manual, or for any incidental or consequential damages resulting
from the performance or use of this document.
KAPSYS strives to continuously improve the quality and functionality of this product.
Consequently, KAPSYS encourages you to visit its website (www.kapsys.com) to obtain
the latest documentary updates concerning the use and operation of this product.
SmartVision3 meets all the legal CE requirements for residential or commercial use.
How to read this document
This user guide describes the main functions of the SmartVision3 in its OMNI version (version with
all the accessories and all the applications available). The description of the functions is generic,
and does not take into account the specificities of use related to the advanced accessibility mode.
This guide focuses on the functionalities developed by KAPSYS. Standard Android and Google
settings and applications will only be briefly described and it is up to the user to consult the user
manuals of third parties for more information.
Box content
SmartVision3 OMNI box contains:
- A 220v/110 Volts –5 Volts USB mains charger
- A USB Type-C cable
- A pair of stereo headphones with microphone
- Five NFC tags
- A SIM extraction tool
- A wireless charger (inductive charging)
- A protective shell
- A screen protector
- A choker
- A microfiber cloth to clean the screen (chamoisine)
- A quick start guide

SmartVision3 - User Manual Page 9 on 52
The list of accessories may vary depending on the country, configuration or product version.
Appearance and specifications of product and accessories are subject to change without notice.
Only use accessories approved by KAPSYS. The use of non-approved accessories may cause
performance problems, as well as malfunctions not covered by the warranty.
Product Description
Front face
The front of the SmartVision3 is separated into 2 distinct parts:
The 3.5 inch touch screen is present on the upper part of the phone. It allows to display the
content of the phone and to interact with it. At the top of this screen is the speaker for
communications and a 5 million pixel camera for video calls.
Below the touch screen is a real physical keyboard, which is divided into two distinct parts:
The first part is the navigation pad located below the touch screen. It is easy to identify thanks to
its joystick in the shape of a rounded square. Each side of the directional pad is in relief and allows
you to perform movement actions. In the rest of the document, we will use the terms: “Up”,
“Down”, “Left”, “Right” to mention the use of one of the sides of the directional pad. The central
key of the directional pad called OK validates the selected element. It is textured to be identified
easily.
To the left of the central joystick are the “Home” and “Menu” keys, respectively one above the
other.
To the right of the central joystick is the "Back" key and the "Delete" key, respectively one above
the other.
The second part of the physical keyboard is the alphanumeric keypad composed of 12 keys (4
lines of 3 keys)
1st line - keys 1, 2, 3
2nd line - keys 4, 5, 6
3rd line - keys 7, 8, 9
4th line - star, 0, pound keys.
To help with keys locations, an ergonomic raised dot is present on the 5 key.
The detailed description of the functions of the keys is available in the chapter "Getting started"
Upper side
At the left end from the upper side is the 3.5 audio jack for connecting headphones. To its right is
the On/Off button, which allows you to turn the phone on and off.
Right side
Starting from the top of the phone, the first button on the right edge is the voice command button.
It is textured to be identified easily. Just below are the Volume Plus and Volume Minus keys to
change the intensity of the phone's volume.
Lower side
At the left end is the USB type C connector for charging the SmartVision3. To its right is the
phone's microphone for communications and voice commands. To the right of the microphone is
the main speaker for listening to phone sound and voice synthesis.
Left side
On the upper part of the left side of the SmartVision3 is the SIM tray for inserting the SIM card and
the SD card via the SIM extraction tool.
Back side
At the top left of the rear face is the dual camera of 16 and 2 million pixels.
Below is the fingerprint sensor to unlock the phone and make secure payments.

SmartVision3 - User Manual Page 10 on 52
Activation
Introduction
SmartVision3 has a dual SIM / SD card connector. You can insert two SIM cards or an SD card
and a SIM card. You cannot have both the second Nano SIM card and the microSD card inserted
at the same time. SmartVision3 is only compatible with SIM cards in Nano SIM format. A modified
card that is thicker than the standard Nano SIM card will not fit properly on the tray and may
damage the SIM connector. The micro SD card is optional and is not supplied with the
SmartVision3. SmartVision3 supports SD cards up to 128 GB. We suggest you to have the
assistance of a sighted person for the insertion of the SIM card and the SD card.
Open the SIM tray
Lay the phone flat in front of you face up. Insert the tip of the SIM extraction tool supplied with your
phone into the SIM tray eject hole on the left side of the phone. Make sure the SIM extraction tool
is perpendicular to the hole. Otherwise, the device may be damaged. When inserting the SIM
extraction tool into the SIM tray eject hole, do not obstruct the tray to avoid damaging the eject
mechanism inside the slot. Push the tip all the way into the hole until the SIM tray pops out and
then pull it out.
The SIM tray has two compartments. The first compartment allows you to insert a SIM card or an
SD card. The second compartment allows you to insert only a SIM card.
Inserting a single SIM card: position the SIM card with the metal side down, the beveled
corner at the bottom right, in one of the two available compartments of the SIM tray. Then
gently reinsert the SIM tray all the way into the slot. When reinserting the SIM tray into the
phone, make sure it is oriented horizontally so that the SIM cards do not fall out. The tray
should be fully inserted and not protrude from the slot or fall out. If the card is not firmly
seated in its compartment, the SIM card may be ejected or fall out.
Inserting two SIM cards: position the first SIM card, metal side down, beveled corner at
the bottom right, in the first compartment of the SIM tray. Perform the same operation for
the second compartment of the SIM tray. Then gently reinsert the SIM tray all the way into
the slot. When reinserting the SIM tray into the phone, make sure it is oriented horizontally
so that the SIM cards do not fall out. The tray should be fully inserted and not protrude from
the slot or fall out.
Good to know: The order of the SIM cards in the tray does not matter. Configuration and
management of SIM cards is done via the phone's "Settings" application, "Network and Internet"
section.
Inserting an SD card and a SIM card: position the SD card in the first compartment of the
tray, metal side down, bevelled corner down. Then position the SIM card in the second
compartment of the tray, metal side down, the bevelled corner at the bottom right. Then
gently reinsert the SIM tray all the way into the slot. When reinserting the SIM tray into the
phone, make sure it is oriented horizontally so that the SD card and SIM card do not fall
out. The tray should be fully inserted and did not protrude from the slot.
Charging the battery
Charge the battery before using the device for the first time or when you have not used it for a
while. Only use a compatible charger and cable for your device. Using an incompatible charger
and cable may cause injury or damage your device.
Improperly connecting the adapter can cause serious damage to the unit. Damage resulting
from misuse is not covered by the warranty.

SmartVision3 - User Manual Page 11 on 52
Use only the USB Type-C cable supplied with this device. You risk damaging the device if
you use a micro-USB cable.
To save energy, unplug the charger when not in use. Since the charger does not have an
On/Off button, you must unplug it from the power outlet to turn off the power. The device
must remain close to the outlet while charging.
Good to know: The autonomy of the SmartVision3 depends on the use you make of it. The more
you use the device, the faster the battery will drain. You can optimize battery usage by adjusting
certain settings such as screen brightness, standby time, activating power saving mode, closing
apps running unnecessarily in the background or deactivating Bluetooth and Wi-Fi if you don't use
it.
Wired charging
To charge the battery, connect the USB Type-C cable between the SmartVision3 USB connector
and the mains charger. Then plug the AC charger into a wall outlet. When the battery is fully
charged, disconnect the charger from the device.
Wireless charging
SmartVision3 is compatible with wireless charging. You can therefore charge the battery using the
wireless charger provided with the OMNI pack. Connect the USB Type-C cable between the USB
connector of the wireless charger and the mains charger and then plug the mains charger into a
wall outlet. Place the back of the SmartVision3 in the center of the wireless charging station. When
the battery is fully charged, remove the device from the wireless charging dock.
Precautions for wireless charging:
If you do not observe the precautions below, the device may not charge properly or heat up, or it
may damage the device and its motherboards:
Do not place the device on the wireless charging dock with a credit card or Radio
Frequency Identification card (RFID) (travel card or access card) placed behind it.
Do not place the device on the wireless charging dock when conductive materials, such as
metal objects and magnets, are placed between the device and the wireless charging dock.
Battery charging tips and precautions:
If the battery is completely discharged, you will not be able to turn on the device, even if the
charger is plugged in. Charge the battery for a few minutes before turning on the device.
If you use multiple apps simultaneously, network apps, or apps that require a connection to
another device, the battery will drain quickly. To avoid losing power while transferring data,
always use these apps when the battery is fully charged.
If you use a power source other than the charger, such as a computer, the charging speed
may be slowed.
The device can be used while charging, but in this case it may take longer to fully charge
the battery
The device and charger may become warm while charging. When using the wireless or fast
charging feature, the device may feel warm to the touch. This has no effect on the life of the
device or its performance, and is completely normal. If the battery temperature becomes
too high, the charging speed may decrease or the charger may stop charging.
Switch the phone on / off
To turn on your SmartVision3, long press the On/Off button located on the upper edge. When the
device vibrates, release the button. If the product does not turn on, check that the battery has
been properly charged. To switch off the device, long press the On/Off button located on the upper
edge. Then select the item “Power” then “Power off”.

SmartVision3 - User Manual Page 12 on 52
Restart the phone
To restart the device, make a long press on the On/Off button located on the upper edge. Then
select on the screen the item “Power” then “Restart”. If your device freezes and becomes
unresponsive, press the power button for 10 seconds to automatically restart the phone.
Standby mode
When SmartVision3 is turn on, a short press on the On/Off button puts the product on standby or
wakes it up. In sleep mode, the screen is off and the keyboard is disabled, however the functions
remain active. You can still receive your calls, messages, emails etc.
Good to know: By default, the product goes to sleep automatically after one minute of inactivity to
save battery power.
Quick setting at launch
When you turn on the device for the first time or after performing a data reset, follow the on-screen
instructions to set it up.
Unlocking the SIM card PIN code
The SIM card is supplied with an identification code made up of 4 digits called a PIN. This code is
used to lock your SIM card against possible fraudulent use. To unlock the SIM card and access all
SmartVision3 functions, please enter the PIN code on the keypad, then press OK.
Getting started
Navigate the phone with the keypad
The keyboard mode is the main mode of the SmartVision3. It allows you, through short presses
and long presses on the keys of the physical keyboard, to navigate in the telephone and launch
certain functions. To familiarize yourself with the location of the keys, please refer to the “Product
Description” chapter. Below is the list of the different actions that can be performed by the physical
keyboard.
Navigation keys :
A short press on the Up key selects the previous item on the screen.
A short press of the Down key selects the next item on the screen.
A short press on the OK key is used to confirm your choice; it validates the item that is
selected. Validate an item generally displays a new screen or confirms an action.
A long press on the Up key selects the first item on the screen.
A long press on the Down key selects the last item on the screen.
A long press on the OK key opens the contextual menu of the selected item. This usually
displays additional options related to the selected item (Edit, Delete, Forward, Move, Share,
etc.).
The Talkback accessibility service, installed by default on the SmartVision3, also supports a
customizable navigation mode called "reading controls". This reading mode allows you to have a
navigation different from the default navigation with the Up and Down keys. In particular, it allows
you to move by: characters, words, lines, paragraphs, titles, links, windows, etc.:
A short press on the Left button allows you to select the previous item according to the
active reading mode.
A short press on the Right button allows you to select the previous item according to the
active reading mode.
A long press on the Left button activates the previous reading mode.
A long press on the Right button activates the next reading mode.

SmartVision3 - User Manual Page 13 on 52
Good to know: You can customize the list of reading controls available from the Talkback
accessibility settings, in the “Customize menus” section then “Customize reading controls”. By
default, only "Characters" and "Words" modes are activated on Left and Right long presses.
Function keys:
A short press on the Home button at the top left of the joystick returns you to the phone's
home screen.
A short press on the Menu button at the bottom left of the joystick gives access to the
options of the screen displayed. Attention, some screen does not have a menu; in this case,
the short press will have no effect.
A short press on the Back button at the top right of the joystick allows you to go back one
screen and close the virtual keyboard (see section writing with the physical keyboard)
A short press on the Delete key at the bottom right of the joystick allows you to delete a
character inserted in an edit box.
A long press on the Home button at the top left of the joystick opens the recent apps
screen (see “Recent apps” section)
A long press on the Menu button at the bottom left of the joystick opens to the Talkback
accessibility menu (see Talkback accessibility section).
A long press on the Back button at the top right of the joystick opens the notifications
shade (see section "Notifications shade")
Navigate the phone with the touchscreen
Touch mode is the secondary mode of SmartVision3. It allows you to navigate through the
different menus at the tip of your finger.
The Talkback accessibility service activated by default in the SmartVision3 modifies the normal
behavior of the touch screen in order to adapt it to visually impaired people.
Below are the main actions that can be performed by the touch screen when the Talkback
accessibility service is activated:
Stock
Touchscreen
Explore the screen and select an item
Touching the screen with one finger
Move to previous item
Swipe the screen with one finger to the left
Move to next item
Swipe the screen with one finger to the right
Select the first item of the screen
Swipe the screen with one finger to the left then to the
right
Select the last item on the screen
Swipe the screen with one finger to the right then to
the left
Activate / Validate the selected element
Tap the screen twice quickly
Open list item context options
Tap the screen twice quickly and keep your finger
pressed
Return to home screen (phone main
page)
Swipe the screen with one finger up then left
View apps running in the background
Swipe the screen with one finger to the left then up
Return to previous screen
Swipe the screen with one finger down then left
Open the notification panel
Swipe down with two fingers from the top of the screen
Open Talkback Accessibility Menu
Swipe the screen with one finger down then to the
right
Progressive vertical displacement
Touch the screen with two fingers up or down

SmartVision3 - User Manual Page 14 on 52
The full list of actions available with the touchscreen is available in the Talkback accessibility
settings in the "Customize gestures" section.
Change phone volume
The volume keys on the right side of the phone allow you to modify the levels of the phone's audio
profiles. There are a total of five different audio profiles: the volume of multimedia content (music,
video, etc.), the volume of calls, the volume of ringtones and notifications, the volume of alarms,
and finally the volume of voice synthesis.
The volume plus key increases the volume of the audio profile in use.
The volume minus key decreases the volume of the audio profile in use.
As the Talkback accessibility service is activated by default, the volume keys act mainly on the
voice synthesis volume.
You can also manage audio profile volumes through the phone's Settings app, "Sound" section. In
this screen, select the volume bar slider of the audio profile you want to change and use the Left
and Right keys to change the value. Be careful when Talkback is activated, the settings slide bars
(volume, brightness, etc.) are reversed. A short press on the Left button increases the value and a
short press on the Right button decreases the value.
Write with the phone
When SmartVision3 announces "Edit box", it means that it is an input area and you can enter text
with the physical keyboard of the phone or the virtual keyboard displayed on the screen. In either
case, press the OK key to start typing text. Once the entry is complete, press the OK key to
confirm and perform the action associated with the edit box (validate, search, etc.).
Good to know: Some edit box offer suggestions as you type (search for a contact in your phone
book, search for an application in the Play Store, enter an email address in Gmail, etc.). To access
it, press the Return key after your entry instead of the OK key, then use the navigation keys to
browse the proposals. Once the desired proposal has been selected, press the OK key to use it.
Physical Keyboard
The alphanumeric keyboard (key 1 to Pound) is used to enter text or characters depending on the
current edit box. Each key on the keyboard provides access to several characters. Press the same
key successively and quickly to access the characters in their order:
Key 1: 1 . ? ! @ - _ , ' \ " ( ) / : ; + & % * = < > € £ $ ¥ ¤ \ [ ] { } \ ~ ^ ¿ ¡ §
Key 2: a b c 2 à â æ ç A B C À Â Æ Ç
Key 3: d e f 3 é è ê ë D E F É È Ê Ë
Key 4: g h i 4 î ï G H I Î Ï
Key 5: j k l 5 J K L
Key 6: m n o 6 ñ ô ö œ M N O Ñ Ô Ö Œ
Key 7: p q r s 7 P Q R S
Key 8: t u v 8 û T U V Û
Key 9: w x y z 9 ŵ ŷ W X Y Z Ŵ Ŷ
Key 0: Space, 0, new line
Star key: Keypad lock in normal, caps or numeric mode
Pound key: Insertion of the Pound character
Virtual keyboard
SmartVision3 has two virtual keyboards. An Android virtual keyboard and a KAPSYS virtual
keyboard. The KAPSYS virtual keyboard is enabled by default. The virtual keyboard is
automatically displayed on the screen when you press the OK key to write into an edit box. To
close the virtual keyboard, press the Return key.

SmartVision3 - User Manual Page 15 on 52
The Android virtual keyboard: this is the standard keyboard that you find on all standard
smartphones. It is displayed on the lower half of the screen and laid out like a computer
keyboard (AZERTY). Place your finger on the screen to scroll through the different
characters, then release your finger on the desired character to insert it.
The Kapsys virtual keyboard: it is a virtual keyboard specially designed for the visually
impaired. Unlike the Android keyboard, it does not have keys on the touch screen, it simply
allows you to display the last character typed on the screen. When the Kapsys virtual
keyboard is used, you also benefit from quick access to the different input modes via the
Menu key:
oCharacter entered: Returns to the default character input mode.
oSmileys: allows access to the list of smileys available on SmartVision3
oSymbols: allows access to special characters and punctuation.
oEdit: provides access to the following editing options: delete all, copy, cut, paste,
beginning of text, end of text.
oSettings: provides access to the following text input options: vibration after character
validation, beep after character validation, character validation delay, automatic
capitalization.
oChange keyboard: allows you to return to the Android virtual keyboard
Good to know: you can use the Star 7 and Star 8 keyboard shortcuts to respectively activate the
Kapsys virtual keyboard or the Android virtual keyboard.
Write with voice recognition
SmartVision3 has the "Dictation" function. This feature allows you to dictate text into edit boxes
with your voice. To write with voice recognition, short press the voice command button located on
the right side of the phone, above the volume keys. After the beep, clearly dictate your text.
Speech recognition stops as soon as you stop speaking (or if you pause too long). After a few
moments, the recognized text will be vocalized and inserted in the edit box. You can then edit the
text with the physical keyboard or make new voice input. Here are some recommendations for
using speech recognition to write text:
Wait for the end of the beep before starting to dictate your text.
A quiet environment will improve the voice recognition result.
You can add punctuation marks to the voice (, ?! etc.), to do this you must speak the
desired punctuation. Example: “Would you like to eat at home on Sunday question mark”.
Speech recognition uses the context of the sentence. It will therefore be more relevant with
long sentences than with small groups of words.
Good to know: It is not possible to launch the Dictation function when you are outside of an edit
box. A short press on the voice command button outside of an edit box launches the Assistant
function. See “Assistant”chapter.
Delete text
In an edit box, short press the "Delete" key to delete the last character entered.
Edit text
In an edit box, you can use the Left and Right keys to move the cursor to delete or add a
character, word, or phrase. By default, the cursor moves by characters. You can also move by
words by long pressing the Left or Right key to change the cursor movement mode.
Keyboard shortcuts
It is possible from KAPSYS accessibility service settings to assign up to 20 keyboard shortcuts for
predefined actions. Keyboard shortcuts are a combination of the "Star" or "Hash" keys held down

SmartVision3 - User Manual Page 16 on 52
and the keys of the numeric keypad from 0 to 9. Here is the list of actions that can be associated
with a keyboard shortcut:
Get the phone status (time, battery level, Wifi status, Bluetooth status, GPS status, network
status)
Increase speech speed
Decrease speech speed
Toggle audio output between receiver and loudspeaker
Select all
Cut
Copy
Paste
Move the cursor to the beginning of the edit box
Move cursor to end of the edit box
Switch to Kapsys keyboard
Switch to Android keyboard
Enable / Disable “MagniText” mode
Enable / Disable Touch panel
Enable / Disable Bluetooth
Enable / Disable Wifi
Enable / Disable GPS Localization
Enable / Disable mobile data usage
Enable / Disable Airplane Mode
Enable / Disable the Flashlight
Switch audio profile to Silent
Open Quick settings screen
By default, some shortcuts are already predefined on the SmartVision3. These shortcuts are
sorted into two categories: Generic "Hash" shortcuts that work on all screens and "Star" shortcuts
that only work in an edit box.
Pre-recorded generic shortcuts with the "Hash" key:
Hash 1: Get the phone status
Hash 2: Switch audio profile to Silent
Hash 3: Open Quick settings screen
Hash 4: Decrease speech speed
Hash 5: Increase speech speed
Hash 6: Enable / Disable “MagniText” mode
Hash 7: Enable / Disable Touch panel
Hash 8: Not allocated
Hash 9: Not allocated
Hash 0: Not allocated
Pre-recorded shortcuts with the "Star" key:
Star 1: Move the cursor to the beginning of the edit box
Star 2: Move the cursor to the end of the edit box
Star 3: Cut
Star 4: Not allocated
Star 5: Not allocated
Star 6: Copy
Star 7: Switch to Kapsys keyboard

SmartVision3 - User Manual Page 17 on 52
Star 8: Switch to Android keyboard
Star 9: Paste
Star 0: Select all
These keyboard shortcuts can be fully modified and personalized from KAPSYS accessibility
settings. For more information, please consult the “KAPSYS Accessibility” chapter.
Accessibility
Introduction
SmartVision3 relies on two accessibility services to operate, Talkback Accessibility and KAPSYS
Accessibility. These two accessibility services are activated by default on SmartVision3 and must
remain permanently activated to ensure optimum operation for the visually impaired. When these
two accessibility services are enabled, the phone provides audio feedback so the user can interact
with the physical keyboard and touch screen. Additional accessibility settings (display size, color
correction, audio setting, Switch Access, etc.) are available from the Settings app, "Accessibility"
section.
Talkback Accessibility
Talkback accessibility is the default accessibility service for all Android smartphones. Once
activated, it transforms the behavior of the touch screen so that a visually impaired person can
navigate the phone. Talkback has many accessibility settings allowing you to customize how the
phone reacts and communicates with you. Access to Talkback accessibility settings is via the
phone's Settings app, "Accessibility" section. You can also open it from the home screen via the
Menu key. The Talkback accessibility settings are as follows:
Text-to-speech settings: allows you to change the text-to-speech engine (Google by
default), download new voices, change the cadence, pitch, etc.
Verbosity: Allows you to change the number and type of audio feedback provided by
Talkback.
Sound and Vibration: Allows you to customize sensory feedback when using Talkback.
Customize gestures: Allows you to view and change the function of gestures on the
touchscreen when Talkback is enabled.
Customize menus: allows you to customize the content of the Talkback accessibility menu
(long press on the Menu key) and the reading controls (long press on the Left and Right).
Cover proximity sensor to stop speech: allows you to stop the voice announcement in
progress when you wave your hand in front of the proximity sensor located at the top left of
the front panel.
Automatically describe icons: allows you to hear a description when you focus an
unlabeled icon.
Braille keyboard: Allows you to use the touch screen as a braille keyboard.
Braille Display: Allows you to connect a braille display to your phone.
Tutorial and help: Provides access to Talkback Help.
Advanced settings: allows access to advanced Talkback settings (Speak passwords,
custom labels, item description order, virtual keyboard input preference, etc.).
For more information, please refer to the Google user manual below: Google Talkback link
Good to know: If you want to be helped by a sighted person, you can suspend Talkback
accessibility so that the helper can use the touch screen like a standard smartphone. To suspend
Talkback accessibility, long press both volume keys simultaneously for three seconds. To turn
accessibility back on, long press both volume keys again for three seconds.

SmartVision3 - User Manual Page 18 on 52
Kapsys Accessibility
Kapsys Accessibility is the second accessibility service of SmartVision3. It allows you to manage
additional features that are not present in Talkback accessibility, such as keyboard management
or wake-up speech. Access to Kapsys accessibility settings is via the Phone Settings application,
“Accessibility” section. You can also open it from the home screen via the Menu key.
The KAPSYS accessibility settings are as follows:
Magnitext: when activated, this feature displays and enlarge the focused text in a scrolling
banner on the screen. The size, color, speed, and position of the banner are customizable
Disable touch panel: disable the touch panel.
Keyboard shortcuts: allows you to consult and modify the keyboard shortcuts of the
Smartvision3.
Quick access: allows you to associate an application or a contact on a numeric key on the
keyboard on the Home screen (long press)
Pick up call with numeric keys: allows to answer an incoming call using any numerical
key on keypad (0 to 9).
Wake-up announcement: you can configure the type of information you want to hear when
waking up from sleep mode (current date, battery level, network status, notifications of
missed calls, new messages, and new software update).
Notification shade
Introduction
Notifications are alerts that appear on your smartphone to inform you of a new activity. These
alerts come in the form of an audible signal and/or a vibration followed by a short message. They
are launched by the applications installed on your SmartVision3 to inform you, for example, of the
arrival of a new email, a text message, a missed call, an appointment reminder, etc. All of your
phone's notifications are grouped together in the notification shade and are sorted by
chronological order. The notifications shade is a quick and easy way to see all of your phone's
apps activities. To open the notification shade, long press the Back key. You can also open it from
the home screen via the Menu key. To close the notification shade, short press the Back key.
For more information, please refer to the Google user manual below: Android Notifications Link
Consult a notification
Open the notifications shade and use the navigation keys to navigate into the list of alerts. Press
the OK key to open the notification and be redirected on the application that sent you the alert.
Example: if you view a notification of a missed call, you will be automatically redirected to the
history of the Phone application. Once viewed, the notification disappears from the notification
shade. Please note that some notifications will remain active until you complete the requested
action.
Delete a notification
Open the notification shade and select the notification you want to delete, then press the Delete
key. You can also delete all notifications at once by selecting the last item in the list "Clear all
notifications".
Manage notifications
Open the notification shade and use the navigation keys to reach the "Manage" item. Then browse
through the different options to customize how notifications behave.
Quick Settings
Introduction

SmartVision3 - User Manual Page 19 on 52
The quick settings screen gives you quick access to the main phone settings without going
through the Settings app. It is an extension of the notifications panel that gives you direct access
to Wifi settings, Bluetooth, mobile data, airplane mode, etc. To access the quick settings screen,
use the keyboard shortcut Hash key and the three key. You can also open it from the home screen
via the Menu key. The Quick Settings screen is editable and customizable through the “Change
Settings Order” item.
Recent Apps
Introduction
The recent apps screen allows you to quickly return to recently used apps on your SmartVision3.
This screen also allows you to free up memory on the phone and save battery power. Indeed, by
pressing the Home or Back keys of the SmartVision3 while using an application, this one
continues to work on background, even if you no longer use it. It is therefore sometimes interesting
to close these applications to gain system speed, free up memory and gain autonomy.
To open the recent apps screen, long press the Home key. You can also open it from the home
screen via the Menu key
Open a recently used app
Open the recent apps screen and then use the navigation keys to browse the list of apps. By
default, the last used application is displayed. Use the Up key to go back in the history of recently
used applications. Press the OK key on an app to return to where you left off previously.
Close a recently used app
Open the recent apps screen and then use the navigation keys to browse the list of apps. By
default, the last used application is displayed. Use Up to go back through the history of recently
used apps. Press the Delete key on an app to close it.
Closing an application does not prevent it from working. The app will continue to be available on
your SmartVision3 and will be re-opened if you launch it again.
Good to know: you can go to the very top of the list of recently used applications to access the
"Clear all" item and close all applications at once.
Home screen
Introduction
The home screen is the main screen of the SmartVision3; it is the starting point to access all the
functions of the device. To return to the home screen at any time, press the Home key of your
SmartVision3.
By default, four applications are available on the SmartVision3 home screen:
Applications: allows access to all the applications available in your SmartVision3.
Contacts: allows you to manage and create contacts.
Telephone: allows you to make calls, check missed calls and access your voicemail.
Messages: allows you to send and read your SMS or MMS (short message with image or
video type attachment, etc.).
Additional options are available from the home screen via the Menu key.
Quick Settings: allows you to access to the Quick settings screen of your SmartVision3.
Notifications: allows you to access to the Notifications shade of your SmartVision3.
Recent Apps: allows you to access to the Recent apps screen of your SmartVision3.
Settings: allows you to access to the general settings of your SmartVision3.
Accessibility Kapsys: allows you to access to the Kapsys accessibility settings.
Accessibility Talkback: allows you to access to the Talkback accessibility settings.

SmartVision3 - User Manual Page 20 on 52
The SmartVision3 home screen is fully customizable. You can add apps to it, rearrange the apps
order, or even remove them from the home screen.
Add an app to the home screen
Select “Applications” from the home screen then select from the list of applications the one you
want to add to the home screen and long press the OK key. Select "Add to home screen" from the
pop-up menu. The application is now available on the home screen at the bottom of the list.
Remove an app from the home screen
Select the application you want to delete from the home screen and long press the OK key. Select
"Remove from home screen" from the pop-up menu. The application is now removed from the
home screen but remains available from "Applications".
Move an app to the home screen
Select from the home screen the application you want to move in the list and long press the OK
key. Then select the move action you want to perform from the popup menu: up into the list, down
into the list, move to the top of the list or move to the bottom of the list.
Quick access
KAPSYS home screen has a "Quick access" function that allows you to associate an application
or a contact directly to a numerical key on the keyboard. Once the application or the contact has
been associated, you can, from the home screen, make a long press on the programmed key to
start the application directly or make the call. The configuration of the quick access function is
done via the Kapsys accessibility settings, "Quick access" section. The key 1 is by default
associated to your voicemail.
Good to know: You can also associate a contact or an application on the keyboard directly from
the home screen. To do this, do a long press on an unassociated numerical key on the keyboard
when you are on the home screen. The “Quick access” screen opens and asks you to associate
an application or a contact on this key.
Apps
Introduction
All applications installed on your SmartVision3 are available from the home screen via the
“Applications” item. Applications are presented as a list in alphabetical order.
Open an app
Select the application you want to open from the list and press the OK key.
Find an app
Use the physical keyboard to type the beginning of the application name. The list of applications is
then filtered based on your input. You can browse the list of candidates using the navigation keys.
To clear a character from the filter, press the Delete key.
Download an app
SmartVision3 comes with a set of applications already installed. However, you can download new
apps using the “Play Store” app.
Delete an app
Select the application you want to delete from the app list and long press the OK key. Select
"Uninstall" from the pop-up menu and confirm the removal.
Good to know: SmartVisio3 preinstalled applications cannot be deleted.
Other manuals for SmartVision3
1
Table of contents
Other Kapsys Cell Phone manuals

Kapsys
Kapsys SmartVision User manual

Kapsys
Kapsys SmartVision User manual

Kapsys
Kapsys SMARTVISION 2 User manual

Kapsys
Kapsys SmartVision2 How to use

Kapsys
Kapsys SmartVision3 User manual

Kapsys
Kapsys MiniVision2 User manual

Kapsys
Kapsys MiniVision2 User manual

Kapsys
Kapsys SmartVision2 User manual

Kapsys
Kapsys MiniVision2 User manual

Kapsys
Kapsys SmartVision User manual