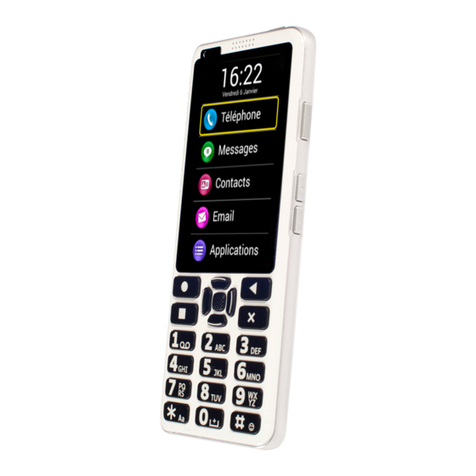
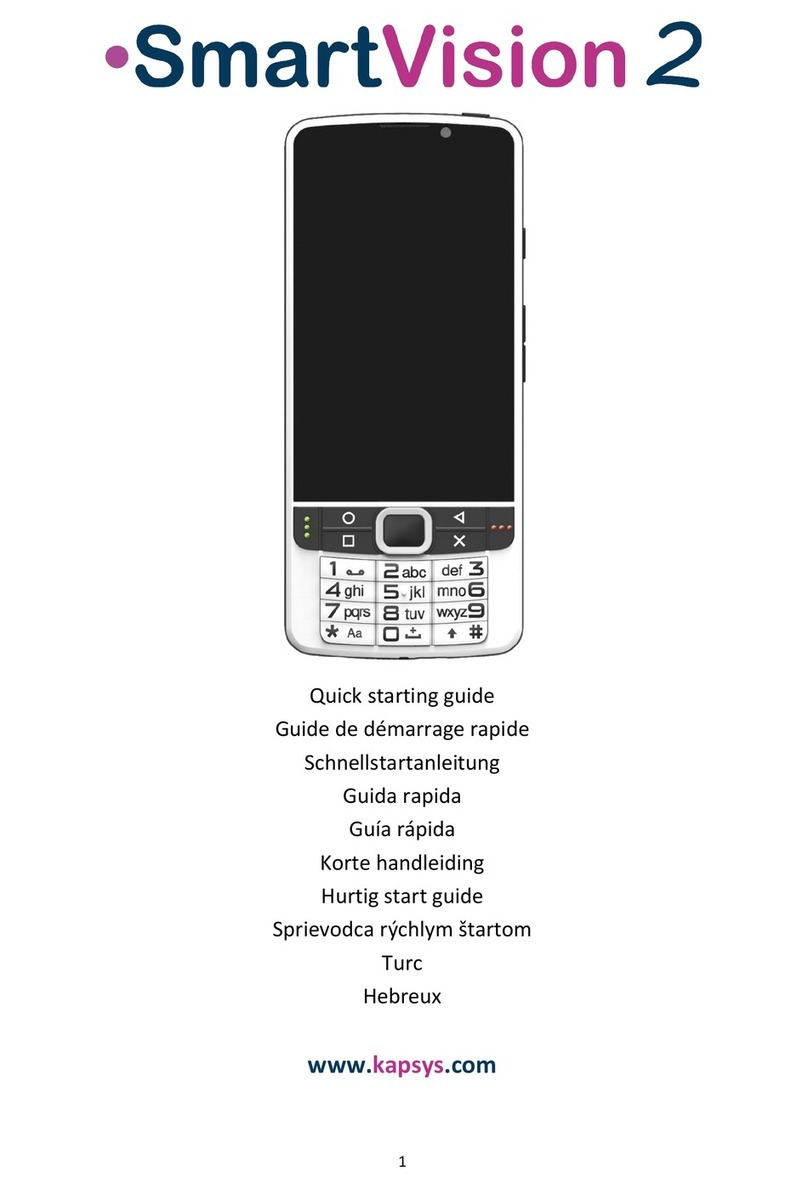
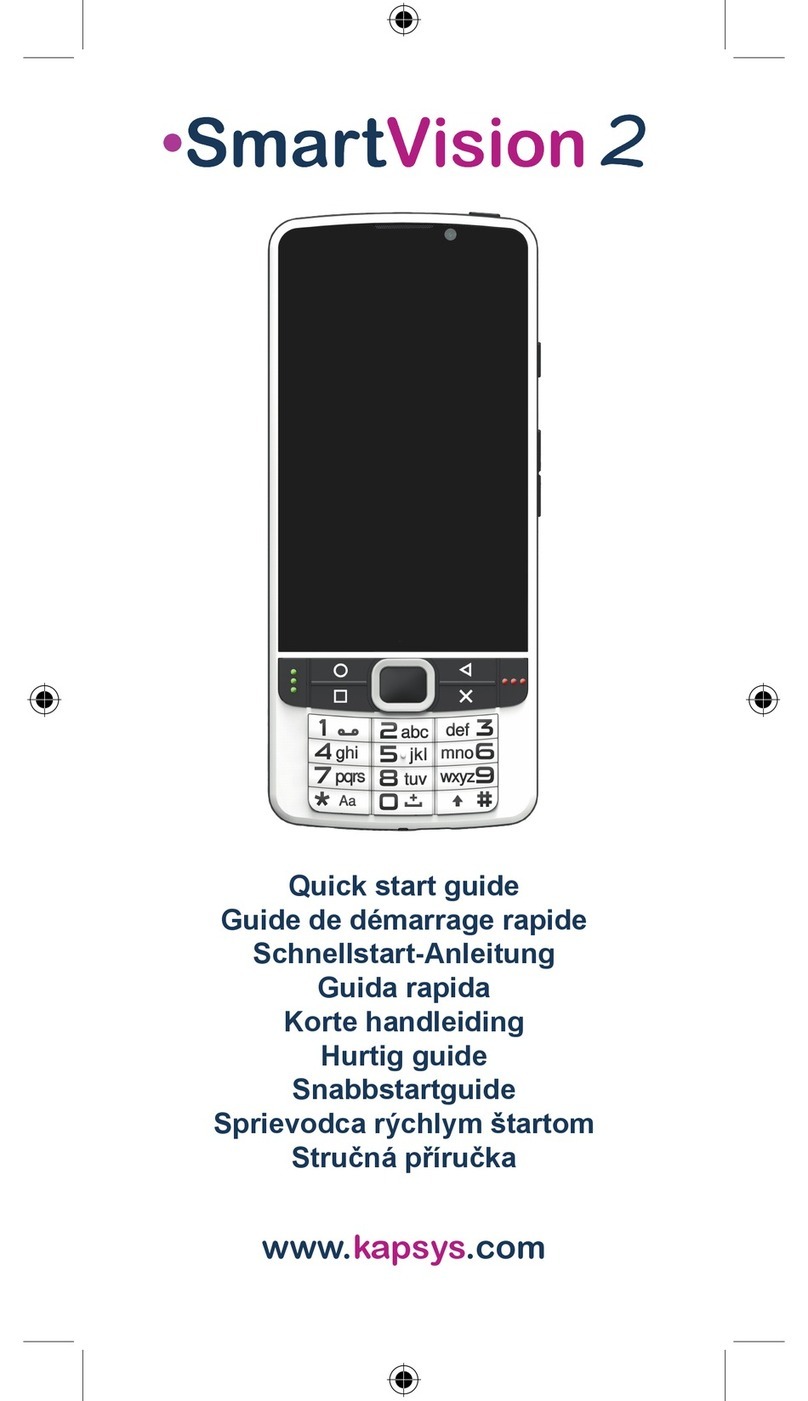
Kapsys SmartVision2 User manual

1 / 86
SmartVision2
User Guide

2 / 86
Table des matières
Introduction 3
Box content 4
SmartVision2 Overview 5
Getting started 7
Controle modes 9
Accessibility 15
Homescreen 22
Applications 24
Notification shade 25
Book reader 27
Calculator 34
Calendar 35
Camera 36
Chrome 37
Clock 38
Colors detection 39
Contacts 40
Gmail 42
FM Radio 43
Kapten 44
Light detection 51
Magnifier 52
Messaging 53
NFC 55
Note 56
OCR 57
Phone 59
Photos 61
Play Musique 62
Play Store 63
SOS 64
Settings 65
Voice recorder 68
Web radio 69
FAQ 70
Troubleshooting 79
Technical specifications 81
Legal notice and warranty 82
A propos de ce document 86

3 / 86
SmartVision2 User Guide
Introduction
Read before first use
Please read these instructions carefullyfor a safer and better use of your SmartVision2.
· Descriptions given inthis document are based on the default settings of your
device.
· Depending onyour location, network operator or device software
characteristics, some contents maydiffer from your device.
· High-qualitycontents requiring intensive usage of the processing unit and
memorymayaffect the overall performance of the device. Applications related to these
contents maynot functionproperlydepending onthe device characteristics and
conditions of use.
· KAPSYS declines anyresponsibilityinregards to the performance of third
partyapplications downloaded from the Google PlayStore.
· Data services suchas sending or receiving messages, uploading or
downloading data, automatic synchronization or use of locationservices mayincur
additional costs, depending onyour operating network subscription. For large data
transfers, it is recommended to use Wi-Fi.
· The applications provided bydefault withthis device maychange or no longer
be available without notice.
· The information published in this document is subject to change without notice.
KAPSYS reserves the right to modifythe contents of this document without obligation
to notifyanypersonor entitywhatsoever. KAPSYS assumes no responsibilityfor
technical or editorial errors, omissions in this manual, or for any incidental or
consequential damages resulting from the performance or use of this document.
· KAPSYS strives to continuouslyimprove the qualityand functionalityof this
product. Consequently, KAPSYS encourages youto visit its website
(www.kapsys.com) to obtainthe latest documentaryupdates concerning the use and
operation of this product.
· The product meets all the legal CE requirements for residential or commercial
use.
How to read this document
This user guide describes the mainfunctions of SmartVision2 and its differentoperating
modes. The descriptionof the functions is generic, and does not take into account the
specificities related to advanced accessibilityfeatures.
These advanced accessibilityfeatures (enabled bydefault onthe product)are described in
detail in the "Accessibility" section.
End of chapter

4 / 86
SmartVision2 User Guide
Box content
Package Overview
SmartVision2 boxcontains:
· a Battery
· a Wall charger 220/110 Volts – 5 Volts USB
· a USB cable (C-type)
· Stereo headphones withmicrophone
· a Protective case
· a Neck strap
· 3 NFC tags
· a Quick User Guide
The list of accessories mayvarydepending oncountry, configuration or product version.
The supplied accessories have beenspeciallydesigned for your device and maynot work
withother devices.
The appearance and characteristics of the product and accessories are subject to change
without notice.
Use onlyapproved accessories KAPSYS. The use of unauthorized accessories mayresult
inperformance issues, malfunctions and will not be covered byKAPSYS warranty.
End of chapter

5 / 86
SmartVision2 User Guide
SmartVision2 Overview
SmartVision2 is a smartphone specificallydeveloped for blinds and visuallyimpaired
people. It incorporates various accessibilityand ergonomic features, which facilitate its
handling and the overall access to smartphones universe.
It is the onlysmartphone providing a triple mode of control thanks to its touchscreen,
physical keyboard and voice command system (voice synthesis and recognition).
Below is a detailed descriptionof the SmartVision2 hardware.
Front face
The front face of the SmartVision2 is separated into two distinctive parts: a touchscreen
and a physical keyboard.
The touchscreenof 4 inches is on the top partof the smartphone. The loud speaker and the
2M pixel front camera for video calls are located onthe top part of the touchscreen.
At the lower part, youwillfind a physical keyboard composed withtwo separate parts.
The first part of the keyboard, located right underneaththe screen, is the navigationpad,
whichis easyto identifythanks to its multidirectional panel allowing to perform actions of
movement and to validate actions with a “OK” button in the center.
Onthe left of the multidirectional panel, you will find the “home” and “menu” Android keys,
whichare respectivelylocated one above the other and are separated from a horizontal
bar. Onthe right of the multidirectional panel, you will find the “return” Android key and a
“delete” key, whichare respectivelylocated one above the other and are also separated
from a horizontal bar.
Oneachside of the navigationpad, you will find a call “pick-up” key and a call “release”
key. The call “pick-up” key is on the left end and has three vertical raised dots. The call
“release” key is on the right end and has three horizontal raised dots.
The second partof the keyboard is the alphanumeric keypad composed with12 keys (4
lines of 3 keys)
· 1st line: 1, 2, 3 keys
· 2nd line: 4, 5, 6 keys
· 3rd line: 7, 8, 9 keys
· 4th line: star, 0, pound keys
To help withkeys locations, anergonomic raised dot is present onthe 5 key.
The detailed descriptionof the keyfunctions is available in the "Keyboard mode" sectionof
the chapter "Control modes".
Upper side
The On/Offbuttonis located onthe right ofthe upper side of the SmartVision2.
Right side
Onthe right side of the SmartVision2, the firstbutton is the voice command button.
Below are the up and downvolume keys.
Lower side

6 / 86
From left to right:
· The 3.5 audio jack to connect the headphones
· The mainspeaker
· The place for the neck strap (provided inthe box)
· The USB connector to plug the C type USB cable and to charge the SmartVision2
(provided inthe box).
Rear face
At the top of the rear face is the 8-mega pixel camera and two LEDs located eachside of
the camera.
Just below the camera lens is the SOS buttonof the SmartVision2.
The back cover of SmartVision2 is fullyremovable and provides access to the battery, the
SIM card and the micro SD card.
End of chapter

7 / 86
SmartVision2 User Guide
SmartVision2 set-up
Insert your SIM card
SmartVision2 is onlycompatible withNano SIM cards (4FF format).
To insertthe SIM card, flip the phone over, locate the notchonthe bottom leftcorner, and lift
the back cover. The SIM card connector is onthe right ofthe SOS button. To install the SIM
card, the chip should face downand the beveled corner should be placed at the top left.
Slide the SIM card upward inits slot.
Good to know:the external Micro-SD memoryslot is just above the SIM card connector.
Insert the battery
Once the back cover is removed, insert the batteryin its compartment byplacing the edge
withthe charging pads first. Thenclip the bottom of the battery.
Replace the back of the phone byfirst engaging the upper part. Clip firmlyto close the
phone.
Charging the battery
For the veryfirst use, we recommend charging the batteryfor at least 4 hours. Afterwards,
youwill recharge the batterydepending onyour use and the discharge of the battery.
To charge the battery, youwillneed the USB cable andAC adaptor supplied withthe
SmartVision2. First, use the USB cable to connect the SmartVision2 portto the AC
adaptor,thenplug the AC adaptor into anoutlet. You canalso charge the product by
connecting the USB cable directlyto your computer.
Caution: sole the battery, USB cable, AC adaptor and wall charger supplied byKAPSYS
are to be used. The use of unprovided accessories maycause damage and willinvalidate
KAPSYS warranty.
Turn your phone on/ off
To turnyour SmartVision2 on, press and hold the On/Off buttonlocated onthe top edge.
WhenSmartVison2 vibrates, release the button.
If it does not turnon, please check if the batteryhas been properly installed. If necessary,
repeat the batteryinstallationprocedure.
To turnyour device off, press and hold the On/Off button to displaythe "MainMenu" then
select "Power Off" and confirm the action. A short vibrationis issued whenSmartVision2 is
turned off.
The "MainMenu" screen also offers shortcuts for “Kapsys Accessibility Service” activation,
“Screen On/Off” to save battery power, “Color inversion” to change color contrast for certain
visibilitydisorders. For further informationonthese different modes, refer to the
“Accessibility” chapters.
Standby mode
WhenSmartVision2 is turned on, brieflypress the On/Off buttonto switchthe device to
standbymode or wake it up (operational mode).

8 / 86
In standbymode, the screenis off but the functions remain active. You canstill receive calls,
messages, emails or navigationinstructions using the Kaptenapplication.
Good to know:bydefault, after one minute of inactivitythe product automaticallygoes to
standbymode to save batterypower.
Quick settings at launch
Whenyou first start your SmartVision2, a series of screens let youset up your smartphone
quickly.
Step 1: Language selection
Use the navigationarrows to select your language and press the "OK" key.
Aconfirmationmessage is thenvoiced inthe selected language. Confirm your choice by
selecting "OK" or select "Cancel" to returna screenback.
Step 2: Enabling Accessibility
Select "OK" to activate the KAPSYS accessibilityservice and all the vocalizationfeatures
of the screens.
Select "Cancel" to start the phone without accessibility.
Step 3: Select profile
Use the arrows to select your profile:
Blind: Accessibilitysettings will be configured to meet the needs of blind people.
Low Vision: KAPSYS accessibilitysettings will be configured to meet the needs of visually
impaired people.
Whenthis last step is completed, the SmartVision2 starts up normallyand the screento
select the PIN code of your SIM card appears.
Unlock your SIM card
YouSIM card is supplied byyour operator witha 4-digit identificationcode called a PIN
code. This code allows you to protect your SIM card against possible fraudulent use. To
unlock the SIM card and access allthe SmartVision2 functions, enter your PIN code and
press "OK".
For confidentialityreasons, the vocalizationof the SmartVision2 willonlywork using your
headphones whenentering the PIN code of your SIM card.
End of chapter

9 / 86
SmartVision2 User Guide
Control modes
SmartVision2 offers 3 controlmodes: a keyboard mode, a touchscreenmode, and a vocal
recognitionmode.
Keyboard mode
The keyboard mode is the maincontrolmode of SmartVision2. It allows youto navigate
through the phone and launchapps using short and long press onthe keyboard.
To familiarize yourself withthe keys positioning, please refer to the chapter “SmartVision2
Overview”.
Below is the list ofthe various actions youcando withthe physical keyboard:
Turn your phone On/ Off
Action Keyboard
TurnON the SmartVision2 Long press ON/ OFF
TurnOFF the SmartVision2 Long press ON/ OFF thenselect
“Power off” from the “Main Menu”
Good to know: The "MainMenu" screenalso provides direct access to other options:
· KapsysAccessibilityService: allows youto enable or disable Kapsys
AccessibilityService (Vocal synthesis, Explore bytouch, keyboard shortcuts,
etc.)
· ScreenOn/ Off: allows youto turnthe screenof SmartVision2 in black during use
to save the batteryand protect your privacydata
· Color inversion: allows to switchcolor values of the screen. For example, black
text ona white screenbecomes white text ona black screen
Standby mode
To save the batterypower, SmartVision2 goes automaticallyto standbymode after 1
minute of inactivity. In this mode, the screenis off but the functions remainactive. You can
still receive calls, messages, emails, etc.
Action Keyboard
Standby mode / Operational mode Short press ON/ OFF
Good to know: Youcanset the delayafter whichthe screen automaticallygoes into standby
mode. This optioncanbe found in the phone settings inthe "Display" sectionand then
"Sleep".
Manage the volume
SmartVision2 distinguishes three types of volume withthe possibilityto define their sound
levelseparately. These volume categories are "Ringtones and Notifications", "Multimedia"
and "Alarms":
· Ringtones and Notifications:
Bydefault, the volume keys "plus" and "minus" on the right side of the product
directlychange the volume ofthe "Ringtones and Notifications". Youcan also
change the volume of the ringtones and notifications from "Settings", "Sound &
Notification", “Device settings button” from the “General” profile, then"Ring

10 / 86
volume".
· Multimedia:
These are the sound of voice synthesis, MP3 files and videos. To change the
sound of the multimedia profile simplyuse the volume keys "plus" and "minus",
whenthe speechsynthesizer is talking or a MP3 file is being played.
Youcanalso use the following keyboard shortcuts:
o Hashkeyand Volume up: Increase the volume of text-to-speechoutput
o Hashkey and Volume down: Decrease the volume of text-to-speechoutput
· Alarm:
To modifySmartVision2 Alarms, select “Settings", "Sound & Notification",
"Device settings button” from the “General” profile, then "Alarm volume".
Good to know: The volume keys "plus" and "minus" also move the cursor from leftto right
whenlevel adjustment is needed on anhorizontal bar. This is the case, for example, with
the brightness level bar, the MP3 file playback bar,or the sound volume adjustment bar.
Answer / Release a call
Action Keyboard
Answer anincoming call Shortpress Pick-up key
Hang-up a call Shortpress Hang-up Key
Good to know: a short press onthe "Pick-up" keyallows to launchquicklythe Phone
application.
Navigate throughout the phone
Use the navigationpad to navigate throughthe SmartVision2 menus and screens.
Action Keyboard
Move to the previous element Shortpress Up arrow
Move to the following element Shortpress Downarrow
Scroll a page up Long press Up arrow
Scroll a page down Long press Downarrow
Move to the first visible element of the screen Short press Left arrow
Move to the last visible element of the screen Short press Right arrow
Move to a page onthe left (if available) Long press Leftarrow
Move to a page onthe right (if available) Long press Right arrow
Activate / Validate a selected element Shortpress OK
Returnto the previous screen Shortpress Returnkey
Back to the home screen Shortpress Home key
Write text
WhenSmartVision2 announces "Edit box", it means that it is inaninput field and youcan
enter a text.
The alphanumeric keypad (key1 to #) is used to enter a text or characters depending on
the edit box.
Eachkey gives access to several characters: keynumber "2" gives access to a, b, c, 2, A
(capital), B (capital), C (capital).
To select the appropriate character, press repeatedlythe relevant keynumber to access
the various characters associated withthis key.
Key"1" is used to insert punctuationmarks and special characters (@, &, +, parentheses,
etc.)
11 / 86
Key “0” is used to insert a space or go to the next line.
Key “star “is used to lock the keypad in “normal”, “capital” or “numeric” modes.
Good to know: to enter a text in the edit box, youcanuse the physical keypad and/or the
virtual keypad.
The virtual keypad appearance changes from numeric to alphabet to suit the content of the
edit box.
To open the virtual keypad, long press OK whenthe edit boxis selected. The virtual keypad
willbe displayed on the lower halfof the screen(as a computer keyboard).
Keep your finger on the screento browse through the different characters. Release your
finger onthe character youwant to confirm. The "Symbols" buttonat the bottom left of the
virtual keypad gives access to special characters. Press the "Back" keyto close the virtual
keypad.
Delete text
Press the "Delete" keyto delete the lastcharacter inanedit box.
Youcanpress and hold the "Delete" keyto quicklydelete the characters.
Edit text
Youcanuse the volume keys to move the cursor and delete or add a character, word, or
phrase inanedit box.
Action Keyboard
Move cursor to the right Shortpress Volume +
Move cursor to the left Shortpress Volume -
Good to know:SmartVision2 supports additional keyboard shortcuts withthe "star" key.
These shortcuts are described inthe chapter "Accessibility".
Menu
The menuallows youto displayadditional options related to the applicationor the
displayed page. It usuallyallows access to help or applicationsettings.
Action Keyboard
Open Menu Short press Menu key
For example: pressing the "Menu" keyinthe contact applicationdisplays the following
general options: contacts to display, import / export, accounts, settings, delete all contacts,
help.
Contextual Menu
The contextual menu provides additional specific options related to the selected item.It
usuallyallows you to delete, edit, save a selected item.
Action Keyboard
Opencontextual menuof a selected item Long press “OK” key
For example: If you select a contact and press and hold OK to openthe contextual menu, it
willdisplaythe following specific options: add the contact to favorites, remove the contact,
edit the contact, share the contact, add the contactonthe home screen.
Global context menu
The global context menuprovides quick access to certainaccessibilitysettings.

12 / 86
Action Keyboard
Open global context menu Long press “Menu” key
For more information about this menu, please refer to the chapter “Accessibility”
Task Manager
The Task Manager allows youto view applications opened inthe background on your
SmartVision2. From this screen, you canreturnto an opened application, get information
about anopened application, or close anopened application.
Action Keyboard
Opentask manager Long press “home” key
Good to know: To save batterypower,youcan close all applications opened inthe
background. To do this, simplypress the "Menu" keywhenthe task manager is opened
and thenselect "Dismiss allapplications" from the list.
Notification shade
Notifications are used to informthe user of anevent,a new message, a missed call, a
calendar appointment, etc.
Allnotifications onyour phone are available in the notificationshade.
Action Keyboard
Openthe notificationshade Long press “return” key
For more information, please refer to the chapter “Notificationshade”.
Good to know: SmartVision2 supports additionalkeyboard shortcuts withthe "hash" key.
These shortcuts are described inthe "Accessibility" chapter.
Touchscreen mode
The touchscreenmode is the secondarycontrolmode of the SmartVision2. It allows youto
navigate throughthe various menus withyour fingertips.
Kapsys accessibilityservice, whichis automaticallyactivated withthe SmartVision2,
modifies the touchscreenbehavior to better adjust it to the needs of visuallyimpaired
people.
Below is the list ofthe various actions youcando from the touchscreen, when Kapsys
accessibilityservice is activated:
Action Touchscreen
Explore a screenand select anitem Touchthe screenwithone finger
Move to the previous element Swipe left withone finger
Move to the following element Swipe right withone finger to the
Scroll a page up, move the cursor to the
right Swipe right thenleft withone finger
Scroll a page down, move the cursor to the
left Swipe left then right withone finger
Move to the firstvisible element of the
screen Swipe up and downwithone finger
Move to the last visible element ofthe
screen Swipe down and up withone finger
Move to a page onthe left (if available) Swipe left withtwo fingers
Move to a page onthe right (if available) Swipe right withtwo fingers

13 / 86
Activate / Validate the selected element Rapid double tap withone finger
Open contextual menuof the selected
element Rapid double tap and maintainit on
Move to the home screen Swipe up thenleft withone finger
Openthe task manager Swipe left thenup withone finger
Returnto the previous screen Swipe downthen left withone finger
Openthe Notificationshade Swipe from top to bottom withtwo fingers
Openthe GlobalAccessibilityMenu Swipe downthen right withone finger
Openthe LocalAccessibilityMenu Swipe up thenright withone finger
Progressive vertical move Touchup or downwithtwo fingers
Good to know: Touchscreencanbe disable in the Accessibilitysettings.
Voice Recognition mode
The voice recognitionis the last control mode of the SmartVision2. It allows youto dictate
text inaninput zone, to perform internet searchor to launch specific functions.
SmartVision2 uses Google voice recognition, an internet connectionis therefore required
to use this service. It is also recommended to use a Gmail address to take advantage of all
available voice command functions. To use this service, make a short press onthe voice
recognitionbuttonlocated onthe right side of the SmartVision2 and distinctlydictate your
command.
Here are examples of actions youcando withthe voice recognitioncontrolmode:
· Calendar, alarms,reminders,and information
o Set analarm: "Set an alarm for 7 AM" or "Set an alarm for everyFriday
morning at 7 AM."
o Set a reminder: "Remind me to callJohnat 6 PM" or "Remind me to buy
Belgianchocolate at Ghirardelli Square."
o See SMS (text) messages: "Show me mymessages from Brianabout
dinner."
o Create a Google Calendar event: "Create a calendar event for dinner in
SanFrancisco, Saturdayat 7 PM.
· Communicate withfriends and family
o Call a friend: "Call Lindsay Hampson" or "Call Mom."
o Text a friend: "Text Jasonthat I'm running 5 minutes late."
o Send an email: "Send an email to Kristin, subject new shoes, message, I
can't wait to show you mynew shoes, fullstop."
· Facts and quick answers
o Find the time: "What time is it inLondon?"
o Check the weather: "Do Ineed a jacket today?" or "What's the weather
like tomorrow morning?"
o Translate words or phrases: "How do yousaycucumber inSpanish?"
o Define a word: "What does gluttonymean?"
o Convert between units: "What's 16 ounces in pounds?"
o Solve a math problem:"What's the square root of 2209?"
The complete list of actions youcando thanks to the voice recognitionis available in
Google support rubric or via the keywords « Ok Google ».
Good to know: In aninput zone, the voice recognitionbuttonallows youto write a text with
your voice. Just do a short press onthe voice recognitionbuttonlocated onthe right side of

14 / 86
the SmartVision2, wait for the beep and dictate your text. Once finished, your text will
automaticallybe incorporated inthe input text zone.
End of chapter

15 / 86
SmartVision2 User Guide
Accessibility
Settings
SmartVision2 has manyaccessibilitysettings that are enabled bydefault onthe product,
suchas the modifications of voice speed, characters font size or keypad shortcuts.
To change accessibilitysettings, first select “Settings” then “Accessibility”.
The accessibilitysettings are:
·Kapsys accessibility service: helps provide audio feedback to the visually
impaired and blind people.The following section describes the different parameters
of Kapsys accessibilityservice.
Good to know:Youcansuspend the Kapsys accessibilityservice at anytime by
pressing and holding the "Volume plus" and "Volume minus" keys. Press and hold againto
reactivate the service.
·BrailleBack: allows youto connect a braille displayto your SmartVision2 via
Bluetooth.
·Switch Access: allows a control of your device using key combinations that you can
personallyconfigure. This setting is particularlyhelpful for people withmotor
disabilities, who want to associate certain actions to specific buttons or use an
external keyboard.
·Captions: allows to turnon captions onyour device and choose language, text, and
style options.
·Magnification gestures: allows to zoom inand out or magnifyyour SmartVision2
screenusing a triple-tap anywhere onthe screen. Youcan pan or adjust the zoom
level as follows:
o To panacross the screen, drag two or more fingers
o To adjust the zoom level,pinchtwo or more fingers together or spread them
apart
To temporarilymagnifythe screen:
o Triple-tap and hold anywhere onthe screen, except the keyboard or
navigation bar
o To move the magnified area, drag your finger across the screen
o To stop magnifying, lift your finger
·Font Size: allows to adjust the font size to the most suitable for your vision. 7
different sizes are available.
·High Contrast text: high contrast makes text easier to read onyour device. This
feature fixes the text color as either black or white,depending onthe original text
color.
·Power button ends call: whenthis setting is enabled, youcansimplypress your
device's power buttonto end a call.This setting canmake it faster and easier to hang
up.
·Pick up calls with keys 0-9: allows to answer anincoming callusing anynumerical
keyonkeypad.
·Auto-rotate screen: whenthis setting is enabled, the screenautomaticallyrotates
whenyoumove your phone from portrait mode to landscape mode.
·Speak password: this setting controls spokenfeedback as youtype passwords.
o Enabled: password characters are announced audiblylike anyother typed
characters.

16 / 86
oDisabled: password characters are onlyaudible via headset.To protect your
privacy, this setting is disabled bydefault.
·Accessibility shortcut: allows to quicklyenable or disable the accessibility.
·Text-to-speech output: allows you to choose the voice synthesis of the
SmartVision2:
oKapsys Voices: allows to select a compact speechsynthesis or to download a
free premium speechsynthesis via anInternet connection.
oMultilanguage: allows to associate up to 3 languages with keyboard shortcuts
to change the language of the vocalsynthesis onthe fly.
Youcanalso activate and set up another voice synthesizer downloaded from the
PlayStore.
·Touch and hold delay: this setting adjusts the amount oftime before your touchon
the screenbecomes a touch and hold. A longer touchand hold delaymeans that you
need to keep your finger inthe same place longer before your touch becomes a
touchand hold. If you find that youaccidentallytouchand hold whenyouintend to tap,
consider choosing a longer delay.
·Keyboard Backlight: allows youto enable or disable the keyboard backlight.
·Color inversion: color inversionexchanges color values. For example, black text on
a white screenbecomes white text ona black screen.
·Color correction: the color correctionsetting enables your device to compensate
for color blindness.
Kapsys Accessibility Service
WhenKapsysAccessibilityService is activated, SmartVision2 gives you spokenfeedback
so that a visuallyimpaired personcanuse the device without looking at the screen.
To activate or deactivate Kapsys Accessibility Service press and hold on the “ON/OFF”
button then select “Kapsys Accessibility Service”.
To suspend or temporarilyresume Kapsys AccessibilityService press and hold
simultaneouslyonVolume up and Volume downbuttons.
To modifyparameters of Kapsys Accessibility Service select “Settings” then “Accessibility”
then “Kapsys Accessibility Service” and press the Android “Menu” key.
The following list gives different parameters of KapsysAccessibilityService:
· Screen reader: enables or disables text-to-speech output.
· Speech volume: allows to set the speechvolume to be the same or less than
the media volume. Media volume is the volume of other sounds onyour device.
· Use pitch change: changes the voice pitchfor keyboard feedback. Whenyou
check this option, spokenkeyboard feedback is set to a lower-pitched voice.
· Editor echo: defines if text-to-speechoutput announces typed characters,
words, or the sentences.
· Vibrate after character input: vibrates after a character is entered inaninput
field.
· Beep after character input: beeps after a character is entered inaninput field.
· Input character validation delay: defines the validationperiod of a character
entered in aninput field.
· Speak when screen is off: when checked, notifications are spokenwhen the
screenis off.
· Use proximity sensor: when checked, allows to temporarilysilence text-to-
speech output depending onproximitysensor information.
· Announce visible items displayed: announces the visible items displayed on

17 / 86
the screen(ex: showing item 1 to 6 of12).
· Shake to start continuous reading: when enabled, shaking the device
enables continuous reading.
· Speak phonetic letters: checking this optionwillallow to hear phonetic letters
(suchas "F, foxtrot" or "S, sierra") whenyoupress and hold a keyonthe virtual
touchscreenkeyboard.
· Speak usage hints: whenchecked, you can hear usage hints whenyou
navigate among screenelements,after a brief delay.
· Speak caller ID: allows to hear your caller's identityspokenbefore you answer.
· Vibration feedback: allows to get vibrationfeedback for your actions, suchas
whenyou select anobject or navigate on your device.
· Sound feedback: whenchecked, this optionallows you to get sound feedback
inadditionto verbalizations as younavigate.
· Focus speech audio: allows youto make other audio volume decrease when
text–to-speechis speaking.
· Sound volume: this optioncontrols the sound volume of speechand other
sounds created byKapsys AccessibilityService. This optionis available when
sound feedback is enabled.
· Disable touch screen: whenchecked, the touch screen is disabled.
· Automatically scroll lists: whenchecked, lists scroll bythemselves during
linear navigation.
· Single-tap selection: touchcurrentlyfocused item onlyonce to validate
· Show context menu as list: select this setting to show the global and local
context menus as lists instead of circles.
· Launch explore by touch tutorial: review a tutorial on touch exploration.
· Keypad shortcuts: allows managing keypad shortcuts of SmartVision2.
· External keyboard shortcuts: allows management of anexternal keyboard
shortcuts.
· Manage custom labels:use this setting to manage anycustom labels that you
have created withthe local context menu.
· MagniText: whenactivated, this feature displays and enlarge the focused text in
a scrolling banner onthe screen. The size, color, speed, and positionof the banner
are customizable.
· Black screen: this option allows youto switchto a black screento save battery
and protect personal data.
· Resume from suspend: this optionallows you to choose how Kapsys
AccessibilityService should resume after youhave suspended it throughthe global
context menu.
· Wake up speech: you canconfigure the type of information youwant to hear
whenwaking up from sleep mode (announcement of time, date, batterylevel,
network status, notifications of missed calls, new messages, and new emails).
· Manage accessibility settings: this optionallows you to save, import or share
accessibilityprofiles.
Accessibility context menus
As younavigate using SmartVision2, two context menus are available to help youfind
settings and controls. The global context menucontains commands that work anywhere,
and the local context menuvaries depending onthe focused item.

18 / 86
Global context menu
To view the global context menu, press and hold on “Menu” key.
The following options are available whenyouactivate the global context menu:
· Read from top: hear a read-out ofall items onthe screen, starting from the top.
· Repeat last utterance: hear the last verbalizationagain.
· Spelllast utterance: hear a letter-by-letter spelling of lastverbalization.
· Read from next item: hear a read-out of allitems onthe screen, starting from the
last focused item.
· Pause feedback: selecting this option suspends KapsysAccessibilityService,
including notifications and “Explore by touch”.
Note: KapsysAccessibilityService resumes either whenthe screen turns on, when
lock is shown, or from the notifications bar, depending onyour "Resume from
suspend" preference. You canchange this preference inKapsysAccessibility
Service settings.
· KapsysAccessibilityService settings: selecting this option opens the Kapsys
AccessibilityService settings screen.
· Text to speech settings: select this option to change your text to speechsettings.
Local context menu
To viewlocal context menu, use the combination of hashkey(press and hold hash key) and
“9” key.
The local context menu contains controls that relate to the focused item. If there are no
relevant options, KapsysAccessibilityService announces, "No menu items."
Whenyou open the local context menu, the menu provides options that are relevant to the
current context. Options might include the following:
· Navigationoptions: Default, Characters,Words,Paragraphs, Lines, and Pages.
· Cursor controlmenu: whenyou're editing text, this optionopens a newlocal
context menu with options such as “Move cursor to beginning”, “Move cursor to end”,
“Select all”, and “Start selection mode”. If text is selected, options caninclude Cut,
Copy, Paste, and End selectionmode. To move the cursor while inanedit box, you
cantap the volume keys.
·Label controls: this menu allows you to add, remove, and edit custom labels for
unlabeled content.Sometimes applications are missing labels onimages. Youcan
use KapsysAccessibilityService to create your own labels for images, to make it
easier to identifythem in the future. You canmanage the custom labels from the
“Manage custom label” setting in Kapsys Accessibility Service settings.
Keypad shortcuts
ThroughKapsysAccessibilityService options, you canassignup to 32 keyboard shortcuts
for predefined actions.
Keyboard shortcuts are a combinationof "star" or "hash" keys (holding down) and “0” to
“9”, up arrow, downarrow, left arrow, right arrow, volume up and volume downkeys.
List of actions that canbe associated witha keyboard shortcut are:
· Get the SmartVision2 status
· Openthe notificationscreen
· Open« Quick settings » page of the notificationscreen
· Increase the text-to-speech output speed

19 / 86
· Decrease the text-to-speechoutput speed
· Change text-to-speechlanguage
· Read from the beginning of the screen
· Read from the next item
· Decrease precisionlevel
· Increase precisionlevel
· Repeat the last text-to-speechitem
· Spell the last text-to-speech item
· Pause / Resume text-to-speech
· KapsysAccessibilitysettings
· Text-to-speechsettings
· Select all
· Cut
· Copy
· Paste
· Move the cursor to the left ofthe input field
· Move the cursor to the right of the input field
· Move the cursor to the beginning of the input field
· Move the cursor to the end of the input field
· Select one character to the left ofthe cursor
· Select one character to the right of the cursor
· Increase the volume of text-to-speechoutput
· Decrease the volume of text-to-speech output
· Activate / Deactivate MagniText mode
· Activate / Deactivate “Magnification gesture” mode
· Kapsys AccessibilityGlobal Menu
· Kapsys AccessibilityLocal menu
· Toggle audio output betweenreceiver and loud speaker
· Enable /disable vocalization
· Enable /disable displaybacklight
· Enable /disable touch panel
· Enable /disable Bluetooth
· Enable /disable Wi-Fi
· Enable /disable GPS localization
· Enable /disableAirplane mode
· Enable /disable the torch
· Openshortcuts list
· Set Editor echo to: None
· Set Editor echo to: Character
· Set Editor echo to: Word
· Set Editor echo to: Sentence
· Set Editor echo to: Character and word
· Set Editor echo to: Character, word, and sentence
· Switchaudio profile to: Normal
· Switchaudio profile to: Silent
· Switchaudio profile to: Meeting
· Switchaudio profile to: Outdoor

20 / 86
Bydefault, some shortcuts are alreadypredefined onSmartVision2. These shortcuts are
organized into two categories:
· Accessibilityrelated shortcuts associated withthe "hash" key,
· Editing related shortcuts associated withthe "star" key.
These shortcuts canbe modified through"Keypad Shortcuts" item in KapsysAccessibility
Service.
Accessibility related shortcuts associated with the “hash” key
· Hashkey0: Kapsys AccessibilityService settings
· Hashkey1: Get the SmartVision2 status
· Hashkey2: Read from the beginning of the screen
· Hashkey3: Open« Quick settings » page of the notificationscreen
· Hashkey4: Decrease text-to-speech speed
· Hashkey5: Increase text-to-speechspeed
· Hashkey6: Activate / Deactivate MagniText mode
· Hashkey7: Repeat the last text-to-speech item
· Hashkey8: Spell the last text-to-speech item
· Hashkey 9: Kapsys AccessibilityLocal Menu
· HashkeyUp arrow: Not allocated
· HashkeyDown arrow: Not allocated
· HashkeyLeft arrow: Not allocated
· HashkeyRight arrow: Not allocated
· HashkeyVolume up: Increase the volume of text-to-speechoutput
· HashkeyVolume down: Decrease the volume of text-to-speech output
Editing related shortcuts associated with the "star" key
· Star 0: Select all
· Star 1: Decrease precisionlevel
· Star 2: Increase precision level
· Star 3: Cut
· Star 4: Not allocated
· Star 5: Not allocated
· Star 6: Copy
· Star 7: Not allocated
· Star 8: Not allocated
· Star 9: Paste
· Up arrow: Move the cursor to the beginning of the input zone
· Downarrow: Move the cursor to the end of the input zone
· Left arrow: Move the cursor to the left of the input zone
· Right arrow: Move the cursor to the right of the input zone
· Volume up: Select one character to the left of the cursor
· Volume down: Select one character to the right of the cursor
Good to know: The volume keys plus and minus let youmove the cursor from leftto right
inaninput area according to the precisionlevel that youhave predefined withthe star 1
and star 2 shortcuts.
The available precisionlevels are: default, characters, words, lines, paragraph, page.
Other manuals for SmartVision2
1
Table of contents
Other Kapsys Cell Phone manuals

Kapsys
Kapsys SmartVision User manual

Kapsys
Kapsys MiniVision2 User manual

Kapsys
Kapsys SmartVision2 How to use

Kapsys
Kapsys SMARTVISION 2 User manual

Kapsys
Kapsys SmartVision User manual

Kapsys
Kapsys MiniVision2 User manual

Kapsys
Kapsys SmartVision3 User manual

Kapsys
Kapsys SmartVision3 User manual

Kapsys
Kapsys SmartVision User manual

Kapsys
Kapsys MiniVision2 User manual