ROUGHING-IN
Unit:mm
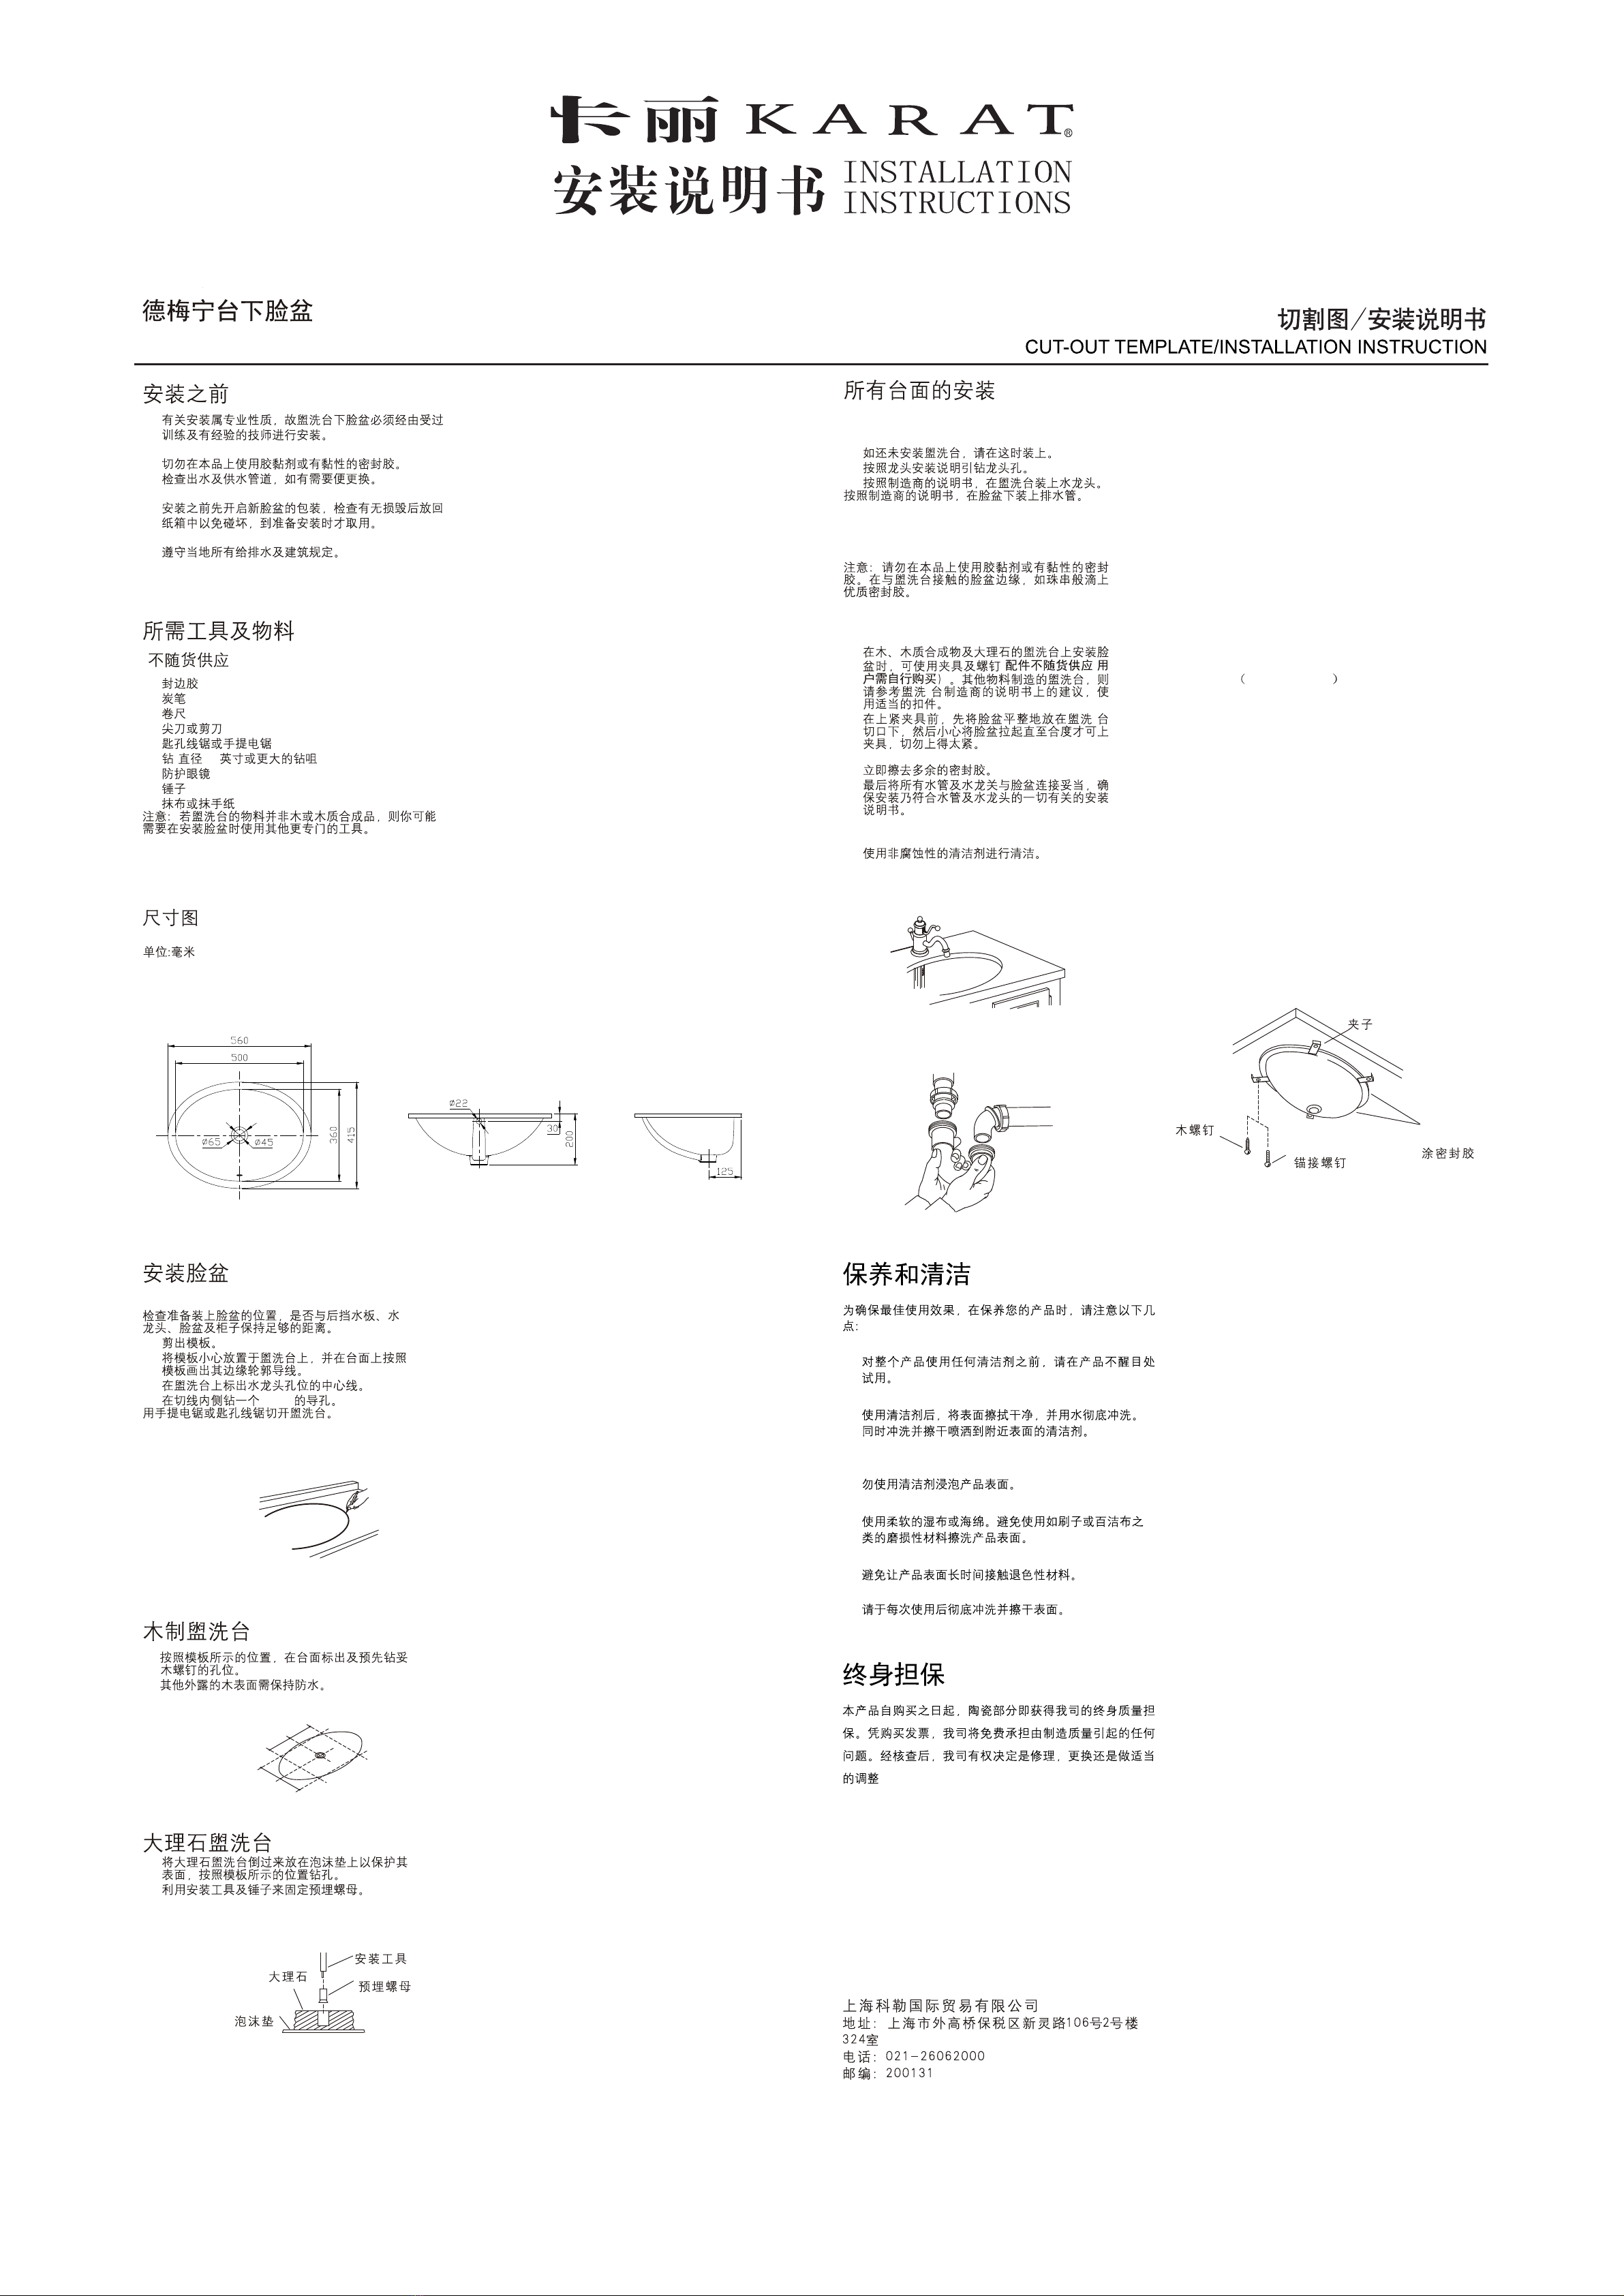
Wood Screw
Anchor Screw
Apply
Sealant
Clamp
Marble
Foam
Padding
Anchor
Setting Tool
·
·
·
·
·
()
·
·
·
·
·
·( 1/2 )
·
·
·
BEFORE YOU BEGIN
·Due to the nature of the installation, undercounter
lavatories should be installed by trained and
experienced installers.
·Do not use adhesives or adhesive sealants with this
product.
·Inspect the waste and supply tubing; replace if
necessary.
·Prior to installation, unpack the new lavatory and
inspect it for damage. Return the lavatory its
protective carton until you are ready to install it.
·Observe all local plumbing and building codes.
TOOLS AND MATERIALS (Not
Supplied)
·Sealant
·Pencil
·Tape measure
·Sharp knife or scissors
·Keyhole or saber saw
·Drill (1/2" dia. drill bit or larger)
·Safety glasses
·Hammer
·Rags or paper toweling
NOTE: You may require different, more specialized
tools to install this lavatory to countertop materials
other than wood or wood composites.
For best results, keep the following in mind when
caring for your product:
·Always test your cleaning solution on an
inconspicuous area before applying to the entire
surface.
·Wipe surfaces clean and rinse completely with
water immediately after applying cleaner. Rinse
and dry any overspray that lands on nearby
surfaces.
·Do not allow cleaners to soak on surfaces.
·Use a soft, dampened sponge or cloth. Never
use an abrasive material such as a brush or
scouring pad to clean surfaces.
·Be careful not to leave staining materials in
contact with the surface for extended periods of
time.
·The ideal cleaning technique is to rinse
thoroughly and blot dry any water from the
surface after each use.
·Connect the trap to the drain.
·Run water into the lavatory. Check all
connections for leaks.
·
·
·
·
·
·
CARE AND CLEANING
This product is warranted for one year from date of
purchase. Our company will be responsible for any
problems caused by manufacturing defects
provided with the invoice. Our company will,at its
election, repair, replace or make appropriate
adjustment where our company inspection
discloses any such defects occurring in normal
usage within one year after purchase.
LIFE-LONG WARRANTY
Shanghai Kohler International Trade Co., Ltd.,
Address: Room324, 2 Xinlin Rd,
Waigaoqiao Free Trade Zone, Shanghai
Tel: 021-26062000
Postcode: 200131
TOURMARINE
UNDERCOUNTER LAVATORY
18799T-M-WK
·
·
·
·12mm
·
·
·
·
INSTALL THE
LAVATORY
·Check the desired lavatory location for
clearance between the backsplash, faucet,
fixture, and cabinet.
·Cut out the template.
·Carefully position and trace the template on
the countertop as directed on the template.
·Mark the faucet hole centerline on the
countertop.
·Drill a 1/2 " pilot hole on the inside of the cut
line.
Cut out the countertop opening with a saber or
keyhole saw.
FOR WOOD
COUNTERTOPS
·Mark and pre-drill the wood screw holes at
the locations shown on the template.
Waterproof any exposed areas of wood.
FOR MARBLE
COUNTERTOPS
·Position the countertop upside down on foam
padding to protect the surface. Mark and drill
holes at the locations shown on the template.
·Use a setting tool and hammer to secure the
anchors.
·
·
·
·
(,
·
·
·
·
FOR ALL
INSTALLATIONS
·If the countertop has not been installed,
install it at this time.
·Drill the faucet holes according to the faucet
installation instructions.
·Install the faucet to the countertop according
to the manufacturer's instructions.
·Install the drain to the lavatory according to
the manufacturer's instructions.
NOTE: Do not use adhesives or adhesive
sealants.
·Apply a continuous bead of quality sealant to
the lavatory rim where it will contact the
countertop.
·For wood, wood composite, and marble
countertops, install the lavatory to the
countertop with the clamps and screws
.For other countertop
materials, refer to the countertop
manufacturer's instructions for recommended
fasteners.
·Position the lavatory squarely under the
cutout before tightening the clamps. Draw
the lavatory rim up to the countertop until it is
snug. Do not overtighten.
·Immediately wipe away any excess sealant.
·Make the final drain and faucet connection to
complete the lMake the final drain and faucet
connection to complete the lavatory
installation. Be sure to follow all instructions
packed with the drain and faucet.
·Clean up with a non-abrasive cleaner.
Not Supplied


