Deutsch 3
Lesen Sie vor der ersten Be-
nutzung Ihres Gerätes diese
Betriebsanleitung und handeln Sie danach.
Bewahren Sie diese Betriebsanleitung für
späteren Gebrauch oder für Nachbesitzer
auf.
Sicherheitshinweise 3
Funktion 3
Bestimmungsgemäße Verwendung 3
Umweltschutz 4
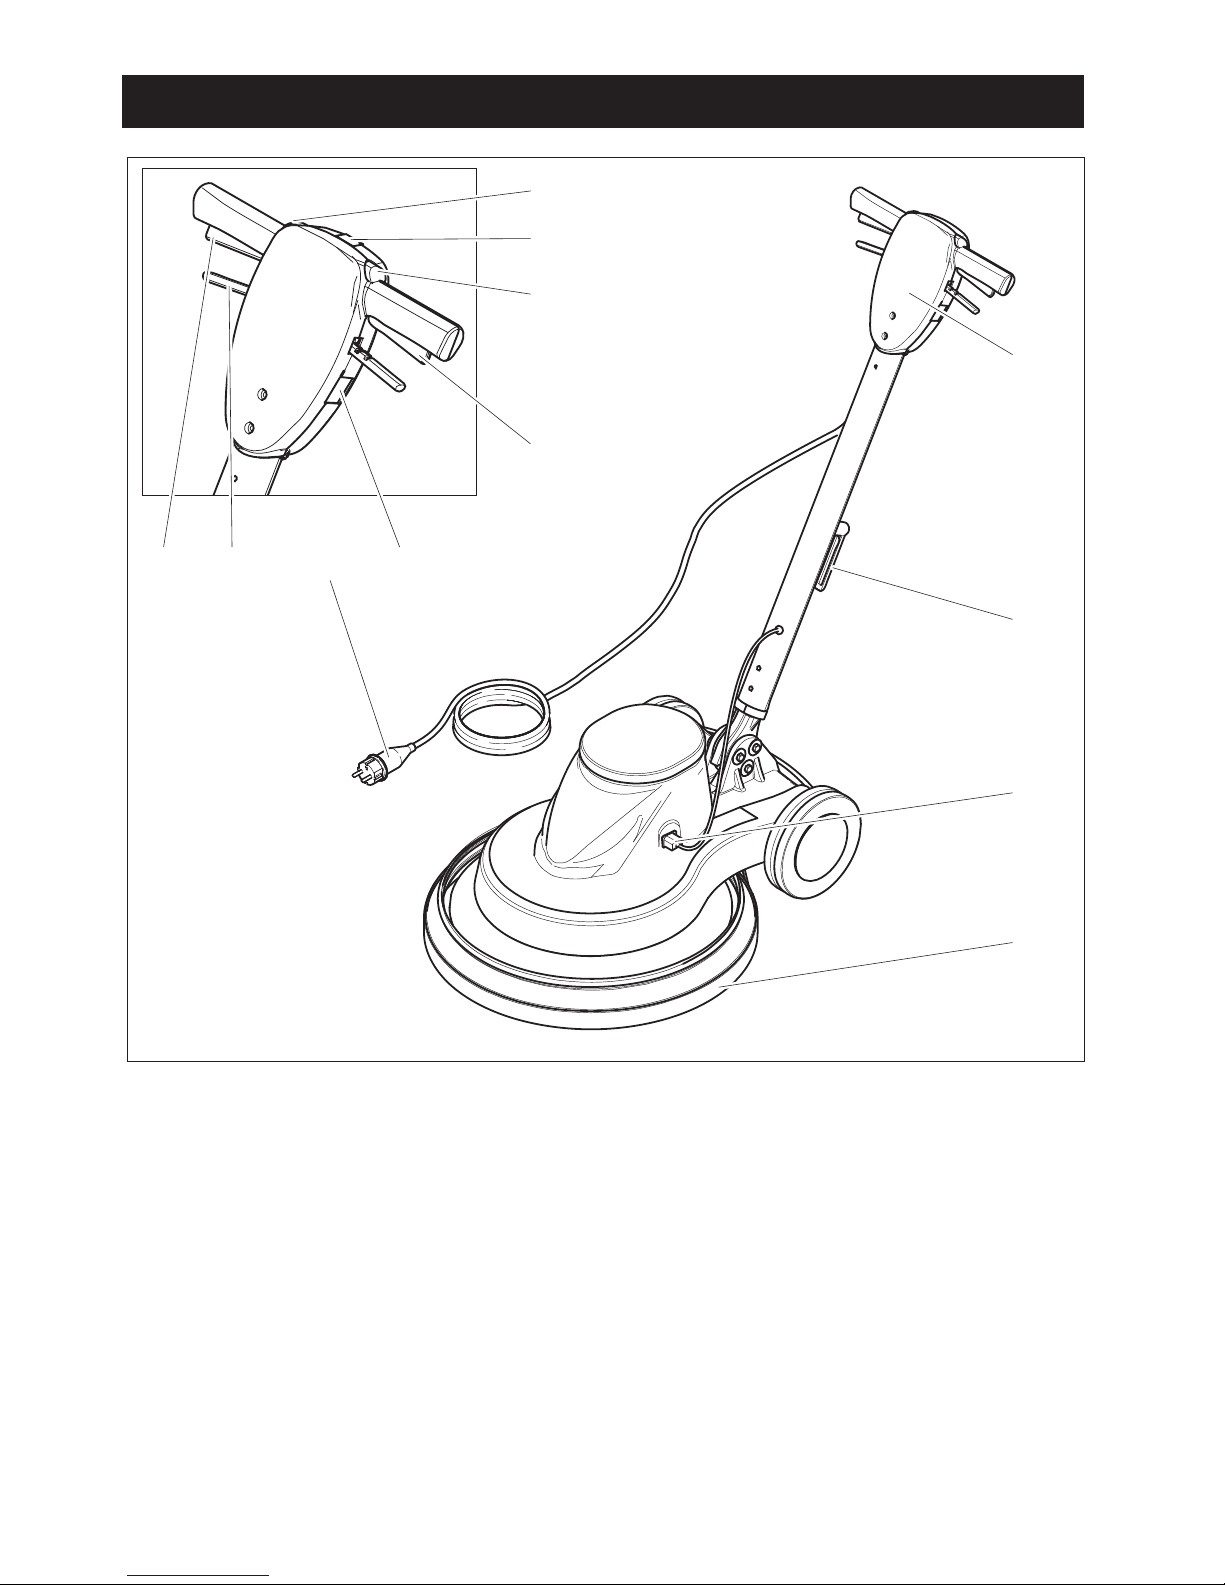
Bedien- und Funktionselemente 5
Montage 6
Vor Inbetriebnahme 6
Betrieb 7
Pflege und Wartung 8
Störungen 8
Zubehör 8
Technische Daten 9
CE-Erklärung 10
Garantie 10
Ersatzteile 10
Lesen und beachten Sie vor der ersten Be-
nutzung des Gerätes diese Betriebsanlei-
tung und beiliegende Broschüre
Sicherheitshinweise für Disc-Einscheiben-
maschinen, Nr. 5.956-659 und handeln Sie
danach.
Sicherheitseinrichtungen dienen dem
Schutz des Benutzers und dürfen nicht au-
ßer Betrieb gesetzt oder in ihrer Funktion
umgangen werden.
Verhindert das unbeabsichtigte Einschalten
des Gerätes.
Gefahr
Für eine unmittelbar drohende Gefahr, die
zu schweren Körperverletzungen oder zum
Tod führt.
몇Warnung
Für eine möglicherweise gefährliche Situati-
on, die zu schweren Körperverletzungen
oder zum Tod führen könnte.
Vorsicht
Für eine möglicherweise gefährliche Situati-
on, die zu leichten Verletzungen oder zu
Sachschäden führen kann.
Das Gerät wird zum Polieren von ebenen
Böden eingesetzt.
Der beim Polieren anfallende Staub wird von
einer auswechselbaren Filtertüte aufgenom-
men.
– Eine Arbeitsbreite von 500 mm ermög-
licht einen effektiven Einsatz.
– Netzbetrieb ermöglicht ein hohes Leis-
tungsvermögen ohne Arbeitszeitbegren-
zung.
Verwenden Sie dieses Gerät ausschließlich
gemäß den Angaben in dieser Betriebsan-
leitung.
– Das Gerät darf nur zum Polieren von
glatten Böden benutzt werden.
– Das Gerät darf nur mit Original-Zubehör
und -Ersatzteilen ausgestattet werden.
– Das Gerät ist nicht für den Einsatz in ex-
plosionsgefährdeten Umgebungen ge-
eignet.
– Dieses Gerät ist nur zur Trockenanwen-
dung bestimmt und darf nicht im Freien
unter nassen Bedingungen verwendet
oder aufbewahrt werden.
Inhaltsverzeichnis
Sicherheitshinweise
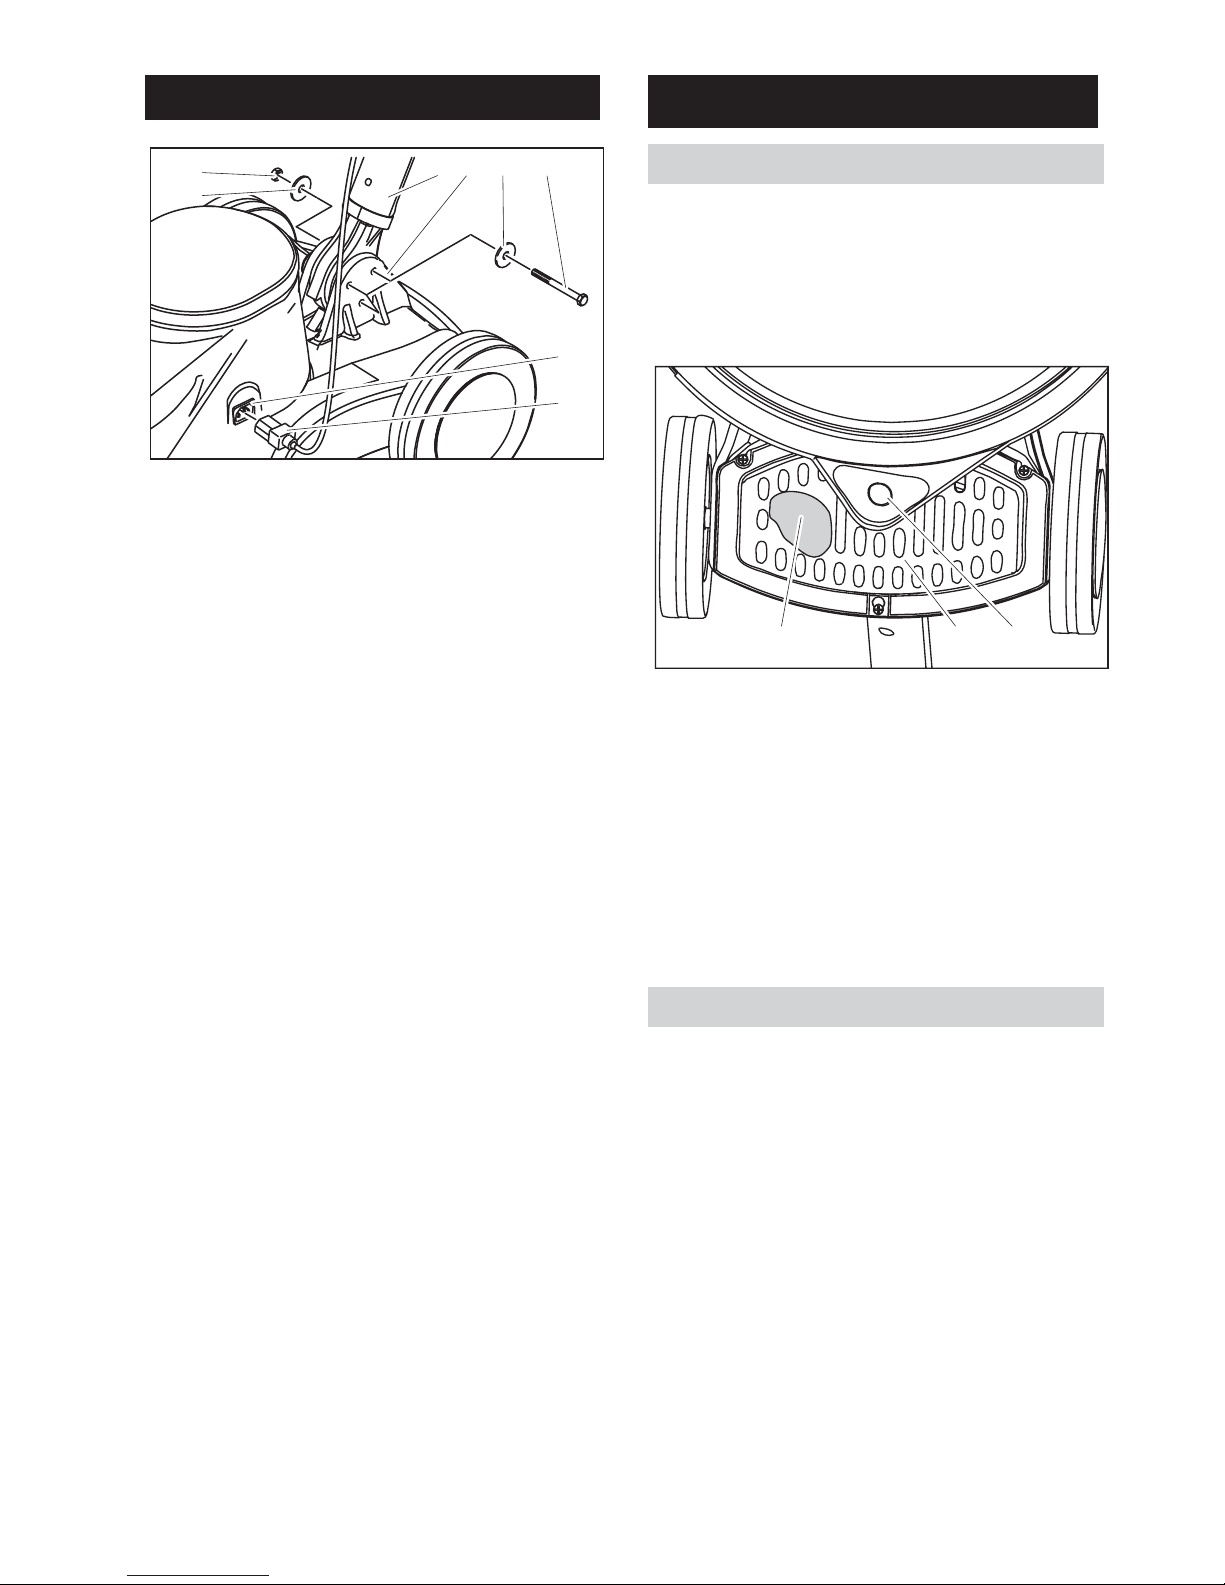
Sicherheitseinrichtungen
Entriegelung
Gefahrenstufen
Funktion
Bestimmungsgemäße Ver-
wendung