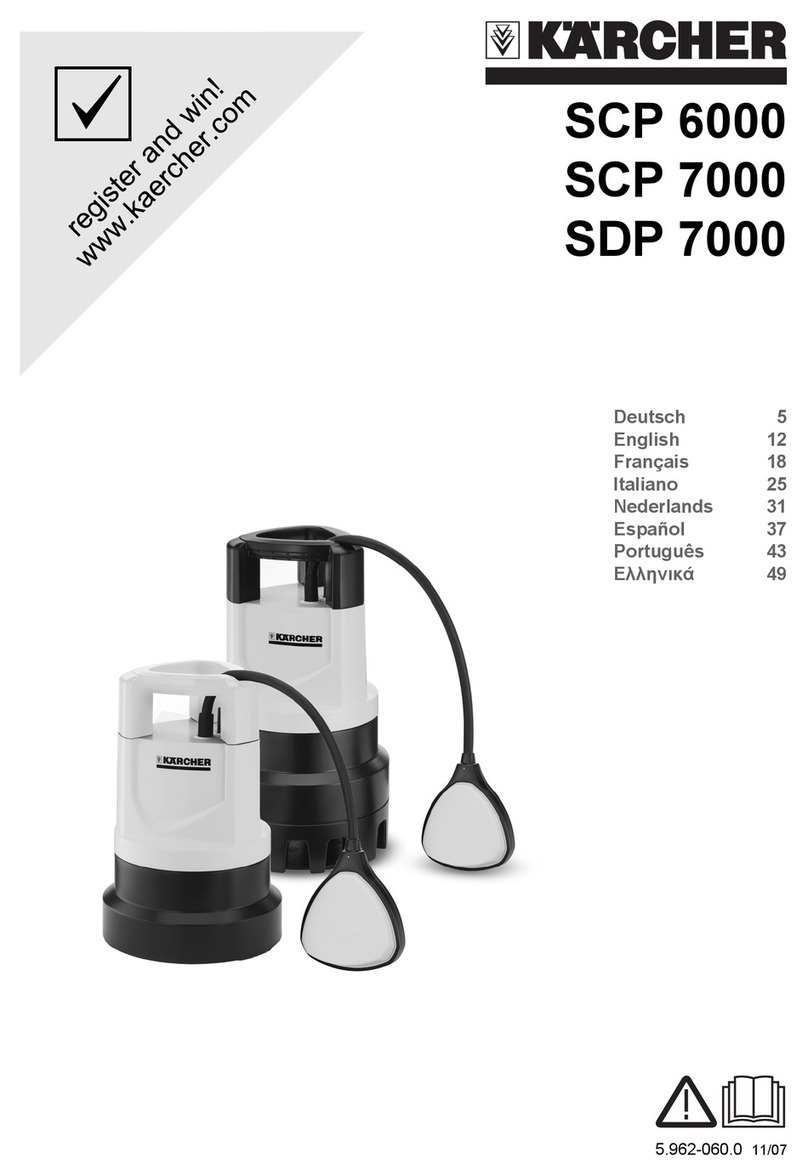
Kärcher SCP 6000 User manual

English 5
Español 10
SCP 6000
SDP 7000
5.963-178.0 11/08

2

3

4
6.997-346.0 6.997-359.0

English 5
Dear Customer,
Please read and comply with
these instructions prior to the
initial operation of your appliance. Retain
these operating instructions for future refer-
ence or for subsequent possessors.
This appliance has been designed for use
in private households and is not intended
for commercial use.
Themanufacturerisnotresponsibleforany
damages that may occur on account of im-
proper use or wrong operations.
The appliance is to be mainly used for re-
moving water from flooded areas but also
for repumping or pumping out containers,
forremovingwaterfrom wellsandshaftsas
well for removing water from boats and
yachts, as long as it is fresh water.
SCP 6000 (clear water pump)
Water with a impurities up to a maxi-
mum grain size of 5mm
Water from swimming pool (provided
the dosing of additives is proper)
Washing lye
SDP 7000 (Dirty water pump)
Water with a impurities up to a maxi-
mum grain size of 20mm
all transportable fluids of the SCP 6000
pump
몇Caution
The appliance is not suitable for contin-
uous pump operation (e.g. continuous
circulation in a pond) or as a stationary
installations (such as a lifting device).
Caustic, slightly inflammable and other
explosive substances such as petrol,
petroleum, diluted nitrogen, greases,
oils, salt water and waste water from
toilets as well as sludgy water that has
a slower flow capacity than water,
should not be transported using the
pump. The temperature of the trans-
ported fluids should not exceed 35°C.
The packaging material can be recy-
cled. Please do not place the pack-
aging into the ordinary refuse for disposal,
but arrange for the proper recycling.
Old appliances contain valuable ma-
terials that can be recycled. Please
arrange for the proper recycling of
old appliances. Please dispose your old ap-
pliances using appropriate collection sys-
tems.
The warranty terms published by the rele-
vant sales company are applicable in each
country. We will repair potential failures of
your appliance within the warranty period
free of charge, provided that such failure is
caused by faulty material or defects in man-
ufacturing. In the event of a warranty claim
please contact your dealer or the nearest
authorized Customer Service centre.
Please submit the proof of purchase.
Check the power cord with mains plug
for damage before every use. If the
powercordisdamaged,pleasearrange
immediately for the exchange by an au-
thorized customer service or a skilled
electrician.
All electrical sockets should be fixed in
an area that is protected against floods.
Unsuitable extension cables can be
hazardous. Only use extension cables
outdoorswhichhavebeenapprovedfor
this purpose and labelled with a suffi-
cient cable cross-section.
Use only extension cables with safety
conductors.
The plug and coupling of the extension
cable used must be spray watertight.
Do not use the mains cable or the cable
of the level sensor to transport or fasten
the appliance.
Proper use
Approved fluids that can be drained:
Environmental protection
Warranty
Safety instructions

6 English
To separate the machine from the
mains, pull the plug and not the power
cord.
Do not scrape the power cord across
sharp edges and ensure that it does not
get pressed.
The voltage indicated on the type plate
must correspond to the voltage of the
electrical source.
To avoid risks, all repairs and replace-
ment of spare parts may only be carried
out by the authorised customer service
personnel.
Follow the rules for electrical safety of
equipment:
When pumping out swimming pools,
garden ponds and fountains, only using
a earth-leakage circuit breaker with a
nominal leakage current of max. 10mA
with the immersion pump. Do not oper-
ate the pump if there are persons locat-
ed in the swimming pool or the garden
pond.
Forsafetyreasons,werecommendthat
you operate the appliance only via a
earth-leakage circuit breaker (max.
10mA).
The machine should only be operated
with a power source with proper earth-
ing and connected safety conductors.
The electrical connection of the system
may only be performed by a qualified
electrician.Please followthe respective
national regulations!
This device is not intended for use by
persons (including children) with re-
duced physical, sensory or mental abil-
ities or lacking experience and/or
knowledge, unless they are supervised
by a person responsible for their safety
or are instructed by these persons on
the use of the device. Children should
be supervised, to ensure that they do
not play with the device.
Please follow the safety instructions before
start-up!
Please keep in mind that the label "Name-
plate" may not be removed from the pump.
If the label is removed, there will be no
more warranty for the tightness of the
pump.
1 Power cord with plug
2 Level sensor
3 Level sensor stopper
4 Carrying handle
5 Hose connection 1" (25.4 mm) with flat
seal
Illustration
ÎScrew the hose connection onto the
pumpand make surethatthe flat seal is
installed in the hose connection.
ÎPush the hose on the hose connection
and fasten it with appropriate hose clip
Note
The shorter the hose, the higher the feed
rate.
Illustration
ÎIn automatic operations mode, set the
required switching height by clamping
the level sensor cable in the stopper.
Illustration
ÎIn manual operations mode, align the
level sensor upward (cable pointing
downward). Tip: Push the cable of the
level sensor like a loop through the han-
dle.
Illustration
ÎPlace the pump on a level, stabile sur-
face in the liquid to be transported, en-
surethat it isstandingfirmly orimmerse
it using a rope tied to the handle.
The suction area should not be blocked
fully or partially through the impurities.
Start up
Description of the Appliance
Preparing the Appliance

English 7
The fluid level must be at least 3 cm (SCP
6000) or8cm (SCDP 7000) for thepump to
suck in automatically.
ÎInsert the mains plug into the socket.
In the automatic mode, the level switch au-
tomatically controls the pumping opera-
tions. The pump switches on or off when
the fluid level reaches the height that has
been set.
Ensure that the level sensor is not obstruct-
ed in any way.
In manual opertions the pump remains
switched on continuously.
Note:
Dry run leads to increased wear and tear;
do not leave the pump unattended when it
is running. Switch off the pump within 3
minutes of dry running.
ÎRinse the pump with clean water after
use.
Especially after running chlorinated wa-
ter or other liquids that leave residue
behind.
Note
Contaminations can accumulate and lead
to malfunctions.
ÎDisconnect the main plug from the
socket.
The appliance is maintenance-free.
ÎStore the appliance in a frost free area.
Operation
Automatic operation
Manual operation
Finish operation
Maintenance and Care
Maintenance
Storage
Special accessories
The figures of the following special accessories can be found on page 4 of these instruc-
tions.
6.997-346.0 Suction hose,by the
meter, 1"(25.4mm)
25 m
Vacuum-tight spiral hose, to be cut into individual
lengths.
6.997-359.0 Pump connection
G1 (33.3 mm) incl.
Check valve
Suitable for 3/4“ (19 mm) or 1“ (25.4 mm) hoses.
WithG1“(33.3 mm)threadedconnection. Insertthe
backflow valve instead of the flat seal to prevent the
water from returning into the pump.

8 English
Troubleshooting
몇Caution
To avoid risks, all repairs and replacement of spare parts may only be carried out by the
authorised customer service personnel.
Fault Cause Remedy
Pump runs but does not
transport Air in the pump Plug in/ pull out the mains
plug of the pump a few
times till the fluid gets
sucked
Suction area blocked Pullout themainsplugand
clean the suction area
(only in manual mode) Water
levelbelowtheminimumwater
level
Where possible, immerse
the pump deeper into the
liquidorproceedaccording
to the instructions in the
chapter describing the
preparationsnecessaryfor
automatic operation
Pump does not run or sud-
denly comes to a standstill
during operations
Power supply interrupted Check fuses and electrical
connections
Thermal protection switch has
switched off the pump due to
over-heating
Pull out the mains plug, let
the pump cool down, clean
the suction area, prevent
dry running
Dirt particles have got jammed
into the suction area Pullout themainsplugand
clean the suction area
Pump operation stopped by
sensor Check position of level
sensor
Pumping capacity is re-
ducing Suction area blocked Pullout themainsplug and
clean the suction area
Pumping capacity too low The pumping capacity de-
pends on the flow height, hose
diameter and hose length.
Keepmax.flowheight,see
technical data. If neces-
sary, select a different
hose diameter or hose
length.

English 9
Subject to technical modifications!
Specifications
SCP 6000 SDP 7000
Voltage V 127 127
Current type Hz 60 60
Output Pnom W 250 320
Protective class I I
Max. flow rate l/h 6000 7000
Max. pressure MPa
(bar) 0,05
(0,5) 0,06
(0,6)
Max. flow height m 5 6
Max. immersion depth m 8 8
Max. grain size of the dirt particles
that can be transported mm 5 20
Weight kg 4,0 4,3
The possible flow rate is even larger:
- the lower the flow heights are
- the larger the diameter of the hoses used are
- the shorter the hoses used are.

10 Español
Estimado cliente:
Antesdeponerenmarchapor
primera vez el aparato, lea el
presente manual de instrucciones y siga
las instrucciones que figuran en el mismo.
Conserve estas instrucciones para su uso
posterior o para propietarios ulteriores.
Este aparato ha sido diseñado para el uso
particular y no para los esfuerzos del uso
industrial.
El fabricante no asume responsabilidad al-
guna por los daños que pudieran derivarse
de un uso inadecuado o incorrecto.
El aparato está destinado principalmente a
extraer el agua en caso de inundaciones,
pero también para bombear y sacar líquido
de recipientes, para sacar agua de fuentes
o huecos, así como para sacar el agua de
botes y yates mientras se trate de agua dul-
ce.
SCP 6000 (bomba de agua limpia)
agua con un grado de suciedad hasta
un tamaño de grano 5mm
agua de piscinas (es imprescindible
una dosificación correcta de los aditi-
vos)
Solución jabonosa
SDP 7000 (bomba de agua sucia)
agua con un grado de suciedad hasta
un tamaño de grano 20mm
todos los líquidos que transporta la
bomba SCP 6000
몇Atención:
Elaparatonoesaptoparaelserviciode
bombeo permanente (p.ej. servicio per-
manente de circulación en un estan-
que) o como instalación estacionaria
(p.ej. dispositivo elevador).
No puede transportar sustancias corro-
sivas, ligeramente inflamables o explo-
sivas (como gasolina, petróleo,
disolvente de nitroglicerina), grasas,
aceites,aguasaladayagua residualde
aseos y agua con barro que tenga una
fluidez menor que el agua. La tempera-
tura del líquido que se va a transportar
no debe superar los 35°C.
Los materiales de embalaje son reci-
clables. Po favor, no tire el embalaje
a la basura doméstica; en vez de ello, en-
trégueloenlospuntos oficialesderecogida
para su reciclaje o recuperación.
Los aparatos viejos contienen mate-
riales valiosos reciclables que debe-
rían ser entregados para su
aprovechamiento posterior. Por este moti-
vo, entregue los aparatos usados en los
puntos de recogida previstos para su reci-
claje.
En todos los países rigen las condiciones
de garantía establecidas por nuestra em-
presadistribuidora.Lasaveríasdelaparato
serán subsanadas gratuitamente dentro
del periodo de garantía, siempre que se de-
banadefectosdematerialodefabricación.
En un caso de garantía, le rogamos que se
dirija con el comprobante de compra al dis-
tribuidor donde adquirió el aparato o al ser-
vicioalclienteautorizadomáspróximoasu
domicilio.
Antes de cada puesta en marcha, com-
pruebe si el cable de conexión y el en-
chufe de red están dañados. Si el cable
de conexión estuviera dañado, debe
pedir inmediatamente a un electricista
especializado del servicio técnico auto-
rizado que lo sustituya.
Se deben colocar todas las conexiones
de clavija eléctricas en una zona a
prueba de inundaciones.
Loscablesprolongadoresinadecuados
pueden ser peligrosos. Para el exterior,
utilice sólo cables prolongadores autori-
zados para exterior, adecuadamente
marcados y con una sección de cable
suficiente.
Uso previsto
Líquidos que se permiten extraer:
Protección del medio ambiente
Garantía
Instrucciones de seguridad

Español 11
Utilice únicamente cables de prolonga-
ción con conductor de protección.
El enchufe y el acoplamiento del cable
deprolongaciónutilizadotienenqueser
impermeables.
El cable de alimentación y el cable del
interruptor de nivel no se deben usar
para transportar o fijar el aparato.
No tire del cable para desconectar el
aparato de la red, sino de la clavija de
enchufe.
Evitar que el cable quede tirante en las
esquinas o quede aplastado.
La tensión de la fuente de corriente tie-
ne que coincidir con la indicada en la
placa de características.
Para evitar riesgos, es necesario que
las reparaciones y el montaje de piezas
de repuesto sean realizados únicamen-
te por el servicio técnico autorizado.
Tener en cuenta los dispositivos protec-
tores eléctricos:
Al bombear el agua de piscinas, estan-
quesdejardínyfuentes, lasbombasde
inmersión sólo se pueden utilizar con
un interruptor de corriente de defecto
con una corriente de defecto nominal
de máx. 10mA. Si hay personas en la
piscina o en el estanque, no se puede
utilizar la bomba.
Por razones de seguridad, también re-
comendamos utilizar el aparato siem-
pre con un interruptor de corriente por
defecto (max. 10mA).
El aparato sólo se puede operar en en-
chufes autorizados con un conductor
de protección conectado.
La conexión eléctrica del aparato sólo
puede ser realizada por un electricista
especializado.Respetarlasnormativas
nacionales sobre el tema.
Este aparato no es apto para ser opera-
do por personas (incl. niños) con capa-
cidades físicas, sensoriales o
intelectuales limitadas, o con falta de
experienciay/oconocimientos,anoser
que sea supervisado por una persona
para responsable para su seguridad o
haya sido instruida para utilizar el apa-
rato. Mantener fuera del alcance de los
niños.
Antes de poner la bomba en marcha, es im-
prescindible respetar las indicaciones de
seguridad.
Después también hay que procurar que la
etiqueta "placa de características" no se
quite bajo ningún concepto de la bomba. Si
se quita la etiqueta se eliminará la garantía
de estanqueidad de la bomba.
1 Cable de conexión a red con enchufe
2 Conmutador de nivel
3 Bloqueo de interruptor de nivel
4 Asa de transporte
5 Conexión de manguera 1“(25,4mm)
con junta plana
Figura
ÎAtornillar la toma de la manguera a la
bomba y procurar que la junta plana
esté montada en la toma de la mangue-
ra.
ÎIntroducir la manguera en la conexión
para manguera y fijar con una brida
apropiada
Nota
Cuanto más corto sea el tubo, mayor será
la capacidad de transporte.
Figura
ÎSi se opera en automático, ajustar la al-
tura de conexión, para ello introducir el
cable del interruptor de nivel en el blo-
queo.
Figura
ÎSi se opera manualmente, colocar el in-
terruptor de nivel hacia arriba (cable ha-
ciaabajo).Sugerencia:deslizarelcable
del interruptor de nivel a través del asa.
Figura
ÎColocar la bomba bien asentada sobre
una base estable en el líquido o introdu-
Puesta en marcha
Descripción del aparato
Preparación

12 Español
cir sujetándola por el asa con una cuer-
da.
El área de aspiración no se debe blo-
quear con suciedad total ni parcialmen-
te.
Para que la bomba aspire automáticamen-
te, el nivel de líquido debe ser de al menos
3cm (SCP 6000), u 8cm (SDP 7000).
ÎEnchufarlaclavijaderedaunatomade
corriente.
En modo automático, el interruptor de nivel
controla el proceso de bombeo automática-
mente. Si el nivel de líquido alcanza la altu-
ra ajustada, la bomba se enciende o
apaga.
Lalibertaddemovimiento delinterruptorse
debe garantizar.
En el modo manual, la bomba están siem-
pre encendida.
Nota:
Si se deja funcionar en vacio, se aumenta
el desgaste, no deje de vigilar la bomba si
está en modo manual. Si se opera en va-
cío, apagar la bomba tras 3 minutos.
ÎLavar la bomba con agua limpia des-
pués de cada uso.
Especialmente tras transportar agua
clorada u otros líquidos que dejen resi-
duos.
Nota
La suciedad se puede acumular y provocar
problemas en el funcionamiento.
ÎSaque el enchufe de la toma de corrien-
te.
El aparato no precisa mantenimiento.
ÎColoque el aparato en un lugar a salvo
de las heladas.
Funcionamiento
Modo automático
Modo manual
Finalización del funciona-
miento
Cuidado y mantenimiento
Mantenimiento
Almacenamiento
Accesorios especiales
Las figuras de los accesorios especiales indicados a continuación se pueden ver en la
página 4 del manual de instrucciones.
6.997-346.0 Manguera de aspi-
ración por metrose
1“(25,4mm) 25m
Manguera con refuerzo espiral al vacío para cortar
los largos de manguera individualmente.
6.997-359.0 Toma de conexión
de bomba G1(33,3
mm) incl. válvula de
retención
Para mangueras de 3/4“ (19mm) o 1“(25,4mm).
Con rosca de conexión G1(33,3mm). Colocar una
válvula de retorno en lugar de la junta plana para
evitar el retorno del agua a la bomba.

Español 13
Ayuda en caso de avería
몇Atención:
Para evitar riesgos, es necesario que las reparaciones y el montaje de piezas de repues-
to sean realizados únicamente por el servicio técnico autorizado.
Avería Causa Modo de subsanarla
La bomba funciona pero
no transporta nada Aire en la bomba Enchufar y desenchufar la
bomba varias veces hast-
sa que se aspire líquido
Zona de aspiración obstruida Desenchufe la clavija y lim-
pie la zona de aspiración
(sólo en modo manual) nivel
de agua bajo mínimos Introducir la bomba si es
posiblemásprofundaenel
líquido o proceder tal y
como se describe en el ca-
pítulo Preparar (Modo au-
tomático)
Labombano funcionaose
apaga de repente. Suministro de corriente inte-
rrumpido Comprobar los fusibles y
conexiones eléctricas
El interruptor térmico de pro-
tección ha apagado la bomba
por sobrecalentamiento
Desenchufar, dejar enfriar
la bomba, limpiar la zona
de aspiración, evitar que
funcione en seco
Partículas de suciedad atasca-
das en la zona de aspiración Desenchufe la clavija y lim-
pie la zona de aspiración
Conmutador de nivel para la
bomba Comprobar la posición del
conmutador de nivel
Se reduce la potencia de
transporte Zona de aspiración obstruida Desenchufe la clavija y lim-
pie la zona de aspiración
Potencia de transporte de-
masiado baja La capacidad de transporte de
la bomba depende de la altura
de transporte, diámetro y lon-
gitud del tubo
Respetar la altura máx. de
transporte,véaselosdatos
técnicos, si es necesario
elegir otro diámetro o lon-
gitud de tubo.

14 Español
Reservado el derecho a realizar modifi-
caciones técnicas.
Datos técnicos
SCP 6000 SDP 7000
Tensión V 127 127
Tipo de corriente Hz 60 60
Potencia Pnom W 250 320
Clase de protección I I
Cantidad máx. de transporte l/h 6000 7000
Presión máx. MPa
(bar) 0,05
(0,5) 0,06
(0,6)
Altura de transporte máx. m 5 6
Profundidad máx. de inmersión m 8 8
Tamaño máximo de grano de las
partículas de suciedad a transportar mm 5 20
Peso kg 4,0 4,3
El caudal posible es aún más grande:
- cuanto más bajas sean las alturas de transporte.
- cuanto mayor sea el diámetro de los tubos utilizados.
- cuanto más cortos sean los tubos utilizados.


195
A
Alfred Kärcher Ges.m.b.H.
Lichtblaustraße 7
1220 Wien
(01) 25 06 00
☎
AUS
Kärcher Pty. Ltd.
40 Koornang Road
Scoresby VIC 3179
(03) 9765 - 2300
☎
B / LUX
Kärcher N.V.
Industrieweg 12
2320 Hoogstraten
0900 - 33 444 33
☎
BR
Kärcher Indústria e Comércio Ltda.
Av. Prof. Benedicto Montenegro 419
CEP 13.140-000 - Paulínia - SP
0800 17 61 11
☎
CH
Kärcher AG
Industriestraße 16
8108 Dällikon
0844 850 863
☎
CZ
Kärcher spol. s.r.o.
Za Mototechnou 1114/4
155 00 Praha 5 -Stodûlky
(02) 3552-1665
☎
D
Alfred Kärcher GmbH & Co. KG
Service-Center Gissigheim
Im Gewerbegebiet 2
97953 Königheim-Gissigheim
(07195) 903 20 65
☎
DK
Kärcher Rengøringssystemer A/S
Gejlhavegård 5
6000 Kolding
70 20 66 67
☎
E
Kärcher S.A.
Pol. Industrial Font del Radium
Calle Doctor Trueta 6-7
08400 Granollers (Barcelona)
902 17 00 68
☎
F
Kärcher S.A.S.
5 Avenue des Coquelicots
Z.A. des Petits Carreaux
94865 Bonneuil-sur-Marne
(01) 43 99 67 70
☎
FIN
Kärcher OY
Yrittäjäntie 17
01800 Klaukkala
0207 413 600
☎
GR
Kärcher Cleaning Systems A.E.
31-33, Nikitara & Konstantinoupoleos str.
13671 Acharnes
210 - 23 16 153
☎
GB
Kärcher(UK) Limited
Kärcher House
Beaumont Road
Banbury
Oxon, OX16 1TB
01295 752200
☎
H
Kärcher Hungária Kft
Tormásrét ut 2.
2051 Biatorbágy
(023) 530-640
☎
HK
Kärcher Limited
Unit 10, 17/F.
APEC Plaza
49 Hoi Yuen Road
Kwun Tong, Kowloon
(02) 357-5863
☎
I
Kärcher S.p.A.
Via A. Vespucci 19
21013 Gallarate (VA)
848 - 99 88 77
☎
IRL
Karcher Limited (Ireland)
12 Willow Business Park
Nangor Road
Clondalkin
Dublin 12
(01) 409 77 77
☎
KOR
Karcher Co. Ltd. (South Korea)
Youngjae B/D, 50-1, 51-1
Sansoo-dong, Mapo-ku
Seoul 121-060
032-465-8000
☎
MAL
Karcher Cleaning Systems Sdn. Bhd.
No. 8, Jalan Serindit 2
Bandar Puchong Jaya
47100 Puchong, Selangor
(03) 5882 1148
☎
N
Kärcher AS
Stanseveien 31
0976 Oslo
24 17 77 00
☎
NL
Kärcher BV
Postbus 474
4870 AL Etten-Leur
0900-33 444 33
☎
NZ
Karcher Limited
12 Ron Driver Place
East Tamaki, Auckland
(09) 274-4603
☎
PRC
Kärcher Cleaning Systems Co., Ltd.
Part B, Building 30,
No. 390 Ai Du Road
Shanghai Waigaoquiao 200131
(021) 5046-3579
☎
P
Neoparts Com. e Ind. Automóvel, Lda.
Largo Vitorino Damásio. 10
1200 Lisboa
(21) 395 0040
☎
PL
Kärcher Sp. z o.o.
Ul. Stawowa 140
31-346 Kraków
(012) 6397-222
☎
RUS
Karcher Ltd.
Vienna House
Strastnoi Blv. 16
107031 Moscow
095-933 87 48
☎
S
Kärcher AB
Tagenevägen 31
42502 Hisings-Kärra
(031) 577-300
☎
SGP
Karcher Asia Pacific Pte. Ltd.
5 Toh Guan Road East
#01-00 Freight Links Express Distripark
Singapore 608831
6897-1811
☎
TR
Kärcher Servis Ticaret A.S.
9 Eylül Mahallesi
307 Sokak No. 6
Gaziemir / Izmir
(0232) 252-0708
☎
TWN
Karcher Limited
5F/6. No.7
Wu-Chuan 1st Rd
Wu-Ku Industrial Zone
Taipei County
(02) 2299-9626
☎
UA
Kärcher Ukraine
Kilzeva doroga, 9
03191, Kyiv
(044) 5947575
☎
UAE
Karcher FZE
Jebel Ali Free Zone
RA 8, XB 1, Jebel Ali, Dubai
(04) 8836-776
☎
ZA
Kärcher (Pty.) Limited
144 Kuschke Street
Meadowdale
Edenvale 1614
(011) 574-5360
☎
11/2007
Other manuals for SCP 6000
2
This manual suits for next models
1
Table of contents
Languages:
Other Kärcher Water Pump manuals

Kärcher
Kärcher SCP 12000 User manual

Kärcher
Kärcher SCP 6000 User manual

Kärcher
Kärcher GP 45 User manual

Kärcher
Kärcher SP 5 Dirt User manual

Kärcher
Kärcher BP 3 User manual

Kärcher
Kärcher SCP 7000 User manual

Kärcher
Kärcher BPE 4200/50 User manual

Kärcher
Kärcher SCP 9000 User manual

Kärcher
Kärcher SP 3 Dirt User manual

Kärcher
Kärcher SCP 12000 IQ Level Sensor User manual