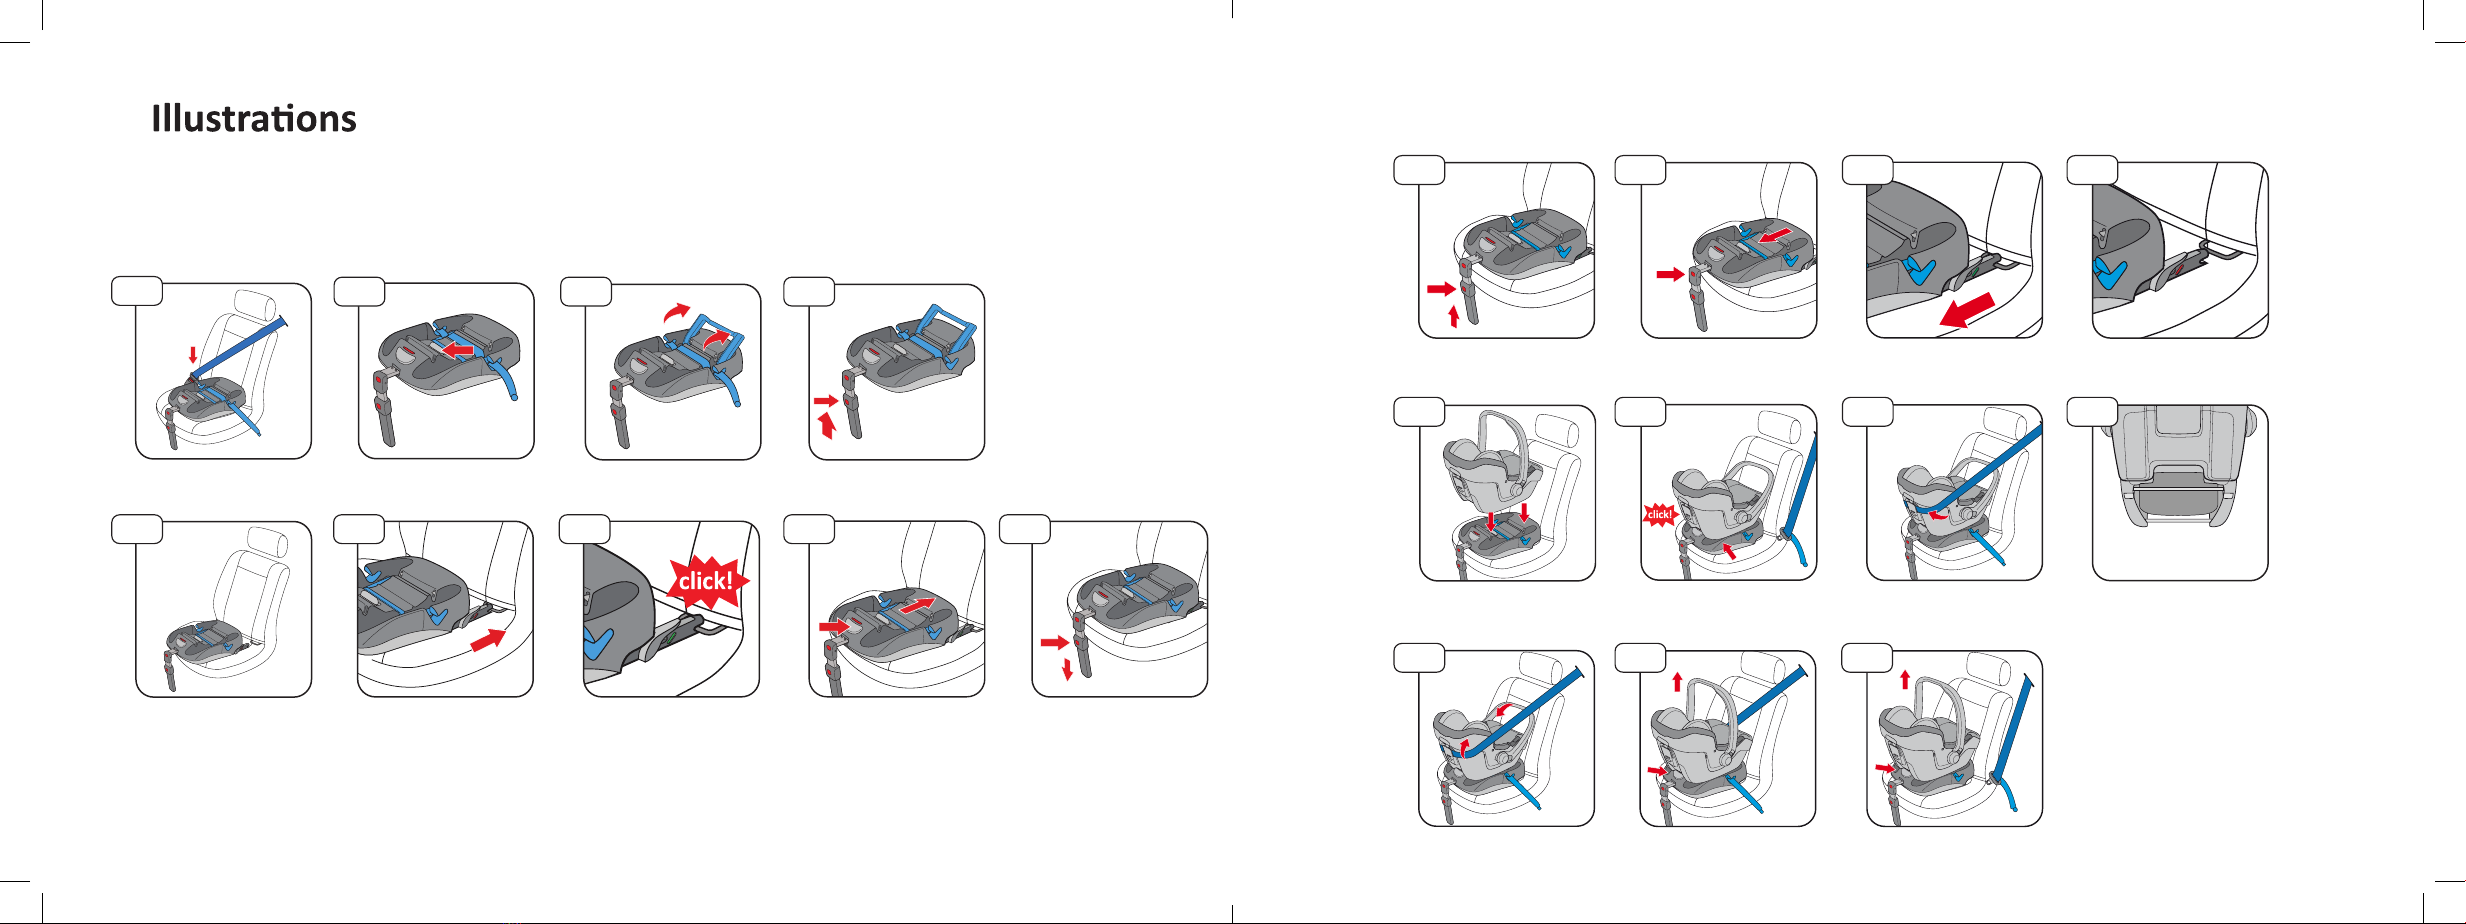
Installing the child seat on the base
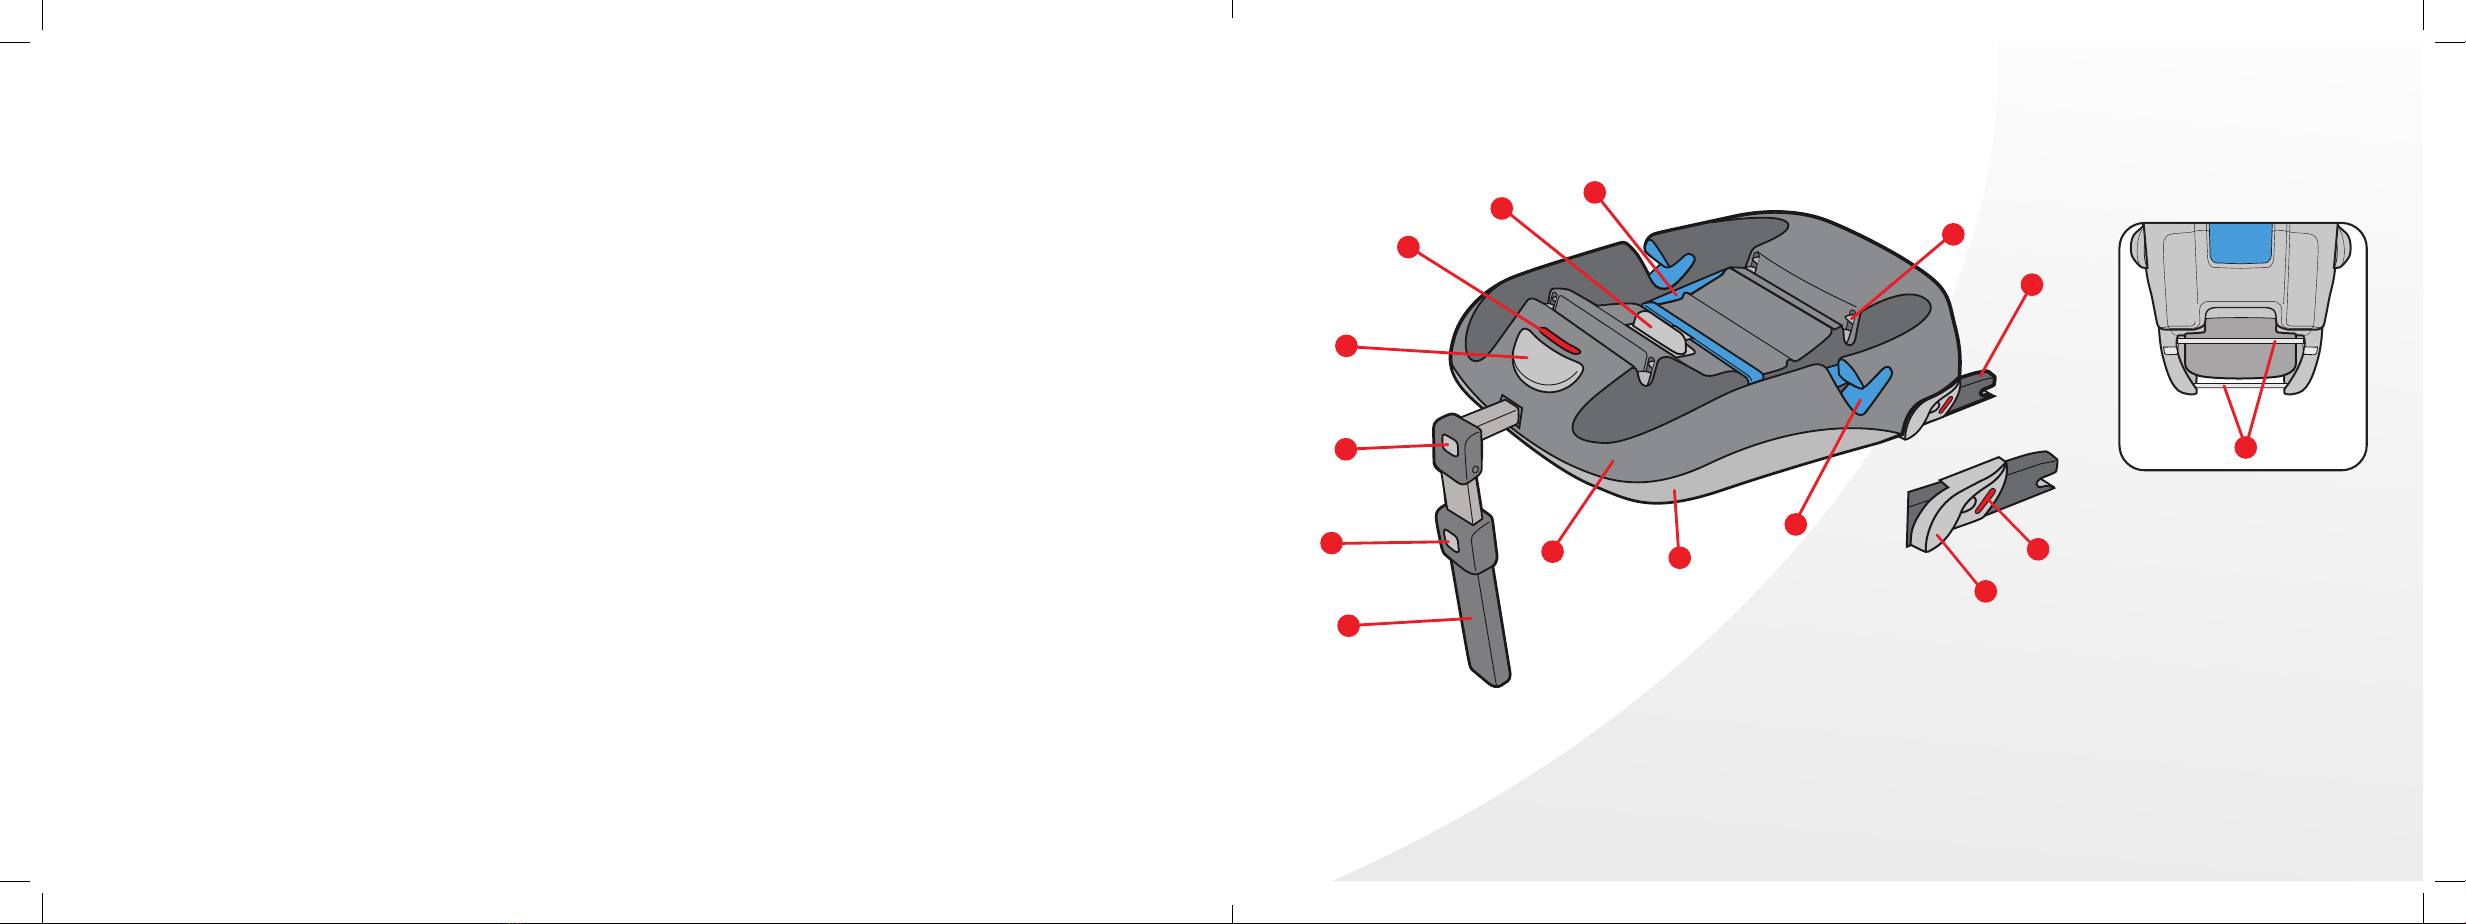
The base has been tested and approved for use with the child seats AVIONAUT JET and CARLO (these
products are labelled with symbol), which are ed with mounng bars 15.
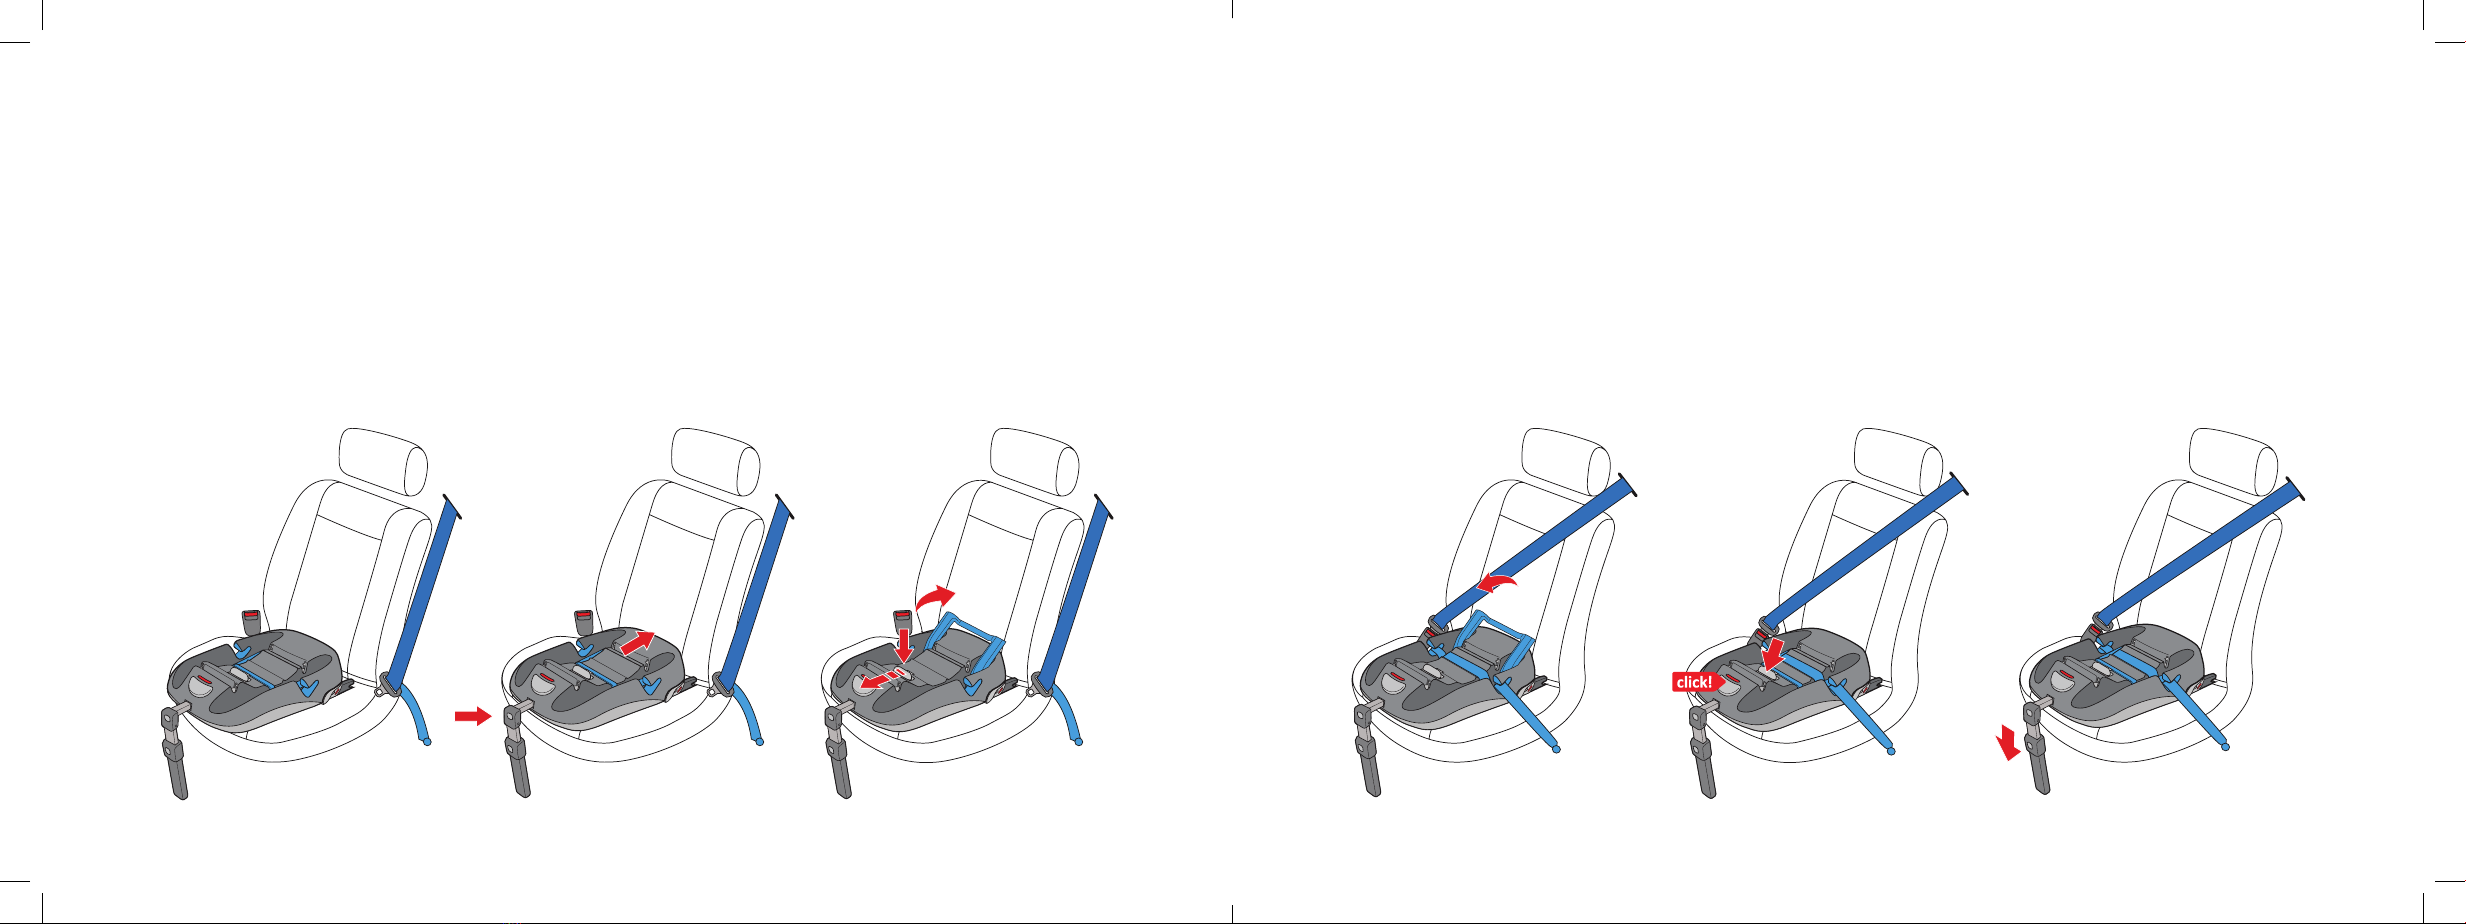
1. Place the child seat over the base, facing towards the rear of the car. - Fig. 14
2. Snap the child seat in the anchoring system of the base 8 starng with the fasteners at the front of the base
(You will hear Click! and the display 5 will show green) - Fig. 15
3. Place the handle so that it faces the back of the car seat (the handle must be blocked) - Fig. 15
* When installing the base with the seat belt, pull the breast part of the seat belt through the guide slot at the
back of the child seat. - Fig. 16
Uninstalling the child seat from the base
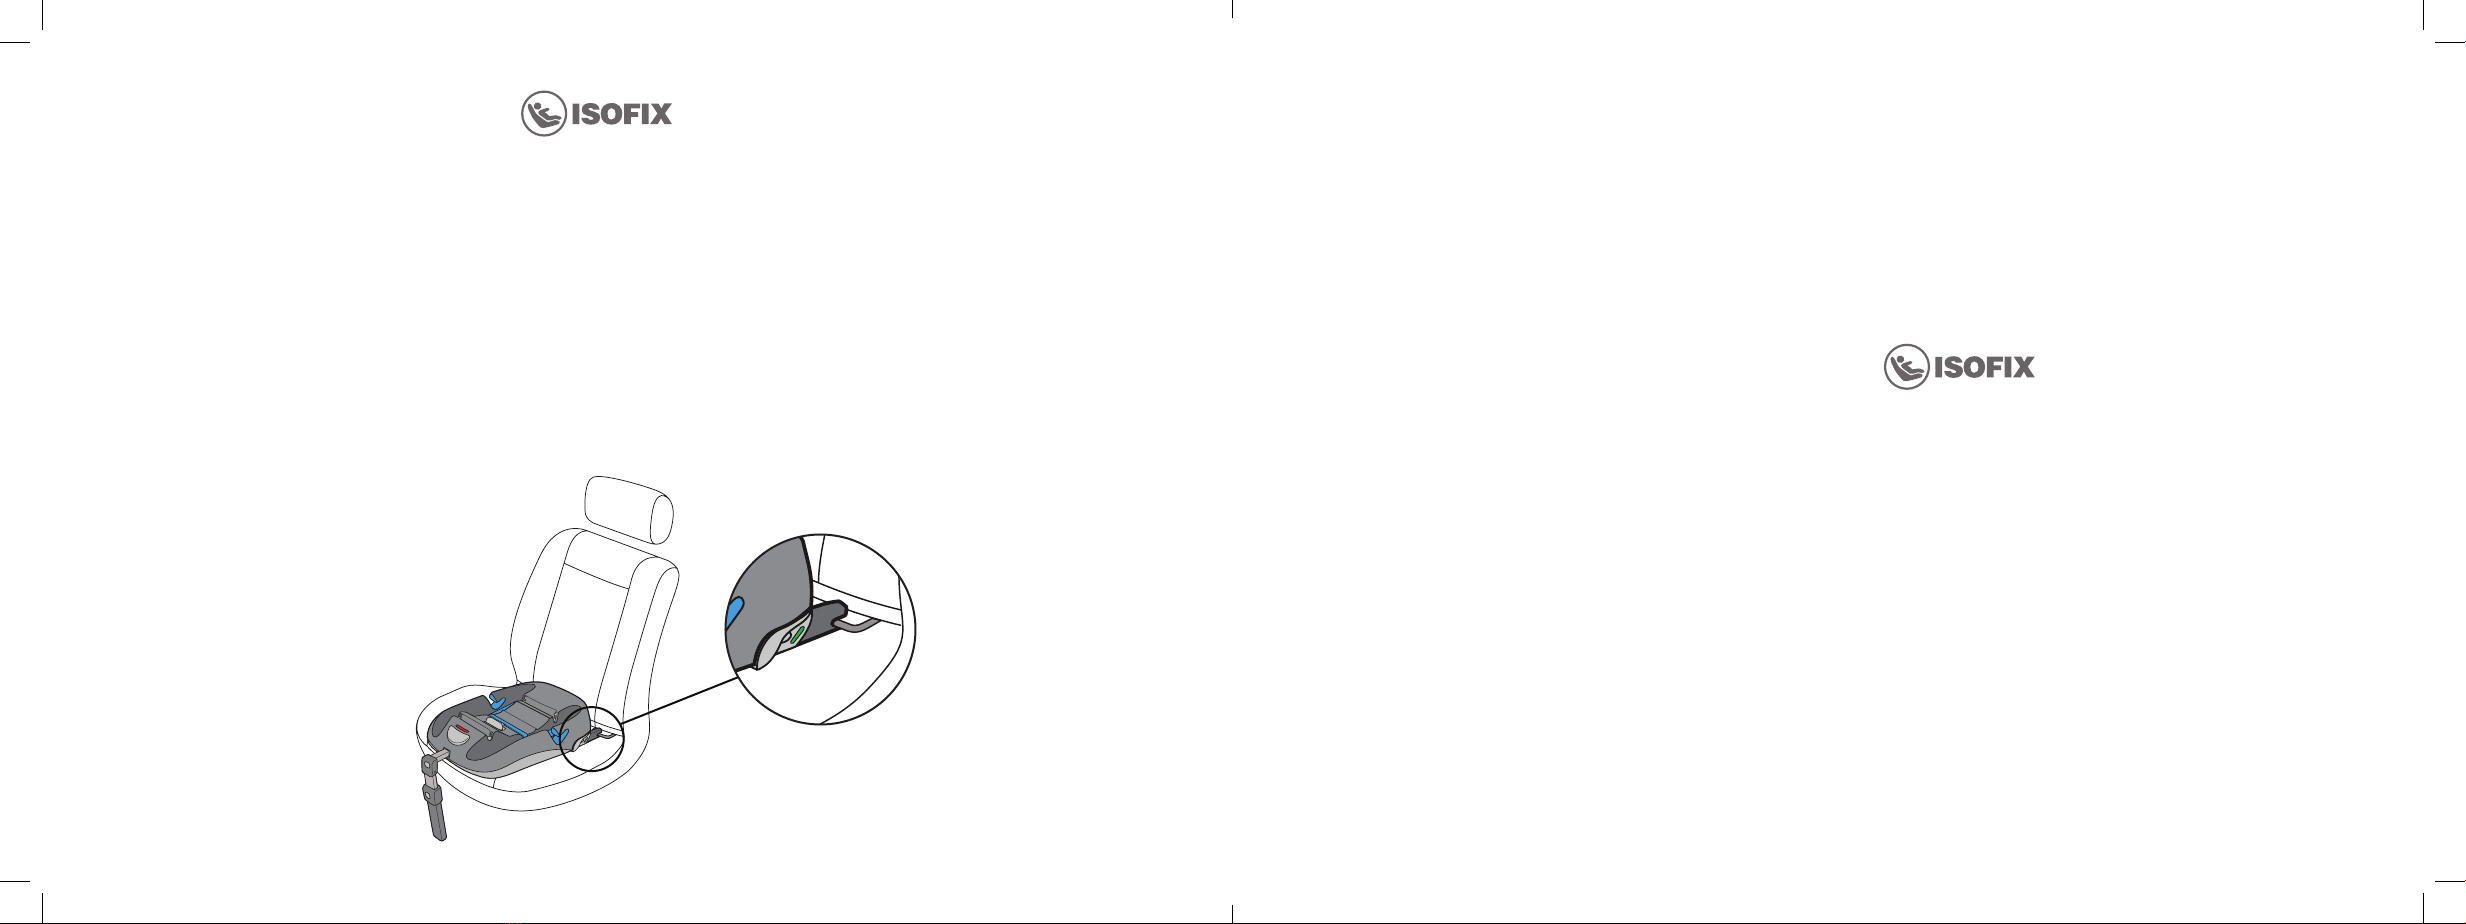
1. Put the handle of the child seat vercally, pull the shoulder belt from the guide slot at the back of the child
seat. - Fig. 18
2. Press buon 4, which releases the block of the base 8 and pull the child seat up. - Fig. 19
Cleaning and maintenance of Carlo base
The parts made of plasc should be cleaned with warm water and soap. Do not use any aggressive chemical
agents.
Warranty
General condions:
- The warranty period is 24 months from the date of purchase.
- The manufacturer guarantees good quality and funconality of the product on condion that it is used for
its intended purpose and in accordance with the manual.
- Only the rst buyer has warranty rights and they cannot be transferred to third pares.
- Should defects appear, go to the sales point with the product, the original warranty card signed by the
shop, and a receipt or other document of sale.
- The warranty for the consumer goods sold does not exclude, limit, or sustain the Buyer’s rights following
from the sales agreement.
- The warranty is valid on the whole EU territory.
The warranty does not include:
- Natural wear and tear of the individual components of the base.
- Mechanical and thermal damage to the product.
- Losing small elements of the equipment.
- Damage caused by the failure to use the product as specied in the manual.
- Other damage for which the Buyer is to blame.
- Products from which serial numbers have been removed.
- Products repaired by persons not qualied.