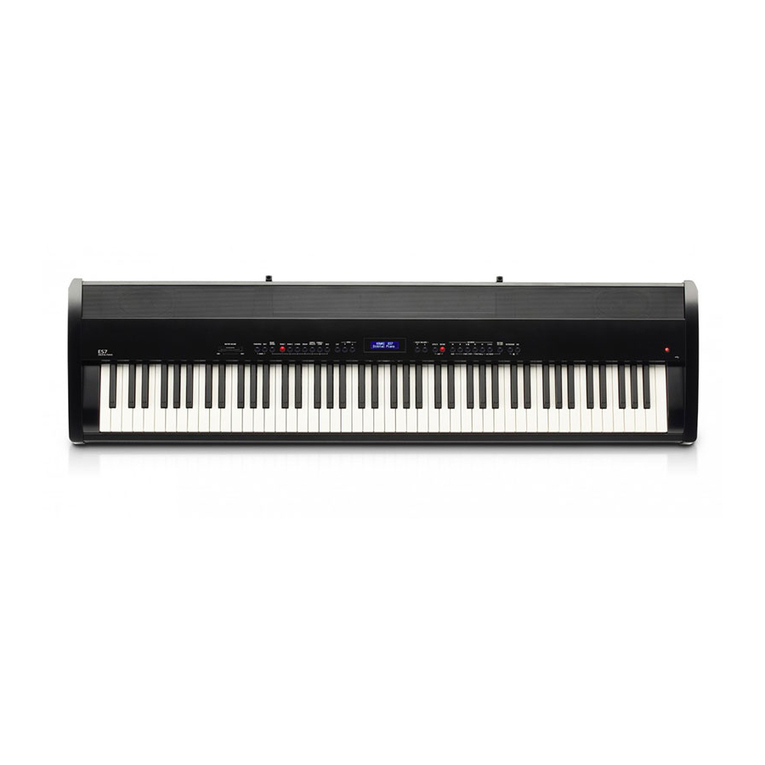
Kawai DP1 User manual


2
denotes that care should be taken.
The example instructs the user to take care not to allow fingers to be trapped.
denotes a prohibited operation.
The example instructs that disassembly of the product is prohibited
denotes an operation that should be carried out.
The example instructs the user to remove the power cord plug from the AC outlet.
Important Safety Instructions
SAVE THESE INSTRUCTIONS
INSTRUCTIONS PERTAINING TO A RISK OF FIRE, ELECTRIC SHOCK, OR INJURY TO PERSONS
RISK OF ELECTRIC SHOCK
DO NOT OPEN
WARNING
TO REDUCE THE RISK OF
FIRE OR ELECTRIC
SHOCK, DO NOT EXPOSE
THIS PRODUCT TO RAIN
OR MOISTURE.
CAUTION
AVIS : RISQUE DE CHOC ELECTRIQUE - NE PAS OUVRIR.
TO REDUCE THE RISK OF ELECTRIC SHOCK, DO NOT REMOVE COVER (OR BACK).
NO USER-SERVICEABLE PARTS INSIDE. REFER SERVICING TO QUALIFIED SERVICE PERSONNEL.
The lighting flash with arrowhead symbol, within
an equilateral triangle, is intended to alert the user
to the presence of uninsulated "dangerous voltage"
within the product's enclosure that may be of
sufficient magnitude to constitute a risk of electric
shock to persons.
The exclamation point within an equilateral triangle
is intended to alert the user to the presence of
important operating and maintenance (servicing)
instructions in the leterature accompanying the
product.
Examples of Picture Symbols
Read all the instructions before using the product.
WARNING - When using electric products, basic precautions should always be followed,
including the following.
WARNING Indicates a potential hazard that could result in death
or serious injury if the product is handled incorrectly.
The product should be connected to
an AC outlet of the specified
voltage.
Do not disassemble, repair or modify
the product.
When using the headphones, do not
listen for long periods of
time at high volume levels.
Do not insert or disconnect the power
cord plug with wet hands.
If you are going to use an AC power cord,
make sure that its has the correct plug shape
and conforms to the specified power voltage.
Failure to do so may result in fire.
Doing so may cause electric shock.
Doing so may result in hearing problems.
Doing so may result in product breakdown, electric
shock or short-circuit.

3
When connecting the AC power cord
and other cords, take care
not to get them tangled.
Do not place the product near electrical
appliances such as TVs and
radios.
Take care not to allow any foreign
matter to enter the product.
Before connecting cords, make sure
that the power to this product
and other devices is turned
OFF.
Do not use the product in the following areas.
Areas, such as those near windows, where the product is
exposed to direct sunlight
Extremely hot areas, such as near a heater
Extremely cold areas, such as outside
Extremely humid areas
Areas where a large amount of sand or dust is present
Areas where the product is exposed to excessive
vibrations
Do not drag the product on the floor.
Take care not to drop the product.
Do not stand on the product or exert
excessive force.
CAUTION
Pulling the AC power cord itself may damage
the cord, causing a fire, electric shock or short-
circuit.
Failure to do so may cause fire in case of
lightning.
Failure to do so may over-heat the product,
resulting in fire.
Indicates a potential hazard that could result in injury
or damage to the product or other
Using the product in such areas may result in
product breakdown.
Use the product only in moderate climates (not
in tropical climates).
Failure to do so may cause breakdown of this
product and other devices.
Doing so may cause the product to generate
noise.
If the product generates noise, move the
product sufficiently away from the electrical
appliance or connect it to another AC outlet.
Entry of water, needles or hair pins may result
in breakdown or short-circuit.
The product shall not be exposed to dripping or
splashing. No objects filled with liquids, such
as vases, shall be placed on the product.
Please lift up the product when moving it. Please
note that the product is heavy and must be
carried by more than two persons.
Dropping the product may result in breakdown.
Failure to do so may damage them, resulting in
fire, electric shock or short-circuit.
When disconnecting the AC power cord’s
plug, always hold the plug
and pull it to remove it.
Doing so may result in discoloration or
deformation of the product.
When cleaning the product, put a soft cloth in
lukewarm water, squeeze it well, then wipe
the product.
Doing so may cause the product to become
deformed or fall over, resulting in breakdown
or injury.
Do not wipe the product with benzene
or thinner.
It is a good practice to have the instrument near the
AC outlet and the power cord plug in a position so
that it can readily be disconnected in an emergency
because the instrument is not completely
disconnected from the power supply even when the
power switch is turned off.
4
Do not place naked flame sources, such as lighted candles on the product.
The product should be serviced by qualified service personnel when:
The power supply cord or the plug has been damaged.
Objects have fallen, or liquid has been spilled into the product.
The product has been exposed to rain.
The product does not appear to operate normally or exhibits a marked change in
performance.
The product has been dropped, or the enclosure damaged.
GROUNDING INSTRUCTIONS
This product must be grounded. If it should malfunction or breakdown, grounding provides a
path of least resistance for electric current to reduce the risk of electric shock. This product is
equipped with a cord having an equipment-grounding conductor and a grounding plug. The plug
must be plugged into an appropriate outlet that is properly installed and grounded in
accordance with all local codes and ordinances.
DANGER - Improper connection of the equipment-grounding conductor can result in a risk of
electric shock. Check with a qualified electrician or serviceman if you are in doubt as to
whether the product is properly grounded. Do not modify the plug provided with the product - if
it will not fit the outlet, have a proper outlet installed by a qualified electrician.
Notes on Repair
When you open/close the keyboard
cover or the top board, do it gently. Doing them roughly may trap your fingers or head,
resulting in injury.
Use the apparatus only in moderate climates (not in tropical climates)
The product should be located so that its location or position does not interfere with its proper
ventilation. Ensure a minimum distance of 5cm around the product for sufficient ventilation.
Ensure that the ventilation is not impeded by covering the ventilation openings with items,
such as newspaper, table-cloths, curtains, etc.
Do not lean against the product. Doing so may cause the product to move.
Should an abnormality occur in the product, immediately turn the power OFF, disconnect
the power cord plug, and then contact the shop from which the product was purchased.

Quick Start
Advanced
Playing
Edit
Recorder
System
Other
5
This KAWAI digital piano is a revolutionary new keyboard instrument, combining the latest technological
advances with traditional craftsmanship inherited from KAWAI's rich heritage of building fine pianos.
This owner's manual contains valuable information that will help you make full use of this instrument’s
many capabilities. Please read all sections carefully and keep this manual handy for further reference.
Adopting the latest technology, the DP1 produces the finest concert grand piano sound ever heard from
a digital instrument, whilst also providing a selection of other rich tones, including string and bass voices.
MAIN FEATURES OF THE DP1
CONCEALED CONTROL PANEL
ACOUSTIC TOUCH KEYBOARD
UNPRECEDENTED TONAL AUTHENTICITY
SURROUND SOUND SYSTEM FOR REALISTIC AMBIENCE
TWO TRACK RECORDER SUPPORTING MP3 AUDIO
The DP1’s 'AWA Grand Pro' wooden keyboard provides excellent feel and control, with a touch resembling
that of an acoustic piano. Moreover, the DP1's keyboard vibrates just like a real grand piano, allowing the
performer to feel the subtle resonance of every note for an incredibly authentic playing experience.
Simply open the lid and play, just as with a real grand piano. The DP1's control panel is hidden from view
until the ACTIVATOR is selected - appearing, with a gentle tap of the touch sensitive, smoked glass
surface.
Thank you for purchasing a
KAWAI Piano!
The DP1 is a revolutionary digital grand piano that employs an orthodox, simple, yet novel concept.
The DP1 recording function allows up to 100, two track songs to be stored in internal memory. Recordings
can be saved as MP3 audio, and written to any connected USB memory device. The DP1 also supports
MP3 audio song playback, offering performers a useful resource for study and practice.
The DP1 implements a 5.1 channel surround system that is capable of reproducing the immersive sound
field of an acoustic grand piano. Moreover, through the intelligent Ambience function, the performer can
simulate numerous playing and listening environments.
MPEG Layer-3 audio coding technology licensed from Fraunhofer IIS and Thomson.
This digital piano uses the ‘Puppy Linux’ kernel and GNU utilities for its operating system.
Further information about this software can be found at http://www.puppylinux.com.

66
66
6
Table of Contents
Quick Start ..............................................................................................................7
1. Playing the Piano....................................................................................................7
2. Pedals.....................................................................................................................8
3. Activating the Control Panel ...................................................................................8
4. Adjusting the Volume..............................................................................................9
5. Headphones ...........................................................................................................9
6. Selecting Sounds .................................................................................................10
7. After Playing the Piano .........................................................................................11
8. Turning off the Standby Power .............................................................................11
9. Opening the Top Board ........................................................................................12
10. Mounting the Music Rack ...................................................................................12
Advanced Playing .................................................................................................13
1. Adjusting the Four Parameters.............................................................................13
2. Dual Mode ............................................................................................................14
3. Split Mode.............................................................................................................15
4. Metronome ...........................................................................................................16
5. Transpose.............................................................................................................16
Ambience Function ...............................................................................................17
1. Reverb/Position ....................................................................................................17
Editing a Sound ....................................................................................................18
1. Tone......................................................................................................................18
2. EFX.......................................................................................................................19
3. Settings ................................................................................................................20
4. Saving a Sound ....................................................................................................21
Digital Recording Function....................................................................................22
1. Playback ...............................................................................................................22
2. Recording .............................................................................................................24
3. Part Settings.........................................................................................................25
4. Part to Audio & Part Delete ..................................................................................25
5. Saving a Song ......................................................................................................27
System Mode........................................................................................................28
1. Master Parameters...............................................................................................28
2. Creating a User Touch Curve ...............................................................................29
3. File Operation.......................................................................................................30
4. Output Settings.....................................................................................................33
5. Display Settings....................................................................................................35
6. MIDI Global...........................................................................................................35
Jacks.....................................................................................................................36
Specifications........................................................................................................38
MIDI Implementation Chart...................................................................................39

77
77
7
Quick Start
Quick Start
1. Playing the Piano
(1) Open the keyboard cover to turn the power on.
Note that only the ACTIVATOR button is visible.
Wait for the DP1 operating system to load (approximately one minute). The ACTIVATOR
light will blink slowly during this time, and will stop blinking when the loading process finishes.
(2) Play the keyboard - the default 'Concert Grand1' sound will be heard.
ACTIVATOR
button
To begin, press the POWER switch on the jack board (located on the left-rear underside of the DP1) to
turn the standby power on.

88
88
8
Quick Start
2. Pedals
The DP1 piano has three pedals: Sustain, Soft and Sostenuto - just like a grand piano. The sustain pedal
is capable of responding to half pedaling, which provides even finer control over the
damper effect.
Touch the ACTIVATOR button on the right side of the control panel.
The main display and several other panel buttons will appear.
Touch the ACTIVATOR button again and the main panel display and buttons will disappear.
3. Activating the Control Panel
ACTIVATOR
button
Soft Sostenuto Sustain

99
99
9
Quick Start
Play a note on the keyboard and try adjusting the volume.
Touching the button raises the volume, whilst touching the button lowers the volume.
5. Headphones
The DP1 piano has two headphone jacks.
For private performances, you may wish to use headphones. The speakers will be turned off automatically
when headphones are plugged into either jack, and the DP1 piano will only be audible through the
headphones.
4. Adjusting the Volume
When the control panel is activated, the buttons below are visible. This owner's manual refers to these
buttons as the following:

1010
1010
10
Quick Start
6. Selecting Sounds
You have already heard the DP1's main grand piano sound. The DP1 has a total of 36 separate sounds,
not only different tones of piano, but various instrument voices also.
The different instrument sounds built into DP1 piano are called 'preset sounds'. All of these preset
sounds have been created through an advanced digital sampling process in order to recreate the most
natural and realistic tones possible.
(1) Touch the SOUND button for the category of instrument you would like to play.
When the button is touched, a variation list is briefly shown in the display.
(2) Selecting the Variation
Touching the same SOUND button again will select the next variation sound assigned to that
SOUND button. Alternatively, while the display shows the variation list, select sounds using
the 2 VALUE buttons or the 4 MENU buttons as demonstrated below.
Category
Variation
(3) Exiting to the Main Screen
Touching the EXIT button or waiting for a brief period, will exit from the variation list
to the main screen.

1111
1111
11
Quick Start
7. After Playing the Piano
After you have finished playing the DP1, close the keyboard cover. The power supply will automatically
switch to standby mode.
In addition, it is also possible to shut-down the DP1 by touching the ACTIVATOR button for five seconds.
Touching the ACTIVATOR button again for five seconds will restart the DP1 after shut-down.
NOTE: When closing the keyboard cover, please close it gently to prevent trapping
your fingers and risking possible injury.
8. Turning Off the Standby Power
When you wish to turn off the standby power, press the POWER switch on the jack board (located on the
left-rear underside of the DP1). If the product will not be used for a long time, turn off the standby
power supply and unplug the AC power cord from the AC outlet.

1212
1212
12
Quick Start
NOTE: When opening or closing the top board, please do so gently to prevent trapping your fingers
or head, and risking possible injury.
Furthermore, please do not attempt to move the DP1 while the top board is raised. Doing so
may cause the top board to fall, risking possible injury.
9. Opening the Top Board
10. Mounting the Music Rack
If you wish to perform using a musical score, please raise the music rack and adjust the angle to a
comfortable position.
(1) Raise the music rack.
(2) Adjust the angle to a comfortable position.
In order to fully enjoy the rich presence of the DP1's surround sound speaker system, one can open the
top board, using either the long or short prop arm to support the lid.
(1) Lift the top board slowly from the right side.
(Short prop arm)
(2) Hold the top board whilst raising the short or long prop arm.
(3) Rest the tip of the prop arm on the cap found underneath the top board.
The long prop arm uses the inside cap, whilst the short prop arm uses the outside cap.

Advanced
Playing
1313
1313
13
Each sound can be easily adjusted using the 4 VALUE buttons - each corresponding to 4 suitable parameters.
In the case of 'Concert Grand1' for example, the following 4 parameters are shown:
1. Adjusting the Four Parameters
To jump to other modes, use the 4 MENU buttons. When the 4 MENU buttons are active, the displays
shows 4 corresponding DESTINATION INDICATORS.
Each destination mode also has 4 adjustable parameters.
Jumping to other modes using the 4 MENU buttons
4 MENU buttons
DESTINATION
INDICATORS
Advanced Playing
Mechanical Noises
(Master Level of all Noises)
Voicing
Sympathetic
Resonance
Sustain Resonance

1414
1414
14
Advanced
Playing
The DUAL function allows two separate sounds to be layered together.
(1) Touch and hold down the desired SOUND button.
The first sound is selected and the list of first (upper) variations is shown in the display.
(2) Touch one more SOUND button.
The second (lower) sound is selected and the list of first and second variations is shown in
the display. DUAL mode is now enabled.
2. Dual Mode
(3) Selecting the Variation
While the list is shown, touching the same SOUND button again will select the next sound
variation. The upper and lower sound variations can also be adjusted by touching the 4
MENU buttons.
Alternatively, touch the 4 VALUE buttons on the left side to adjust the lower sound and the 4
VALUE buttons on the right side to adjust the upper sound.
Lower Octave Lower Velo Depth
Balance
Lower
Category
Upper
Category
Upper
Variation
(4) Exiting to the Main Screen
Touch the EXIT button or wait for a brief period to exit to the main screen.
(5) Ajusting the DUAL Balance
To adjust the volume balance of the two sounds, touch the VALUE buttons labelled 'Balance'.
It is also possible to adjust the Octave setting and Velocity Depth (touch sensitivity) of the
lower sound using the VALUE buttons labelled 'Lower Oct.' and 'Lower Velo Depth'.
Lower
Variation

Advanced
Playing
1515
1515
15
3. Split Mode
The SPLIT function divides the keyboard into two sections - upper and lower - allowing you to play each
part with a different sound.
(1) Touch and hold down the desired SOUND button.
The upper sound is selected and the upper variation list is shown in the display.
(2) Touch and hold down one more SOUND button.
The lower sound is selected and the list of upper and lower variations is shown in the display.
(4) Selecting the Variation
While the list is shown, touching the same SOUND button again will select the next sound
variation. The upper and lower sound variations can also be adjusted by touching the 4
MENU buttons.
Alternatively, touch the 4 VALUE buttons on the left side to adjust the lower sound and the 4
VALUE buttons on the right side to adjust the upper sound.
(5) Exiting to the Main Screen
Touch the EXIT button or wait for a brief period to exit to the main screen.
(6) Adjusting the Split Balance
To adjust the Split point, touch the VALUE buttons labelled 'Split Point'.
To adjust the volume balance of the two sounds, touch the VALUE buttons labelled 'Balance'.
It is also possible to adjust the Octave setting and Velocity Depth (touch sensitivity) of the
lower sound using the VALUE buttons labelled 'Lower Oct.' and 'Lower Velo Depth'.
Balance
Split Point
Lower Velo Depth
Upper
Lower
(3) Designating the Split Point
While holding down the two SOUND buttons, press the lowest key of the upper section. SPLIT
mode is now enabled.
Lower Octave

1616
1616
16
Advanced
Playing
The transpose function allows you to raise or lower the DP1's key in half steps. This is particularly useful
when you have learned a song in one key and are required to play it in another key. The transpose
function will allow you to play the song in the original key, yet hear it in another key.
(1) Entering the 'SYSTEM' menu
Touch the MENU button labelled 'SYSTEM'.
(2) Specifying the Transposition amount
Select the desired amount by using the Left-Upper VALUE buttons.
The Transpose value will be memorised automatically.
5. Transpose
The DP1's metronome function can help when recording a song by proving a steady beat to play along
with. The metronome beats, however, are not recorded.
(1) Entering the 'Recorder' screen
Touch the MENU button labelled 'Recorder'.
(2) Entering the 'Metronome Settings' screen
Touch the MENU button labelled 'Metronome Settings'.
(3) Starting the Metronome
Touch the MENU button labelled of 'Metronome ON'.
4. Metronome
Metronome
Beat
Tempo
Metronome
Volume
(7) Exiting to the Main Screen
Touching the EXIT button two times will exit to the main screen.
Metronome
ON/Off
(4) Changing the Metronome Beat (time signature)
Select the desired beat using the Right-Lower VALUE buttons.
(5) Adjusting the Metronome Tempo and Volume
Select the desired metronome tempo using the Right-Upper VALUE buttons.
Select the desired metronome volume using the Left-Lower VALUE buttons.
(6) Stopping the Metronome
Touch the MENU button of 'Metronome OFF'.

Edit
1717
1717
17
The DP1's Ambience function allows the performer to apply various reverberation and positioning effects,
assisting the 5.1 channel surround system to recreate authentic playing environments. This collection of
parameters can be saved as a USER setting and immediately recalled at any time.
see "Saving a Sound" for saving.
Touch the MENU button labelled 'Ambience' to enter the Ambience mode from the main screen.
1. Ambience
Reverb setting
Adjust the desired reverberation parameters using the 4 VALUE buttons.
Ambience Function
Position setting
Touch the MENU button labelled 'Position' and adjust the desired positioning parameters for each
upper and lower sounds using the 4 VALUE buttons.
Type
Dry/Wet
Main Time
Pre Delay
Upper L-R
Lower L-R
Upper F-R
Lower F-R

1818
1818
18
Edit
Touch the MENU button labelled 'Tone' once again. The display shows the third group of adjustable
parameters for the current sound.
Further adjustable parameter groups for the selected sound can be displayed by touching the MENU
buttons labelled 'More', when available. Touch the 'Back' button to return to the previous screen. Touch
the 'Exit' button to return to the main screen.
The 'EDIT' menu allows performers to adjust sound parameters. These adjustments can be saved as a
USER sound and immediately recalled at any time. The DP1 provides 12 USER sound memories.
Touch the MENU button labelled 'Edit' to enter the EDIT mode from the main screen. The MENU
button labels will change, allowing the performer to jump to 'Tone', 'EFX' and 'Settings' menus.
When DUAL/SPLIT mode is enabled, the The MENU button switches the editable part between lower
and upper sounds.
Editing a Sound
1. Tone
Each sound has groups of 4 suitable parameters for adjusting the sound.
In the 'Edit Tone' screen, the performer can adjust more parameters than are available from the main
screen. The following is an example of adjustments to the 'Concert Grand 1' sound.
Treble
Bass
Pedal Noise
Level Hammer Release
Level
The advanced menu
Editing Tone
Touch the MENU button labelled 'Tone'. The display shows the second group of adjustable parameters
for the current sound.
Key Thumps
Level

1919
1919
19
Edit
2. EFX
A maximum of 4 separate EFXs (effects) can be applied to each sound, providing a near limitless
combination of acoustic possibilities. Upon selecting a sound, the DP1 automatically applies suitable
EFXs, adding greater authenticity to each voice.
The advanced menu
Touch the MENU button that corresponds to 'EFX1' - 'EFX4' to enter the advanced menu. The display
shows the group of adjustable parameters for the current EFX.
Effect TypeOn/Off SW
Mix
Rate
Depth
Pre Delay
Further adjustable parameter groups for the selected EFX, can be displayed by touching the MENU
button, labelled 'More', when available. Touch the 'Back' button to return to the previous screen.
Touch the 'Exit' button to return to the main screen.
Editing EFX
Touch the MENU button labelled 'EFX' to enter the EFX menu from the Edit screen. The MENU button
labels will change, allowing the performer to select 'EFX1' - 'EFX4'. Once selected, the 'Effect Type' can
be changed and switched 'On' or 'Off' using the 2 VALUE buttons.

2020
2020
20
Edit
3. Settings
The 'Edit Settings' screen allows the performer to adjust parameters that affect the sound.
The advanced menu
Touch the MENU button labelled 'Settings' a second time to enter another screen of adjustable settings.
Volume
Temperament
Fine Tune
Temperament Key
PanpotTranspose
Editing Settings
Touch the MENU button labelled 'Settings' to enter the Settings menu from the Edit screen.
The 4 VALUE buttons can be used to adjust further settings.
Touch the 'Back' button to return to the previous screen or 'Exit' button to return to the main screen.
Stretch
Other manuals for DP1
1
Table of contents
Other Kawai Musical Instrument manuals

Kawai
Kawai EP308 User manual

Kawai
Kawai CN39 Manual

Kawai
Kawai DX200 User manual

Kawai
Kawai CA901 User manual

Kawai
Kawai ANYTIMEX3 User manual

Kawai
Kawai MP9500 User manual

Kawai
Kawai ES110 User manual

Kawai
Kawai Digital Electronic Organs SR50 User manual

Kawai
Kawai ES1 User manual

Kawai
Kawai CN34 User manual

Kawai
Kawai XR600 User manual

Kawai
Kawai MP7 User manual

Kawai
Kawai EGP-10 Grand E1 User manual

Kawai
Kawai ANYTIME X2 GP User manual

Kawai
Kawai CL20 User manual

Kawai
Kawai CN17 User manual

Kawai
Kawai Concert Performer CP139 User manual

Kawai
Kawai Digital Piano CA840 User manual

Kawai
Kawai ES100 User manual

Kawai
Kawai Digital Piano model 2000 2000 User manual