Thank
you
for
purchasing
a
KAWAI
Digital
Piano!
The
Kawai
digital
piano
MR170
is
a
revolutionary
new
keyboard
instrument
that
combines
the
latest
in
electronic
advances
with
traditional
craftsmanship
inherited
from
Kawai's
many
years
of
experience
in
building
fine
pianos.
The
keyboard
provides
the
touch
response
and
full
dynamic
range
required
for
a
superb
performance
on
the
piano,
harpsichord,
organ,
and
other
instrument
presets.
Industry-Standard
MIDI
(Musical
Instrument
Digital
Interface)
jacks
are
included
which
allow
you
to
play
other
electronic
instruments
at
the
same
time
-
opening
a
whole
new
world
of
musical
possibilities.
This
Owner's
Manual
contains
valuable
information
that
will
help
you
make
fuli
use
of
this
instrument's
many
capabilities.
Read
it
carefully
and
keep
it
handy
for
further
reference.
Table
of
Contents
M
Basic
Control
Sicario
2
M
Lers
Play
nasse
4
El
Advanced
Features.............u220uu200nnaru0nnannnnannnnnnnnnnnrnnaneen
5
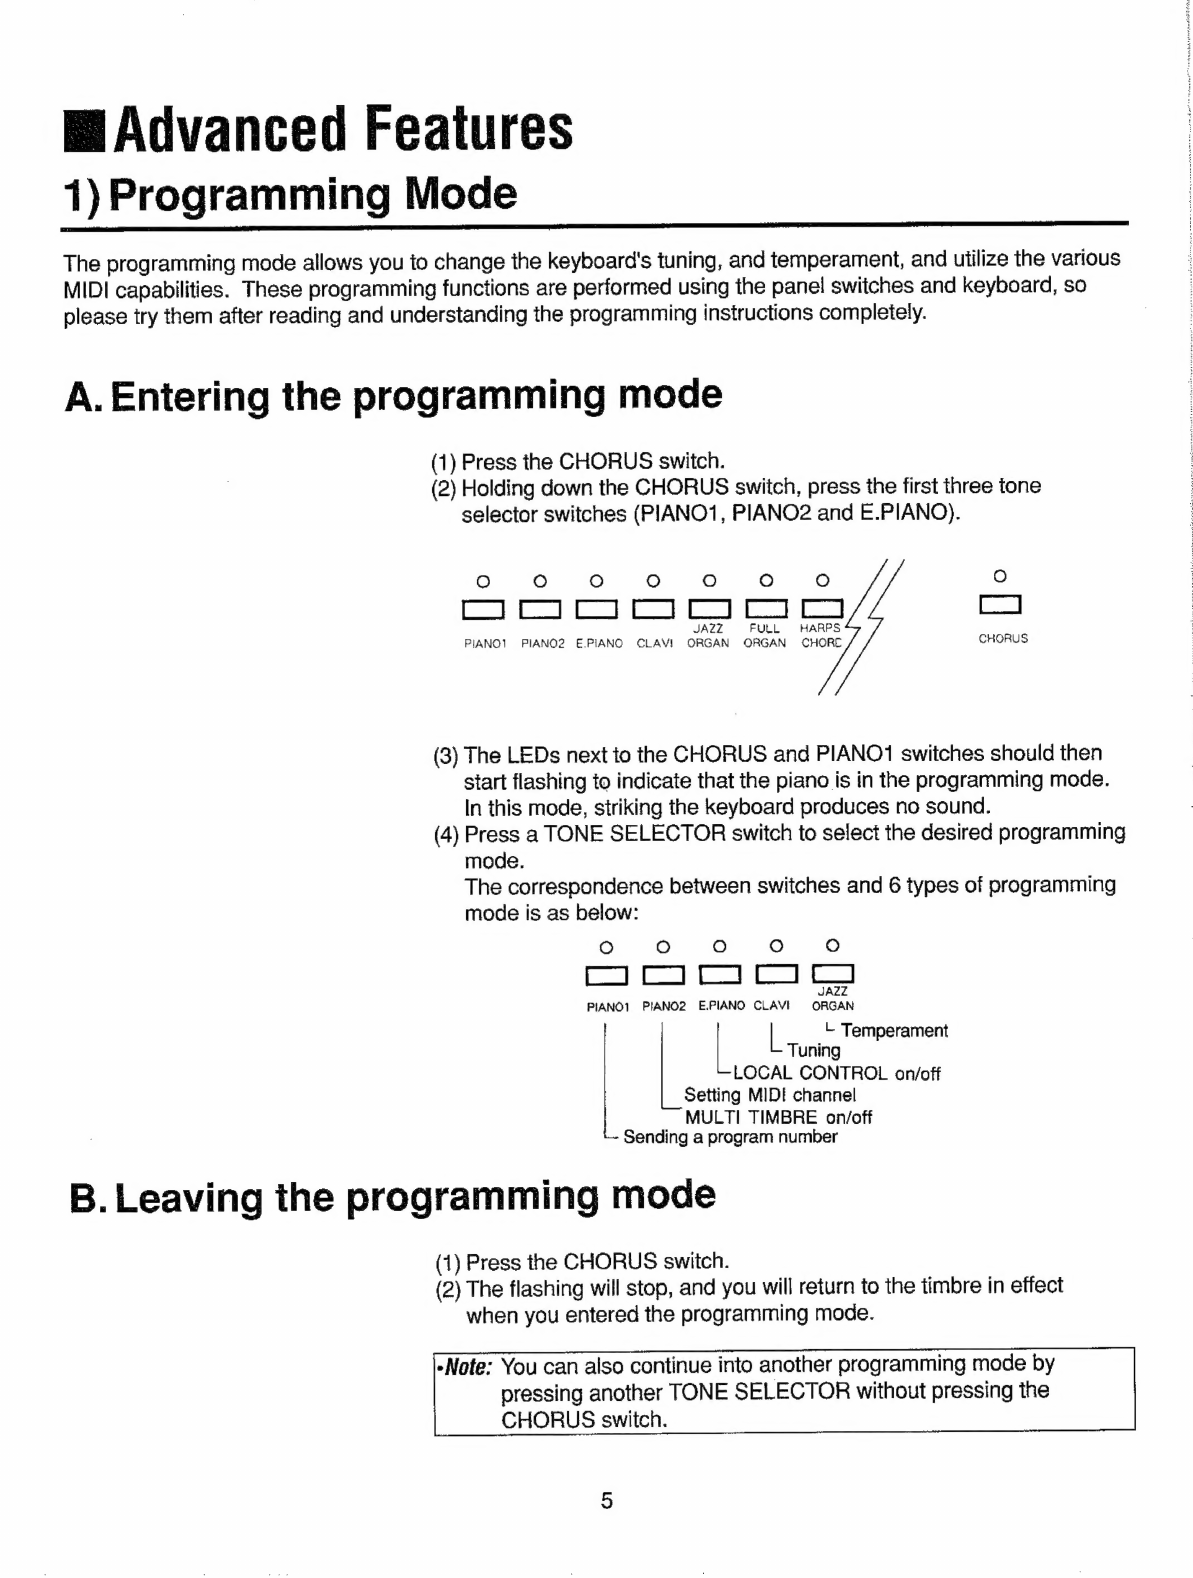
1)
Programming
Mode
..........n.nesusennunnrnsennsnennennnnnennnnnunennnennnnonnnunonn
5
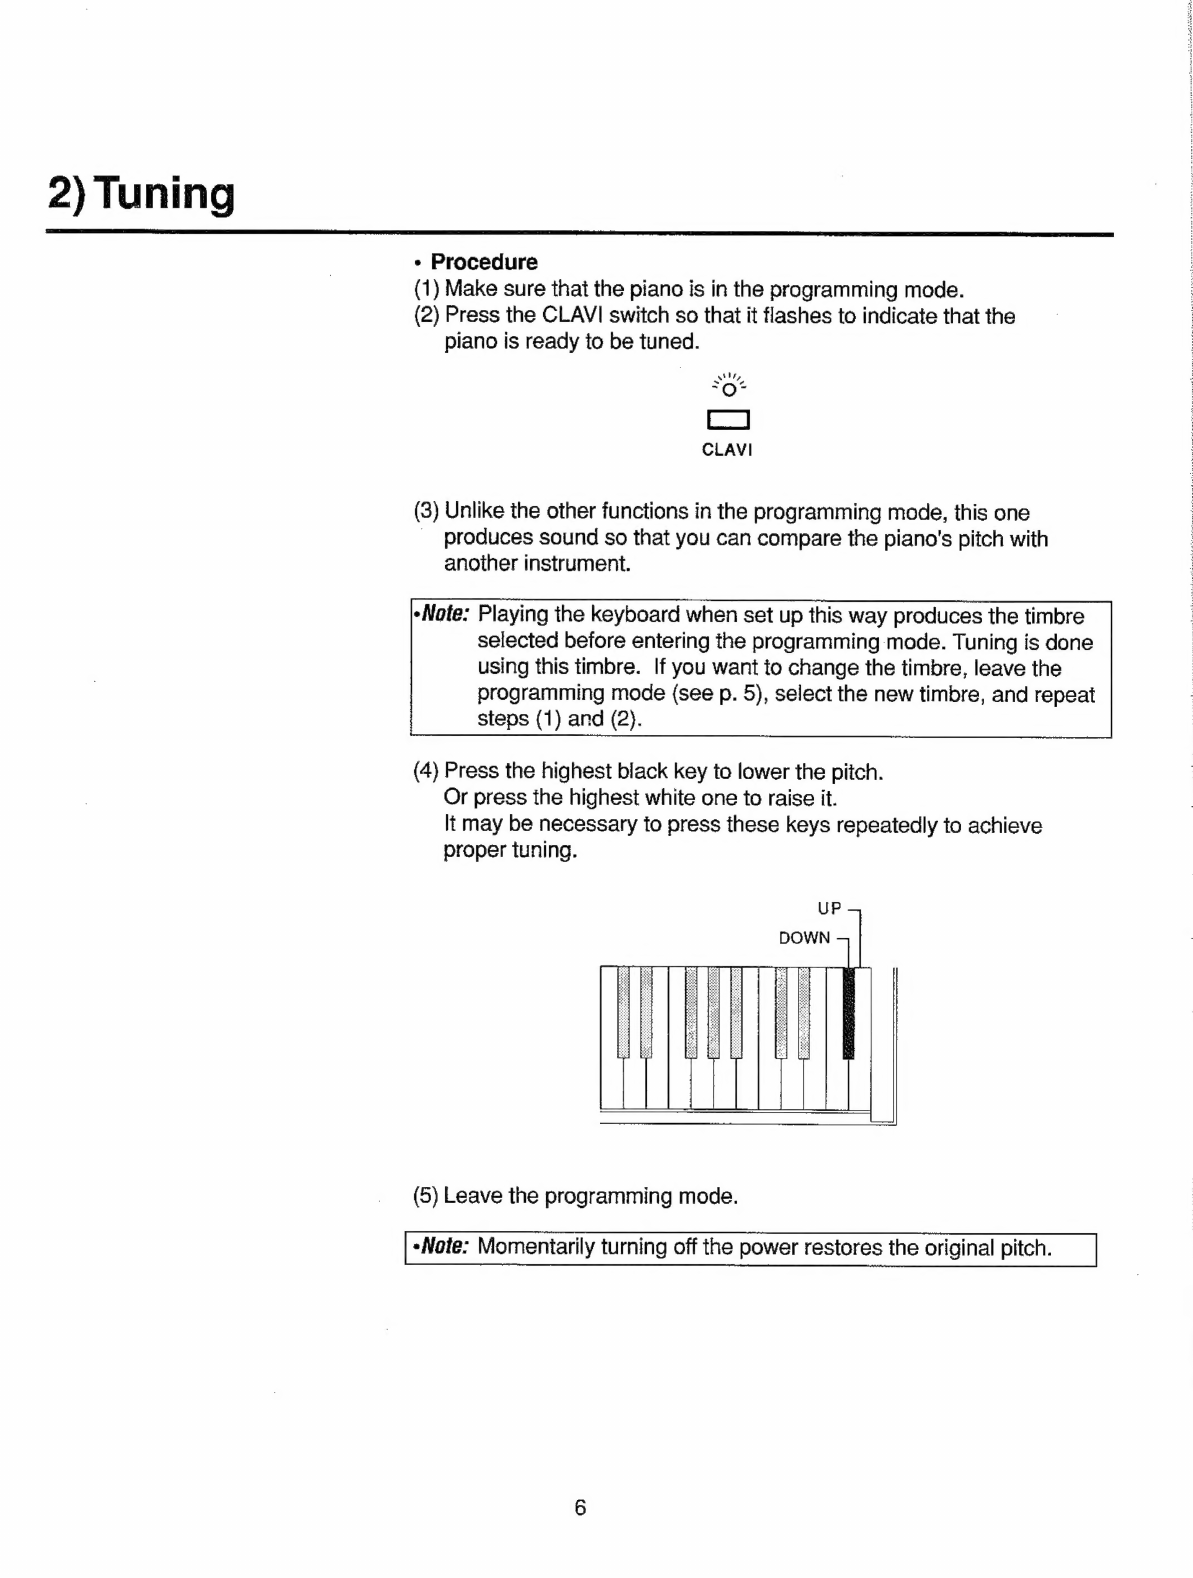
2):
TUNING
PAE
ca
E
aia
6
3)
Temperaments
necccycaccasncussecaixevaseentnetenns-aaseteveddanancuceessenexanteonsunsn
7
E
MIDI
Interface
nn
a
9
1)
Whats
MIDI?
....
uns
9
2)
Conneelions.:
=...
asiain
iaaa
Naaa
10
3)
MIDI
Implementation
........resennnnnnnnnnnnannanonnnnnnnnnernnnnnunnnnnnennnnnen
12
A)
MIDI-
Operation
A
aE
A
aai
13
(A)
Setting
the:channel...e.n
een
13
(B)
Sending
a
program
number
................-.220000000nn00n0nn
san
ons
snn
nenn
14
(C)
Turning
MULTI
TIMBRE
on
and
off...
eee
sans
17
(DOC
ALCON
TRO
i
ee
18
E
SpeciHications
na
20
Ml
MIDI
Implementation
Chart
....oonnnnanoncaananccnannanarcncanonsan
21