Thank
you
for
purchasing
a
KAWAI
Digital
Piano!
The
Kawai
digital
piano
MR380(C)
is
a
revolutionary
new
keyboard
instrument
that
combines
the
latest
in
electronic
advances
with
traditional
craftsmanship
inherited
from
Kawai's
many
years
of
experience
in
building
fine
pianos.
lts
wooden
keys
provide
the
touch
response
and
full
dynamic
range
required
for
a
superb
performance
on
the
piano,
harpsichord,
organ,
and
other
instrument
presets.
Moreover,
the
reverb
effect
gives
you
even
deeper
resonance.
industry-Standard
MIDI
(Musical
Instrument
Digital
Interface)
jacks
are
included
which
allow
you
to
play
other
electronic
instruments
at
the
same
time
-
opening
a
whole
new
world
of
musical
possibilities.
This
Owner's
Manual
contains valuable
information
that
will
help
you
make
full
use
of
this
instrument's
many
capabilities.
Read
it
carefully
and
keep
it
handy
for
further
reference.
Table
of
Contents
MM
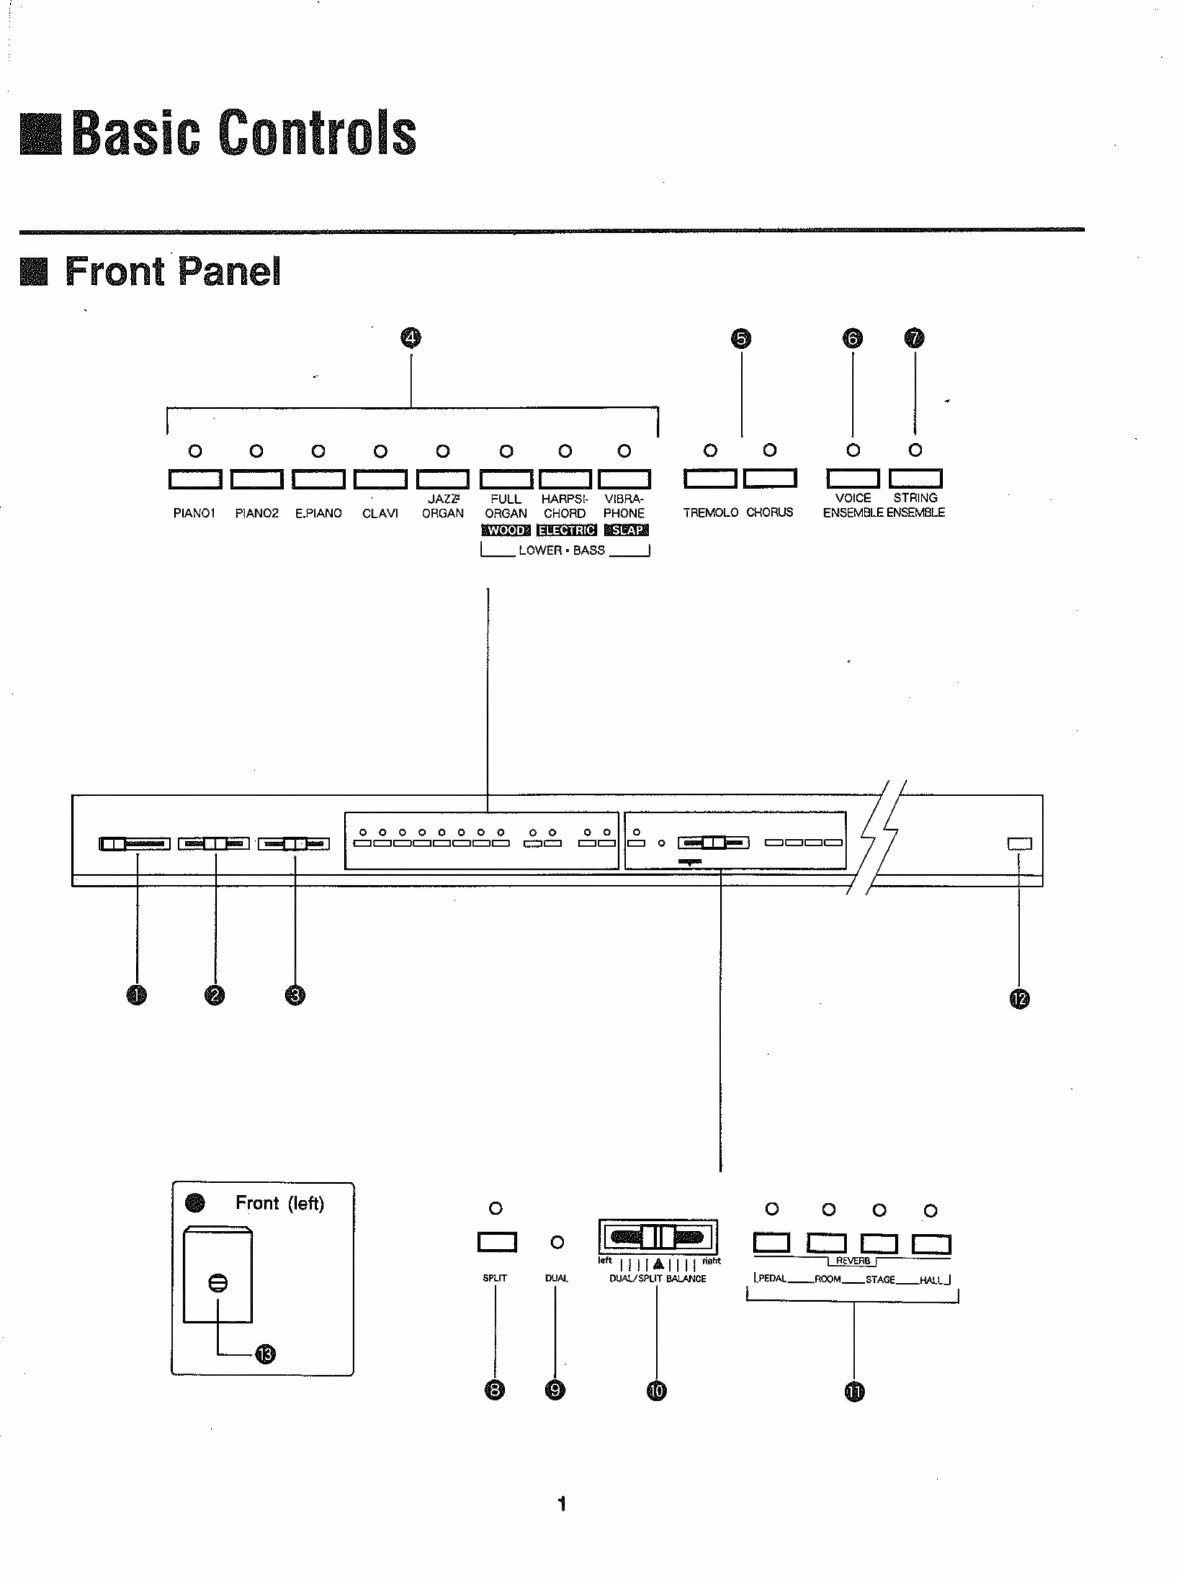
Basle
Controls
ae
anos
dd
1
MLS
Pav
a
a
4
1}
Basle
OPE
eiii
ici
4
2)
DUAL
and
SPLIT
......ssnsnensnneossesononnsnnnnorannnannnvusososunsennseunoonnnrnnennne
5
E
Advanced
Features
......e..eessooncunnnsossostovoonunannnnnnunnuoennasononuoeuussesrurnse
7
1-Programming
MODO
cicassisnsssssssesenstacvnsccousiei
secs
sesavinanvacdsbeesactipeises
7
2)
Choosing
a
Touch
Curve
...ss.s.senseonnunnnnonnnnennansanoasonsonununnunonsnnnanne
8
3)
Changing
the
SPLIT
Point
........csssssssssssssecssssssonesssencsensnenscensneeas
9
A
aaah
SR
e
RE
E
10
JM
ASA
11
E
MIDI
Interface
iii
ds
13
1)
Whats
MIDI?
acid
cad
reinar
lana
13
2)-GONTASCUIÓS
a
dei
14
3)
MIDI
Implementation
.....cconnccocoonecocccnoncnncncncoanennaraconnnornasonnenaaness
16
A)
MIDI
Opëratlórn
cai
17
(A)
Setting
the
channel
........occnnnonunoonrarccnaracannncanaranononoonnrananonnanas
17
(B)
Sending
a
program
number
.............cccesscesseesssscereecsenseneeeeeees
18
(C)
Turning
MULTI
TIMBRE
on
and
off...
21
(DI
CORAL
CONTRO
Lea
at
ees
etic
alt:
22
in
asi
ias
RS
aulas
rd
24
HZ
MIDI
Implementation
Chart..........ceeemessenesenorocermerceneorecinrace
re
2D