Table
of
Contents
How
to
care
for
your
Kawai
Organ
1.
9.
Before
Playing
........................................................
1
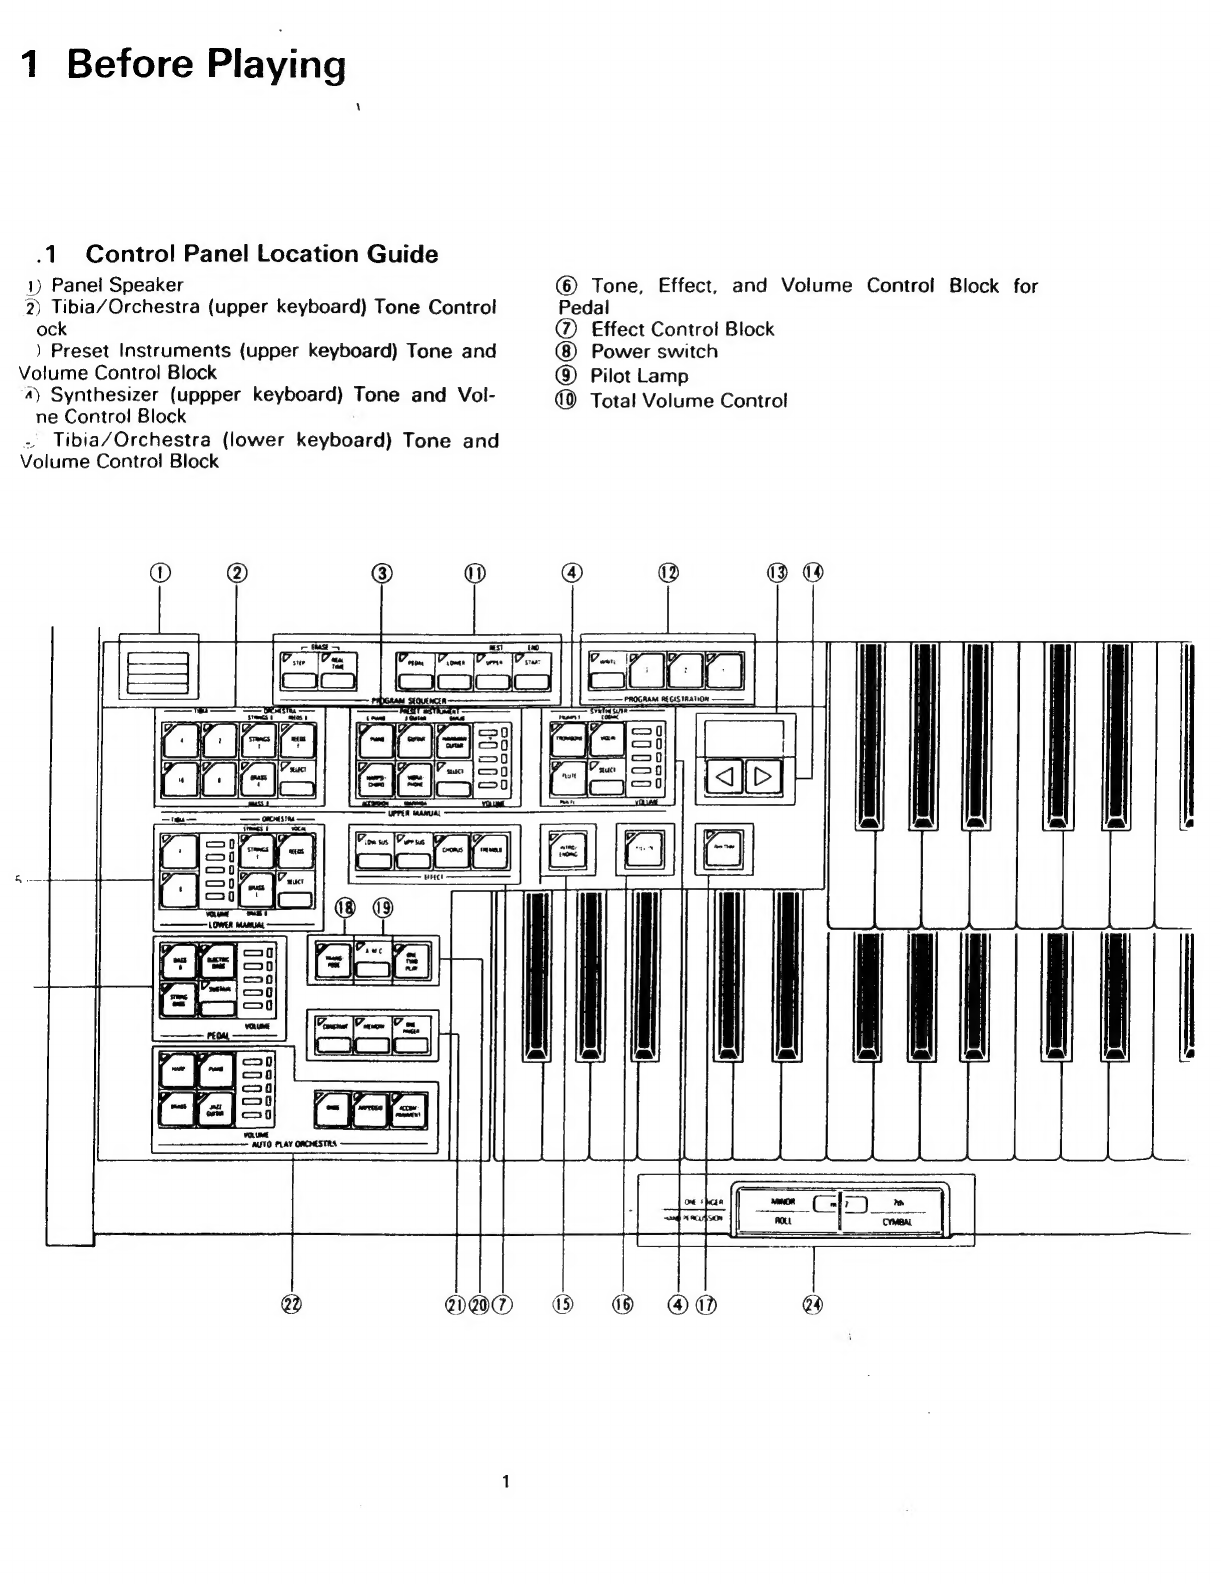
1.1
Control
Panel
Location
Guide
........................................
1
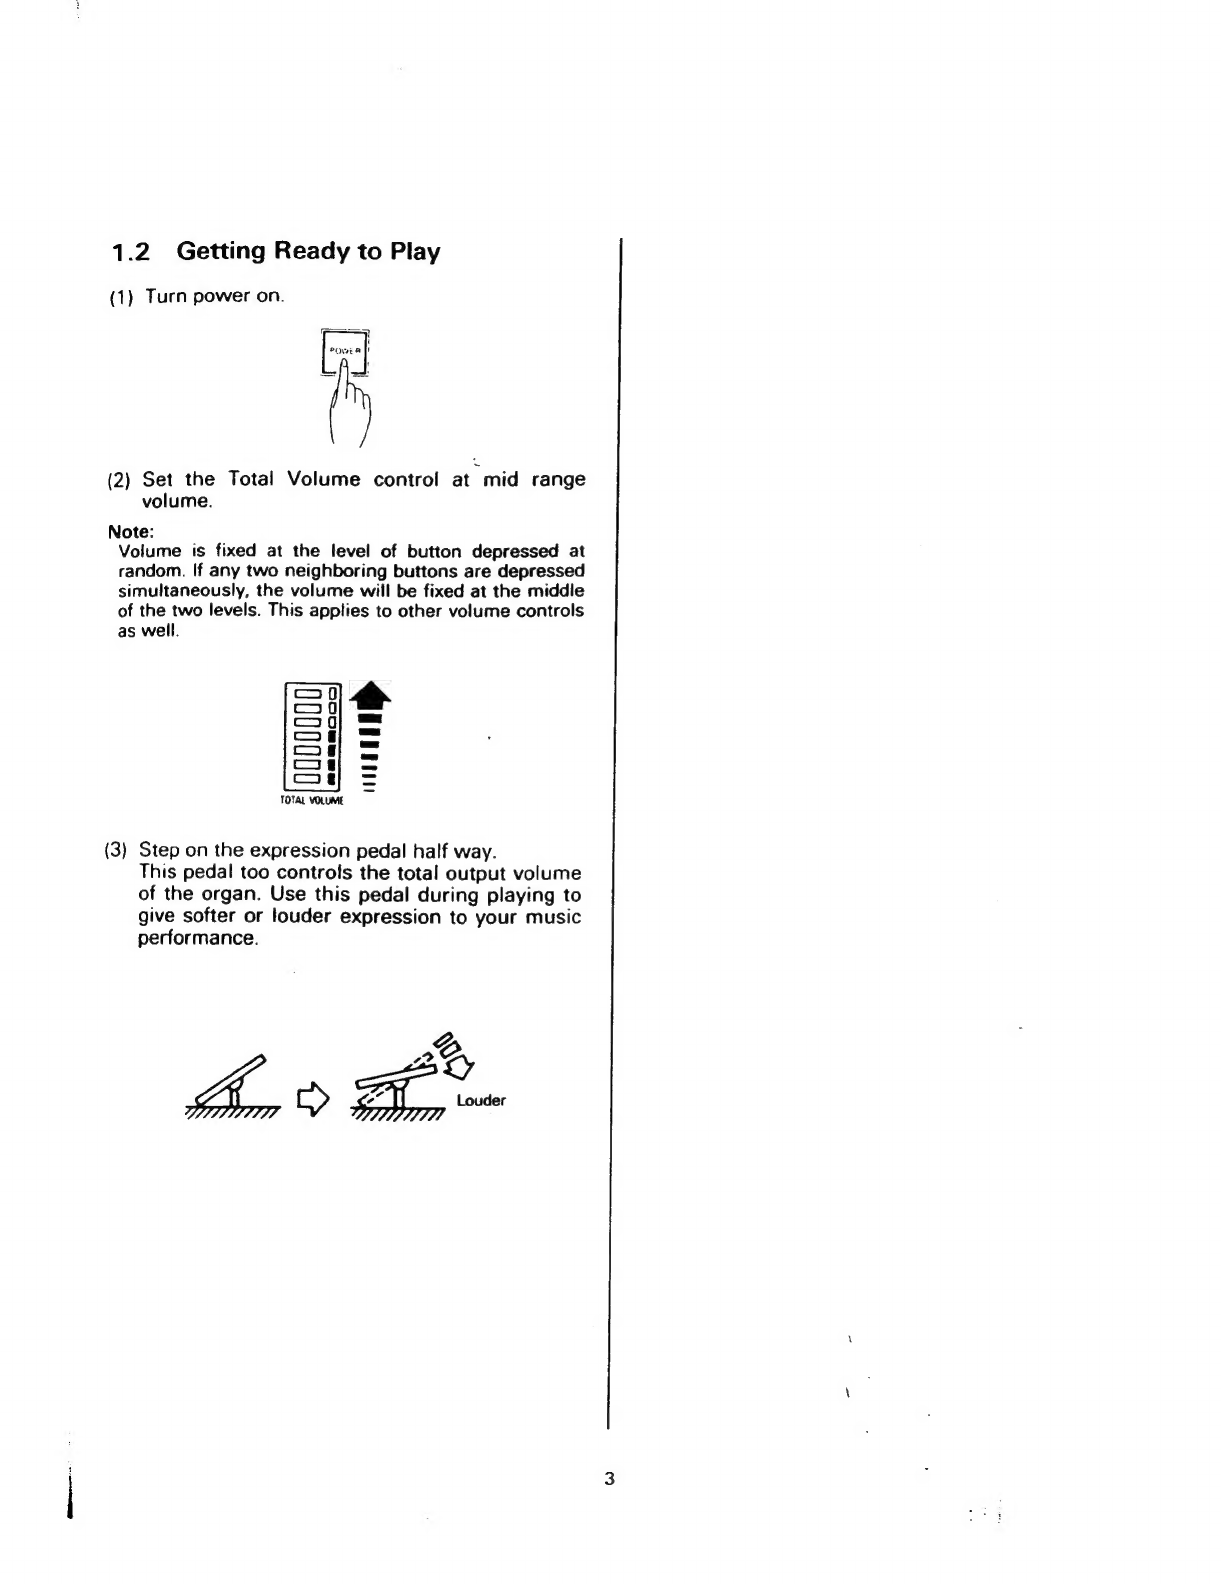
1.2
Getting
Ready
to
Play
...............................................
3
Tones
and
Effects
....................................................
4
A
Doce
SANA
ie
uq
aytuy
luu
d
4
22
ORCHESTRA
a
o
na
5
2.3
PRESET
INSTRUMENT
..............................................
6
24
SYNTHESIZER
©
да
ааа
оро
ар
ии
6
Rhythm
Accompaniment
.............................................
7
3,1
Procedúra
оние
гаража
ш
e
EI
bell.
Y
Padi
7
3.2
Additional
Functions
................................................
7
3.3
Hand
Percussion
...................................................
9
Auto
Accompaniment
System
........................................
10
4.1
AUTO
PLAY
ORCHESTRA
...........................................
10
4.2
AUTO
MELODY
CHORD
............................................
10
4.3
ONE
FINGER,
MEMORY
and
CONSTANT
Functions
....................
11
44
ONE
TMO
PLEAY
з
u
Q
a
ka
K
SD
CSI
IUDA
I
DH
ARE
Du
11
Registration
Memory
.................................................
12
Program
Sequencer
..................................................
13
MM
cui
ut
heat
Bi
Го
Lu
13
5:2:
Editing
tester
ќе
РИС
knees,
wih
UU
um
cen
ean
ences
Gt
ae
16
dE
noc
MR
HIM
17
cr
Pa
17
МИЕТЕ
A
es
oil
tes
КИ
ЛК
КЕЛК
ЛУ
ОКУЛ
ТОЛКУ
18
Т
o
A
IN
18
12
Operation
A
ав
ааа
аЬ
ао
Sato
d
19
Other
Functions
......................................................
20
8.1
TUNE
Function
.....................................................
20
82
TRANSPOSE
Function
..............................................
20
Front
and
Rear
Panel
Connectors
.....................................
21


 User manual")