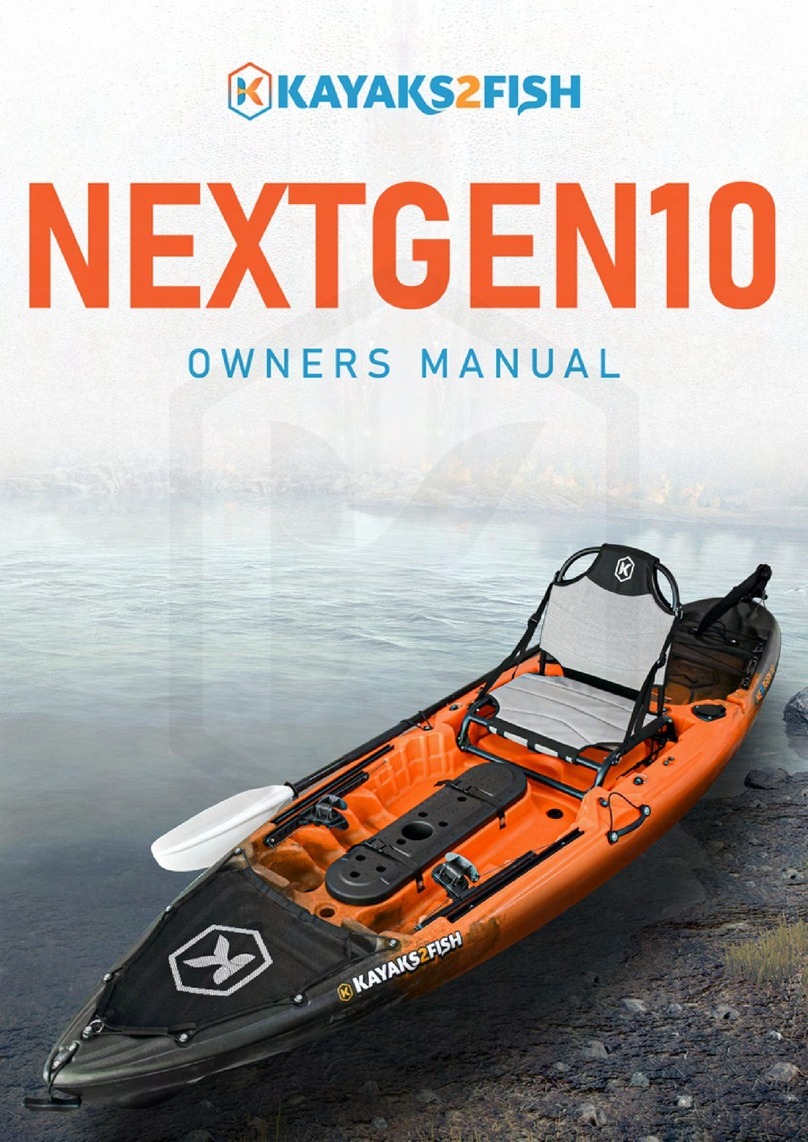
KAYAKS2FISH NEXTGEN10 MK2 User manual


Welcome 3
Introduction 3
Included Equipment 4
Paddle 4
Paddle leash 4
Vantage Aluminium Seat 4
One large centre console with a lid 4
Scupper plugs 4
360° Rod holder 5
Paddle Holder strap 5
Toggle Handles 5
Inbuilt rod holders 5
Rear Bungee cord 5
Installation guides 6
Important things to check before you go kayaking 8
Kayaking checklist 9
Vantage Aluminium seat 6
Rudder system 6
360° Rod holder 7
Paddle lock 7
Paddle leash 7
How to install and use a Kayaks2Fish Sit on top trolley 8
Kayaking Gear 9
Clothing 9
Essentials 9
Safety 9
Fishing gear 9
Accessories 9

Transportation 10
Roof racks 10
Soft roof racks 10
How to load a kayak by yourself 10
How to strap a kayak to a set of roof racks 11
Roof rack accessories 11
J-Racks 11
Kayaks2fish Universal Kayak carrier 11
Stacking 11
Maintenance 12
Washing your kayak 12
Warped plastic 12
Give Your Kayak a Check-up 12
Storage solutions 13
Basic Safety Tips for Kayaking 14
How to flip your kayak 15
How to get back on a Sit-On-Top 15
Warranty 15
Spare parts 15
FAQ 16-18
Kayak Hoist system 13
Kayak Cover 13
Kayak stands 13
Wall racks 13

WELCOME!
INTRODUCTION
Welcome to the KAYAKS2FISH family. We hope you enjoy this kayak and the adventures it may bring.
For 10 years, KAYAKS2FISH has focused on one thing — allowing paddlers of any skill level to enjoy
the thrill that comes from being surrounded by water and nature.
Visit our website at any time for more information
https://k2f.com.au/s/clL
This guide will take you through the components of the NextGen 10 MK2 , installation guides
and tips and tricks to make your kayaking trip safe and enjoyable.
https://k2f.com.au/s/clM
Visit our blog for tips and tricks when it comes to kayaking
Some facts about the NextGen 10 MK2 Fishing Kayak.
Much easier to stand up in as it has a dedicated stand-up area that is purposely designed
to provide increased balance when standing and comes standard with the traction pads.
Trimaran hybrid hull which is much more stable than the V-shaped hull of the
Nextgen 9 and Osprey kayaks.
The package comes with the front storage mesh cover as standard.
Comes with a multi-purpose centre console hatch.
The centre console hatch also features a built-in measurement guide.
Second seating position to allow you to sit higher in the kayak.
The Handles of the Nextgen 10 MK2 are flush with the hull reducing the chance of hitting
the handles when paddling.
It has a moulded rod resting area that is perfect to re-tackle/ re-bait your rod while
on the water.
Comes with the Aluminium seat as standard.
Rudder and track system included.
3.02 metres long and only weighs 26Kg.
Comfortable seating that keeps you dry as you sit off the deck.
Five-year warranty on the hull.
Max user weight of 140Kg and a max overall weight of 185Kg.

INCLUDED EQUIPMENT
Paddle
The paddle that comes with the NextGen 10 MK2 fishing kayak package is
a lightweight 2 piece paddle. It is extendable up to 2.5 metres and
can be feathered depending on your preference. The paddle has the
feature that it floats when joined together.
Paddle leash
The stretchy red cord that comes with the NextGen 10 MK2 is a useful
tool to keep the paddle attached to the kayak so in the event, you or a young
family member kicks the paddle overboard you will not have it floats away.
Vantage Aluminium Seat
The Aluminium Vantage seat provides a comfortable,
padded ride. The breathable mesh fabric dries quickly,
keeping you and your seat dry!
Scupper plugs
The drainage holes in the kayak are also known as scupper holes.
The purpose of these holes is to add rigidity to the kayak's hull and to
also allow water to drain from the hull of the kayak. The black plugs that
come with the NextGen 10 MK2 fishing kayak are the plugs for these holes.
They are not required to be in for operation but are recommended by
Kayaks2fish to be kept in while out on the water as not having them in
can reduce the weight capacity of the kayak.
One large centre console with a lid
The NextGen 10 MK2 comes standard with a large centre console storage
area and a lid that includes a built-in brag mat. While only water-resistant
they will handle the normal splashing that would occur when out on the
water. We recommend a small drybag for your valuables.

360° Rod holder
The NextGen 10 MK2 fishing kayak comes standard
with the Kayaks2Fish 360° swivel rod holder.
Paddle Holder strap
The NextGen 10 MK2 fishing kayak comes with 2 built-in paddle holders
on either side of the kayak under the handles.
Toggle Handles
The NextGen 10 MK2 fishing kayak comes with two comfortable toggle
handles which make carrying or using the Sit-On-Top kayak trolley
much easier.
Rear Bungee cord
The NextGen 10 MK2 fishing kayak comes with a rear storage bungee cord
to strap down any cooler boxes or gear you want in the back of the kayak.
Inbuilt rod holders
The NextGen 10 MK2 fishing kayak comes with 4 inbuilt rod holders
to make it a simple task to transport up to 4 fishing rods at a time.

INSTALLATION GUIDES
Place the seat in the
allocated grooves.
Using the bungee cord underneath
the seat strap, loop the
bungee cord over the clip.
1 2
Connect to the rear
eyehooks to secure the seat
3
Insert the rudder into the steel
ring at the back of the kayak.
Secure the rudder onto the
back with the included steel pin.
1 2
Set the rudder into the groove
to ensure it is sitting in the center.
3
Feed the cord through the hole on
either side of the rudder assembly.
Pull the cord until the top of
the foot pedal is in line with
the bottom of the pedal.
4 5
Wrap the remaining cord around
the rudder assembly and tie it off.
6
VANTAGE ALUMINIUM SEAT
RUDDER SYSTEM

https://k2f.com.au/s/cl9
https://k2f.com.au/s/cmb
360° ROD HOLDER
Here is a link to an instructional video of the Rod holder installation
Step 1
Screw the 360° rod holder base onto the preassigned
mounting area.
Step 2
Insert the rod holder tube into the mounting base
and turn until it locks in.
To swivel the rod tube, just lift the tube slightly and twist.
PADDLE LOCK
Here is a YouTube video demonstrating
To tighten the paddle lock,
Twist the paddle locking tab clockwise.
PADDLE LEASH
Disconnect
the paddle end
of the paddle leash.
1
Disconnect
the paddle
into two pieces.
2
Place the disconnected
paddle into the
paddle leash.
3
Reconnect the
paddle leash
and paddle.
4

HOW TO INSTALL AND USE A KAYAKS2FISH SIT ON TOP TROLLEY
Here is a YouTube video demonstrating
Step 1 Slide the trolley prongs onto the main pole with the prong with
the attached strap going on first.
Step 2 Slide on the black ring, align the holes, then use the bolt and nut
to secure.
Step 3 Insert the spring clip into the main pole until the button pops up.
Step 4 Install end cap.
Step 5 Screw on the black knob hand screws.
Step 6 Install the wheels by pressing the button down, once in all the way,
the wheels will be locked in place.
How to install the Kayaks2Fish Sit on top trolley
How to use the Kayaks2Fish Sit on top trolley
Step 1 Remove the scupper plugs from the kayak.
Step 2 Adjust the scupper poles in line with the supper holes of the kayak.
Step 3 Place the kayak on the side.
Step 4 Insert the scupper poles as far as they can go into the scupper holes.
Step 5 Turn the kayak the right way up.
Step 6 Strap the kayak down to the Sit-On-Top trolley.
WARNING:
Follow the manufacturer's instructions.
Do not use the trolley unless all components are correctly fitted and adjusted.
Do not use the trolley if any part is broken, torn or missing.
Do not use the trolley on a kayak exceeding the length/weight limit.
The trolley is not for highway use.
Keep away from children when installing.
https://k2f.com.au/s/cmf
IMPORTANT THINGS TO CHECK BEFORE YOU GO KAYAKING
Ensure you have all drainage plugs before you head out.
Ensure all fittings and fixtures are tight.
Give the hull a once over to check for any cracks or deformities.
Check the weather forecast.
Ensure you have first aid supplies.
Ensure you have a dry storage bag for your valuables.
Ensure you have told someone where you are going and when you are expected back.

KAYAKING CHECKLIST
A QUICK LIST TO HELP WITH WHAT TO TAKE OUT KAYAKING.
KAYAKING GEAR
PADDLE
PADDLE LEASH
DRY BAG
ANCHOR KIT
KAYAK TROLLEY
SCUPPER PLUGS
SEAT / CHAIR
CLOTHING
SPF RATED SHIRT
HAT
SUNGLASSES
WATER SHOES
PADDLING GLOVES
QUICK-DRY PANTS
RAINCOAT
FACE SHIELD
ESSENTIALS
INSECT REPELLENT
SUNSCREEN
FIRST AID KIT
DRINKING WATER
SNACKS
WET WIPES
FISHING LICENSE
MOBILE PHONE
SAFETY
LIFE JACKET
HIGH VISIBILITY FLAG
SIGNAL MIRROR
EMERGENCY POSITION
INDICATING RADIO
BEACON (EPIRB)
ELEVATED LIGHT POLE
AIR-HORN
GPS
TORCH
FISHING GEAR
LANDING NET
MICROFIBER CLOTH/TOWEL
ROD-LEASH
ROD HOLDERS
FISH-GRIP
MEASURING DEVICE
CUTTING BOARD
COOLER BOX
CRATE
TACKLE BOXES
PLIERS
ROD SLEEVES
POCKET KNIFE
BAIT BUCKET
FILLET KNIFE
ZIP LOCK BAGS
ACCESSORIES
TROLLING MOTOR
BATTERIES (CHARGED)
TROLLING MOTOR
MOUNTING BAR
SCREWDRIVER
GOPRO
FISH-FINDER
OUTRIGGERS
SUNSHADE

TRANSPORTATION
ROOF RACKS
A common question we receive is what kind of roof rack is needed to transport a kayak.
We recommend a hard roof rack or a trailer for transporting your NextGen 10 MK2 fishing kayak.
SOFT ROOF RACKS
While soft roof racks are a great temporary solution that is easy to install,
we recommend having hard roof racks as a permanent solution.
HOW TO LOAD A KAYAK BY YOURSELF
Step 1
Line the kayak up alongside the car as below and remove any loose items or
items that could get loose when driving.
Step 2
Spread your moving blanket over the roof of the car tucking it under the roof
bars to avoid it moving or if the blanket is large enough to close the corners in
the car doors or windows. Make sure the blanket is over each roof rack.
Step 3
Lift the bow and rest it on the edge of the car but high enough that it does not
slip easily off. We have demonstrated this on the grass with a kayak that does
not have a rudder. If your kayak has a rudder that could get damaged then
consider loading in reverse with the stern first.
Step 4
Keeping your hands on the kayak to avoid it slipping, walk to the stern of the
kayak, bend your knees, lift the stern and push forward, sliding the kayak
further onto the roof until you have about half the kayak on the roof.
Step 5
Carefully lift the kayak at each end to remove the blanket then secure your
kayak with tie-downs.

HOW TO STRAP A KAYAK TO A SET OF ROOF RACKS
ROOF RACK ACCESSORIES
STACKING
Step 1
Lay the Kayak Straps Over the Bars of the Roof Rack.
Thread each strap underneath and around each bar and let
the kayak straps lay flat against your vehicle.
Step 2
Place Your Kayak or Canoe on the Roof Rack.
If you are tying the kayak directly to the crossbars of the roof rack,
place the boat upside down on the rack.
Step 3
Bring the Kayak Straps Over the Kayak.
Step 4
Secure the Kayak Straps.
Bring the other end underneath the crossbar and back up to meet the buckle. Thread
the kayak strap up through the buckle by pushing the button on the clamp and opening
a slot for the strap to fit through. Finally, pull the straps to take up the slack.
We stock two different kinds of mounting options for roof racks to make the kayak
more secure or fit more kayaks onto the roof at once.
J-RACKS
The typical use for the J-racks is to stand the kayaks up on
its side to make it easier to transport 2 or more kayaks.
KAYAKS2FISH UNIVERSAL KAYAK CARRIER
The main use of the universal Kayak carrier is to have a more
secure way to strap the kayak down to the roof racks without
having to worry about the roof rack scratching the kayak.
The NextGen 10 fishing kayak can be stacked with other kayaks.
Here is a good example of how they should be stacked.
It is recommended only ever stack the kayaks 3 high at any time.
Please check your roof rack weight capacity before attempting
to stack multiple kayaks.
https://k2f.com.au/s/cmh
It can be found here
https://k2f.com.au/s/cmj
It can be found here

WASHING YOUR KAYAK
To wash your kayak it is required to wash after each use to wash any saltwater off the kayak
as that can cause the metal parts of the kayak to rust.
To wash the kayak you need to use fresh water to thoroughly rinse the kayak then leave it in
the sun to dry completely.
It is recommended to store your kayak with a storage cover to keep the dust and spiders out
as well as protect your kayak from the elements.
WARPED PLASTIC
If the hull on your boat is distorted due to an accident, improper storage or transportation,
correction may be simple: brief exposure to the heat of the sun often restores a hull to its
original shape. If that fails, hull shape can often be restored by applying a low heat source
(such as a low wattage bulb or hairdryer) to the deformed area. When the hull is pliable
enough, hand-shaping can restore the hull.
CAUTION: Overheating can burn you or damage the hull.
GIVE YOUR KAYAK A CHECK-UP
Occasional operational checkups will keep your boat in tip-top condition. Check hatch covers,
cables, buckles, straps and other moving parts for wear, and replace them when necessary.
Keep all nuts tight and check hardware exit holes for watertight silicone seals. Give your hull
and deck a thorough review annually. Light nicks, scratches and scrapes are part of the paddling
experience, but deep scratches should be repaired.
On rare occasions (one in a thousand), kayak may have tiny holes around the scupper plug
area, which are very hard to notice during the manufacturing process. This can cause a leak
and fill the hull with water and can potentially cause the kayak to become unstable and flip.
So it’s best to take the kayak out for a test run in a shallow area first if you are planning
a big trip.
MAINTENANCE

KAYAK HOIST SYSTEM
The Kayaks2Fish hoist system is a hoist that allows the user to store the kayak on the roof
freeing up ground space. This system is perfect for sheds and garages.
KAYAK COVER
Our covers offer long-term protection from the elements.
It is highly recommended a cover if storing the kayak outside.
KAYAK STANDS
Lightweight folding aluminium kayak stands. Ideal as a storage solution or to carry with you
when you are washing down your kayak or surf ski at the end of your paddle.
WALL RACKS
A Two hook design for convenient storage - rest your kayak on the top hooks and your paddle
or other accessories on the bottom hooks. Foam padding to protect your kayak when mounted
on the racks. Easy installation - screwdriver required. Fold-away arms - The arms can be folded
flat against the wall when not in use to avoid accidents and save space. Max weight capacity 40kg.
KEY FEATURES
600 denier silver painted waterproof Oxford cloth.
UV Resistant to protect from harsh Sun.
3M Kayaks Cover is suitable for Kayaks up to 2.7m to 3.0m Length.
STORAGE SOLUTIONS
It can be found here
https://k2f.com.au/s/cmk
https://k2f.com.au/s/cml
https://k2f.com.au/s/cmm
https://k2f.com.au/s/cmn
It can be found here
KEY FEATURES
Padded for kayak protection
Folds flat when not in use
Lightweight
42cm high when standing
Sold in a pair
Weight capacity: 46Kg

As with all recreational activities, there is always the possibility of injury or death.
Always use common sense and follow all safety guidelines at all times.
Be aware of weather conditions and water temperature. Prepare for changes
in weather and the possibility of a capsize. If paddling in cold water, a wet suit
or dry suit can keep you warm and comfortable. In warm weather, a long sleeve
shirt can provide sun protection.
Invest in appropriate clothing for your climate. One advantage of sit-inside kayaks
is that you can shield yourself from some of the elements, while sit-on-tops leave
you more exposed. Dress for the day.
Beware of off-shore winds that make it difficult to return to shore.
Always follow the boating rules of the area you're in.
Never mix alcohol or drugs (prescription or non-prescription) with kayaking.
Never exceed the weight capacity of your kayak and always check your equipment
for wear and tear before you paddle.
Seek qualified instruction to learn proper paddling techniques, water safety and
basic first aid.
Brush up on self-rescue first in calm, warm, shallow water, and again in more
extreme conditions.
Most importantly, WEAR YOUR FLOTATION DEVICE. Australian regulations require
that all kayaks have a life jacket on board. Wearing your life jacket will help keep your
head above water and add insulation to your body, keeping you warmer in cold water.
There are great Life jackets designed specifically for paddlers. Buy one that fits well,
and always wear it while you paddle.
Tell someone your paddle plan, which includes: where you are going, what you will
be doing, how long you expect to be gone and how many people are in your party.
Then stick to your plan.
Paddling in the surf zone or rivers can be dangerous. Always wear a helmet.
Stay hydrated. Always bring plenty of water and food.
When paddling in a new area, check with the locals regarding currents, shoreline
conditions and weather patterns. Plan an "escape" route - an alternative place to get
off the water should environmental conditions dictate it. Abiding by these rules will
help to make your kayak adventure safe and fun.
BASIC SAFETY TIPS FOR KAYAKING
It can be found here
https://k2f.com.au/s/cmp

Unfortunately, Capsizing is a natural part of kayaks even though Kayaks2Fish kayaks are very
stable fishing platforms it can be unavoidable due to rogue waves or aggressive chop or wake.
The best way to stay safe if your kayak flips over, though, is to prepare in advance for that
possibility and to make sure you have the right safety equipment. When you are doing any form
of kayaking, it is vital that you wear a personal flotation device (PFD) at all times.
It is also best to understand and practice the techniques of exiting and re-entering your kayak
in the water.
The first thing to do when your sit-on kayak flips over is to stay calm. Panicking makes you
unable to concentrate and can put you in danger.
Your sitting position on the kayak will most likely have you falling sideways into the water.
If you do find yourself fully inverted, try to move away from your kayak to avoid banging
your head on your kayak as you surface.
Try and remember to grab your paddle as it will be your only means of moving. You can get
into a tricky situation if it floats away.
Kicking your legs to provide thrust, push your torso onto the upturned kayak of the kayak
and use both hands to grab the edge of the kayak on the far side.
Keeping hold of the kayak, bring your knees up and lean backwards. Your body weight will pull
the kayak over to the point where the shape of its hull will take over and the kayak will right itself.
Try practicing in a shallow area first.
This time, allow your legs to float up to the surface behind you instead of bringing your knees
up and leaning back. Your levelled body will keep the kayak from flipping over.
You can pull yourself onto it until you are lying flat with your centre of gravity in the middle
of the ‘yak. Once you feel stable, roll your body around until your backside is in the seat and
then swing your legs up.
HOW TO FLIP YOUR KAYAK
HOW TO GET BACK ON A SIT ON TOP
WARRANTY
SPARE PARTS
In the unlikely event that you break something on your kayak,
Kayaks2Fish carry a wide range of spare parts.
Our warranty information can be found here
https://k2f.com.au/s/cmq
https://k2f.com.au/s/cms

https://k2f.com.au/s/cfc
How do you secure the seat to the kayak?
Here is a video outlining the installation process for the seat
Does the NextGen 10 MK2 come with a seat?
Yes, the NextGen 10 MK2 comes with the Vantage Aluminium seat as standard.
It allows for more comfortable seating and keeps you dry as you sit off the deck.
What are the main advantages of the NextGen 10 MK2?
Is the NextGen 10 MK2 compatible with a fish finder?
Yes, the NextGen 10 MK2 comes with a track rail system pre-installed to mount the fish finder
and a transducer plate underneath to mount the transducer.
Do you have instructions on how to position a transducer for a fish finder on the NextGen 10 MK2?
Unfortunately, we don’t have instructions. However, the transducer normally is zip-tied to the
transducer plate, the whole compartment fills with water it will not obstruct any transmission
or reception. You need to unscrew the four screws holding the transducer plate, then zip tie the
transducer to that plate. You then need to run the wiring up the hole which is located in front of
the long hatch, then screw the transducer wiring into the fish finder.
Please note: When installing the transducer please ensure the right orientation as if the
transducer is upside down it will not work.
FAQ
Much easier to stand up in as it has a dedicated stand-up area that is purposely designed
to provide increased balance when standing and can fit the traction pads.
Has a flat hull which is much more stable than the V-shaped hull of the NextGen 9
and Osprey kayaks.
The package comes with the front storage mesh cover as standard.
Comes with a multi-purpose centre console hatch.
The centre console hatch also features a built in measurement guide.
Comes standard with a foot-controlled flip down rudder.
Comes with the Vantage aluminium seat as standard.
Comes in a package with a pre installed track mount system.
3.01 metres long and only weighs 26 Kg.
You sit up off the deck of the kayak and will avoid getting wet pants.
Five year warranty on the hull.
The traction pads can be found here
What is the weight limit of the NextGen 10 MK2?
The Nextgen 10 Mk2 has a max user weight of 140Kg and an max weight capacity of 185Kg.

https://k2f.com.au/s/cd7
What is the difference between max weight capacity and max user weight?
Max user weight refers to the person's weight when using the kayak.
Max weight capacity refers to the total weight of the user and gear such as coolers,
tackle and tackle boxes, bait and tools distributed along the whole kayak.
Does the NextGen 10 MK2 stack on roof racks?
Yes, the NextGen 10 MK2 can stack on roof racks.
We recommend using a carrier when transporting more than one kayak.
They can be found here
https://k2f.com.au/s/cfd
They can be found here
https://k2f.com.au/s/cd9
They can be found here
Can the NextGen 10 MK2 fit a MaxDrive™ pedal system?
No, the NextGen 10 MK2 cannot fit a MaxDrive™ pedal system.
The kayaks that can fit a MaxDrive™ can be found here
Can you stand up in the NextGen 10?
The NextGen 10 MK2 kayaks have a dedicated stand-up area that is purposely designed to provide
increased balance when standing. The kayak can be paired with the traction pads for further grip.
How wide are the scupper holes in the NextGen 10 MK2?
The scupper holes are between 35-40mm wide. The scupper holes add rigidity to the structure of
the kayak and also allow drainage for water on the deck.
What motor do you recommend for the NextGen 10 MK2 kayak?
We recommend a 32lb thrust motor.
Can the NextGen 10 MK2 fit a rudder?
The NextGen 10 MK2 comes with a rudder as standard.
Can I fit a cooler box in the rear storage of the NextGen 10 MK2?
Yes, you can fit the 12L Cooler box, 22L Cooler box, Bow cooler bag
or Soft cooler box into the rear storage of the NextGen 10 MK2.
Can I bring a child with me onboard?
The NextGen 10 MK2 does not have a dedicated spot for a child.
The NextGen 1+1 is designed to sit an adult and a child.
https://k2f.com.au/s/cfk
It can be found here
FAQ

Is the swivel rod holder removable?
Yes, It easily comes out when the locking groove on the rod holder is lined up
with the notch in the base.
Is the rudder for the Nextgen 9 the same as the rudder for the Nextgen 10 Mk2 mk2 or the Nextgen 1+1?
The Rudder is different from the Nextgen 9 and Nextgen 10 to the Nextgen 10 Mk2 and the Nextgen 1+1.
What size cover do I need for the NextGen 10 MK2?
A 3m cover is best for the NextGen 10 MK2.
How can I stack the NextGen 10 MK2 with a smaller kayak?
The kayaks are stackable so you need to put the smaller Kayak upside down on the car
roof and then put the NextGen 10 MK2 kayak on top of the smaller kayak and tie them securely.
What are the holes on the multi-purpose centre console used for?
They are for quick mounting of the K2F rod holder and hardmounting accessories such as fishfinders.
What is the difference between the NextGen 10 and the NextGen 10 MK2?
The NextGen 10 Mk2 is 1cm wider and taller than the NextGen 10.
The NextGen 10 is 3Kg lighter compared to the NextGen 10.
The NextGen 10 Mk2 can support an extra 10 Kg compared to the NextGen 10.
The NextGen 10 Mk2 comes with an extra four tracks; two in the front and two in the rear.
The NextGen 10 Mk2 has two seat height adjustment levels
Higher seating is beneficial for sight fishing activities and more comfortable for the knees.
Lower seating lowers the kayak's centre of gravity which increases stability when paddling
or carrying heavy loads.
The NextGen 10 Mk2 has a rear storage hatch at an angle to allow long items such as fishing
rods or anchor poles to be stored within the kayak.
The NextGen 10 Mk2 has carry handles flush with the kayak body to help avoid hitting the handles
while paddling.
The NextGen 10 Mk2 has cleared out footwells for comfort whereas the NextGen 10 has moulded
footrests.
https://k2f.com.au/s/cfj
They can be found here
FAQ
What do HDPE, LDPE and LLDPE stand for?
Low-density polyethylene (LDPE) is softer and more flexible than HDPE. It also has a lower
melting point (115° C) and is more transparent. Compared to HDPE, it is more likely to crack
under stress.
Linear low-density polyethylene (LLDPE) is a copolymer of ethylene and another longer olefin,
Which is incorporated to improve properties such as tensile strength or resistance to
harsh environments.
High-density polyethylene (HDPE) is rigid and durable and offers greater chemical resistance.
Its higher melting point (135° C) allows it to withstand higher temperatures than LDPE. Its more
crystalline structure also results in greater strength. It also has greater opacity which results
in greater vibrancy and longer-lasting colour.

THANK YOU
CONTACT US
SHARE YOUR EXPERIENCE
sales@kayaks2fish.com
https://k2f.com.au/s/ck4
NEWCASTLE, THORNTON 2322.
02 4047 5340.
BRISBANE, COORPAROO 4151.
07 2101 2968.
SYDNEY, WETHERILL PARK 2164.
02 8379 5333.
MELBOURNE, CAMPBELLFIELD 3061.
03 8579 0979.
ADELAIDE, PORT ADELAIDE 5051.
08 7009 4818.
PERTH, NAVAL BASE 6165.
08 6323 8695.
ROCKLEA, ROCKLEA 4106.
07 3557 2178.
https://k2f.com.au/s/ck5
https://k2f.com.au/s/ck6 https://k2f.com.au/s/ck7
Table of contents
Other KAYAKS2FISH Boat manuals