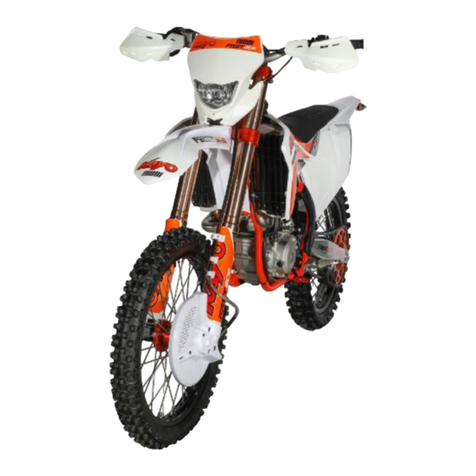
KAYO MOTOR K4 User manual

ZHEJIANG KAYO MOTOR CO., LTD.
www.kayomoto.us
- 1 -
KAYO MOTO
K4
Service Manual
WWW.KAYOMOTO.COM

ZHEJIANG KAYO MOTOR CO., LTD.
www.kayomoto.us
- 2 -
This service manual is edited by KAYO
Please do not modify the content without authorization。
Manufacturer has the right to improve and update the model’s structure and spare parts
without notice.
The model in the image may be different from the real model.

ZHEJIANG KAYO MOTOR CO., LTD.
www.kayomoto.com
- 3 -
Preface
Hereby, on behalf of KAYO all staff thank you for choosing our dirt bike: K4, and we believe
that this choice will not disappoint you.
This manual is designed to help you better use our products, and it introduces the
maintenance adjustment procedure, disassembly and assembly essentials, inspection and
maintenance points, troubleshooting methods and maintenance technical data of K4 model
in detail, with detailed graphic data attached to guide the operation.
Please carefully read this manual and conduct inspection and repair in accordance with the
standard operating practices, which can effectively extend the service life of each part,
improve the performance of the engine and the reliability of the whole vehicle.
For the sake of technological development, Kayo reserves the right to modify the
construction, equipment and accessories of the motorcycle without prior notice. Due to the
different regulations and requirements in different markets, we have made appropriate
adjustments to the models, so the images in the manual may be different from the standard
samples.In addition, if you have any questions, please refer to our official website
www.kayo.com.cn and contact with our service staff, we will be humbly accept.
Please understand that the contents in this maintenance manual which subject to
change due to vehicle improvement, upgrading will not notify again. The actual
condition of the vehicle shall prevail in the maintenance.
ZHE JIANG KAYO MOTOR CO., LTD
Technical Department

ZHEJIANG KAYO MOTOR CO., LTD.
www.kayomoto.com
- 4 -
March, 2021
Content

ZHEJIANG KAYO MOTOR CO., LTD.
www.kayomoto.com
- 5 -
Symbols and Meanings of Special Words
* This symbol indicates that this operation requires the operator to have professional
knowledge and technical understanding. If you do not have the confidence to complete this
operation, you can go to a professional repair shop or KAYO after-sale service point to be
operated by professionals.
→ This symbol indicates that the specific information is on the following page number.
Danger/warning/attention
In this manual, the words "Danger/Warning/attention" will appear. Please read the following
words carefully to protect yourself and your motorcycle. The meanings of "danger",
"warning" and "attention" are as follows:
Danger: Be on high alert for danger.
Warning: to be alert to moderate danger.
Attention: to be alert to minor danger.
However, please note that in this manual, we only enumerate the main safety issues related
to vehicle maintenance and repair, and the contents of warning slogans cannot cover all the
potential dangers during the use and repair of the vehicle.Therefore, in addition to the
"Danger", "Warning" and "Attention" related matters, users must also have basic mechanical
safety knowledge, if you do not grasp the entire maintenance and repair operation process,
please consult a more experienced senior technician before operation.

ZHEJIANG KAYO MOTOR CO., LTD.
www.kayomoto.com
- 6 -
Suggestions for Daily Use
The vast majority of off-road motorcycle fatalities are caused by head injuries. Without
helmets, the chances of serious injury or death from a head-hit are much higher. Therefore,
we strongly recommend that you wear a full set of safety equipment such as helmet, goggles,
gloves and boots when driving, which will save your life at the critical moment.
This series of models is designed for off-road racing at the beginning, without considering
the problem of carrying passengers, and there is no backseat, handlebar and pedal for
carrying people, so please be sure not to use this motorcycle to carry other people except
the driver, which behavior can easily lead to safety accidents.
Try to avoid using non-original parts to modify the car, also do not arbitrarily delete the
original components of the car, if you need to replace any parts, please choose the original
parts produced by KAYO or products authorized by KAYO manufacturers.In addition, the
company is not responsible for any vehicle problems caused by personal modification and
the use of unauthorized parts.
Our K4 product are specially designed for off-road and woodland crossing, so they are not
suitable for highway riding or long-distance motorcycling. If you insist on using them, the
tires may accelerate the wear of the pattern due to high speed rotation and reduce the
service life .It is also not suitable for urban use, as prolonged periods at traffic lights may
cause the engine to overheat and thus shorten its life. Please take care of your vehicle and
avoid problems caused by improper use.
Please check your motorcycle carefully before each use and maintain it in accordance with
the maintenance manual after use. After the motorcycle falls, please first check whether the
main parts are damaged. If you drive a faulty motorcycle, it is very easy to lead to the
occurrence of an accident and endanger your own safety.
When using this motorcycle, the temperature of the engine and exhaust pipe is very high, so
it needs to cool down for a period of time after parking. During this period, do not touch or
move the engine and exhaust pipe, so as not to cause scald. Do not wear shorts while riding,
otherwise leg injuries may result.

ZHEJIANG KAYO MOTOR CO., LTD.
www.kayomoto.com
- 7 -
Operation notes
Precautions for safety
1. You must wear work clothes (covered overalls, etc.), hats, and safety boots that are
suitable for the job. If necessary, you should also wear dust-proof glasses, dust-proof masks,
gloves and other safety protection products to protect your body.
2. Because the exhaust contains harmful components, it is forbidden to run the engine for a
long time in a closed place or a place with poor ventilation.
3. When the engine is just stopped, the temperature of the engine and the muffler is still very
high. Do not touch them before cooling to avoid burns.
4. The storage battery solution (dilute sulfuric acid) is a strong corrosive agent, which may
cause burns and blindness when it touches the skin and eyes. If your clothes or skin are
accidentally stained with battery solution, please wash them immediately with plenty of water
and go to the hospital for treatment. The storage battery and storage battery solution should
be kept strictly, and must be placed in a safe place out of the reach of children. When the
battery is charged, it will produce flammable and explosive hydrogen. Once a fire source or
electric spark approaches, there is a danger of explosion. So please charge in a
well-ventilated place.
5. As gasoline is flammable, fireworks are strictly prohibited at the work site. Pay attention
not only to open flames, but also to electric sparks. In addition, the vaporized gasoline may
explode. Please choose a well-ventilated site for operation.
6. Be careful not to let the rear wheels, clutches and other rotating parts and movable parts
pinch hands and clothes during maintenance.
7. When two or more people are doing homework, they must greet each other continuously
to confirm safety.
Precautions for disassembly and assembly
1. Parts, lubricating oil and grease must use KAYO recommended products.
2. The parts of each system should be sorted and kept separately, so that the parts can be
installed back to their original positions.
3. Please clean the dirt and dust on the car before maintenance.
4. Gaskets, O-rings, piston pin retaining rings, split pins, etc. must be replaced with new
ones after disassembly.
5. When the elastic retaining ring is disassembled, if the opening is too large, it will be
deformed and will easily fall off after reassembly. Please do not use elastic retaining rings
that have become loose or have lost their elasticity.
6. After the parts are disassembled and inspected, they should be cleaned and the cleaning

ZHEJIANG KAYO MOTOR CO., LTD.
www.kayomoto.com
- 8 -
agent should be blown off with compressed air before the measurement. Apply lubricating oil
on the moving surface before assembling.
7. When disassembling, check the necessary places and measure relevant data so that it
can be restored to the state before disassembly during assembly.
8. Fasteners such as bolts, nuts, and screws must be pre-tightened first, and then tightened
on the diagonal according to the specified tightening torque according to the principle of from
large to small, from inside to outside.
9. The rubber parts should be checked for aging during disassembly and replaced in
advance if necessary. In addition, since rubber parts are not resistant to gasoline, kerosene,
etc., try not to let volatile oils and greases adhere to them.
10. According to the requirements of the maintenance manual, apply or inject the
recommended grease on the designated parts.
11. Use correct special tools for disassembly and assembly operations.
12. The inner ring or outer ring of the ball bearing can be rotated by fingers to confirm
whether the rotation is flexible and smooth. If the disassembly method of applying force on
the ball is adopted during disassembly, the dismantled bearing should not be used again:
ngs that feel stuck in rotation should be cleaned, and those that still feel stuck
after cleaning should be replaced, and those that cannot be cleaned should be replaced
directly.
not tight after
disassembly, replace the bearing.
13. Bearings should be coated with oil or grease before assembling. Pay attention to the
installation direction when assembling single-sided dust-proof bearings. Open type or
double-sided dust-proof bearings should be installed with the manufacturer's logo and size
facing outward when assembling.
14. When installing the rectangular retaining ring, the chamfered side should face the
direction of force. Do not use the retaining ring that has been slackened and lost its elasticity.
After assembling, turn the rectangular retaining ring to confirm that it is firmly installed in the
groove.
15. After assembly, it is necessary to check whether each fastening part is tightened and
whether it works normally.
16. Brake fluid and coolant will damage the painted surface, plastic parts, rubber parts, etc.
Do not allow them to adhere to such parts, and rinse with water immediately in case of
adhesion.
17. The oil seal should be installed with the side with the manufacturer's logo facing outward
(the direction without oil):
scratching the oil seal lip.
18. When installing hose-like parts, insert the hose into the root of the joint. If there is a pipe
clamp, install the pipe clamp in the dent of the pipe. Replace the hoses that are not tight
during installation.

ZHEJIANG KAYO MOTOR CO., LTD.
www.kayomoto.com
- 9 -
19. Don't get dust, dirt, etc. into the engine and brake hydraulic system.
20. The gasket material attached to the joint surface of each engine box must be cleaned up
before assembly. The bumps on the contact surface must be polished evenly with oilstone.
21. Do not twist or bend the cable too much. Deformed and damaged cables can cause
malfunction or breakage.
22. When assembling protective cap parts, if there is a groove, the protective cap must be
inserted into the groove.
Vehicle components and location
K4 specific components and locations
1 2 3 4 5 6 7 8 9
10 11 12 13 14 15 16 17 18
No.
Name
No.
Name
1
Front fender
10
Front brake caliper
2
Front panel
11
Front fork
3
Raiser
12
Fuel tank
4
Handlebar
13
Gear shift lever
5
Vent pipe
14
Pedal
6
Fuel tank cap
15
Chain
7
Fuel tank petcock
16
Single support

ZHEJIANG KAYO MOTOR CO., LTD.
www.kayomoto.com
- 10 -
8
Air filter cover
17
Chain guide
9
Chain guide cover
18
Rear sprocket
19 20 21 22 23 24
25 26 27 28 29 30 31 32 33
No.
Name
No.
Name
19
Rear fender
27
swingarm
20
Exhaust pipe muffler
28
Triangle rocker arm
21
Seat
29
U-shape rocker arm
22
Rear shock
30
Rear brake pump body
23
Upper clamp
31
Brake pedal
24
Lower clamp
32
Exhaust pipe
25
Rear disc brake
33
Front disc brake
26
Rear brake caliper

ZHEJIANG KAYO MOTOR CO., LTD.
www.kayomoto.com
- 11 -
VIN Code and Engine Number
VIN Code
The VIN Code of the K4 is located on the
nameplate of the front extension tube.
Engine Number
The engine number of the K4 is located on the
inside of the engine gearshift lever
The Vehicle Parameter
Vehicle Dimensions and Mass Parameter
L*W*H(mm)
2145×810×1220
L*W*H(mm)
1455
Net weight(kg)
115.5
Tire size
F: 80/100-21;R:110/100-18
Seat height(mm)
925
Min ground clearance
(mm)
275

ZHEJIANG KAYO MOTOR CO., LTD.
www.kayomoto.com
- 12 -
Tank volume(L)
7.5
Engine Parameters
Engine type
Single cylinder, four stroke, Air-cooled, 4 Valves
Clutch type
Wet type, Multiple disk
Cylinder diameter×stroke
72×61.4mm
Displacement
249.9
Max. Power(kw/r/min)
15/8500
Max. Torque(N•m/r/min)
18/6500
Compression Ratio
9.25:1
Shift type
Usually engaged two - stage transmission five - speed
transmission, International profile
Starting
Electric
Fuel control system
CDI
Battery
EL2-2500 lithium battery
Chain
#520H;13T/45T
Frame/Shock/Brake/Wheel system Parameters
Frame type
Central double cradle type high strength steel tube frame
Front shock
Inverted single adjustable front shock absorber L=880mm
Rear shock
Double adjustable nitrogen airbag rear shock absorber
L=465mm
Swingarm
High-strength steel flat fork, L=580mm with improved
progressive rate of forged aluminum connecting rod system
Handlebar
6061 aluminum alloy fat bar, with Kayo special ultra-soft off-road
grip
F/R rims
F:1.60×21;R:2.15×18;high strength aluminum rim
F brake system
Φ270mm disc brake
R brake system
Φ240mm disc brake, Forged up-walking brake pedal
Others
Air filter type
Sponge filter core filter type
Fuel type
92 and above grade gasoline
Motorcyclists
1人(rider)
Maximum load mass
120kg

ZHEJIANG KAYO MOTOR CO., LTD.
www.kayomoto.com
- 13 -
Important fastener specifications
No.
Item
Fastener specifications
Quantity
1
Front brake caliper
mounting bolt
Outer hexagon small head
flange M8×45 half thread
2
2
Steering column nut
Aluminum silver M25×1×H9
1
3
Upper pressure block
mounting screws
Hexagon socket head M8×25
4
4
Front disc brake rotor
mounting bolt
Opposite side of outer hexagon
M6×20
6
5
Front axle mounting nut
Outer hexagon flange
M16×1.5×H14
1
6
Shift lever mounting bolt
Hexagon socket head M6×20
1
7
Engine mounting bolts
Opposite side of outer hexagon
M10×110
2
8
Engine mounting nut
Hexagon flange self-locking
nuts M10×1.25
2
9
Exhaust pipe mounting nut
Hexagon flange self-locking
nuts M8
2
10
Chain guide sleeve
mounting screws
Phillips flat head machine screw
M6×15
4
11
Flat fork shaft mounting nut
Hexagon flange self-locking
nuts M16×1.5×H14.8
1
12
Triangle cradle fastening
nut
Hexagon flange self-locking
nuts M12×1.25
2
13
Adjusting Chain bolt
Hexagon bolts on opposite
sides M8×70 S13
2
14
Adjusting chain nut
Hexagon bolts on opposite
sides M8
4
15
Rear shock and frame
connecting bolt
Outer hexagon small head
flange bolts M10×70×1.25
1
16
Connecting bolts of rear
shock and tripod cradle
Oval head bolts
M10×42×1.25+Φ10×28
1
17
Fastening nut for rear
shock and tripod cradle
Hex flange with teeth M10×1.25
1
18
Rear brake disc mounting
bolt
Opposite side of outer hexagon
M6×20
4

ZHEJIANG KAYO MOTOR CO., LTD.
www.kayomoto.com
- 14 -
19
Rear sprocket mounting
screws
Hexagon socket countersunk
head screws M8×31 10.9 level
6
20
Rear sprocket fastening nut
Hexagon self-locking nuts M8
6
21
Rear axle nut
Hexagon self-locking nuts
M14×1.5
1
22
Brake pedal head mounting
screw
Hexagon round head M6×12
1
23
Rear brake pump mounting
bolt
Cross half round head with
gasket M6×20
2
24
High voltage package
mounting bolt
Outer hexagon small head
flange M6×20
2
25
Voltage stabilizer mounting
bolt
Outer hexagon small head
flange M6×12
2
26
Electric door lock bracket
bolt
Outer hexagon small head
flange M6×12
2
27
Screws connecting the left
and right guard plates to
the fuel tank
Cross half round head with
gasket M5×10 full thread
6
28
Muffler mounting bolt
Outer hexagon big head flange
bolts M8×35 half thread
1
29
Hexagonal flange tooth nut
M6
8
30
Hexagon flange self-locking
nuts
M6
14
The tightening torque of the fasteners in the above table can refer to the standard torque.
Note:Before installing the thread, apply anti-rust grease on the thread and the joint surface.
The Vehicle Control
Clutch lever inspection
The clutch is controlled by the clutch lever,
which located at the left end of the handlebar, and
operated by the left hand.
The angle of the K4 clutch lever can be
adjusted according to the wishes of customers. By
adjusting the screw, the angle between the clutch
lever and the handlebar can be changed. This

ZHEJIANG KAYO MOTOR CO., LTD.
www.kayomoto.com
- 15 -
adjustment does not change the internal structure of
the clutch, so it will not affect the normal use of the
clutch.
Front brake lever inspection
The front disc brake is controlled by the brake
lever. Which located at the right end of the
handlebar, and operated by the right hand.
The angle between the brake lever and the
handlebar of K4 model can be adjusted according to
the needs of customers. For details, see "Adjusting
the Stroke of the Front Brake lever".
The front brake adopts a floating caliper disc
brake, which is installed on the lower end of the left
front shock and fixed by 2 bolts.
Throttle knob
The throttle knob is located on the right side of
the handlebar and is controlled by turning with the
right hand. When the handle is turned
counterclockwise, increase the throttle, release the
handle and return it to the position.

ZHEJIANG KAYO MOTOR CO., LTD.
www.kayomoto.com
- 16 -
Start
The vehicle start button is located on the right side
of the handlebar, close to the position of the throttle
knob. It is a square gray button. Long press it to start
the motorcycle engine. In addition to the start button,
the vehicle can also be started by stepping on the
start lever.
Note:When starting, the left hand should squeeze
the brake to prevent the engine from starting with
gear。
Note:There should be fuel in the fuel tank before
starting the engine, and the fuel tank switch is
required to be in the open position。
Extinguish
The engine's flameout switch is located on the
left side of the handlebar near the grip. It is a square
red button. Long press it to turn off the engine.
Fuel Tank Pump/Fuel Tank Switch
The K4 carburetor version adjusts the fuel supply
through the fuel tank switch, which is located at the
bottom of the left side of the fuel tank. By rotating the
switch, you can control whether the fuel enters the
carburetor, so as to achieve the control effect.

ZHEJIANG KAYO MOTOR CO., LTD.
www.kayomoto.com
- 17 -
The meaning of each symbol on the fuel tank switch
is as shown in the left figure, where the "ON" symbol
indicates that the switch is turned on and the fuel is
drained; the "OFF" symbol indicates that the switch
is turned off and the fuel drain stops; the "RES"
symbol indicates that the reserve oil is enabled.
Shift check
The K4 shift lever is located on the left side of the
engine, and the shift operation is performed by
stepping on and hooking up the shift lever.
The K4 engine gear is the international five gears,
and its gear setting is shown in the left picture.
Inspection of rear disc brake
The foot brake pedal is located on the right side of
the engine and is operated by stepping on it.
Note:When performing brake operation, the foot
brake should be used as the main brake, and the
hand brake should be used as a supplement.

ZHEJIANG KAYO MOTOR CO., LTD.
www.kayomoto.com
- 18 -
The rear wheel brake adopts a floating caliper disc
brake, whose caliper body is located on the right
side of the rear wheel and is fixed by a disc brake
bracket.
Parking support
K4 use a single support for parking support.
The single support is located on the left side of the
whole vehicle. When in use, the vehicle is centered
and the single support is kicked to expand it. Tilt the
whole vehicle to the left to make the single support
contact the ground and support the motorcycle.
Precautions Before Use
Advice for beginners
1.Please read this manual before driving, especially the "The Vehicle Control" and "Drive
Guide" sections.
2.Please carry out a standard run-in when driving.
3.If any part problem is found during use, please refer to this manual for repair or contact
KAYO dealer.
4.After each use, the whole vehicle needs to be cleaned with water flow.
5.If not necessary, do not drive in bad weather (such as heavy rain, blizzard, etc.).
6.The company is not responsible for the whole vehicle problems caused by malicious
behavior.

ZHEJIANG KAYO MOTOR CO., LTD.
www.kayomoto.com
- 19 -
The running-in process
Motorcycle engines have a lot of relatively moving parts, such as pistons, piston rings,
cylinder blocks, and transmission gears that mesh with each other. Therefore, at the initial
stage of use, the engine must be run-in to a standard. The running-in can make the moving
parts adapt to each other, correct the working gap, and form a good smooth friction surface
that can withstand larger loads. Only after standard running-in can the engine have
excellent performance and reliability.
The recommended running-in steps are as follows:
1、0~2.5h stage:when the motorcycle is used at 50% ~ 75% throttle, the speed should be
changed frequently to avoid the motorcycle running for a long time at the same
throttle; After working for 1 hour, let the engine cool for 5 ~ 10 minutes; Avoid rapid
acceleration, throttle can not be sudden and small.
2、2.5~4h stage:at 50% ~ 75% throttle, the motorcycle can run for a long time at the same
throttle. In the working process, the throttle can reach 100%, but the duration is not higher
than 5 ~ 10 seconds;
3、4~5h stage:use the motorcycle at 75% ~ 100% throttle.
4、More than 5h:increase the speed to 60 ~ 80km/h, until the engine performance can be
fully played.
Danger :When driving a motorcycle, please do not speed up regardless of the
consequences, this behavior is easy to cause engine damage, thus causing safety
accidents.Therefore, please pay attention to certain driving skills when using motorcycles.
Drive Guide
Check items before driving
1.Check the tank level
2.Check the liquid level of the hand brake oil cup
3.Check the liquid level of the foot brake oil cup
4.Check the hand brake clamp system dynamic friction plate
5.Check the foot brake clamp system dynamic friction plate
6.Check braking effect of braking system
7.Check the chain
8.Inspect rear sprocket, engine sprocket and chain guide structure
9.Check the chain guider

ZHEJIANG KAYO MOTOR CO., LTD.
www.kayomoto.com
- 20 -
10.Check the outside surface of the tire
11.Check tire pressure
12.Check the battery level
13.Check the thickness of the front disc brake
14. Check the thickness of the rear disc brake
15. Check the torque of each fastener
16. Check the engine gear
17. Check cover
18. Check the fuel tank switch
19. Check if the body armour is fully worn
Precautions for ignition
The steps of electric ignition are as follows:
1、Open the electric lock.
2、Squeeze the brake lever with your right hand.
3、Hold the ignition switch with your right finger.
4、The engine starts to work, loosen the ignition switch, and the start of the vehicle is over
Note:Before starting the engine for K4 carburetor models, turn the fuel tank switch to the
"ON" position.
Precautions for start
1、An inspection should be carried out before starting, including the state of the vehicle and
the driver’s dress.
2、When starting, the motorcycle should not go too fast.
3、To ensure safety, please use the first gear to start driving for a certain distance before
shifting gears.
Precautions for turning
1、Take care to slow down in advance when turning.
2、When turning, lower your center of gravity to reduce the risk of side rolling.
3、When turning, do not shift gears.
Precautions for acceleration
1、Do not accelerate on the corners.
2、After acceleration, shift gears in time.
Table of contents
Other KAYO MOTOR Motorcycle manuals

KAYO MOTOR
KAYO MOTOR KT250 User manual

KAYO MOTOR
KAYO MOTOR T2 User manual

KAYO MOTOR
KAYO MOTOR KMB60 2021 User manual

KAYO MOTOR
KAYO MOTOR TT 125 User manual

KAYO MOTOR
KAYO MOTOR TS90 User manual

KAYO MOTOR
KAYO MOTOR K6-R User manual

KAYO MOTOR
KAYO MOTOR K2 User manual

KAYO MOTOR
KAYO MOTOR T4 User manual

KAYO MOTOR
KAYO MOTOR TD125 User manual