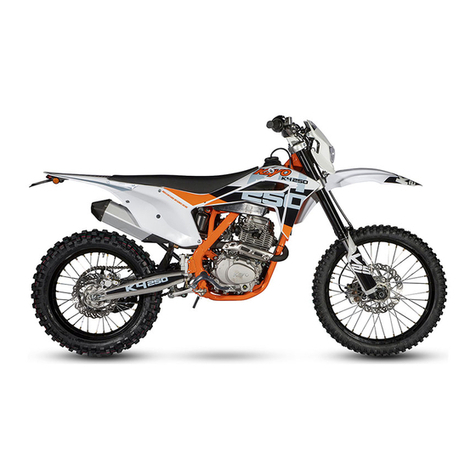
KAYO MOTOR K6-R User manual

www.kayomoto.us
- 1 -
KAYO MOTO
K6-R
Service Manual
W W W . K AY OMOTO.US

www.kayomoto.us
- 2 -
This service manual is edited by KAYO
Please do not modify the content without authorization。
Manufacturer has the right to improve and update the model’s structure and spare parts without notice.
The model in the image may differ slightly from production models.
Preface
This service manual is edited by KAYO
Please do not modify the content without authorization。
Manufacturer has the right to improve and update the model’s structure and spare parts without notice.
The model in the image may differ slightly from production models.
Notification and Warning
This service manual is edited by KAYO
Manufacturer reserves the right to improve and update this manual, model’s structure, and spare parts without notice.
The images in this manual may differ from the actual model.
This manual, contains words like “Danger/Warning/Caution”, please read the manual carefully and follow the
instructions closely when performing inspections and repairs, this will increase the reliability, performance and
overall lifespan of the vehicle. The meanings of "DANGER", "WARNING" and "CAUTION" are as follows:
Danger: you should pay attention on the dangers that may cause severe injuries or death.
Warning: you should notice of the dangers that may cause injuries or vehicle damage.
Caution: you should focus on the dangers that may cause you uncomfortable or vehicle lifespan decrease.
Contents
Preface………………………………………………………………………….3
Notification and warning……………………………………………………..4
Vehicle profile………………………………………………………………....6
Vehicle component and location……………………………………………………………………………………6
VIN number…………………………………………………………………………………………………………8
Specifications…………………………………………………………………………………………………….....9
Circuit diagram……………………………………………………………………………………………………...11

www.kayomoto.us
- 3 -
Fasteners torque table……………………………………………………………………………………………….11
Operating instruction……………………………………………………….12
Check before use……………………………………………………………………………………………............13
starting steps………………………………………………………………………………………….......................16
run-in period …………………………………………………………………………………………………..........17
cleaning……………………………………………………………………………………………………...............17
Storage and usage …………………………………………………………………………………………..............18
Routine maintenance…………………………………………………………18
Periodic maintenance table………………………………………………………………………………………....19
Specific maintenance content…………………………………………………………………………………….....20
Vehicle settings……………………………………………………………….29
Specific settings and methods………………………………………………………………………………............29
Vehicle troubleshooting……………………………………………………...31
Possible faults and troubleshooting methods……………………………………………………………………......31
Engine maintenance manual………………………………………………..36
Cylinder head and valve………………………………………………………………………………………….....42
Cylinder and piston………………………………………………………………………………………………....46
Clutch, drive tooth, overrunning clutch, oil pump,and shift mechanism...................................................................51
Magnetos and balancing main and driven Gear……………………………………………....................................60
Crankcase, crankshaft, variable speed drive, balance shaft…………………………………………………….......65

www.kayomoto.us
- 4 -
Vehicle profile
Vehicle component and location
No.
Name
No.
Name
1
Front fender
10
Front brake caliper
2
Headlight
11
Front fork
3
Handlebar
12
Fuel tank
4
Vent pipe
13
Carburetor
5
Fuel tank cap
14
Gear shift lever
6
Fuel tank petcock
15
Pedal
7
Air filter
16
Chain
8
Chain slider
17
Chain guide
9
Front brake disc
18
○
1○
2 ○
3 ○
4○
5 ○
6○
7 ○
8
○
9 ○
10 ○
11 ○
12 ○
13 ○
14 ○
15 ○
16 ○
17

www.kayomoto.us
- 5 -
No.
Name
No.
Name
18
Taillight
25
Rear brake caliper
19
Muffler
26
U-shape rocker arm
20
Seat
27
Triangle rocker arm
21
Rear shock
28
Rear brake oil cup
22
Start lever
29
Brake pedal
23
Radiator
30
Muffler pipe
24
Rear brake disc
○
18 ○
19 ○
20 ○
21 ○
22 ○
23
○
24 ○
25 ○
26 ○
27 ○
28 ○
29 ○
30

www.kayomoto.us
- 6 -
VIN number
①
VIN number
②
Frame plate
③
Engine number
○
1 ○
2 ○
3

www.kayomoto.us
- 7 -
Specifications
Vehicle dimension and mass parameter
Length×Width×Height
(mm)
2180×820×1254
Wheelbase(mm)
1488
Curb weight(kg)
111
Tire type
Front 80/100-21;Rear 100/90-19
Seat height(mm)
955
Ground clearance(mm)
340
Fuel capacity(L)
7.5
Engine
Engine type
Single cylinder, 4-stroke, water cooling, 4 valves, SOHC, w/ balance shaft
Clutch type
Wet multiple disc
Bore×Stroke
77×53.6mm
Lubrication method
Forced, splash
Engine oil capacity
1500ml
Oil make
SJ 5W-40
Displacement
249.6cc
Max power(kw/r/min)
19/9000
Max torque(N•m/r/min)
23/7000
Compression ratio
11.6:1
Transmission type
Constant mesh, double-stage driving, 6-speed, international gear 1-N-2-3-4-5-6
Start type
Electric/kick
Fuel control system
PWK racing version carburetor
Battery
12V/7Ah Lithium
Chain
#520;13T/51T
Chassis/Suspension/Braking/Wheel
Frame type
Center double cradle type, high strength steel pipe frame
Front fork
L=950mm,travel 300mm USD double-adjustable
Rear shock
L=480mm,travel 110mm double-adjustable
Swing arm
High strength forging alloy, L=595mm
Handlebar
7075 alloy fat bar, Φ28.6mm

www.kayomoto.us
- 8 -
Rim
Front 1.60×21,rear 2.15×19;7050 alloy,forging CNC hub
Front brake
Double piston pump hydraulic brake system,disc Φ240mm,CNC lever
Rear brake
Single piston pump hydraulic brake system, disc Φ240mm,forging brake pedal
Others
Air filter type
Sponge filter type
Person capacity
1 person(driver)

www.kayomoto.us
- 9 -
Circuit diagram
Fasteners torque table
Caution: please apply anti-rust grease on the thread and joint surface before installing the thread.
No.
Item
Fasteners specification
Qty
Torque(N•m)
1
Front brake caliper screw
M8×40 full thread
2
20~32
2
Front brake guard screw
M6×16
2
7~11
3
Steering stem screw
Aluminum, silvery
1
/
4
Upper raisers assembly screw
M8×30
4
20~32
5
Front brake disc screw
M6×16
6
7~11
6
Front wheel axle nut
M16×1.5×H14
1
175~218
7
Pedal bracket bolt
M8×20 full thread
2
20~32
8
Gearshift bolt
M6×25
1
7~11
9
Engine upper assembly bolt
M8×60
3
20~32
10
Engine assembly nut
M10×1.25
2
40~70
11
Cooling tank screw
M6×25
4
7~11
12
Muffler pipe nut
M8
2
20~32
13
Chain slider screw
M6×12
3
7~11
14
Swing arm axle nut
M16×1.5×H14.8
1
175~218
15
Triangle rocker arm nut
M12×1.25
3
68~85
16
Chain adjuster bolt
M10×40×1.25 S14
2
36~55
17
Chain adjuster nut
M10×1.25
2
40~70
18
Rear shock & frame joint bolt
M10×50×1.25
1
40~70
19
Oval-head bolt
M10×42×1.25+Φ10×2
8
1
40~70

www.kayomoto.us
- 10 -
20
Rear disc bolt
M6×16
4
7~11
21
Rear sprocket screw
M8×31 10.9 level
6
27~35
22
Rear wheel axle nut
M22×1.5
1
452~550
23
Rear brake disc guard bolt
M6×12
4
7~11
24
Brake pedal head screw
M5×10 full thread
2
4~7
25
Brake limit bolt
M8×20 full thread
1
20~32
26
Rear brake pump bolt
M6×16 full thread
2
7~11
27
Brake pedal bolt
M6×25 full thread
1
7~11
28
Ignition coil bolt
M6×20
2
7~11
29
Plastics bolt
M6×16 full thread
10
7~11
30
CDI bolt
M6×16 full thread
2
7~11
31
Voltage regulator bolt
M6×25 full thread
2
7~11
32
Key bracket bolt
M6×12
2
7~11
33
Fuel tank petcock screw
M5×12 full thread
2
4~7
34
Front fender bolt
M6×12
4
7~11
35
Left/right fender & fuel tank joint screw
M5×10 full thread
6
4~7
36
Phillips pan head tapping screw
ST 4.2×12
10
/
37
Phillips large flat head machine screw
M6×10
4
/
38
Spark plug
/
1
25~30

www.kayomoto.us
- 11 -
Operating instruction
Check before use
Please check the following items each time.
1.Fuel level
Open the tank cap and shake the handlebars, and observe the fuel the level
of the tank. If fuel is low, please add fuel.
2. Fuel tank switch
There are three positions of the fuel tank switch in this motorcycle,
from top to bottom: RES (the auxiliary fuel tank is open), OFF (the fuel
tank switch is closed), ON (the fuel tank switch is open).If the fuel tank
switch is OFF, there is no fuel in the carburetor and the engine cannot run.
If fuel is low in the tank, switch the tank to the RES position and refuel
immediately. If fuel is sufficient and the motorcycle is in good condition,
switch to ON.
Note: when the engine is turned off, turn the tank switch to OFF.
3.Engine Oil level.
Engine Oil capcity:1500ml. To check oil level run the vehicle for
a few minutes until it reaches operating temperature. Then stand
the bike up vertically and check the sight glass on the lower right
side of the engine case.
4. Coolant level
2、The coolant quantity is sufficient or not.
Open the coolant tank cover and shake the handle bar. Observe the coolant
level in the tank. If the level is too low, add coolant. Add the coolant close
to or slightly below②.
Warning: do not open the tank cover while the engine is working to avoid
serious burns.
○
1
○
2

www.kayomoto.us
- 12 -
5. Brake fluid level.
Through the brake fluid sight glass (①and②), checking the
brake fluid in the brake master cylinder. If brake fluid level is
lower than half of the observation hole, or "LOWER" position,
then add brake fluid.
Note: brake fluid should be replaced annually even if the
motorcycle has not been used for a long time.
Note: please check the brake fluid level frequently. Check the
brake line and connecting points for damage or wear. If any,
please replace. Check the master cylinder/calipers for damage or
wear, if any, please replace.
Note: Do not leave .brake reservoirs open for extended periods of
time
Note: Always use brake fluid from an unopened container
6.Brake pads
Check the caliper brake pad’s thickness, if the brake pad’s thickness is less
than the minimum thickness, the brake pad must be replaced. Check the
caliper brake pad for damage or crack. If there is damage or crack, a new
brake pad should be replaced.
Minimum thickness of brake pad:
Front MIN = 1 mm
Rear MIN = 1 mm
Note: brake pads should be replaced as a set.
7. Brake rotors
Check for damage to the brake disc surface, (scratches, gouges, warping,
bluing) and check the thickness, if the brake disc is less than the limit
thickness, the brake disc must be replaced immediately.
Limit thickness of brake disc:
Front MIN=2.5mm
Rear MIN=3.5mm
○
1 ○
2
○
3
○
4

www.kayomoto.us
- 13 -
8、check tire pressure
Use the pressure gauge to check whether the tire pressure level is in line
with the standard of this motorcycle, if there is often a small pressure
problem, check the tire flats and any punctures .
recommended pressure
Front :1 bar(15PSI)rear :1bar(15PSI)。
Note: the check of the tire pressure should be done under cool conditions.
9. Check spoke tension
Pinch the two adjacent spokes with your fingers to check whether there is
a lack of tension in the spokes. If the spokes are found loose wheel truing
and tightening may need to be performed..
NOTE: spoke tensioning and truing should be performed by a professional
10. Check the chain and its supporting parts
Check chain tension. If the chain is too loose, it can be adjusted by
loosening the rear axle and adjusting the chain adjusters. Do not make the
chain too tight.
Note: if the chain needs to be tensioned frequently, or if you find any
signs of wear on the front sprocket, rear sprocket and chain replace
immediately.
11、Check whether the front shock needs to vent.
When the environment temperature is high, the gas in the shock is heated
and expands. At this time, it is necessary to conduct the exhaust operation.
Otherwise, damage the oil seal may occur, which will affect the use of the
shock.
12、Inspection of the remaining
components
Visually inspect the entire
motorcycle for loose parts. Tighten
any loose bolt or parts
○
1 ○
2

www.kayomoto.us
- 14 -
. Check the battery charge.
check the lights.
Note: these pre ride checks won't take much time, but it can help you
develop good riding habits and make your daily riding easier and safer.
Check whether the seat cushion is comfortable, check whether the battery
is sufficient, check whether the water tank is shaking.
Note: if there is a large number of problems, please contact the KAYO
distributor.
The checking before riding will be very quick and won't take you much
time, but it can help you develop good riding habits and make your daily
riding easier and safer.
Starting steps
The steps to kick start as follows (if with kickstart lever)
1. Switch the fuel tank to the "ON" position;
2, the left hand pull in clutch handlebar;
3, the right hand pull in the brake handle;
4. kick the kickstart lever down in a smooth rapid motion
5.once the engine starts up, release the kickstart lever and fold back
to its regular position.
The electric starting steps are as follows:
1. Switch the fuel tank to the "ON" position;
2. turn the key switch on;
3, the left hand pull in clutch lever;
4, the right hand pull in front brake lever;
5. push the start switch with the right thumb;
6. once then engine starts make sure you are in neutral and release
clutch and brake levers
Note: when the vehicle starts,
the brake should be applied to
prevent the vehicle from starting in
gear.
○
1
○
2
○
3

www.kayomoto.us
- 15 -
Engine break-in period
Motorcycle engines have many parts that make relative movements, such as pistons, piston rings, cylinder blocks,
and meshing transmission gears. Therefore, in the initial stage of use, the engine must be regularly run-in. The
running-in can adapt the moving parts to each other, correct the working gap, and form a good smooth friction
surface that can withstand large loads. After the engine break-in is complete. Engine will have excellent
performance and reliability.
The recommended running-in steps are as follows:
1. 0 ~ 4.5h stage: when using a motorcycle at 50% ~ 75% throttle, the speed should be changed frequently to avoid
the motorcycle running at the same throttle for a long time; after each hour of running, let the engine cool for 5 ~
10 minutes; Avoid rapid acceleration, and deceleration.
2, 4.5 ~ 7h stage: work under 50% ~ 75% throttle, at this time, the motorcycle can run at the same throttle for
longer times. While running, the throttle can reach 100%, but for no longer than 5-10 seconds;
3, 7 ~ 10h stage: Use motorcycles at 75% ~ 100% throttle.
4. Above 10h: Increase the speed to 60 ~ 80km / h, until the engine’s performance is fully utilize.
Danger: when driving, please do not accelerate recklessly, this behavior can easily lead to engine damage, accident
and injury.
Vehicle cleaning
Vehicle cleaning is also an important part of the daily use and maintenance of motorcycles. Regular cleaning of
your motorcycle can keep your vehicle in good motion and prolong its service life. Here are the steps you can take
to clean your motorcycle:
1. Plug the exhaust system to prevent water from entering;
2. Seal the switches and connectors with tape;
3. Use low-pressure water spraying device to remove mud and dirt on the surface;
4. Clean especially dirty parts with special motorcycle cleaner;
5. Rinse with low pressure water;
6. Let the motorcycle air dry naturally;
7. Drive the motorcycle for a short time until the engine reaches the working temperature;
8. Lubricate the chain and all other components that need lubrication.

www.kayomoto.us
- 16 -
Warning: Never use high pressure water to clean the vehicle. Avoid direct contact of water flow with coils, pipe
plugs, carburetor or any electrical components.
Warning: do not use high pressure water to clean it. Avoid making the water directly touch with coils, pipe plugs,
carburetors or any electrical components.
Storage and use of vehicles
When you plan to store your vehicle for long periods of non-use, follow these steps:
1. Block the exhaust pipe;
2. Thoroughly clean the motorcycle;
3. Wait for the motorcycle to air dry naturally;
4. Start the engine for about 5 minutes to heat the lubricating oil, and then empty the oil from the engine;
5. Add new engine lubricant to the engine;
6. Empty the fuel tank (if it is not used for a long time, the gasoline will deteriorate);
7. Lubricate the chain;
8. Apply oil to all unpainted metal surfaces to avoid rusting;
9. Keep motorcycle wheels floating when storing motorcycles. If this condition cannot be met, cardboard or
padding can be used under motorcycle tires.
10. Cover the motorcycle to prevent dust and dirt from adhering.
Note: when applying anti-rust oil, please do not splash oil on the brake and rubber parts, This may cause rubber
parts to deteriorate. .
After the motorcycle is stored for a long time, please follow these steps before putting it into use:
1. Remove the obstruction in the exhaust pipe;
2. Tighten the spark plug;
3. Fill the fuel tank with fuel;
4. Check the inspection items before daily driving;
5, conventional lubrication of motorcycles.

www.kayomoto.us
- 17 -
Routine Maintenance
Every 30 hours operating
Every 20 hours operating
Every 10 hours operating/after every race
Once after 1 operating
Checkandchargethebattery
●
●
●
Check the front brake linings
●
●
●
Check the rear brake linings
●
●
●
Check the brake discs
●
●
●
Check the brake lines for damage and leakage
●
●
●
Check the rear brake fluid level
●
●
●
Checkthefreetravelofthe footbrakelever
●
●
●
Checktheframeandswingarm
●
●
●
Checktheswingarmbearingforplay
●
Check the heim joints at the top ofthe shock absorber
●
●
●
Checktheshockabsorberlinkage
●
●
●
Check the tire condition
○
●
●
●
Check the tire air pressure
○
●
●
●
Checkthe wheelbearingforplay
●
●
●
Check the wheelhubs
●
●
●
Check the rimrun-out
○
●
●
●
Check the spoke tension
○
●
●
●
Check the chain, rear sprocket, engine sprocket, and chain guide
●
●
●
Check the chain tension
○
●
●
●
Greaseall movingparts(e.g.,handlever, chain, ...)andcheckforsmoothoperation
●
●
●
Check the front brake fluid level
●
●
●
Checkthefreetravelofthe handbrakelever
●
●
●
Checkthesteeringhead bearingplay
○
●
●
●
Checkthevalveclearance
○
●
Check the clutch
●
Changethecoversealand shaftsealringsofthe waterpump
●
Change the engine oil and oil filter, clean the oil screen
○
●
●
●
Check all hoses (e.g. fuel, cooling, bleeder, drainage, etc.) and sleeves for cracking, leaks,
and incorrect routing.
○
●
●
●
Check the antifreeze and coolant level
○
●
●
●
Checkthecables for damageand routingwithout sharpbends
●
●
●
Checkthatthethrottlecablesareundamaged,routed withoutsharpbends, andsetcorrectly
○
●
●
●
Clean the air filter and air filter box
●
●
●

www.kayomoto.us
- 18 -
Check the screws and nuts for tightness
○
●
●
●
Changethefuelscreen
○
●
●
●
Checkidle
○
●
●
●
Final check: Check the vehicle for safe operation and take a test ride
○
●
●
●
○ One-time interval ● Periodic interval
Note: this table is for reference only. Please adjust the period according to the usage of motorcycle.
Warning: the inspection, adjustment and replacement of the engine parts should be carried out after
consulting KAYO service center to avoid damage to the engine.
Specific maintenance content
1.Clutch handle
The clutch handle can be adjusted according to your actual needs:
By adjusting the nut, the pull of clutch lever can be changed.
This adjustment does not change the internal structure of the clutch, so it
will not affect the normal use of the clutch.
Note: The clamping force of the clutch handle should not be adjusted too
much, otherwise the clutch line will be easily broken.
2.Clutch disc:
For the inspection, adjustment and replacement of this item, please refer to
the engine maintenance manual below for details
3. Throttle:
Turn the throttle handle by hand to checking if it is smooth and snaps back
quickly.
Check whether the throttle cable has a free play of 10-20mm;
If the free play is too little, adjust as follows:
Loosen the lock nut at the end of the throttle cable,
Rotate the adjuster until free play is correct,
Then tighten the lock nut.
4.Spark plug:
Engine spark plug torque is 25-30N • m.
The spark plug must be removed regularly to check the gap (0.6 to 0.7 mm)
between the electrodes. If the spark plug contains oil or carbon, clean with
a wire brush or similar. Measure the distance between the electrodes with
a measuring instrument and adjust it to prevent abnormal bending of the
external electrodes. If the spark plug electrode is rusted, damaged, or the
insulator is broken, the spark plug must be replaced.
Note: The spark plug should be checked every 10 hours and replaced
every 20 hours.
Note: If engine performance decreases, replace spark plug to restore
normal performance
Note: if engine performance degrades, replace ignition plugs to restore
normal performance
5、air filter
Remove the seat⑤;
Remove the side panel⑥;
Checke the air filter。
Installation and restoration shall be
carried out in reverse order of
removal.
○
1
○
2 ○
3○
4
○
5
○
6
○
7

www.kayomoto.us
- 19 -
5.Air filter
The air filter should be checked on time, as follows:
Remove the seat cushion;
Remove the air filter cover;
Check the air filter.
Installation is performed in the reverse order of removal.
Danger: The air filter should be cleaned regularly to prevent dust or dirt
from entering the engine, which may cause engine wear or even damage.
Filters should be cleaned in a well-ventilated area and ensure that there are
no sparks, flames, or strong heat sources in the workplace. Never use
gasoline to clean the filter.
Warning: If the filter is damaged, it must be replaced immediately,
otherwise dirt can enter the carburetor. When installing the air filter
lubricate all connections and threads
6.Carburetor
Throttle screws and air screws allow idle speed adjustment of the
carburetor. The steps are as follows:
Turn the air screw clockwise until it reaches the top of its stroke and
reverse one and a quarter turns;
Adjust the throttle screw to ensure that the engine can idle at a steady speed
when the throttle is fully relaxed;
Adjust the throttle screw to reduce the engine speed as much as possible;
Adjust the air screw to make the engine speed as high as possible;
Repeat the above steps until a satisfactory speed is obtained;
Check if the throttle cable is working properly.
Danger: Driving a motorcycle with a damaged throttle cable is undoubtedly
a very dangerous behavior. A normal throttle cable should have a free travel
of at least 10mm. Start the engine and turn the handlebar left and right. If
the engine stalls or accelerates due to the movement of the handlebar, the
throttle cable is not adjusted properly or damaged. Make sure the throttle
cable is normal before driving the motorcycle.
◆Check whether the throttle cable is
working properly.
Danger: driving a motorcycle with a
damaged throttle cable is

www.kayomoto.us
- 20 -
undoubtedly a very dangerous behavior.Normal throttle cable should have
at least 10mm free travel.Start the engine and turn the handlebars, if the
engine stops or accelerates due to handlebar’s movement, then the throttle
cable is not properly adjusted or damaged.Make sure the throttle cable is
OK before driving the motorcycle.
7. Engine oil
Lubricating oil is a very important part of the normal working process of
an engine.Insufficient lubricating oil, deterioration or pollution can lead to
engine wear and even damage.
Oil level check
Lubricating oil is a very important part of normal engine operation.
Insufficient lubricant, deterioration or pollution can cause engine wear and
damage.
Oil level check
If the motorcycle has just been used, wait for a few minutes after the
engine has stopped to check;
Observe the amount of lubricating oil in the engine through the oil dipstick.
The oil level can be observed through the oil level hole;
The level of lubricating oil in the engine should be between the maximum
and minimum values, that is, between "H" and "L";
If the oil level is too high, remove excess oil through the drain bolt;
If the oil level is too low, add oil through the cap.
Note: The added lubricant should be the same as the original organic oil
grade in the engine.
Recommended oil brands and brands are:
Shell lubricants SJ 10W-40
Maximum oil capacity: 1000ml
○
1
Oil Change
Lubricants need to be changed
regularly to ensure the life of the
engine. The replacement steps are as
○
2
○
3○
5
○
4
Table of contents
Other KAYO MOTOR Motorcycle manuals

KAYO MOTOR
KAYO MOTOR K2 User manual

KAYO MOTOR
KAYO MOTOR TS90 User manual

KAYO MOTOR
KAYO MOTOR K4 User manual

KAYO MOTOR
KAYO MOTOR T2 User manual

KAYO MOTOR
KAYO MOTOR T4 User manual

KAYO MOTOR
KAYO MOTOR TT 125 User manual

KAYO MOTOR
KAYO MOTOR KT250 User manual

KAYO MOTOR
KAYO MOTOR TD125 User manual

KAYO MOTOR
KAYO MOTOR KMB60 2021 User manual