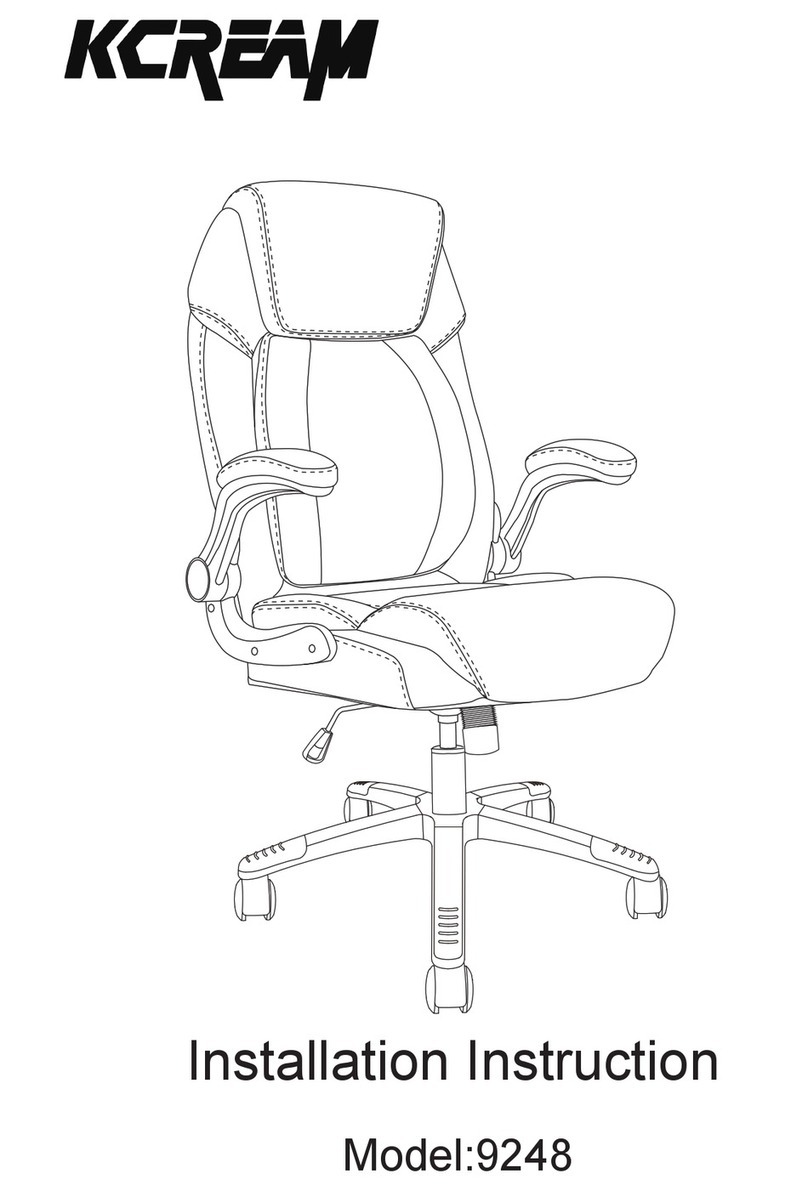
KCream Gaming Chair User manual

INSTRUCTION MANUAL

Congratulations, you are now the owner of a brand new chair!
Before enjoy the comfort chair, you have to put it together.This Assembly
Guide will take you through the basic assembly process. To make sure
your assembly goes smoothly, please follow the assembly instructions, and
especially the important safety information.
For more detailed and visual instructions, we have an Assembly Video that
will help you to understand the assembly process much better.
Also, while it is possible to assemble the chair on your own, having a
second person to help you makes it even easier.
Before you begin, please check if there are any missing parts from the
package. Should there be any issues, please don't hesitate to drop us an
email and we'll help you out ASAP.
2
ASSEMBLY GUIDE

3
Quantity: 5
Quantity: 2
Left
Right
Quantity: 1 Quantity: 1
Quantity: 1 Quantity: 2
Quantity: 2 Quantity: 1
Quantity: 1
Quantity: 1
Quantity: 1
Quantity: 1
Casters
Angle Adjusters
Back Cushion Seat Cushion
Footrest Rubber Rings
Armrests Seat Plate
Star Base
Left Plastic Cover Set
Gas Lift
Right Plastic Cover Set
A
G
JK
L M
H I
B
E
C
F
Quantity: 1
Lift Cover
D
Quantity: 6 Quantity: 16
Quantity: 1
Bolts M5*8mm Bolts M8*25mm
Wrench
41 2 3
8mm 25mm
Quantity: 1
Cable
8mm
PACKAGE LIST

4
ASSEMBLY INSTRUCTIONS
STEP 2 : Turn the Star Base upright and insert the Lift into the center
hole of the Star Base, the Lift Cover should be placed over the Lift.
C
D
If possible, using drill bit with your electric drill to install our
chair will make assembly more convenient.

5
STEP 3 : Remove All M8x25mm Bolts from the seat and back.
STEP 4 : Attach the arms to the seat cushion with four M8X25mm
bolts, using the Wrench.
ASSEMBLY INSTRUCTIONS
KJ
H H
3
3
M8*25mm
J
front

STEP 5 : Align the seat plate to the bottom of the seat cushion, make
sure that the front of the seat plate is facing the front of the seat cushion.
Attach the seat plate to the seat cushion using four M8X25mm bolts,
tighten all the bolts with the wrench.
STEP 6 : Insert the footrest to the pre-drilled holes underneath the seat
cushion, then put the rubber rings at the end of pole.
6
ASSEMBLY INSTRUCTIONS
M
L
front
I
3
front

STEP 7: Turn the seat cushion upright and align the center hole of the
seat plate over the lift, then push the seat cushion down onto the lift
STEP 8: Using Adjusters to attach Seat Cushion and Back Cushion,
align the adjusters over the pre-drilled holes underneath the seat cushion
and back cushion with M8x25mm Bolts, tighten all the bolts with the
wrench.
Note: Do not tighten the bolts fully at this step.
7
C
ASSEMBLY INSTRUCTIONS
3
G
1

STEP 10: Adjust the balance, then fully tighten all the bolts on
each side of adjusters.
STEP 11: Attach the PlasticCover on rightand left side with four
M5X8mm bolts, using the wrench.
STEP 9: Attach Seat Cushion and Back Cushion, align the adjusters
over the pre-drilled holes underneath the back cushion with M8x25mm
Bolts, tighten all the bolts with the wrench.
Note: Do not tighten the bolts fully at this step.
8
1
2
F
E
2
3
ASSEMBLY INSTRUCTIONS

9
CAUTION! Do not pull
the cable during using.
4
ASSEMBLY INSTRUCTIONS
Congratulations!You’ve assembled your chair.

10
INSTRUCTIONS FOR USE
1Seat Height: Paddle-shaped lever on right side
To raise:
To lower:
While seated, lift lever up.
At the proper height, your feet should rest flat on the floor.
While taking your weight
off chair, lift lever up.
*
2Tilt Tension: Long stem under the seat cushion with knob
To increase tension:
To decrease tension:
While seated, turn knob
backward (toward - sign).
Set the tilt tension to control the resistance you feel when leaning back.
While seated, turn knob
forward (toward + sign).
*
+
_

11
INSTRUCTIONS FOR USE
4Backrest Recline
Pull the lever FULLY and lean
back slowly until desired angle
is achieved, then slowly return
the lever to its starting position,
Ensure the lever locks back in
place.
3Operating the tilt lockout
To let your chair tilt back, pull
the control handle out.
To stop your chair from tilting,
sit forward, then push the
control handle in.

12
5
6
2D-Function Armrest
Relax with footrest
Pull out the pole of the
footrest, and turn the
footrest to the front.
INSTRUCTIONS FOR USE
Up and Down
Left and Right
1
2

13
SAFETY AND MAINTENANCE
SAFETY INFORMATION
Sit in the center of the
chair,with your back to
the backrest
Do not push the chair
around when a person
is sitting in it
Do not sit at the front
edge of the chair
Do not push down on
the backrest when a
person is reclined
Do not stand on the
chair
Do not place all your
weight on the backrest
only
Do not use the chair
with more than one
person
Do not place all your
hand or ngers near
the recline mechanism
Do not stand on the chair, Do Not use the chair as stepladder.
Use this product for seating one person at a time.
Do not use the chair unless all bolts and screws are rmly secured.
Avoid contact with sharp objects to prevent puncturing the fabric.
Every 6 months, check all bolts and screws to ensure they are tight.
To clean, spot clean only using a damp towel and mild cleaner, first
test on a small,, obscure area of fabric.
Chair weight limit not to exceed 300 lbs.

14
MONTAGEANLEITUNG
Herzlichen Glückwunsch!Sie sind jetzt Inhaber eines
Markenstuhls !
Bevor Sie den Komfortstuhl genießen, müssen Sie ihn zusammenbauen.
Diese Montageanleitung führt Sie durch den grundlegenden
Montageprozess. Um sicherzustellen, dass Ihre Montage reibungslos
funktioniert, bitte folgen Sie die Montageanweisungen und insbesondere
die wichtigen Sicherheitsinformationen.
Für mehr detailliertere und visuellere Anweisungen haben wir ein
Montagevideo, das Ihnen hilft, den Montageprozess viel besser zu
verstehen.
Obwohl es möglich ist, den Stuhl selbst zusammenzubauen, macht es
mit Hilfe einer zweiten Person den Zusammenbau noch einfacher.
Bevor Sie beginnen, prüfen Sie bitte, ob Teile der Verpackung fehlen. Bei
Problemen zögern Sie bitte nicht, uns eine E-Mail zu schreiben, damit wir
Ihnen so schnell wie möglich unterstützen können.

15
A
JK
L M
HI
BCD
Rollen
Quantität: 5 Sternbasis
Quantität: 1 Gaslift
Quantität: 1 Abdeckung anheben
Quantität: 1
Quantität: 1 Quantität: 1
Linke Kunststoffabdeckung
Rechte Plastikabdeckung
eingestellt
Quantität: 2
Winkelversteller
Quantität: 2
Armlehnen Sitzplatte
Quantität: 1 Quantität: 1 Quantität: 1
Rückenkissen Sitzkissen
Quantität: 1 Quantität: 2
Fußstütze Gummiringe
E F
41 2 3
8mm 25mm
quantität: 6 quantität: 16
quantität: 1 quantität: 1
Bolzen M5*8mm
Bolzen M8*25mm
Schlüssel
Kabel
VERPACKUNGSLISTE
Left
Right
G

16
MONTAGEANLEITUNGEN
Schritt 1 : Drehen Sie die Star Base um und drücken Sie die Rollen in
die Löcher am Ende jedes Basisbeines.
Schritt 2 : Drehen Sie die Star Base aufrecht und setzen Sie den Lift in
das mittlere Loch der Star Base ein.
C
D
Wenn möglich, erleichtert die Verwendung eines Bohrers mit
Ihrer elektrischen Bohrmaschine die Montage.

17
Schritt3 : Entfernen Sie alle M8x25mm Bolzen vom Sitz und von der
Rückseite.
Schritt 4 :
Befestigen Sie die Arme mit vier M8X25mm mit
dem Schraubenschlüssel am Sitzkissen.
MONTAGEANLEITUNGEN
KJ
3
M8*25mm
J
H H
3
front

Richten Sie die Sitzplatte an der Unterseite des Sitzkissens aus
und stellen Sie sicher, dass die Vorderseite der Sitzplatte zur Vorderseite
des Sitzkissens zeigt.
Befestigen Sie die Sitzplatte mit vier M8X25mm Schrauben am Sitzkissen
und ziehen Sie alle Schrauben mit dem Schlüssel fest.
Schritt 6 :
Setzen Sie die Fußstütze in die vorgebohrten Löcher unter dem
Sitzkissen ein, und setzen Sie die Gummiringe am Ende der Stange ein.
18
I
3
M
L
front
front
MONTAGEANLEITUNGEN
Schritt 5 :

Drehen Sie das Sitzkissen aufrecht und richten Sie das
Mittelloch der Sitzplatte über dem Lifter aus. Drücken Sie dann das
Sitzkissen fest auf den Lifter bis die Verbindung sicher ist
Befestigen Sie das Sitzkissen und das Rückenkissen mit den
Justierelementen, richten Sie die Justierelemente mit den M8x25mm-
Schrauben über den vorgebohrten Löchern unter dem Sitz- und Rückenkissen
aus und ziehen Sie alle Schrauben mit dem Schraubenschlüssel fest.
Hinweis: Ziehen Sie die Schrauben in diesem Schritt nicht fest an.
19
C
3
G
1
MONTAGEANLEITUNGEN
Schritt 7 :
Schritt 8 :

Schritt 10: Stellen Sie die Waage ein und ziehen Sie alle Schrauben
auf jeder Seite der Einstellschrauben fest an.
Schritt 11:
Sechs Schrauben M5X8mm mit dem Schraubenschlüssel.
Schritt 9 :
Befestigen Sie das Sitzkissen und das Rückenkissen, richten
Sie die Versteller mit den M8x25mm Schrauben über den vorgebohrten
Löchern unter dem Rückenkissen aus und ziehen Sie alle Schrauben
mit dem Schraubenschlüssel fest.
Hinweis: Ziehen Sie die Schrauben
in diesem Schritt nicht fest an.
20
1
2
F
E
3
MONTAGEANLEITUNGEN
Table of contents
Languages:
Other KCream Indoor Furnishing manuals
Popular Indoor Furnishing manuals by other brands

PB TEEN
PB TEEN CLEARLY CAPTAIN Assembly instructions

home star
home star Mainstays 109079 Assembly instructions

Light Headed
Light Headed 20249 Assembly instructions

Polywood
Polywood Braxton TGD182 Assembly instructions

Jason.L
Jason.L Litewall Evolve Assembly instructions

Home Styles
Home Styles 20 05506 0031 Assembly instructions

J D Williams
J D Williams Evesham Nest of Tables 052 7170 Series Assembly instructions

HOMEDEPOT
HOMEDEPOT THD-ADSTBF-T-CK Use and care guide

SouthShore
SouthShore 027 Assembly instructions

PIETBOON
PIETBOON ANNE instructions

Happy Beds
Happy Beds Flintstone manual

King Slide
King Slide SIMLEAD 1F85 installation instructions