KCSOFT Liang Fang Shen Qi KC-70B User manual

Laser Distance Measure
Manual
www.kcsoft.com.cn
www.kcsmas.com
Room 207,Block 3,Yimin Technology
Park,NO.232 Kezhu Road,Guangzhou,China
Guangzhou Kechuang Computer Technology
Development Co., Ltd
www.facebook.com/LiangFangShenQi

01
Table of Content
Safety Notes -----------------------------------------------------------------------
Display & Keyboard --------------------------------------------------------------
Insert/Replace Batteries ---------------------------------------------------------
Initial Operation ------------------------------------------------------------------
Self-calibration -------------------------------------------------------------------
Measuring Functions -------------------------------------------------------------
Memory Function -----------------------------------------------------------------
Bluetooth --------------------------------------------------------------------------
Professional CAD Drawing APP --------------------------------------------------
Tips ---------------------------------------------------------------------------------
Technical Data --------------------------------------------------------------------
Instruction Maintenance ---------------------------------------------------------
Packing List -----------------------------------------------------------------------
P02
P03
P04
P04
P06
P11
P12
P12
P13
P15
P06
P14
P15

02 03
Please carefully read through all the guidance and safety
notes in this manual before operation. If the laser distance
measure is not used in accordance with the manual provided,
it may cause damage to the device, affect the measurement
precision, or even result in serious problems.
Safety Notes
The manual should be read carefully in order to work safely
with the laser distance measure.
Never disassemble or repair the device yourself. In case of
damage, contact a local dealer or manufacturer. Do not make
any change or modification on the device. Always keep it
away from children and prevent access to the device from
unauthorised personel.
Do not focus the laser beam on persons, animals or reflective
objects. Do not stare into the direct or reflected laser beam
yourself, even not from a distance. You could blind somebody,
cause accidents, or damage your eyes.
As the electromagnetic radiation of this device may interfere
with other equipment and devices, do not use it on the plane
or near the medical equipment. Also, do not use it in
explosive or inflammable environments.
Do not discard the scrap batteries or laser distance measures
just as household garbage, please deal with them according to
the local law and regulations.
Any quality issues or questions about the device, please contact
the local dealers or manufacturer.
>1/4 S
DISPLAY & KEYBOARD
Display
Keyboard
Power
Bluetooth
Record
Length, area,
volume &
pythagorean
Laser on
Angle
MAX value
Auxiliary line
MIN value
Main Line
On/Measuring
Area/Volume/
Pythagorean
Unit/Sound
Add/Subtract
Reference point/
Timer
Save
Off/Clear

04 05
In the length measurement mode, press button long
to adjust the unit. The default unit mode is 0.000m.
There are 6 unit modes for your option.
Press button long for 3 seconds to switch off the
measuring device. If there’s no operation on device for 150
seconds, the device switches off automatically.
INSERT/REPLACE BATTERIES
INITIAL OPERATION
Switching On/Off
Unit setting
Press button to turn on the measuring device. It’s in the
length measurement mode with laser off. Press again to
activate laser and start to measure.
Remove the lid on the back of device, pay attention to
the correct polarity,and insert batteries according to the
representation on the inside of battery compartment.
Supports only 3.7 V 850mAh li-ion battery and 1.5 V
AAA alkaline battery.
Take out the batteries from device to prevent battery
corrosion when not using it for longer period.
Unit Modes:
Length Area Volume
0.000m
0.00m
0.0in
0.00ft
0 1/16in
0’00’1/16’
0.00ft
2
0.00ft
2
0.00ft
2
0.00ft
2
0.000m
0.00m
0.00ft
3
3
3
0.00ft
3
0.00ft
3
0.00ft
3
Changing the Reference Point
Press button to change the reference point, including 3 types:
the front, middle and rear end of the device.
The system default reference point is at the rear end of the device.
Timer
Press button long to activate the Timer mode.
The default releasing time is 5 secs. You could adjust the releasing
time by pressing or .
Press button to start the counting down. When the time turns
into 0, the measurement device starts to measure.
Back Light On/Off
The back light is set to be on/off automatically. Once operating,
it will last 15 secs. Also it will automatically switch off within
15 secs if there’s no operation on the device.
Sound On/Off
Press button briefly to turn on or off the buzzer.
0.00m
2
0.000m
2

06 07
Press button briefly to switch the laser on, and press
again for single distance measurement.
The measured value is displayed on the main line.
MEASURING FUNCTIONS
SELF-CALIBRATION
Press button once for the length measurement;
Press button again for the width measurement.
Press button once, aprears with one of the rectangle
sides flashing on the screen.
For area measurement, please follow the instructions as
below:
Single Distance Measurement
Continuous Measurement
To ensure the measurement accuracy, please do self-calibration
regularly.
Operations: when power is off, press and simultaneously
till “CAL” appears with one number flashing under it, enter into
the self-calibration mode. Users can adjust the number with
and according to the tolerance. Adjusting range: -9~9mm.
Press button to save the result.
Area Measurement
Press button long to enter into the continuous
measurement mode. The MAX & MIN measuring values
are displayed on the auxiliary line, and the current value
is displayed on the major line.
Press button or briefly to exit the continuous
measuring mode.
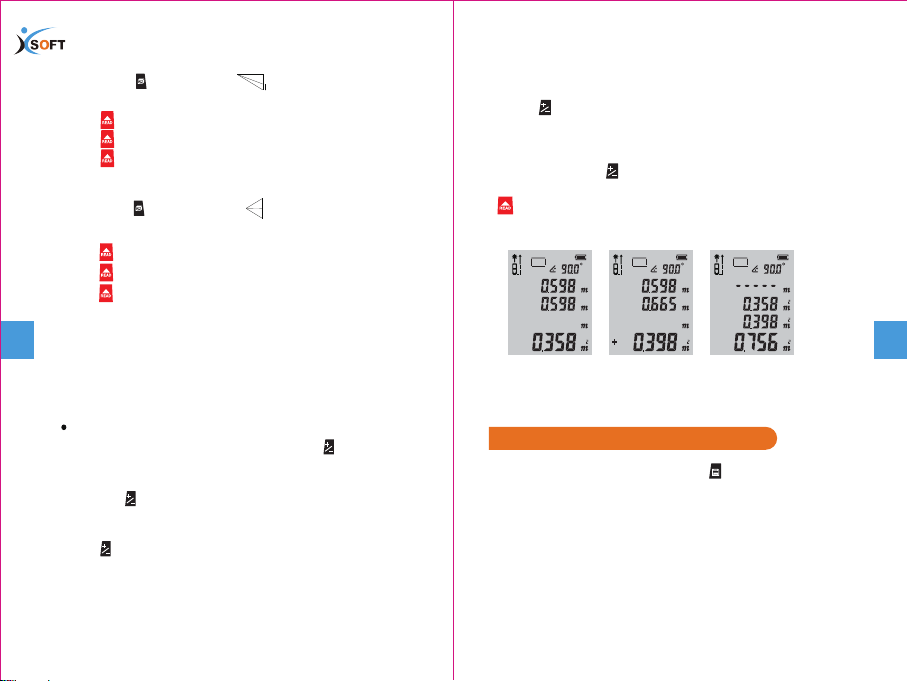
The measured values of length & width are showed on the
auxiliary line.
Press button , clear off the results and remeasure if
necessary.
Press again to exit the area measurement mode.
The device can automatically process the area calculations
and show the result on the main line.
Volume Measurement
Press button twice to enter the volume measurement mode.
A flashing appears on the top of screen. For volume
measurement, please follow the below instructions:
Press once for the length measurement;
Press again for the width measurement;
Press again for the height measurement.
The device can automatically calculate the volume, and the
result is shown on the major line.
The measured values of length,width & height are shown
on the auxiliary line.
Press , clear off the results, and remeasure if necessary.
Press again to exit the volume measurement mode.
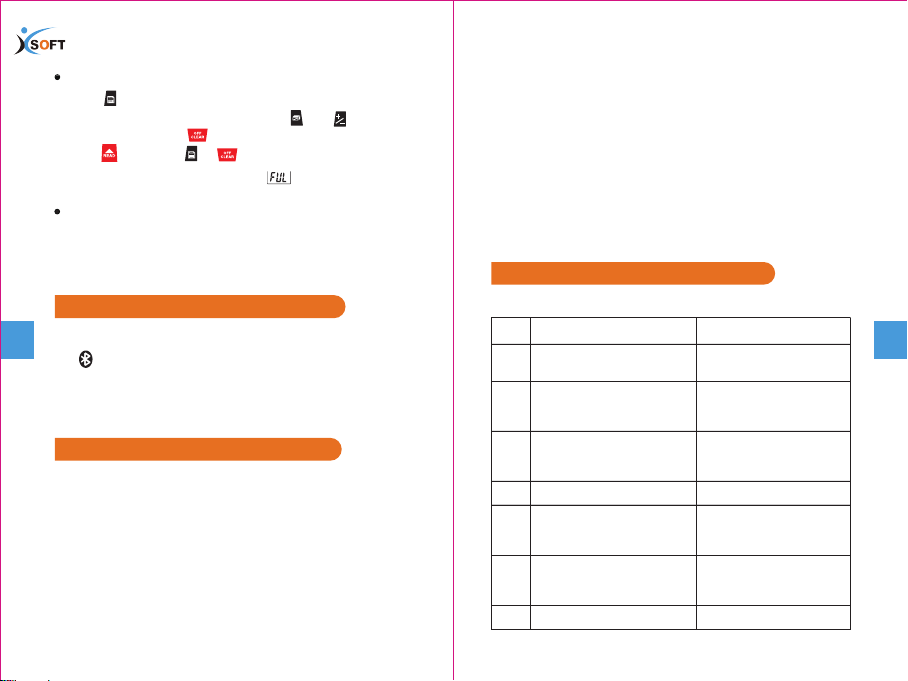
Wall Surface Measurement
In the area measurement mode, you can total up several
individual surfaces by pressing the button “add/subtract” .
If not, press button three times till aprears on the
screen.
(E.g. several walls with the same room height but different
lengths.)

08 09
When no data is shown on the Auxiliary line, you can press
to exit the wall surface measurement mode.
For more surface measurements, repeat the above operations.
Press , you can clear the previous measured results and
start the new measurement.
h
Press once to measure height A of the 1st wall;
Press again to measure length B1 of the 1st wall, and the 1st
wall surface value is shown on main line;
Press again to measure length B2 of the 2nd wall, and the
total surface value is displayed on the main line .
Pythagorean/Indirect Distance Measurement
a
b
h
a
b
h
There’re 4 pythagorean methods in case that users cannot directly
measure the distance as one obstacle would obstruct laser beam or
no target surface is available.
1. Indirect height measurement
Press button briefly four times, the indication appears
on the screen with the hypotenuse flashing.
Press , measure the length of hypotenuse (a) and angle (α).
Upon the completion of the measurement, the results of two
legs (b) and (h) are displayed on the screen.
2. Indirect hypotenuse measurement
Press button briefly five times, the indication appears
on the screen with one of the legs flashing.
Press once, measure the length of leg (a);
Press again, measure the length of leg (b);
Then the length of hypotenuse (x) is automatically shown on
the main line.

10 11
Press once, measure the length of side (a);
Press agian, measure the length of median line (b);
Press again, measure the length of side (c);
Then the length of leg(x) is showed on the main line.
Press once, measure the length of hypotenuse (a);
Press again, measure the height of side (b);
Press again, measure the length of another hypotenous (c);
Then the length of leg(X) is displayed on the main line.
4. Press button briefly seven times, appears on the screen with
one hypotenuse flashing.
NOTE:
Legs must be shorter than the hypotenuse, otherwise "err" will be
showed on the screen. To ensure the measurement accuracy, please
make sure all measurements start from the same point.
First press , "+" appears on the main line, enter into the cumulation
mode. The next measurement is added to the previous one. The last
measured value and the sum are showed on the screen.
To add/subtract the measured values, press button to select the
plus or minus function and process as your need after you get the
1st measured value.
Add/Subtract
3. Press button briefly six times, appears on the screen
with one hypotenuse flashing.
Press again , "-" appears on the major line, enter into the regressive
mode. The next measurement is subtracted from the previous one.
The last measured value and the result of final subtraction measurement
are displayed on the screen.
Pic 1 Pic 2 Pic 3
In the measuring mode, press button long for 3 secs to save
your measured results.
Memory Function
In the area, volume or pythagorean mode, you also could save
the results.
The above processes can be repeated as required. You can
switch the addition or subtraction mode by pressing the
button .
The same process can be used for adding or subtracting areas
or volumes. For example:
Adding Area Values: measure the first area as shown in Pic 1.
Then press button , and measure the second area as shown
in Pic 2, "+" appears on the left bottom. Finally, press button
to get the sum of both area values as shown on Pic 3.

12 13
Download methods:
1> Android Platform:【Google Play Store】search
【 LiangFangShenQi 】
2> ISO Platform:【APP STORE】search
【LiangFangShenQi】
Press briefly to recall the stored measurements.Then read
them forward or backward by pressing and . To delete
the last record, press briefly ; to clear up all the records,
press long. Press or to exit the record mode.
When the storage is full, the icon of will aprear on the screen.
Angle Measurement
The angle icon is always displayed on the top of the screen.
Angle measurement range is -90°~ 90°.
Bluetooth is always on, without switching off.
" " shown on the screen is the icon of Bluetooth. We provide
a professional APP (LiangFangShenQi) to help you transfer
data between your smart mobile/terminals and this laser.
Bluetooth
Professional CAD Drawing APP
Recall/Delete the Measured Values
With APP:
1) The measuring device can connect the intelligent
terminals easily, and realize real-time measurement and
data sharing.
2) Export data in various formats, easily share them with others.
3) Powerful functions of CAD drawing satisfies kinds of drawing
requirements in the fields of architecture, machinery,
construction, electric power, hvac, and interior design, etc.
The output of drawings is in DWG format, which also can be
shared via emails, social media, etc.
Tips
Please check warning information as below:
INFO
Err
CAUSE
Out of distance measuring
range
SOLUTION
Use the device within the
measuring range
Err1 Target surface reflects too
intensely (e.g. a mirrior)
Chose the surface with
appropriate reflectance
or use a laser target plate
Err2 Target surface reflects
insufficiently (e.g. a black
fabric)
Chose the surface with
appropriate reflectance
or use a laser target plate
Err3 Low battery voltage Charge/change batteries
Err4 Out of the working
temperature range
Use the device within the
working temperature
range
Err5 Pythagorean measuring
error
Remeasure, ensure that
the hypotenuse is longer
than both legs
Err6 Angle sensor error Depot repair

14 15
Note: it’s recommended to use a laser target plate to increase the
measurement range in the daylight or when the target has very
poor reflection properties.
ITEM KC-70B
Working range 0.05~70m
Distance measuring precision ±2mm *
Bluetooth √
Continuous measurement √
Area measurement √
Volume measurement √
Pythagorean measurement Full mode
Wall surface measurement √
Angle measurement √
Angle measuring range ±90˚
Add/Subtract √
MIN/MAX value √
Self-calibration √
Laser level Ⅱ
Laser type 635nm,﹤1mW
MAX storage 30 units
Automatically laser off 20s
Automatically switch off 150s
Battery 3*1.5V AAA or 3.7V 850mAh Li-ion
Battery life 8000 times for single measurement
Button sound √
Storage temperature –20℃~60℃
Working temperature 0℃~40℃
Storage humidity 20%~80% RH
Dimension 118*52*27mm
Technical Data
Keep the device clean all the time. Wipe off debris using a moist
and soft cloth. Do not use any cleaning lotion.
Please clean the laser window and focusing lens according to
the ways of maintaining optical devices.
NO. ITEM UNIT QTY
1 Laser distance measure Set 1
2 Portable bag PC 1
3 Hand strap PC 1
4 1.5V AAA battery PC 3
5 3.7V 850mAh Li-ion battery PC 1
6 Manual*1 + Warranty card*1 Book 2
7 Laser target plate PC 1
8 USB cable PC 1
9 Package box PC 1
Tolerance: ±2mm, when applying for 100% target reflectivity
(white painted surface), environment light <2000 LUX. 25°C.
Tolerance is affected by distance,reflectivity,and environment
light, etc. Usually, tolerance is around ± (2mm+0.2mm/m) .
*
Instrument Maintenance:
This device cannot be stored in the high temperature nor in
strong humidity environment for a long time;if it’s not used very
often,please take out the battery from the device and place it in
the supplied protective bag and store it in the cool and dry place.
Packing List

Table of contents
Popular Measuring Instrument manuals by other brands

Nordson
Nordson Seal Sentry 10 Series Customer product manual

PRECISION DIGITAL
PRECISION DIGITAL Loop Leader Series instruction manual

Brooks Instrument
Brooks Instrument VersaTorr BVT125 Installation & operation manual

Siemens
Siemens FDUL221 operating instructions

Sony
Sony WatchCorder EVT-820 operating instructions

Myron L
Myron L ULTRAPEN PT5 quick start guide