KEF XQ60b User manual

Part No. K230237ML
Issue 1: December 2008
Model XQ60b Subwoofer
Installation Manual
Manuel d’installation
Installationshandbuch
Manuale d’installazione
Manual de instalación
Manual de instalação
Installatiehandleiding
GB
I
ES
DK
F
P
D
NL
DK
P
NL
Installationsanvisning
Podręcznik instalacji
RU
CN
TC
PL
P
NL
JP
K
K7276 XQ60b Manual 23/12/08 15:23 Page 1
安装手册
安裝手冊
取り扱い説明書
설치방법
XQ60b manual-ex_noGK.indd 1 2009-1-6 14:40:45

INTRODUCTION
(F) Utilisation du manuel (D) Verwendung der Anleitung (I) Uso del manuale (ES) Uso del manual (P) Utilização do manual (NL) Gebruik van de handleiding
(DK) Brug af manualen(RU) (PL) Zastosowanie instrukcji
USING THE MANUAL
The following icons are used throughout this manual to help you safely install your new speakers. Please follow them carefully.
GB
F
D
I
ES
P
NL
DK
Les icônes reprises ci-après sont utilisées dans tout le manuel de manière à vous aider à installer vos nouveaux haut-parleurs en toute sécurité.
Veuillez suivre scrupuleusement leur signification.
Die folgenden Symbole finden Sie in der gesamten Anleitung. Sie erleichtern eine sichere Installation Ihrer neuen Lautsprecher. Bitte achten Sie sorgfältig
auf die Symbole.
Le seguenti icone usate nel manuale aiutano ad installare correttamente i diffusori. Si raccomanda di seguirle con attenzione.
Se utilizan los iconos siguientes en este manual para ayudarle a instalar con seguridad sus nuevos altavoces. Sígalas cuidadosamente.
Os seguintes ícones são utilizados no manual afim de o ajudarem a instalar com segurança as suas novas colunas. Siga-os cuidadosamente.
De hierna volgende pictogrammen worden in de hele handleiding gebruikt om u te helpen bij het veilig aansluiten en gebruiken van uw nieuwe luidsprekers.
Volg de instructies steeds nauwgezet op.
Følgende symboler benyttes i denne manual, for at hjælpe dig med sikker installation af dine højttalere. Følg dem nøje.
Thank you for purchasing KEF powered subwoofer XQ60b. We are confident that your XQ60b will provide reliable, high performance sound for many years to come.
Please read this manual fully before you attempt any connections to the XQ60b.
GB
RU
RU
F
D
I
ES
P
NL
DK
KEF vous remercie de votre achat d’un subwoofer modèle XQ60b. Nous sommes convaincus que votre haut-parleur XQ60b vous procurera un son fiable et de
hautes performances pendant de longues années. Veuillez lire intégralement le présent manuel avant de procéder à des connexions quelconques.
Vielen Dank fur den Kauf des aktiven Subwoofers KEF XQ60b. Wir sind davon überzeugt, daß Ihr XQ60b lange Zeit zuverlässig funktionieren und eine hohe
Klangqualität gewährleisten wird. Lesen Sie bitte diese Anleitung sorgfältig durch, bevor Sie Ihr Gerät anschließen.
Vi ringraziamo per aver dato la Vs preferenza al subwoofer attivo KEF, apparecchio affidabile e dalle elevate prestazioni. Prima di effettuare i collegamenti si
consiglia di leggere per intero il presente manuale.
Le damos las gracias por haber adquirido el altavoz para graves KEF Modelo XQ60b. Estamos seguros de que el XQ60b le proporcionará un sonido de calidad y
de altas prestaciones durante muchos años. Por favor, lea este manual antes de intentar conectar y poner en funcionamiento el altavoz.
Obrigado por ter escolhido o modelo KEF XQ60b: um subwoofer com amplificador. Acreditamos que o seu XQ60b lhe oferecerá durante muitos anos, um som
de alta fidelidade. Leia, por favor, este manual integralmente antes de tentar quaisquer conexões com o XQ60b.
Wij danken u van harte voor uw aankoop van de actieve subwoofer KEF Model XQ60b. Wij zijn ervan overtuigd dat uw subwoofer u jarenlang hoogwaardig
luisterplezier zal geven. Lees eerst deze handleiding aandachtig door alvorens u de subwoofer XQ60b aansluit.
Tillykke med erhvervelsen af din KEF model XQ60b subwoofer med forstærker. Vi er overbevist om, at din XQ60b vil give dig en stabil high performance sound i
mange år fremover. Gennemlæs venligst denne manual inden du foretager nogen tilslutning til din model XQ60b.
(F) Introduction(D) Einleitung (I) Introduzione (ES) Introducción(P) Introdução(NL) Inleiding(DK) Introduktion (RU)
(PL) Wstęp
PL
PL
Bardzo dziękujemy za zakupienie aktywnego subwoofera KEF XQ60b. Jesteśmy przekonani, że Państwa XQ60b będzie działał niezawodnie przez długi czas i zapewni wysoką
jakość brzmienia. Przed podłączeniem urządzenia prosimy starannie przeczytać niniejszą instrukcję.
W niniejszej instrukcji znajdą Państwo następujące symbole. Ułatwią one bezpieczną instalację nowych głośników. Prosimy zwrócić szczególną uwagę na symbole.
K7276 XQ60b Manual 23/12/08 14:31 Page 2
SAFETY INFORMATION
WARNING:
Due to the mains switch being located on the rear panel, the appliance must be located in an open area without anything obstructing access to the mains switch.
WARNING
TO REDUCE THE RISK OF FIRE OR ELECTRICAL SHOCK, DO NOT EXPOSE THIS APPLIANCE TO RAIN OR MOISTURE
CAUTION:TO REDUCE THE RISK
OF ELECTRIC SHOCK, DO NOT
REMOVE COVER (OR BACK).
NO USER-SERVICEABLE PARTS
INSIDE. REFER SERVICING TO
QUALIFIED SERVICE PERSONNEL.
Explanation of Graphical Symbols
The lightning flash with arrowhead symbol, within an equilateral triangle, is intended to alert the user to the
presence of uninsulated “dangerous voltage” within the products enclosure that may be of a sufficient
magnitude to constitute a risk of electrical shock to persons.
The exclamation mark within an equilateral triangle is intended to alert the user to the presence of important
operating and maintenance (servicing) instructions in the literature accompanying the appliance.
Correct Disposal of this product. This marking indicates that this product should not be disposed with other
household wastes throughout the EU. To prevent possible harm to the environment or human health from
uncontrolled waste disposal, recycle it responsibly to promote the sustainable reuse of material resources.
To return your used device, please use the return and collection systems or contact the retailer where the product
was purchased. They can take this product for environmentally safe recycling.
•A combined mains power input lead and country specific mains plug is provided.
•Check before connecting to your local mains supply that the local supply voltage
is the same as that marked on the rear panel. If it is not, check with your supplier
before proceeding.
RISK OF
ELECTRIC SHOCK
DO NOT OPEN
CAUTION
(GB) Read
(F) ‘A lire’
(D) Lesen
(I) Leggere
(ES) Lea
(P) Leia
(NL) Lees
(DK) Gennemlæs
(RU)
(PL) Przeczytaj
(GB) Correct
(F) Correct
(D) Richtig
(I) Corretto
(ES) Correcto
(P) Correcto
(NL) Juist
(DK) Korrekt
(RU)
(PL) Dobrze
(GB) Wrong
(F) Incorrect
(D) Falsch
(I) Errato
(ES) Incorrecto
(P) Errado
(NL) Fout
(DK) Forkert
(RU)
(PL) Źle
(GB) Option
(F) Option
(D) Option
(I) Opzione
(ES) Opción
(P) Opcional
(NL) Optie
(DK) Tilbehør
(RU)
(PL) Opcja
(GB) Caution/Warning
(F) Attention/Avertissement
(D) Achtung / Warnung
(I) Attenzione/Avvertenza
(ES) Precaución/Atención
(P) Atenção/ Aviso
(NL) Opgelet/Waarschuwing
(DK) Forsigtigt / Advarsel
(RU)
(PL) Uwaga
(GB) Electrical Warning
(F) Danger électrique
(D) Warnung: Gefährliche
Spannungen
(I) Rischi elettrici
(ES) Advertencia eléctrica
(P) Aviso sobre a parte eléctrica
(NL) Opgelet! Elektriciteit!
(DK) Elektrisk advarsel
(RU)
(PL) Niebezpieczne napięcie
(GB) Positive/RED
(F) Positif / ROUGE
(D) Positiv / ROT
(I) Positivo / ROSSO
(ES) Positivo / ROJO
(P) Positivo/Vermelho
(NL) Positief / ROOD
(DK) Positiv / RØD
(RU)
(PL) Dodatni/CZERWONY
(GB) Negative/BLACK
(F) Négatif / NOIR
(D) Negativ / SCHWARZ
(I) Negativo / NERO
(ES) Negativo / NEGRO
(P) Negativo/ Preto
(NL) Negatief / ZWART
(DK) Negativ / SORT
(RU)
(PL) Ujemny/CZARNY
(GB) Switch off appliance
(F) Couper l’appareil
(D) Gerät abschalten
(I) Disattivazione dell’ap parecchio
(ES) Interruptor del aparato
(P) Interruptor para desligar
(NL) Het toestel uitschakelen
(DK) Afbryd apparatet
(RU)
(PL) Wyłącz urządzenie
K7276 XQ60b Manual 23/12/08 14:31 Page 3
2
3
(CN) 简介 (TC) 簡介 (JP) はじめに (K) 제품 소개
感谢您购买 XQ60b!我们相信,XQ60b 将在未来数年里带给您可靠的高性能音质。安装 XQ60b 之前,请仔细阅读本手册。
感謝您購買 XQ60b!我們相信,XQ60b 將在未來數年里帶給您可靠的高性能音質。安裝 XQ60b 之前,請仔細閱讀本手冊。
XQ60b をお買い上げ有難うございます。ご使用前に必ず本取説をお読みください。
KEF 파워 서브우퍼 XQ60b를 구입해 주셔서 감사합니다. XQ60b는 앞으로도 오랫동안 안정적이고 성능이 뛰어난 사운드를 유지할 것입니다. XQ60b를 연결하기 전에 본
설명서를 자세히 읽어주십시오.
(CN) 使用须知 (TC) 使用須知 (JP) マニュアルの使用にあたって (K) 설명서 기호
本手册中使用了下列图标,旨在帮助用户安全地安装新的扬声器。请仔细遵照手册操作。
本手冊中使用了下列圖標,旨在幫助用戶安全地安裝新的揚聲器。請仔細遵照手冊操作。
下記の記号は本取説でひんぱんに使用されているものです。本機を安全に正しくご使用いただくため記号の指示に従ってください。
본 설명서에서 사용되는 다음 기호들은 안전한 스피커 설치를 돕기 위한 것입니다. 신중하게 지시에 따르십시오.
2
3
XQ60b manual-ex_noGK.indd 2 2009-1-6 14:40:46

INTRODUCTION
(F) Utilisation du manuel (D) Verwendung der Anleitung (I) Uso del manuale (ES) Uso del manual (P) Utilização do manual (NL) Gebruik van de handleiding
(DK) Brug af manualen(RU) (PL) Zastosowanie instrukcji
USING THE MANUAL
The following icons are used throughout this manual to help you safely install your new speakers. Please follow them carefully.
GB
F
D
I
ES
P
NL
DK
Les icônes reprises ci-après sont utilisées dans tout le manuel de manière à vous aider à installer vos nouveaux haut-parleurs en toute sécurité.
Veuillez suivre scrupuleusement leur signification.
Die folgenden Symbole finden Sie in der gesamten Anleitung. Sie erleichtern eine sichere Installation Ihrer neuen Lautsprecher. Bitte achten Sie sorgfältig
auf die Symbole.
Le seguenti icone usate nel manuale aiutano ad installare correttamente i diffusori. Si raccomanda di seguirle con attenzione.
Se utilizan los iconos siguientes en este manual para ayudarle a instalar con seguridad sus nuevos altavoces. Sígalas cuidadosamente.
Os seguintes ícones são utilizados no manual afim de o ajudarem a instalar com segurança as suas novas colunas. Siga-os cuidadosamente.
De hierna volgende pictogrammen worden in de hele handleiding gebruikt om u te helpen bij het veilig aansluiten en gebruiken van uw nieuwe luidsprekers.
Volg de instructies steeds nauwgezet op.
Følgende symboler benyttes i denne manual, for at hjælpe dig med sikker installation af dine højttalere. Følg dem nøje.
Thank you for purchasing KEF powered subwoofer XQ60b. We are confident that your XQ60b will provide reliable, high performance sound for many years to come.
Please read this manual fully before you attempt any connections to the XQ60b.
GB
RU
RU
F
D
I
ES
P
NL
DK
KEF vous remercie de votre achat d’un subwoofer modèle XQ60b. Nous sommes convaincus que votre haut-parleur XQ60b vous procurera un son fiable et de
hautes performances pendant de longues années. Veuillez lire intégralement le présent manuel avant de procéder à des connexions quelconques.
Vielen Dank fur den Kauf des aktiven Subwoofers KEF XQ60b. Wir sind davon überzeugt, daß Ihr XQ60b lange Zeit zuverlässig funktionieren und eine hohe
Klangqualität gewährleisten wird. Lesen Sie bitte diese Anleitung sorgfältig durch, bevor Sie Ihr Gerät anschließen.
Vi ringraziamo per aver dato la Vs preferenza al subwoofer attivo KEF, apparecchio affidabile e dalle elevate prestazioni. Prima di effettuare i collegamenti si
consiglia di leggere per intero il presente manuale.
Le damos las gracias por haber adquirido el altavoz para graves KEF Modelo XQ60b. Estamos seguros de que el XQ60b le proporcionará un sonido de calidad y
de altas prestaciones durante muchos años. Por favor, lea este manual antes de intentar conectar y poner en funcionamiento el altavoz.
Obrigado por ter escolhido o modelo KEF XQ60b: um subwoofer com amplificador. Acreditamos que o seu XQ60b lhe oferecerá durante muitos anos, um som
de alta fidelidade. Leia, por favor, este manual integralmente antes de tentar quaisquer conexões com o XQ60b.
Wij danken u van harte voor uw aankoop van de actieve subwoofer KEF Model XQ60b. Wij zijn ervan overtuigd dat uw subwoofer u jarenlang hoogwaardig
luisterplezier zal geven. Lees eerst deze handleiding aandachtig door alvorens u de subwoofer XQ60b aansluit.
Tillykke med erhvervelsen af din KEF model XQ60b subwoofer med forstærker. Vi er overbevist om, at din XQ60b vil give dig en stabil high performance sound i
mange år fremover. Gennemlæs venligst denne manual inden du foretager nogen tilslutning til din model XQ60b.
(F) Introduction(D) Einleitung (I) Introduzione (ES) Introducción(P) Introdução(NL) Inleiding(DK) Introduktion (RU)
(PL) Wstęp
PL
PL
Bardzo dziękujemy za zakupienie aktywnego subwoofera KEF XQ60b. Jesteśmy przekonani, że Państwa XQ60b będzie działał niezawodnie przez długi czas i zapewni wysoką
jakość brzmienia. Przed podłączeniem urządzenia prosimy starannie przeczytać niniejszą instrukcję.
W niniejszej instrukcji znajdą Państwo następujące symbole. Ułatwią one bezpieczną instalację nowych głośników. Prosimy zwrócić szczególną uwagę na symbole.
K7276 XQ60b Manual 23/12/08 14:31 Page 2
SAFETY INFORMATION
WARNING:
Due to the mains switch being located on the rear panel, the appliance must be located in an open area without anything obstructing access to the mains switch.
WARNING
TO REDUCE THE RISK OF FIRE OR ELECTRICAL SHOCK, DO NOT EXPOSE THIS APPLIANCE TO RAIN OR MOISTURE
CAUTION:TO REDUCE THE RISK
OF ELECTRIC SHOCK, DO NOT
REMOVE COVER (OR BACK).
NO USER-SERVICEABLE PARTS
INSIDE. REFER SERVICING TO
QUALIFIED SERVICE PERSONNEL.
Explanation of Graphical Symbols
The lightning flash with arrowhead symbol, within an equilateral triangle, is intended to alert the user to the
presence of uninsulated “dangerous voltage” within the products enclosure that may be of a sufficient
magnitude to constitute a risk of electrical shock to persons.
The exclamation mark within an equilateral triangle is intended to alert the user to the presence of important
operating and maintenance (servicing) instructions in the literature accompanying the appliance.
Correct Disposal of this product. This marking indicates that this product should not be disposed with other
household wastes throughout the EU. To prevent possible harm to the environment or human health from
uncontrolled waste disposal, recycle it responsibly to promote the sustainable reuse of material resources.
To return your used device, please use the return and collection systems or contact the retailer where the product
was purchased. They can take this product for environmentally safe recycling.
•A combined mains power input lead and country specific mains plug is provided.
•Check before connecting to your local mains supply that the local supply voltage
is the same as that marked on the rear panel. If it is not, check with your supplier
before proceeding.
RISK OF
ELECTRIC SHOCK
DO NOT OPEN
CAUTION
(GB) Read
(F) ‘A lire’
(D) Lesen
(I) Leggere
(ES) Lea
(P) Leia
(NL) Lees
(DK) Gennemlæs
(RU)
(PL) Przeczytaj
(GB) Correct
(F) Correct
(D) Richtig
(I) Corretto
(ES) Correcto
(P) Correcto
(NL) Juist
(DK) Korrekt
(RU)
(PL) Dobrze
(GB) Wrong
(F) Incorrect
(D) Falsch
(I) Errato
(ES) Incorrecto
(P) Errado
(NL) Fout
(DK) Forkert
(RU)
(PL) Źle
(GB) Option
(F) Option
(D) Option
(I) Opzione
(ES) Opción
(P) Opcional
(NL) Optie
(DK) Tilbehør
(RU)
(PL) Opcja
(GB) Caution/Warning
(F) Attention/Avertissement
(D) Achtung / Warnung
(I) Attenzione/Avvertenza
(ES) Precaución/Atención
(P) Atenção/ Aviso
(NL) Opgelet/Waarschuwing
(DK) Forsigtigt / Advarsel
(RU)
(PL) Uwaga
(GB) Electrical Warning
(F) Danger électrique
(D) Warnung: Gefährliche
Spannungen
(I) Rischi elettrici
(ES) Advertencia eléctrica
(P) Aviso sobre a parte eléctrica
(NL) Opgelet! Elektriciteit!
(DK) Elektrisk advarsel
(RU)
(PL) Niebezpieczne napięcie
(GB) Positive/RED
(F) Positif / ROUGE
(D) Positiv / ROT
(I) Positivo / ROSSO
(ES) Positivo / ROJO
(P) Positivo/Vermelho
(NL) Positief / ROOD
(DK) Positiv / RØD
(RU)
(PL) Dodatni/CZERWONY
(GB) Negative/BLACK
(F) Négatif / NOIR
(D) Negativ / SCHWARZ
(I) Negativo / NERO
(ES) Negativo / NEGRO
(P) Negativo/ Preto
(NL) Negatief / ZWART
(DK) Negativ / SORT
(RU)
(PL) Ujemny/CZARNY
(GB) Switch off appliance
(F) Couper l’appareil
(D) Gerät abschalten
(I) Disattivazione dell’ap parecchio
(ES) Interruptor del aparato
(P) Interruptor para desligar
(NL) Het toestel uitschakelen
(DK) Afbryd apparatet
(RU)
(PL) Wyłącz urządzenie
K7276 XQ60b Manual 23/12/08 14:31 Page 3
2
3
(CN) 负极/黑色
(TC) 負極/黑色
(JP) マ イ ナ ス 側・黒
(K) 네거티브/BLACK
(GK) Θετικό/ΚΟΚΚΙΝΟ
(TC) 負極/黑色
(JP) プ ラ ス 側・赤
(K) 포지티브/RED
(CN) 注意/警告
(TC) 注意/警告
(JP) 注 意!警 告!
(K) 주의/경고
(CN) 注意强电
(TC) 注意強電
(JP) 感電注意!
(K) 감전 경고
(CN) 正确
(TC) 正確
(JP) 正しいです
(K) 옳음
(CN) 错误
(TC) 錯誤
(JP) 誤りで す
(K) 틀림
(CN) 阅读
(TC) 閱讀
(JP) お読みください
(K) 읽기
(CN) 选择
(TC) 選擇
(JP) オプション(任意選択)
(K) 옵션
(CN) 切断电源
(TC) 切斷電源
(JP) 主電源を切る
(K) 기기 스위치 OFF
The apparatus should be conneTCed to a mains socket with a proteTCive earthing conneTCion.
2
3
XQ60b manual-ex_noGK.indd 3 2009-1-6 14:40:47

4
5
重要的安全注意事项
警 告
为避免发生火灾或触电事故,本机不准淋雨或受潮。
CAUTION 警 告
RISK OF
ELETCRIC SHOCK
DO NOT OPEN
不准打开
以防触电
注意:为避免触电,不准打开机壳(或机背)。
机壳内没有用户能自行维修的零部件。本机须
由合格维修人员维修。
· 跟机提供了一条带有插头的电源线,插头的类型取决于
不同的销售国。
· 在连接电源之前,必须检查当地市电与后面板上标识的
电压是否一致。如果不一致,请联系销售商。
左示三角形内加闪电标志,提醒用户本机内有未
经绝缘的“危险电压”存在,可能足以令人发生
触电危险。
左示三角形内加感叹号标志,提醒用户本机附有
重要的文字指南,介绍如何操作及维修。
请在使用XQ60b之前务必留意以下指引。注意,“本机”
在这里是指XQ60b超低音音箱或其部分。
1. 在对本机进行操作之前,必须阅读所有安全信息和操
作说明。
2. 务必保留所有安全信息和操作说明以备日后参考。
3. 必须遵守本机和操作说明上的所有警告信息。
4. 必须遵守所有操作和使用说明。只能使用KEF规定的
附件。
5. 切勿让分了极性的或接地型的插头失去安全效用。第
三插脚是用于安全目的的。
如果跟机提供的插头与您的插座不匹配,请咨询电
工、更换不适用的插座。
请将所有维修事项交给合格维修人员完成。对于受损
的零件如电源线或插头,必须进行维修。
6. 不准在近水地方使用本机,例如在靠近浴缸、洗手
盆、厨房洗涤盆或洗衣盆的地方,或在潮湿的地库
内,或靠近泳池的地方使用本机。本机不得暴露于滴
水或溅水中。必须注意,不要将装有液体的物品放置
在本机上,不要让液体由机箱的开口处进入机内。本
机上不应放置诸如花瓶一类的装液体的物品。
7. 本机应安装或放置在不影响正常通风的位置上使用,
例如不应将其放在可能堵塞其通风孔的睡床、沙发、
毯子或类似表面上。
8. 本机的安装位置应远离热源,例如暖炉、加热器、火
炉或其他产热装置(包括功放)。
9. 本机的操作说明或本机上的标识都有对电源要求的描
述,只能连接符合此要求的电源,并且要保证便于操
作。电源插头是断开电源的装置,为了完全断开电
源,必须将本机的插头完全拔出电源插座。
10. 布置电源线时,确保电源线不被踩踏或挤压,尤其要
注意插头、转接插座及接出本机处的电源线部分。必
须确保电源插头不被阻挡,便于操作。
11. 只能使用KEF规定的附件。
12. 本机只能使用KEF规定的或跟机提供的推车、架子、
三角架或桌子进行搬运。在使用推车搬运时,必须注
意整体移动推车/本机,避免翻倒引起伤害。
13. 打雷或长期闲置不用时,必须将电源插头拔掉。
14. 本机在发生下列情形时,必须交给合格维修人员进行
维修:
a)电源线或插头损坏,
b)有异物掉进或液体溅入本机,
c)本机受到雨淋,
d)本机运行不正常或性能上出现明显变化,
e)本机坠落或机箱受损。
15. 用户不得试图对本机进行操作说明所描述的之外的维
修操作。所有其他的维修事项必须交给合格的维修人
员进行。
请正确处置本产品。该标识表示,在全欧洲本产
品不得随其他家庭废物一起处置。为了防止由于
不受控制的废物处置引起的对人体或环境可能造
成的损害,请尽责地循环使用以促进资源的可持续性再利
用。若要退回不再使用的设备,请使用退回收集系统或联
系销售商。他们可以将本产品进行有利环境的安全循环
利用。
警告:
由于电源开关位于后面板,因此本机必须放置在敞开的区
域,电源开关不被阻挡,便于操作。
本机必须连接至带有保护接地的电源插座。
XQ60b manual-ex_noGK.indd 4 2009-1-6 14:40:47

4
5
・ 仕向国の規格にあわせた付属の電源コードとプラグが付属し
ています。
・ 電源コードを接続する前に、リア・パネルに記されている電源
電圧がお使いの地域の電源電圧に合っていることを確認して
ください。もし、異なっている場合には接続せずにお買い求め
の販売店にご相談ください。
シンボル・マークの説明
正三角形の中に稲妻が記されているマークは、ケースの内部に感電する恐れのある高い電圧が絶縁されずにかかっ
ていることについての警告を示しています。
正三角形の中に感嘆符が記されているマークは、セットに付属の印刷物に取り扱いやサービスについての重要な指
示があることについて警告しています。
警告
主電源スイッチは後部パネルにありますので、機器は主電源スイッチにアクセスするのに障害物などがない場所に置いてく
ださい。
アース接続をしないで 操作をしないでください。
アース接続はプラグインの前に行ってください。またソケットからプラグを抜いた後アース接続を取り払ってください。
警告・安全上のご注意
ご使用前に必ずお読みください。
警 告
火災や感電の恐れがありますので、絶対に内部を開けたり水に濡らさないでください。
警 告
感電の原因
になります
注意: 感電の危険を減らすため、カバー(または背面
カバー)は取り外さないでください。内部には、ユーザ
ーが点検・修理できる部品はありません。点検・修理は
資格を持つ技術者に依頼してください。
ご使用上の注意
1. 本機を安全にお使いいただくと共に、性能を十分に発揮していただくために、ご使用前に本書を必ずお読みください。
2. 本書は大切に保管してください。
3. 安全にお使いいただくために製品本体や本書に記載されている全ての警告と注意を守ってください。
4. 本機の設置や操作は本書に従ってください。
5. 本機を安全にお使いいただくようアースをおとり下さい。
6.
本機を水の中や水のそばで使わないでください。また、湿気の多い場所での使用も避けてください。(例:バスタブ、洗面所、台所、洗濯場、
湿気の多い地下、プールなど。)
7. 本機の放熱を妨げるような場所に置いたり、物をかぶせたりしないでください。
8. 本機を暖房器具や電熱器、アンプなど発熱の多い機器のそばに置かないでください。
9. 製品本体のリアーパネルに記されている電源仕様のみでお使いいただけます。
10. 電源コードやプラグが歩行の邪魔になったり、ものに挟まれたりすることのないように十分注意してください。
11. アタッチメントやアクセサリーは本書にしたがって使 用してください。
12. 取り扱い−本機を移動するときは台車など生産者が指定した物を使って安全に移動してください。特に台車を使うときにはバランスを失
うなどして荷崩れを起こし事故に至ることのないように十分にご注意ください。
13. 長期間お使いにならないときは、必ず電源プラグをACコンセントから抜いてください。
14. 次のような場合は KEF 製品の修理できる資格のあるサービスマンに修理を依頼してください。
a) 電源コードやプラグが不良となったとき。
b) ものを本体内に落としたり、液体をこぼしてしまったとき。
c) 雨など水にぬれてしまった場合。
d) 正常に動作しないとき。
e) 落としたり、キャビネットを損傷したとき。
15. 修理について。お客さまご自身での修理はしないでください。全ての修理は KEF 製品を修理できる資格を持ったサービスマンに依頼し
てくだ さ い 。
XQ60b manual-ex_noGK.indd 5 2009-1-6 14:40:48

IMPORTANT SAFETY INSTRUCTIONS
Please take heed of the following before using the KEF Model XQ60b. Note also that the word “appliance”
shall refer to the KEF XQ60b subwoofer, or any part of it.
1. Read Instructions – All the Safety and Operating Instructions should be read before the appliance is operated.
2. Retain Instructions – The Safety and Operating Instructions should be retained for future reference.
3. Heed Warnings – All warnings on the appliance and in the Operating Instructions should be adhered to.
4. Follow Instructions – All Operating and Use Instructions should be followed. Only use attachments/accessories
specified by the manufacturer.
5. Important – Do not defeat the safety purpose of the polarized or grounding type plug. The third prong is
provided for your safety.
If the provided plug does not fit into your outlet, consult an electrician for replacement of the obsolete outlet.
Refer all servicing to a qualified service personnel. Servicing is required for any damaged parts such as power-
supply cord or plug.
6. Water and Moisture – The appliance should not be used in or near water - for example, near a bathtub,
washbowl, kitchen sink, laundry tub, in a wet basement, or near a swimming pool, and the like. The appliance
shall not be exposed to dripping or splashing. Care should be taken so that objects containing liquids are not
placed upon or spilled into the enclosure through openings and that no objects filled with liquids, such as a vase,
shall be placed on the appliance.
7. Ventilation – The appliance should be situated so that its location or position does not interfere with its proper
ventilation. For example, the appliance should not be situated on a bed, sofa, or similar surface that may block
any ventilation openings.
8. Heat – The appliance should be situated away from heat sources such as radiators, heat registers, stoves or other
appliances (including amplifiers) that produce heat.
9. Power Sources – The appliance should be connected to a power supply only of the type described in the
Operating Instructions or as marked on the appliance and it shall remain readily operable. Mains plug is used as
the disconnect device. To be completely disconnected from the power input, the mains plug of the appliance must
be disconnected from the mains completely.
10. Power-cord Protection – Power supply cords should be routed so that they are not likely to be walked on or
pinched by items placed upon or against them, paying particular attention to cords at plugs, convenience
receptacles and the point where they exit from the appliance. The main plug should not be obstructed OR should
be easily accessed during intended use.
11. Attachments and Accessories – Use only attachments/accessories specified by the manufacturer.
12. Handling – The appliance should be transported with the cart, stand, tripod, bracket, or table specified by
manufacturer, or sold with the apparatus. When a cart is used, use caution when moving the cart/appliance
combination to avoid injury from tip-over.
13. Non-use Periods – Unplug this appliance during lightning storms or when unused for long periods of time.
14. Damage Requiring Service – The appliance should be serviced by qualified service personnel when:
a) The power supply cord or the plug has been damaged; or
b) Objects have fallen or liquid has been spilled into the appliance; or
c) The appliance has been exposed to rain; or
d) The appliance does not appear to operate normally or exhibits a marked change in performance; or
e) The appliance has been dropped or the enclosure damaged.
15. Servicing – The user shall not attempt to service the appliance beyond that described in the Operating
Instructions. All other servicing should be referred to qualified service personnel.
(F) Utilisation du manuel (D) Verwendung der Anleitung (I) Uso del manuale (ES) Uso del manual (P) Utilização do manual (NL) Gebruik van de handleiding
(DK) Brug af manualen(RU) (PL) Ważne instrukcje bezpieczeństwa
K7276 XQ60b Manual 23/12/08 14:31 Page 4
(F) Utilisation du manuel (D) Verwendung der Anleitung (I) Uso del manuale (ES) Uso del manual (P) Utilização do manual (NL) Gebruik van de handleiding
(DK) Brug af manualen(RU) (PL) Ważne instrukcje bezpieczeństwa
IMPORTANT SAFETY INSTRUCTIONS
K7276 XQ60b Manual 23/12/08 14:31 Page 5
6
7
(CN)
重要安全事项
(TC)
重要安全事項
(JP) 重要安全項目
(K) 중요한 안전 지침
XQ60b manual-ex_noGK.indd 6 2009-1-6 14:40:48

IMPORTANT SAFETY INSTRUCTIONS
Please take heed of the following before using the KEF Model XQ60b. Note also that the word “appliance”
shall refer to the KEF XQ60b subwoofer, or any part of it.
1. Read Instructions – All the Safety and Operating Instructions should be read before the appliance is operated.
2. Retain Instructions – The Safety and Operating Instructions should be retained for future reference.
3. Heed Warnings – All warnings on the appliance and in the Operating Instructions should be adhered to.
4. Follow Instructions – All Operating and Use Instructions should be followed. Only use attachments/accessories
specified by the manufacturer.
5. Important – Do not defeat the safety purpose of the polarized or grounding type plug. The third prong is
provided for your safety.
If the provided plug does not fit into your outlet, consult an electrician for replacement of the obsolete outlet.
Refer all servicing to a qualified service personnel. Servicing is required for any damaged parts such as power-
supply cord or plug.
6. Water and Moisture – The appliance should not be used in or near water - for example, near a bathtub,
washbowl, kitchen sink, laundry tub, in a wet basement, or near a swimming pool, and the like. The appliance
shall not be exposed to dripping or splashing. Care should be taken so that objects containing liquids are not
placed upon or spilled into the enclosure through openings and that no objects filled with liquids, such as a vase,
shall be placed on the appliance.
7. Ventilation – The appliance should be situated so that its location or position does not interfere with its proper
ventilation. For example, the appliance should not be situated on a bed, sofa, or similar surface that may block
any ventilation openings.
8. Heat – The appliance should be situated away from heat sources such as radiators, heat registers, stoves or other
appliances (including amplifiers) that produce heat.
9. Power Sources – The appliance should be connected to a power supply only of the type described in the
Operating Instructions or as marked on the appliance and it shall remain readily operable. Mains plug is used as
the disconnect device. To be completely disconnected from the power input, the mains plug of the appliance must
be disconnected from the mains completely.
10. Power-cord Protection – Power supply cords should be routed so that they are not likely to be walked on or
pinched by items placed upon or against them, paying particular attention to cords at plugs, convenience
receptacles and the point where they exit from the appliance. The main plug should not be obstructed OR should
be easily accessed during intended use.
11. Attachments and Accessories – Use only attachments/accessories specified by the manufacturer.
12. Handling – The appliance should be transported with the cart, stand, tripod, bracket, or table specified by
manufacturer, or sold with the apparatus. When a cart is used, use caution when moving the cart/appliance
combination to avoid injury from tip-over.
13. Non-use Periods – Unplug this appliance during lightning storms or when unused for long periods of time.
14. Damage Requiring Service – The appliance should be serviced by qualified service personnel when:
a) The power supply cord or the plug has been damaged; or
b) Objects have fallen or liquid has been spilled into the appliance; or
c) The appliance has been exposed to rain; or
d) The appliance does not appear to operate normally or exhibits a marked change in performance; or
e) The appliance has been dropped or the enclosure damaged.
15. Servicing – The user shall not attempt to service the appliance beyond that described in the Operating
Instructions. All other servicing should be referred to qualified service personnel.
(F) Utilisation du manuel (D) Verwendung der Anleitung (I) Uso del manuale (ES) Uso del manual (P) Utilização do manual (NL) Gebruik van de handleiding
(DK) Brug af manualen(RU) (PL) Ważne instrukcje bezpieczeństwa
K7276 XQ60b Manual 23/12/08 14:31 Page 4
(F) Utilisation du manuel (D) Verwendung der Anleitung (I) Uso del manuale (ES) Uso del manual (P) Utilização do manual (NL) Gebruik van de handleiding
(DK) Brug af manualen(RU) (PL) Ważne instrukcje bezpieczeństwa
IMPORTANT SAFETY INSTRUCTIONS
K7276 XQ60b Manual 23/12/08 14:31 Page 5
6
7
(CN)
重要安全事项
(TC)
重要安全事項
(JP) 重要安全項目
(K) 중요한 안전 지침
(GB) Follow this manual carefully for best results from
your subwoofer
(F) Afin de tirer les meilleurs résultats des haut-parleurs,
veuillez suivre scrupuleusement les instructions reprises
dans le présent manuel
(D) Für optimale Ergebnisse mit Ihrem Lautsprecher befolgen
Sie diese Anleitung
(I) Per ottenere le migliori prestazioni dai diffusori seguire le
istruzioni contenute nel presente manuale
(ES) Siga las instrucciones de este manual para obtener los
mejores resultados de los altavoces
(P) Siga este manual atentamente para obter o melhor
resultado das colunas
(NL) Volg terwille van een optimaal resultaat de instructies
nauwkeurig op
(DK) Følg denne manual omhyggeligt for at opnå det bedste
resultat fra højttalerne
(RU) Для получения наилучших результатов от
громкоговорителей, тщательно следуйте данной инструкции
(PL) Aby osiągnąć jak najlepsze rezultaty, należy ściśle stosowac się
do poniższej instrukcji
(CN) 请仔细阅读和遵循本手册以取得最佳的效果。
(TC) 請仔細閱讀和遵循本手冊以取得最佳的效果。
(JP) スピーカーの性能を出し切るためにこのマニュアルをよくお読み
くだ さ い 。
(K) 설치 전 본 매뉴얼을 숙지 하세요
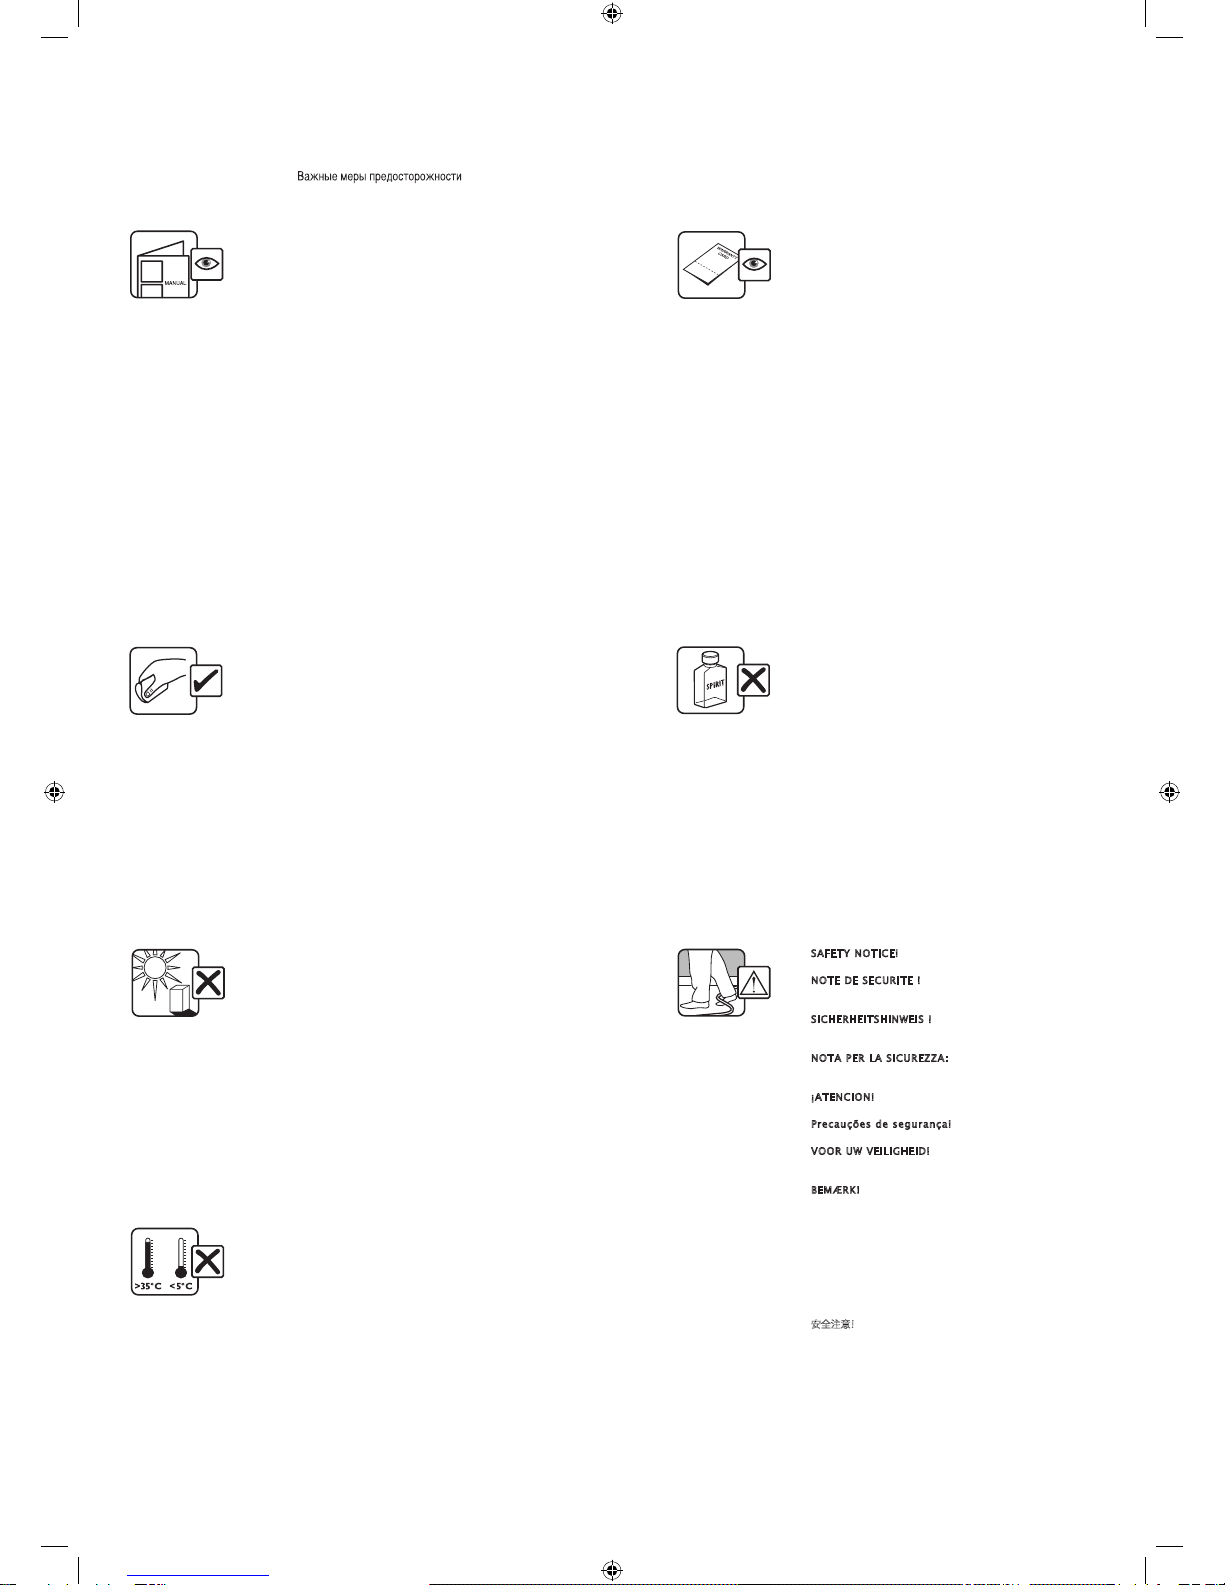
(GB) Avoid direct sunlight
(F) Eviter l’exposition directe aux rayons du soleil
(D) Direktes Sonnenlicht vermeiden.
(I) Evitare l’esposizione diretta ai raggi del sole
(ES) Evite la luz directa del sol
(P) Evite a exposição directa à luz do sol
(NL) Vermijd rechtstreeks zonlicht
(DK) Undgä direkte sollys
(RU) Избегайте прямых солнечных лучей
(PL) Należy unikać bezpośredniego nasłonecznienia
(CN) 避免阳光照射。
(TC) 避免陽光照射。
(JP) 直射日光を避けてください。
(K) 직사 광선을 피하세요
(GB) Read and return warranty card
(F) Veuillez lire et renvoyer la carte de garantie
(D) Lesen Sie die Garantiekarte und senden Sie sie ausgefüllt
zurück
(I) Si prega di restituire la scheda di garanzia, previa attenta
lettura
(ES) Lea y envíenos la tarjeta de garantía
(P) Leia e devolva o cartão de garantia
(NL) U kunt na lezing en invulling de garantiekaart aan de
importeur sturen
(DK) Gennemlæs og send garantibeviset tilbage
(RU) Прочтите гарантийный талон
(PL) Proszę przeczytać, a następnie odesłać kartę rejestracyjną
(CN) 请阅读和寄回质量保证卡。
(TC) 請閱讀和寄回質量保證卡。
(JP) 日本国内では保証書の発行をいたしておりません。正規販売店の
領収書が保証書に替わります。iQシリーズは自然故障においてお買
い上げより2年間の無償修理です。
(K) 품질보증서 확인
(GB) Do not use spirit based cleaners.
(F) Ne pas utiliser d’agents nettoyants à base d’alcool.
(D) Keine alkoholhaltigen Reinigungsmittel verwenden.
(I) Non utilizzare prodotti a base di alcol
(ES) No use limpiadores con base de alcohol
(P) Não utilize produtos de limpeza à base de álcool
(NL) Gebruik geen reinigingsprodukten op basis van alcohol
(DK) Brug ikke rengøringsmidler med alkohol
(RU) Не используйте растворители для чистки
(PL) Do czyszczenie powierzchni nie należy używać płynów
zawierających alkohol
(CN) 不要使用含酒精的清洁剂。
(TC) 不要使用含酒精的清潔劑。
(JP) アルコールなど化学物質を一切使用しないでください。
(K) 윤활유 등으로 닦지 마세요
(GB) Clean with a dry lint free cloth
(F) Nettoyer à l’aide d’un chiffon humide, non pelucheux
(D) Mit einem angefeuchteten, nicht fusselnden Tuch
abwischen
(I) Pulire con un panno umido non sfilacciato
(ES) Limpie con un paño húmedo
(P) Limpe com um pano húmido sem pêlos
(NL) Reinigen met een vochtige niet pluizende doek
(DK) Rengør med en fugtig klud, der ikke fnugger
(RU) Очищайте влажной тканью, не содержащей волокон.
(PL) Czyść wilgotna szmatką bez nici
(CN) 用不含麻质的干布清洁。
(TC) 用不含麻質的乾布清潔。
(JP) 乾いた毛羽立ちのないやわらかい布で汚れを拭いてください。
(K) 부드럽고 마른천으로 닦으시요
(GB) Avoid temperature extremes
(F) Eviter les températures extrêmes
(D) Extreme Temperaturen vermeiden
(I) Evitare temperature troppo alte o troppo basse
(ES) Evite temperaturas extremas
(P) Evite temperaturas extremas
(NL) Vermijd extreme temperaturen
(DK) Undgå ekstreme temperaturer
(RU) Используйте при нормальной комнатной температуре
(PL) Należy unikać wysokich i niskich temperatur
(CN) 避免过高和过低的温度。
(TC) 避免過高和過低的溫度。
(JP) 極端な温度は避けてください。
(K) 설치 온도
(GB) SAFETY NOTICE! trailing cables are dangerous, secure
all cables
(F) NOTE DE SECURITE ! Les câbles de haut-parleurs
traînant sur le sol peuvent être source de danger. Fixer
tous les câbles
(D) SICHERHEITSHINWEIS ! Herumliegende
Lautsprecherkabel sind eine Gefahrenquelle.
Bitte alle Lautsprecherkabel sorgfältig verlegen
(I) NOTA PER LA SICUREZZA: i cavi di uscita dei diffusori
possono essere pericolosi se non sistemati in un posto
sicuro
(ES) ¡ATENCION! los cables de conexión sueltos de los
altavoces son peligrosos. Fíjelos
(P) Precauções de segurança! Os cabos das colunas
espalhados são perigosos, fixe todos os cabos
(NL) VOOR UW VEILIGHEID! Loshangende luidsprekerkabels
zijn gevaarlijk! De kabels steeds op een veilige plaats
leggen
(DK) BEMÆRK! skarpe knæk og slid på højttalerledningerne er
farlig, de skal fastgøres
(RU) Замечание по безопасности! Не допускайте образования
петель из кабелей, закрепите все кабели
(PL) UWAGA! Wszystkie przewody muszą być
zabezpieczone i przytwierdzone do podłoża
(CN) 注意安全!散乱曳尾的连接线和电线有潜在危险,必须固定所有
连接线及电线。
(TC) 注意安全!散亂曳尾的連接線和電線有潛在危險,必須固定所有
連接線及電線。
(JP) 安全注意!ケーブル類はきれいにまとめ足に引っ掛けることのない
ようにしてください。
(K) 케이블은 이동이 없는 곳에 설치하세요
XQ60b manual-ex_noGK.indd 7 2009-1-6 14:40:49

UNPACKING
(F) Déballage (D) Auspacken (I) Apertura della confezione (ES) Desembalaje (P) Desembalagem (NL) Het toestel uitpakken (DK) Udpakning
(RU) (PL) Rozpakowanie
ACCESSORIES
(F) Accessoires(D) Zubehör (I) Accessori (ES) Accesorios(P) Acessórios(NL) Accessoires(DK) Tilbehør(RU) (PL) Akcesoria
K7276 XQ60b Manual 23/12/08 15:23 Page 6
CONTROLS AND SOCKETS
(F) Commandes et prises (D) Bedienungselemente und Anschlüsse (I) Comandi e prese (ES) Controles y conexiones (P) Comandos e fichas
(NL) Regelaars en aansluitingen (DK) Betjeningsknapper og stik (RU) (PL) Elementy obsługi i przyłącza
K7276 XQ60b Manual 23/12/08 14:31 Page 7
8
9
(CN) 拆开包装 (TC) 拆開包裝 (JP) 開梱 (K) 개봉
(CN) 附件 (TC) 附件 (J) アクセサリー (K) 액세서리
XQ60b manual-ex_noGK.indd 8 2009-1-6 14:40:49

UNPACKING
(F) Déballage (D) Auspacken (I) Apertura della confezione (ES) Desembalaje (P) Desembalagem (NL) Het toestel uitpakken (DK) Udpakning
(RU) (PL) Rozpakowanie
ACCESSORIES
(F) Accessoires(D) Zubehör (I) Accessori (ES) Accesorios(P) Acessórios(NL) Accessoires(DK) Tilbehør(RU) (PL) Akcesoria
K7276 XQ60b Manual 23/12/08 15:23 Page 6
CONTROLS AND SOCKETS
(F) Commandes et prises (D) Bedienungselemente und Anschlüsse (I) Comandi e prese (ES) Controles y conexiones (P) Comandos e fichas
(NL) Regelaars en aansluitingen (DK) Betjeningsknapper og stik (RU) (PL) Elementy obsługi i przyłącza
K7276 XQ60b Manual 23/12/08 14:31 Page 7
8
9
(CN) 控制和接口 (CT) 控制和接口 (JP) コントロールSW及び入出力端 (K) 제어장치 및 소켓
XQ60b manual-ex_noGK.indd 9 2009-1-6 14:40:51

CONTROLS AND SOCKETS
(F) Commandes et prises (D) Bedienungselemente und Anschlüsse (I) Comandi e prese (ES) Controles y conexiones (P) Comandos e fichas
(NL) Regelaars en aansluitingen (DK) Betjeningsknapper og stik (RU) (PL) Elementy obsługi i przyłącza
K7276 XQ60b Manual 23/12/08 14:31 Page 8
CONTROLS AND SOCKETS
(F) Commandes et prises (D) Bedienungselemente und Anschlüsse (I) Comandi e prese (ES) Controles y conexiones (P) Comandos e fichas
(NL) Regelaars en aansluitingen (DK) Betjeningsknapper og stik (RU) (PL) Elementy obsługi i przyłącza
K7276 XQ60b Manual 23/12/08 14:31 Page 9
10
11
(CN) 控制和接口 (CT) 控制和接口 (JP) コントロールSW及び入出力端 (K) 제어장치 및 소켓
XQ60b manual-ex_noGK.indd 10 2009-1-6 14:40:51

CONTROLS AND SOCKETS
(F) Commandes et prises (D) Bedienungselemente und Anschlüsse (I) Comandi e prese (ES) Controles y conexiones (P) Comandos e fichas
(NL) Regelaars en aansluitingen (DK) Betjeningsknapper og stik (RU) (PL) Elementy obsługi i przyłącza
K7276 XQ60b Manual 23/12/08 14:31 Page 8
CONTROLS AND SOCKETS
(F) Commandes et prises (D) Bedienungselemente und Anschlüsse (I) Comandi e prese (ES) Controles y conexiones (P) Comandos e fichas
(NL) Regelaars en aansluitingen (DK) Betjeningsknapper og stik (RU) (PL) Elementy obsługi i przyłącza
K7276 XQ60b Manual 23/12/08 14:31 Page 9
10
11
(CN) 控制和接口 (CT) 控制和接口 (JP) コントロールSW及び入出力端 (K) 제어장치 및 소켓
XQ60b manual-ex_noGK.indd 11 2009-1-6 14:40:52

XQ60b Subwoofer Rear Panel
1. LFE / Line in Smart Connect input
2. Phase control
3. Bass boost
4. Level control
5. Mains indicator light Power ON Power OFF
6. Crossover frequency control
7. ‘ON/OFF’ switch (Vacation switch)
8. AC power input (230V Euro / 230V UK / 115V US)
9. High Level (Speaker) Input Block
FAULT
Mains indicator light does not come on.
Mains indicator light is on but no sound
comes from the subwoofer.
If there is still no sound.
Red light no sound.
Green light no sound.
REMEDY
Check that the subwoofer is plugged into the mains supply and that any switches are on.
Check any fuses (including the plug) or circuit breakers on the mains supply which may
affect the power to the subwoofer.
Ensure that all equipment is switched on.
Contact your dealer for further advice.
Check and adjust the level control.
Check the output sockets on the source equipment are correctly switched and
adjusted to provide sufficient level to drive the subwoofer.
Check that all connections between the subwoofer and the source equipment
are correct and adjust as necessary.
Contact your dealer for further advice.
Check volume levels of subwoofer and amplifier/receiver.
As the sub-bass (low frequency) sound produced by the subwoofer is
non-directional it can be positioned almost anywhere in the room,
although it should not be placed too close to the listener. For optimum
performance try the subwoofer in different positions to find the best
place for a boom-free sound.
Connect to the amplifier LFE subwoofer output.
All inputs work simultaneously.
Set the subwoofer frequency on the amplifier / receiver to 80Hz
(refer to the amplifier / receiver manual).
Set the crossover on the XQ60b to 140Hz.
Set the volume on the XQ60b to the 7th dot.
Ensure that the satellites are set to the appropriate configuration in
the amplifier / receiver menu (refer to the speaker manual).
Adjust the subwoofer volume on the AV amplifier / receiver to your
desired level (refer to the amplifier / receiver manual).
It is possible to manually adjust the set up of the XQ60b instead of
using the amplifier / receiver.
A. Crossover Frequency Control
The crossover frequency control changes the upper cut-off frequency of
the subwoofer. Its effective range is from 40Hz to 140Hz at a rate of
24dB per octave. The frequency control should be adjusted to achieve
the smoothest integration between the main/satellite speakers and the
subwoofer. Clockwise rotation will increase the cut-off frequency and
anti-clockwise rotation will decrease the cut-off frequency.
1. Ideal crossover - flat response.
2. Crossover point set too low - causes dip in combined response.
3. Crossover point set too high - causes hump in combined response.
B. Phase Control
The phase control will normally be set at 0° but more output level can
sometimes be achieved in the 180° position, particularly when the
subwoofer is far away from the satellite speakers.
C. Volume Control
The volume control adjusts the output level of the subwoofer in relation
to the satellite or AV speaker output level. Clockwise rotation to
increase the output level or anti-clockwise to decrease the output level.
Controls and sockets
Positioning
Connection to AV amplifier / receiver
Connect to amplifier speaker or preamp or subwoofer output.
Set the crossover to 80Hz for large speakers or higher to match small
speakers. Start with the volume set at the 7th dot. Adjust the volume
to match output to your main speakers.
Connection to stereo preamp / receiver
Manual controls
ENGLISH INSTRUCTIONS
Trouble Shooting
Red / Green
GB
Bass Boost (EQ)
The bass boost control is intended to adjust the response of the
subwoofer to compensate for room conditions and user preferences.
Boost is switchable between 0, +6 and +12dB at around 40Hz.
K7276 XQ60b Manual 23/12/08 14:31 Page 10
Dans la mesure où le son infra-grave (basse fréquence) produit par le
subwoofer est non-directionnel, ce dernier peut être placé en n’importe quel
endroit de la pièce. On veillera toutefois à ne pas le positionner trop près
de l’auditeur. Essayez, si possible, de placer successivement le subwoofer
en différents endroits de manière à localiser le meilleur endroit pour un
rendu du son sans grondement. Un fil d’alimentation satisfaisant aux
normes nationales de mise à la terre et répondant aux exigences locales en
matière de sécurité est fourni avec le subwoofer.
Positionnement/Branchement sur secteur
Il est possible de régler le XQ60b via ses propres réglages en lieu et
place de ceux de l’amplificateur/récepteur.
A. Commande de la fréquence de coupure.
Cette commande modifie la fréquence de coupure supérieure du
subwoofer. Sa plage de réglage efficace s’échelonne de 40Hz à 140Hz
à un taux de 24 dB par octave. La commande de fréquence doit être
réglée de manière à obtenir la parfaite intégration entre les haut-
parleurs principaux/satellites et le subwoofer.Une rotation dans le
sens horlogique relèvera la fréquence de coupure et une rotation dans
le sens anti-horlogique abaissera la fréquence de coupure.
1. Croisement idéal - Réponse plate.
2. Point de croisement réglé trop bas - provoque um creux en
réponse combinée.
3. Point de croisement réglé trop haut - provoque une boss en
réponse combinée.
B. Contrôle de phase
Le contrôle de phase sera normalement positionné sur 0°. Un niveau
plus élevé de sortie peut toutefois être obtenu en position 180°, et ce
plus particulièrement lorsque le subwoofer est éloigné des haut-
parleurs satellites.
C. Commande du niveau
La commande de niveau règle le niveau de sortie du subwoofer en
fonction du niveau de sortie du haut-parleur satellite ou AV. Une
rotation dans le sens horlogique augmentera le niveau de sortie et une
rotation dans le sens anti-horlogique abaissera le niveau de sortie.
Reglages manuels
INSTRUCTIONS EN FRANCAIS
Depannage
Panneau arrière du modèle XQ60b Subwoofer
1. LFE/ Entrée ligne bas-niveau.
2. Contrôle de phase.
3. Bass Boost
4. Commande de niveau.
5. Témoin de mise MARCHE ARRET
6. Commande de la fréquence de coupure.
7. Commutateur ‘MARCHE/ARRET’ (ON/OFF)
(Interrupteur Vacances)
8.
Entrée d’alimentation en c.a. (230V Euro / 230V UK / 115V US)
9. Entrée Haut Niveau (Haut-parleur)
Commandes et prises
Rouge / Vert
Connectez à la sortie LFE subwoofer de l'amplificateur.
Toutes les entrées fonctionnent simultanément..
Réglez, sur l’amplificateur/récepteur, la fréquence de sortie du caisson
de basses a 80Hz (veuillez vous référer au manuel d’utilisation de
l’amplificateur/récepteur).
Régler la fréquence de coupure du XQ60b à 140Hz
Régler le volume du XQ60b au niveau 7
Assurez vous, sur l’amplificateur/récepteur, que la configuration des
satellites est appropriée (veuillez vous référer au manuel d’utilisation
des satellites).
Ajustez le volume du caisson de basses sur l’amplificateur/récepteur
(veuillez vous référer au manuel d’utilisation de l’amplificateur/récepteur).
Raccordement à un amplificateur ou un récepteur
Audio/Vidéo
F
Bass Boost (EQ)
La fonction "bass Boost"permet d'adapter la réponse au local ou aux
préférences personnelles. Les basses peuvent etre "poussées" pas par
pas, 0,+6 et +12dB a +/- 40Hz
Branchez sur la sortie haut-parleurs ou pré-ampli ou subwoofer de
l'amplificateur. Réglez la fréquence de coupure sur 80Hz pour une
utilisation avec des enceintes de type colonne/bibliotheque ou sur une
fréquence plus élevée pour des enceintes de type satellite. Commencez
avec le volume réglé sur le septième point. Ajustez le volume en
fonction du niveau sonore produit par vos enceintes principales..
Connexion à un amplificateur intégré stéréo ou à un
préamplificateur stéréo
REMEDE
Vérifier que la fiche du subwoofer est bien branchée sur le secteur et que les commutateurs
sont positionnés sur ‘ON’.
Vérifier tous les fusibles (ainsi que la fiche) circuit d’alimentation du subwoofer.
Pour de plus amples conseils, adressez-vous à votre revendeur.
Vérifier que toute l’installation est branchée.
Vérifier et régler le commande de niveau.
Vérifier que les prises de sortie de l’équipement source sont correctement
commutées et procéder à un réglage de manière à obtenir un niveau suffisant
pour le subwoofer.
Vérifier que toutes les connexions entre le subwoofer et l’équipement source
sont correctes et procéder, si nécessaire, à la correction.
Pour de plus amples conseils, adressez-vous à votre revendeur.
Vérifier les niveaux
PROBLEME
Le témoin indicateur de mise sous tension ne
s’allume pas.
Le témoin indicateur de mise sous tension ne
s’allume toujours pas.
Le témoin indicateur de mise sous tension est
allumé mais aucun son ne provient du
subwoofer.
Le subwoofer n’émet toujours aucun son.
Voyant rouge pas de son
Voyant vert pas de son
K7276 XQ60b Manual 23/12/08 14:31 Page 11
12
13
XQ60b manual-ex_noGK.indd 12 2009-1-6 14:40:52

XQ60b Subwoofer Rear Panel
1. LFE / Line in Smart Connect input
2. Phase control
3. Bass boost
4. Level control
5. Mains indicator light Power ON Power OFF
6. Crossover frequency control
7. ‘ON/OFF’ switch (Vacation switch)
8. AC power input (230V Euro / 230V UK / 115V US)
9. High Level (Speaker) Input Block
FAULT
Mains indicator light does not come on.
Mains indicator light is on but no sound
comes from the subwoofer.
If there is still no sound.
Red light no sound.
Green light no sound.
REMEDY
Check that the subwoofer is plugged into the mains supply and that any switches are on.
Check any fuses (including the plug) or circuit breakers on the mains supply which may
affect the power to the subwoofer.
Ensure that all equipment is switched on.
Contact your dealer for further advice.
Check and adjust the level control.
Check the output sockets on the source equipment are correctly switched and
adjusted to provide sufficient level to drive the subwoofer.
Check that all connections between the subwoofer and the source equipment
are correct and adjust as necessary.
Contact your dealer for further advice.
Check volume levels of subwoofer and amplifier/receiver.
As the sub-bass (low frequency) sound produced by the subwoofer is
non-directional it can be positioned almost anywhere in the room,
although it should not be placed too close to the listener. For optimum
performance try the subwoofer in different positions to find the best
place for a boom-free sound.
Connect to the amplifier LFE subwoofer output.
All inputs work simultaneously.
Set the subwoofer frequency on the amplifier / receiver to 80Hz
(refer to the amplifier / receiver manual).
Set the crossover on the XQ60b to 140Hz.
Set the volume on the XQ60b to the 7th dot.
Ensure that the satellites are set to the appropriate configuration in
the amplifier / receiver menu (refer to the speaker manual).
Adjust the subwoofer volume on the AV amplifier / receiver to your
desired level (refer to the amplifier / receiver manual).
It is possible to manually adjust the set up of the XQ60b instead of
using the amplifier / receiver.
A. Crossover Frequency Control
The crossover frequency control changes the upper cut-off frequency of
the subwoofer. Its effective range is from 40Hz to 140Hz at a rate of
24dB per octave. The frequency control should be adjusted to achieve
the smoothest integration between the main/satellite speakers and the
subwoofer. Clockwise rotation will increase the cut-off frequency and
anti-clockwise rotation will decrease the cut-off frequency.
1. Ideal crossover - flat response.
2. Crossover point set too low - causes dip in combined response.
3. Crossover point set too high - causes hump in combined response.
B. Phase Control
The phase control will normally be set at 0° but more output level can
sometimes be achieved in the 180° position, particularly when the
subwoofer is far away from the satellite speakers.
C. Volume Control
The volume control adjusts the output level of the subwoofer in relation
to the satellite or AV speaker output level. Clockwise rotation to
increase the output level or anti-clockwise to decrease the output level.
Controls and sockets
Positioning
Connection to AV amplifier / receiver
Connect to amplifier speaker or preamp or subwoofer output.
Set the crossover to 80Hz for large speakers or higher to match small
speakers. Start with the volume set at the 7th dot. Adjust the volume
to match output to your main speakers.
Connection to stereo preamp / receiver
Manual controls
ENGLISH INSTRUCTIONS
Trouble Shooting
Red / Green
GB
Bass Boost (EQ)
The bass boost control is intended to adjust the response of the
subwoofer to compensate for room conditions and user preferences.
Boost is switchable between 0, +6 and +12dB at around 40Hz.
K7276 XQ60b Manual 23/12/08 14:31 Page 10
Dans la mesure où le son infra-grave (basse fréquence) produit par le
subwoofer est non-directionnel, ce dernier peut être placé en n’importe quel
endroit de la pièce. On veillera toutefois à ne pas le positionner trop près
de l’auditeur. Essayez, si possible, de placer successivement le subwoofer
en différents endroits de manière à localiser le meilleur endroit pour un
rendu du son sans grondement. Un fil d’alimentation satisfaisant aux
normes nationales de mise à la terre et répondant aux exigences locales en
matière de sécurité est fourni avec le subwoofer.
Positionnement/Branchement sur secteur
Il est possible de régler le XQ60b via ses propres réglages en lieu et
place de ceux de l’amplificateur/récepteur.
A. Commande de la fréquence de coupure.
Cette commande modifie la fréquence de coupure supérieure du
subwoofer. Sa plage de réglage efficace s’échelonne de 40Hz à 140Hz
à un taux de 24 dB par octave. La commande de fréquence doit être
réglée de manière à obtenir la parfaite intégration entre les haut-
parleurs principaux/satellites et le subwoofer.Une rotation dans le
sens horlogique relèvera la fréquence de coupure et une rotation dans
le sens anti-horlogique abaissera la fréquence de coupure.
1. Croisement idéal - Réponse plate.
2. Point de croisement réglé trop bas - provoque um creux en
réponse combinée.
3. Point de croisement réglé trop haut - provoque une boss en
réponse combinée.
B. Contrôle de phase
Le contrôle de phase sera normalement positionné sur 0°. Un niveau
plus élevé de sortie peut toutefois être obtenu en position 180°, et ce
plus particulièrement lorsque le subwoofer est éloigné des haut-
parleurs satellites.
C. Commande du niveau
La commande de niveau règle le niveau de sortie du subwoofer en
fonction du niveau de sortie du haut-parleur satellite ou AV. Une
rotation dans le sens horlogique augmentera le niveau de sortie et une
rotation dans le sens anti-horlogique abaissera le niveau de sortie.
Reglages manuels
INSTRUCTIONS EN FRANCAIS
Depannage
Panneau arrière du modèle XQ60b Subwoofer
1. LFE/ Entrée ligne bas-niveau.
2. Contrôle de phase.
3. Bass Boost
4. Commande de niveau.
5. Témoin de mise MARCHE ARRET
6. Commande de la fréquence de coupure.
7. Commutateur ‘MARCHE/ARRET’ (ON/OFF)
(Interrupteur Vacances)
8.
Entrée d’alimentation en c.a. (230V Euro / 230V UK / 115V US)
9. Entrée Haut Niveau (Haut-parleur)
Commandes et prises
Rouge / Vert
Connectez à la sortie LFE subwoofer de l'amplificateur.
Toutes les entrées fonctionnent simultanément..
Réglez, sur l’amplificateur/récepteur, la fréquence de sortie du caisson
de basses a 80Hz (veuillez vous référer au manuel d’utilisation de
l’amplificateur/récepteur).
Régler la fréquence de coupure du XQ60b à 140Hz
Régler le volume du XQ60b au niveau 7
Assurez vous, sur l’amplificateur/récepteur, que la configuration des
satellites est appropriée (veuillez vous référer au manuel d’utilisation
des satellites).
Ajustez le volume du caisson de basses sur l’amplificateur/récepteur
(veuillez vous référer au manuel d’utilisation de l’amplificateur/récepteur).
Raccordement à un amplificateur ou un récepteur
Audio/Vidéo
F
Bass Boost (EQ)
La fonction "bass Boost"permet d'adapter la réponse au local ou aux
préférences personnelles. Les basses peuvent etre "poussées" pas par
pas, 0,+6 et +12dB a +/- 40Hz
Branchez sur la sortie haut-parleurs ou pré-ampli ou subwoofer de
l'amplificateur. Réglez la fréquence de coupure sur 80Hz pour une
utilisation avec des enceintes de type colonne/bibliotheque ou sur une
fréquence plus élevée pour des enceintes de type satellite. Commencez
avec le volume réglé sur le septième point. Ajustez le volume en
fonction du niveau sonore produit par vos enceintes principales..
Connexion à un amplificateur intégré stéréo ou à un
préamplificateur stéréo
REMEDE
Vérifier que la fiche du subwoofer est bien branchée sur le secteur et que les commutateurs
sont positionnés sur ‘ON’.
Vérifier tous les fusibles (ainsi que la fiche) circuit d’alimentation du subwoofer.
Pour de plus amples conseils, adressez-vous à votre revendeur.
Vérifier que toute l’installation est branchée.
Vérifier et régler le commande de niveau.
Vérifier que les prises de sortie de l’équipement source sont correctement
commutées et procéder à un réglage de manière à obtenir un niveau suffisant
pour le subwoofer.
Vérifier que toutes les connexions entre le subwoofer et l’équipement source
sont correctes et procéder, si nécessaire, à la correction.
Pour de plus amples conseils, adressez-vous à votre revendeur.
Vérifier les niveaux
PROBLEME
Le témoin indicateur de mise sous tension ne
s’allume pas.
Le témoin indicateur de mise sous tension ne
s’allume toujours pas.
Le témoin indicateur de mise sous tension est
allumé mais aucun son ne provient du
subwoofer.
Le subwoofer n’émet toujours aucun son.
Voyant rouge pas de son
Voyant vert pas de son
K7276 XQ60b Manual 23/12/08 14:31 Page 11
12
13
XQ60b manual-ex_noGK.indd 13 2009-1-6 14:40:53

Sie können Die Subwoofer-Einstellungen auch direkt am Subwoofer
vornehmen, ohne über die Menüs des Receivers / Verstärkers zu gehen.
A. Frequenzeinstellung
Die Frequenzeinstellung ändert die obere Trennfrequenz des Subwoofers,
Der Einstell-bereich reicht von 40Hz bis 140Hz; die Flankensteilheit beträgt
24dB Oktave. Der Regler sollte so eingestellt sein, daß Frontlautsprecher
und Subwoofer optimal zu-sammenarbeiten; d.h. es sind weder
“Frequenzlücken” vorhanden, noch findet eine Überbtonung bestimmter
Grenzfrequenzen statt. Durch Rechtsdrehen (im Uhrzeigersinn) wird die
Trennfrequenz erhöht. Durch Linksdrehen (gegen den Uhrzeigersinn) wird
sie gesenkt.
1. Ideale Trennfrequenz : flacher Frequenzgang
2. Übergangspunkt zu niedrig: Verursacht eine “Frequenzlücke” im
kombinierten Frequenzgang
3. Übergangspunkt zu hoch: verursacht eine Überbetonung
bestimmter Frequenzen im kombinierten Frequenzgang
B. Phasensteurung
Der Phasensteurung wird normalerweise auf 0° eingestellt. Allerdings
kann manchmal in der Position 180° ein höherer Ausgangspegel
erzielt werden, insbesondere, wenn der Subwoofer weit von den
Satellitenlautsprechern entfernt ist.
C. Pegeleinstellung
Mit der Pegeleinstellung kann der Ausgangspegel des Subwoofers auf den
Ausgangspegel der Satelliten- oder AV-Lautsprecher eingstellt werden.
Durch Rechtsdrehen (im Uhrzeigersinn) wird der Ausgangspegel erhöht.
Durch Linksdrehen (gegen den Uhrzeigersinn) wird er gesenkt.
SYMPTOM
Betriebsanzeige leuchtet nicht auf.
Betriebsanzeige leuchtet immer noch nicht auf
Betriebsanzeige leuchtet, jedoch kein
Ausgangssignal aus dem Subwoofer.
Immer noch kein Ausgangssignal aus dem Subwoofer.
Rotes Licht kein Klang.
Grünes Licht kein Klang.
FEHLERBESEITIGUNG
Vergewissern Sie sich, daß der Subwoofer an das Stromnetz angeschlossen ist.
Überprüfen Sie (z.B. mit irgendeinem anderen Gerät), ob an der betreffenden Netzsteckdose
Spannung anliegt.
Bitte wenden Sie sich an lhren Fachhändler.
Vergewissern Sie sich, daß alle Geräte eingeschaltet sind.
Pegeleinstellung überprüfen und ggf, korrigieren.
Überprüfen Sie, ob der entsprechende Hoch-oder Niederpegel-Ausgang am
Verstärker aktiviert ist und so eingestellt ist, daß ein ausreichender Pegal an den
Subwoofer übertragen wird.
Vergewissern Sie sich, daß alle Anschlußkabel bzw. - stecker fest und
ordnungsgemäß sitzen. Tauschen sie ggf, die Anschlußkabel aus.
Bitte wenden Sie sich an lhren Fachhändler.
Überprüfen Sie die Einstellung für die Lautsärke.
Da der vom Subwoofer produzierte Tiefbaß ungerichtet ist, kann das
Gerät praktisch fast an jedem Ort im Raum aufgestellt werden. Eine
Aufstellung in direkter Nähe des Zu-hörers ist allerdings nicht
empfehlenswert. Nach Möglichkeit sollten Sie den Subwoofer
probeweise an verschiedenen Orten aufstellen um die beste Position
zu ermitteln. Ein Netzkabel, das den gültigen landesspezifischen
Sicherheitsbestimmungen entspricht, ist im Lieferumfang enhalten.
Aufstellung/Netzkabelanschluß
Verbindung zum Lautsprecherausgang des Verstärkers oder
Vorverstärkerausgang oder Subwoofer-Ausgang.
Wählen Sie die Übergangsfrequenz 80Hz für große oder höher für
kleinere Lautsprecher. Stellen Sie zuerst den Lautstärkeregler auf die
Sieben-Uhr-Stellung und erhöhen Sie die Lautstärke des Subwoofers
weiter bis sie zu der Lautstärke der Hauptlautsprecher passt.
Vom Stereoverstärker/Receiver
Direkte Einstellung
Fehlersuche
DEUTSCHE ANLEITUNG
Modell XQ60b Subwoofer Rückseite
1. LFE/Line in Smart Connect-Eingang
2. Phasensteurung
3. Bassanhebung
4. Pegeleinstellung
5. Betriebsanzeige Betrieb Gerätausgeschaltet
6. Frequenzeinstellung
7. Netzschalter (EIN/AUS) (Urlaubsschalter)
8. Netzstromeingang (230V Euro / 230V UK / 115V US)
9. Hi-Level-Lautsprecheranschlussfeld
Bedienungselemente und Anschlüsse
Rot / Grün
D
Vom Subwoofer-Ausgang des Verstärkers/Receivers.
Alle Eingänge können gleichzeitig benutzt werden.
Stellen Sie die Übergangsfrequenz des Subwoofers im entsprechenden Menü des
Receivers / Verstärkers auf 80 Hz ein. (Hinweise hierfür finden Sie in der
Bedienungsanleitung des Receivers / Verstärkers).
Stellen Sie die Übergangsfrequenz am XQ60b auf 140 Hz ein.
Stellen Sie die Lautstärke des XQ60b auf Level 7.
Stellen Sie sicher, dass die Receiver- / Verstärker-Einstellungen für die
Satellitenlautsprecher den Empfehlungen der Bedienungsanleitung entsprechen.
(Hinweise hierfür finden Sie in der Bedienungsanleitung der Satellitenlautsprecher).
Stellen Sie die Lautstärke des Subwoofers am Receiver / Verstärker auf den von
ihnen gewünschten Wert ein. (Hinweise hierfür finden Sie in der
Bedienungsanleitung des Verstärkers).
Anschluss an einen AV-Receiver / -Verstärker
Bassanhebung (EQ)
Die Einstellung der Bassanhebung erlaubt die Anpassung des
Subwoofers an die Bedingungen des Raums und Ihrem personlichen
Geschmack. Die Anhebung ist schaltbar in folgenden Stufen: 0 dB, +6
dB und +12 dB bei etwa 40 Hz.
K7276 XQ60b Manual 23/12/08 14:31 Page 12
I
Collegare all’uscita subwoofer LFE dell’amplificatore.
Tutti gli ingressi sono attivi.
Impostare la frequenza del subwoofer sull’amplificatore a 80 Hz
(seguire le istruzioni dell’amplificatore).
Posizionare il crossover del XQ60b a 140Hz
Posizionare il volume del XQ60b al settimo punto
Assicurarsi che gli altri diffusori acustici siano configurati
correttamente (seguire le istruzioni dell’amplificatore).
Regolare il volume del subwoofer sull’amplificatore al livello
desiderato (seguire le istruzioni dell’amplificatore).
Connessioni all’amplificatore A/V
Collegare alle uscite dei diffusori, o uscita pre out, o uscita subwoofer out.
Posizionare il taglio del crossover a 80Hz con diffusori grandi o ad un
valore maggiore con diffusori piccoli. Iniziare con il volume posizionato
su “7”. Regolare il volume per ottenere un buon accoppiamento con i
diffusori principali.
Connessione al preamplificatore stereo /
ricevitore stereo
La taratura dell’XQ60b può essere effettuata manualmente invece di
utilizzare l’amplificatore.
A. Regolazione di frequenza
Il regolatore di frequenza modifica la frequenza di taglio superiore del
subwoofer, con un intervallo effettivo di 40-140 Hz a 24dB per ottava.
Regolare la frequenza in modo da ottenere la migliore integrazione tra
i diffusori principali/secondari e il subwoofer.
La rotazione in senso orario aumenta la frequenza di taglio, mentre
quella in senso orario la riduce.
1. Crossover ideale - risposta piatta.
2. Frequenza di taglio troppo bassa: provoca una flessione nella
risposta combinata.
3. Frequenza di taglio tropo alta: provoca un innalzamento nella
risposta combinata.
B. Interruttore di fase
In genere l’interruttore di fase viene impostato a 0° ma a volte si ottiene
un maggior livello d’uscita nella posizione a 180°, particolarmente se il
subwoofer è molto distante dagli altoparlanti secondari.
C. Regolazione di livello
Il regolatore di livello consente di regolare il livello d’uscita del
subwoofer in rapporto al livello d’uscita dai diffusori AV o secondari.
Ruotare in senso orario per aumentare il livello d’uscita o in senso
antiorario per ridurlo.
ANOMALIA
La spia di alimentazione non si accende.
Se la spia di alimentazione resta ancora spenta
Se la spia di alimentazione è accesa ma non
arriva alcun suono dal subwoofer
Se persiste l’assenza del suono.
Spia rossa non c’é suono
Spia verde non c’é suono
AZIONE
Verificare che il subwoofer sia collegato all’alimentazione di corrente e che gli eventuali
interruttori presenti siano su ON.
Controllare gli eventuali fusibili (spina compresa) o sezionatori sull’alimentazione che
possano influenzare l’alimentazione del subwoofer.
Per ulteriori informazioni rivolgersi al rivenditore.
Verificare che l’apparecchiatura sia accesa.
Controllare il regolatore di livello e regolarlo di conseguenza.
Verificare che le uscite della sorgente (pre o finale) siano correttamente impostate, in modo
da garantire un adeguato livello al subwoofer.
Verificare che tutti i collegamenti tra il subwoofer e la sorgente siano stati
realizzati in modo appropriato e modificarli se necessario.
Per ulteriori informazioni rivolgersi al rivenditore.
Controllare i livelli
Il subwoofer, poiché produce un suono a bassa frequenza non-
direzionale, può essere posizionato in qualunque punto dell’ambiente,
purché non troppo vicino all’ascoltatore. Tuttavia, per ottenere un
suono quanto più pulito possibile si consiglia di provare il subwoofer
in diverse posizioni.Viene fornito un cavo di alimentazione compatibile
con le normative di messa a terra nazionali ed in conformità ai
requisiti di sicurezza locali.
Comandi e prese
Posizionamento/collegamento del cavo di alimentazione
Controlli manuali
Individuazione delle anomalie
ISTRUZIONI IN ITALIANO
Modello XQ60b Subwoofer Pannello posteriore
1. Ingresso LFE/Line in
2. Interruttore di fase
3. Bass Boost
4. Regolazione di livello
5. Indicatore luminoso Acceso Spento
di alimentazione
6. Regolazione di frequenza
7. Interruttore ON/OFF (Interruttore Vacanze)
8. Alimentazione a c.a. (230V Euro / 230V UK / 115V US)
9. Ingresso Alto Livello (diffusori)
Rosso / Verde
Bass Boost (EQ)
Mediante il selettore "bass boost" è possibile apportare piccole enfasi
nella risposta in frequenza del sub-woofer, per compensare differenti
situazioni ambientali o per preferenze personali. Le variazioni possibili
sono +6 e +12 dB a circa 40 Hz.
K7276 XQ60b Manual 23/12/08 14:31 Page 13
14
15
XQ60b manual-ex_noGK.indd 14 2009-1-6 14:40:53

Sie können Die Subwoofer-Einstellungen auch direkt am Subwoofer
vornehmen, ohne über die Menüs des Receivers / Verstärkers zu gehen.
A. Frequenzeinstellung
Die Frequenzeinstellung ändert die obere Trennfrequenz des Subwoofers,
Der Einstell-bereich reicht von 40Hz bis 140Hz; die Flankensteilheit beträgt
24dB Oktave. Der Regler sollte so eingestellt sein, daß Frontlautsprecher
und Subwoofer optimal zu-sammenarbeiten; d.h. es sind weder
“Frequenzlücken” vorhanden, noch findet eine Überbtonung bestimmter
Grenzfrequenzen statt. Durch Rechtsdrehen (im Uhrzeigersinn) wird die
Trennfrequenz erhöht. Durch Linksdrehen (gegen den Uhrzeigersinn) wird
sie gesenkt.
1. Ideale Trennfrequenz : flacher Frequenzgang
2. Übergangspunkt zu niedrig: Verursacht eine “Frequenzlücke” im
kombinierten Frequenzgang
3. Übergangspunkt zu hoch: verursacht eine Überbetonung
bestimmter Frequenzen im kombinierten Frequenzgang
B. Phasensteurung
Der Phasensteurung wird normalerweise auf 0° eingestellt. Allerdings
kann manchmal in der Position 180° ein höherer Ausgangspegel
erzielt werden, insbesondere, wenn der Subwoofer weit von den
Satellitenlautsprechern entfernt ist.
C. Pegeleinstellung
Mit der Pegeleinstellung kann der Ausgangspegel des Subwoofers auf den
Ausgangspegel der Satelliten- oder AV-Lautsprecher eingstellt werden.
Durch Rechtsdrehen (im Uhrzeigersinn) wird der Ausgangspegel erhöht.
Durch Linksdrehen (gegen den Uhrzeigersinn) wird er gesenkt.
SYMPTOM
Betriebsanzeige leuchtet nicht auf.
Betriebsanzeige leuchtet immer noch nicht auf
Betriebsanzeige leuchtet, jedoch kein
Ausgangssignal aus dem Subwoofer.
Immer noch kein Ausgangssignal aus dem Subwoofer.
Rotes Licht kein Klang.
Grünes Licht kein Klang.
FEHLERBESEITIGUNG
Vergewissern Sie sich, daß der Subwoofer an das Stromnetz angeschlossen ist.
Überprüfen Sie (z.B. mit irgendeinem anderen Gerät), ob an der betreffenden Netzsteckdose
Spannung anliegt.
Bitte wenden Sie sich an lhren Fachhändler.
Vergewissern Sie sich, daß alle Geräte eingeschaltet sind.
Pegeleinstellung überprüfen und ggf, korrigieren.
Überprüfen Sie, ob der entsprechende Hoch-oder Niederpegel-Ausgang am
Verstärker aktiviert ist und so eingestellt ist, daß ein ausreichender Pegal an den
Subwoofer übertragen wird.
Vergewissern Sie sich, daß alle Anschlußkabel bzw. - stecker fest und
ordnungsgemäß sitzen. Tauschen sie ggf, die Anschlußkabel aus.
Bitte wenden Sie sich an lhren Fachhändler.
Überprüfen Sie die Einstellung für die Lautsärke.
Da der vom Subwoofer produzierte Tiefbaß ungerichtet ist, kann das
Gerät praktisch fast an jedem Ort im Raum aufgestellt werden. Eine
Aufstellung in direkter Nähe des Zu-hörers ist allerdings nicht
empfehlenswert. Nach Möglichkeit sollten Sie den Subwoofer
probeweise an verschiedenen Orten aufstellen um die beste Position
zu ermitteln. Ein Netzkabel, das den gültigen landesspezifischen
Sicherheitsbestimmungen entspricht, ist im Lieferumfang enhalten.
Aufstellung/Netzkabelanschluß
Verbindung zum Lautsprecherausgang des Verstärkers oder
Vorverstärkerausgang oder Subwoofer-Ausgang.
Wählen Sie die Übergangsfrequenz 80Hz für große oder höher für
kleinere Lautsprecher. Stellen Sie zuerst den Lautstärkeregler auf die
Sieben-Uhr-Stellung und erhöhen Sie die Lautstärke des Subwoofers
weiter bis sie zu der Lautstärke der Hauptlautsprecher passt.
Vom Stereoverstärker/Receiver
Direkte Einstellung
Fehlersuche
DEUTSCHE ANLEITUNG
Modell XQ60b Subwoofer Rückseite
1. LFE/Line in Smart Connect-Eingang
2. Phasensteurung
3. Bassanhebung
4. Pegeleinstellung
5. Betriebsanzeige Betrieb Gerätausgeschaltet
6. Frequenzeinstellung
7. Netzschalter (EIN/AUS) (Urlaubsschalter)
8. Netzstromeingang (230V Euro / 230V UK / 115V US)
9. Hi-Level-Lautsprecheranschlussfeld
Bedienungselemente und Anschlüsse
Rot / Grün
D
Vom Subwoofer-Ausgang des Verstärkers/Receivers.
Alle Eingänge können gleichzeitig benutzt werden.
Stellen Sie die Übergangsfrequenz des Subwoofers im entsprechenden Menü des
Receivers / Verstärkers auf 80 Hz ein. (Hinweise hierfür finden Sie in der
Bedienungsanleitung des Receivers / Verstärkers).
Stellen Sie die Übergangsfrequenz am XQ60b auf 140 Hz ein.
Stellen Sie die Lautstärke des XQ60b auf Level 7.
Stellen Sie sicher, dass die Receiver- / Verstärker-Einstellungen für die
Satellitenlautsprecher den Empfehlungen der Bedienungsanleitung entsprechen.
(Hinweise hierfür finden Sie in der Bedienungsanleitung der Satellitenlautsprecher).
Stellen Sie die Lautstärke des Subwoofers am Receiver / Verstärker auf den von
ihnen gewünschten Wert ein. (Hinweise hierfür finden Sie in der
Bedienungsanleitung des Verstärkers).
Anschluss an einen AV-Receiver / -Verstärker
Bassanhebung (EQ)
Die Einstellung der Bassanhebung erlaubt die Anpassung des
Subwoofers an die Bedingungen des Raums und Ihrem personlichen
Geschmack. Die Anhebung ist schaltbar in folgenden Stufen: 0 dB, +6
dB und +12 dB bei etwa 40 Hz.
K7276 XQ60b Manual 23/12/08 14:31 Page 12
I
Collegare all’uscita subwoofer LFE dell’amplificatore.
Tutti gli ingressi sono attivi.
Impostare la frequenza del subwoofer sull’amplificatore a 80 Hz
(seguire le istruzioni dell’amplificatore).
Posizionare il crossover del XQ60b a 140Hz
Posizionare il volume del XQ60b al settimo punto
Assicurarsi che gli altri diffusori acustici siano configurati
correttamente (seguire le istruzioni dell’amplificatore).
Regolare il volume del subwoofer sull’amplificatore al livello
desiderato (seguire le istruzioni dell’amplificatore).
Connessioni all’amplificatore A/V
Collegare alle uscite dei diffusori, o uscita pre out, o uscita subwoofer out.
Posizionare il taglio del crossover a 80Hz con diffusori grandi o ad un
valore maggiore con diffusori piccoli. Iniziare con il volume posizionato
su “7”. Regolare il volume per ottenere un buon accoppiamento con i
diffusori principali.
Connessione al preamplificatore stereo /
ricevitore stereo
La taratura dell’XQ60b può essere effettuata manualmente invece di
utilizzare l’amplificatore.
A. Regolazione di frequenza
Il regolatore di frequenza modifica la frequenza di taglio superiore del
subwoofer, con un intervallo effettivo di 40-140 Hz a 24dB per ottava.
Regolare la frequenza in modo da ottenere la migliore integrazione tra
i diffusori principali/secondari e il subwoofer.
La rotazione in senso orario aumenta la frequenza di taglio, mentre
quella in senso orario la riduce.
1. Crossover ideale - risposta piatta.
2. Frequenza di taglio troppo bassa: provoca una flessione nella
risposta combinata.
3. Frequenza di taglio tropo alta: provoca un innalzamento nella
risposta combinata.
B. Interruttore di fase
In genere l’interruttore di fase viene impostato a 0° ma a volte si ottiene
un maggior livello d’uscita nella posizione a 180°, particolarmente se il
subwoofer è molto distante dagli altoparlanti secondari.
C. Regolazione di livello
Il regolatore di livello consente di regolare il livello d’uscita del
subwoofer in rapporto al livello d’uscita dai diffusori AV o secondari.
Ruotare in senso orario per aumentare il livello d’uscita o in senso
antiorario per ridurlo.
ANOMALIA
La spia di alimentazione non si accende.
Se la spia di alimentazione resta ancora spenta
Se la spia di alimentazione è accesa ma non
arriva alcun suono dal subwoofer
Se persiste l’assenza del suono.
Spia rossa non c’é suono
Spia verde non c’é suono
AZIONE
Verificare che il subwoofer sia collegato all’alimentazione di corrente e che gli eventuali
interruttori presenti siano su ON.
Controllare gli eventuali fusibili (spina compresa) o sezionatori sull’alimentazione che
possano influenzare l’alimentazione del subwoofer.
Per ulteriori informazioni rivolgersi al rivenditore.
Verificare che l’apparecchiatura sia accesa.
Controllare il regolatore di livello e regolarlo di conseguenza.
Verificare che le uscite della sorgente (pre o finale) siano correttamente impostate, in modo
da garantire un adeguato livello al subwoofer.
Verificare che tutti i collegamenti tra il subwoofer e la sorgente siano stati
realizzati in modo appropriato e modificarli se necessario.
Per ulteriori informazioni rivolgersi al rivenditore.
Controllare i livelli
Il subwoofer, poiché produce un suono a bassa frequenza non-
direzionale, può essere posizionato in qualunque punto dell’ambiente,
purché non troppo vicino all’ascoltatore. Tuttavia, per ottenere un
suono quanto più pulito possibile si consiglia di provare il subwoofer
in diverse posizioni.Viene fornito un cavo di alimentazione compatibile
con le normative di messa a terra nazionali ed in conformità ai
requisiti di sicurezza locali.
Comandi e prese
Posizionamento/collegamento del cavo di alimentazione
Controlli manuali
Individuazione delle anomalie
ISTRUZIONI IN ITALIANO
Modello XQ60b Subwoofer Pannello posteriore
1. Ingresso LFE/Line in
2. Interruttore di fase
3. Bass Boost
4. Regolazione di livello
5. Indicatore luminoso Acceso Spento
di alimentazione
6. Regolazione di frequenza
7. Interruttore ON/OFF (Interruttore Vacanze)
8. Alimentazione a c.a. (230V Euro / 230V UK / 115V US)
9. Ingresso Alto Livello (diffusori)
Rosso / Verde
Bass Boost (EQ)
Mediante il selettore "bass boost" è possibile apportare piccole enfasi
nella risposta in frequenza del sub-woofer, per compensare differenti
situazioni ambientali o per preferenze personali. Le variazioni possibili
sono +6 e +12 dB a circa 40 Hz.
K7276 XQ60b Manual 23/12/08 14:31 Page 13
14
15
XQ60b manual-ex_noGK.indd 15 2009-1-6 14:40:54

ES
Es posible ajustar manualmente la configuración del XQ60b en lugar de
usar el amplificador/receptor.
A. Control de frecuencia
El control de frecuencia cambia el umbral superior de la frecuencia del
altavoz de graves. Su intervalo efectivo va desde 40 a 140 Hz a un
régimen de 24 dB por octava. El control de frecuencia debe ajustarse
para obtener la integración más suave entre los altavoces
principal/satélite y los altavoces de graves.
El giro en el sentido de las agujas del reloj incrementa la frecuencia de
corte y en sentido contrario la decrementa.
1. Frecuencia de cambio ideal. Respuesta plana.
2. El punto de frecuencia de cambio fijado demasiado bajo causa una
depresión en la respuesta combinada.
3. El punto de frecuencia de cambio fijado demasiado alto causa una
cresta en la respuesta combinada.
B. Controllo di fase
El Controllo di fase debe estar normalmente en 0˚, pero algunas veces
se puede obtener un mayor nivel de salida en la posición de 180˚,
especialmente cuando el altavoz de graves esta alejado de los
altavoces satélite.
C. Control de nivel
El control de nivel ajusta el nivel de salida del altavoz de graves en
relación con los altavoces AV o satélites. El giro hacia la derecha
incrementa el nivel de salida y hacia la izquierda lo disminuye.
SINTOMA
La luz indicadora de red no se ilumina.
Si la luz indicadora de red sigue sin iluminarse.
Si la luz indicadora de red está iluminada pero el
altavoz de graves no suena.
Si sigue sin emitir sonido.
Luz roja no suena.
Luz verde no suena.
REMEDIO
Compruebe que el altavoz de graves está conectado a la red y que los interruptores
están activados.
Compruebe los fusibles o disyuntores de la red que puedan afectar a la falta de
funcionamiento del altavoz.
Póngase en contacto con el proveedor del equipo para obtener asesoramiento.
Asegúrese de que todo el equipo está conectado.
Compruebe y ajuste el control de nivel.
Compruebe que las clavijas de salida del equipo principal están correctamente
conectadas y ajústelas para proporcionar potencia suficiente para que funcione el altavoz
de graves.
Compruebe que todas las conexiones entre el altavoz de graves y el equipo
principal (fuente) están correctas y ajústelas según sea necesario.
Póngase en contacto con el proveedor del equipo para obtener asesoramiento.
Comprobar niveles.
Puesto que el sonido de baja frecuencia producido por el altavoz de
bajos no es direccional, puede ser colocado en cualquier lugar de la
habitación, aunque no debe ser colocado demasiado cerca del oyente.
Si es posible, pruebe el altavoz en diferentes ubicaciones para
encontrar el lugar en el que no se produce reverberación del sonido.
Se suministra un cable de conexión a la red de acuerdo con los
requisitos del país y las regulaciones relativas a la toma de tierra.
Controles y conexiones
Posicionamiento/Conexión a la red
Controles manuales
INSTRUCCIONES EN ESPAÑOL
Localizacion de averias
Conectar a el amplificador LFE salida subwoofer
Todas las entradas funcionan simultameamente
Seleccione la frecuencia del subwoofer en el amplificador / receptor
80Hz (referido en el manual amplificador/receptor).
Fijar el crossover en el XQ60b a 140Hz
Fijar el volumen en el XQ60b a el 7º punto.
Asegurase que los satélites están fijados según la configuración adecuada al
amplificador/receptor ( especificados en el manual del amplificador/receptor).
Ajustar el volumen del subwoofer en el amplificador/receptor AV al nivel
que desee ( Consultar el manual amplificador/receptor).
Conexión a AV amplificador / receptor
XQ60b Subwoofer Rear Panel
1. LFE/ conector entrada de linea
2. Controllo di fase
3. Realce de graves
4. Control de nivel
5. Luz indicadora de Encendido Power OFF
conexión a red (desconectado)
6. Control de frecuencia
7. Interruptor ON/OFF (botón Vacaciones)
8. Entrada de corriente (CA) (230V Euro / 230V UK / 115V US)
9. Alto nivel (altavoz) entrada de conexiones
Rojo / Verde
Realce de graves (EQ)
El control de realce de graves permite ajustar la respuesta del
subwoofer para compensar las condiciones de la sala y las
preferencias del usuario. El realce se puede poner a 0, +6 y +12 dB en
torno a 40Hz.
Conectar el altavoz del amplificador o preamp o salida de subwoofer.
Configurar el crossover del amplificador a 80Hz para altavoces
grandes o mas alto para altavoces pequeños. Empezar con el volumen
fijado a el 7 punto. Ajustar el volumen para fijar la salida a los
altavoces principales.
Conectar a preamp/ receptor stereo
K7276 XQ60b Manual 23/12/08 14:31 Page 14
P
Ligue à saída LFE do Amplificador.
Todas as entradas funcionam simultâneamente.
Ligação a Pre- Amplificador Stereo / Receiver.
Configurar a frequência do subwoofer no amplificador/receiver para
80Hz (consultar o manual do amplificador/receiver).
Ajuste o crossover no XQ60b para 140Hz
Ajuste o volume no XQ60b no ponto 7
Certifique-se de que os satélites estão definidos para a configuração
adequada no menu do receiver/amplificador (consulte o manual da coluna).
Ajustar o volume do subwoofer no receiver/amplificador AV para o
nível pretendido (consulte o manual do receiver/amplificador).
Ligação ao Amplificador/Receiver AV
É possível ajustar a configuração do XQ60b manualmente em vez de
usar o amplificador/receiver.
A. Controlo de frequência
O controlo de frequência altera a frequência superior de corte do
subwoofer. O seu intervalo efectivo é de 40 Hz a 140 Hz numa
proporção de 24dB por oitava. O controlo de frequência deve ser
ajustado para se obter a mais suave integração possível entre a coluna
principal/ satélite e o subwoofer.
A rotação no sentido dos ponteiros do relógio aumentará a frequência
de corte e a rotação no sentido inverso diminuirá a frequência corte.
1. Confluência Ideal - Resultado monótono.
2. Ponto de confluência fixado demasiado baixo - Provoca descidas nas
respostas combinadas.
3. Ponto de confluência fixado demasiado alto - Provoca elevações nas
respostas combinadas.
B. Controlo de fase
O controlo de fase será fixado normalmente a 0° mas algumas vezes
pode-se conseguir um maior nível de saída numa posição a 180°,
nomeadamente quando o subwoofer se encontra longe das colunas
satélites.
C. Controlo de nível
O controlo de nível ajusta o nível de saída do subwoofer em relação ao
nível de saída da coluna satélite ou AV. A rotação no sentido dos
ponteiros do relógio permite aumentar o nível de saída e a rotação no
sentido inverso permite diminuir o nível de saída.
FALLHAS
O indicador luminoso de tensão não se acende.
Se o indicador luminoso de tensão continua sem
se acender.
Se o indicador luminoso de tensão está aceso
mas não há som do subwoofer.
Se ainda não há som.
Luz vermelha sem som
Luz verde sem som
SOLUÇÕES
Verifique se o subwoofer está ligado à corrente e se todos os interruptores estão ligados.
Verifique todos os interruptores (incluindo a tomada) ou corta-circuitos da tomada que
possam afectar a chegada de corrente ao subwoofer.
Contacte o seu fornecedor para mais conselhos.
Verifique se todo o equipamento está ligado.
Verifique e ajuste o controlo de nível.
Verifique se as fichas de saída do equipamento principal estão correctamente
ligadas e ajustadas para fornecerem um nível suficiente de energia ao subwoofer.
Verifique se todas as conexões entre o subwoofer e o equipamento principal
estão correctas e ajustadas convenientemente.
Contacte o seu fornecedor para mais conselhos.
Verificar os níveis
Como o som sub-baixo (baixa frequência) produzido pelo subwoofer
não é direccional, pode ser posicionado em quase todos os locais da
sala, embora não deva ser colocado muito próximo do ouvinte.
Se possível, tente colocar o subwoofer em diferentes posições até
encontrar o melhor local para obter um som sem ressonância.
É fornecido um cabo de ligação à corrente compatível com os padrões
eléctricos nacionais e de acordo com as normas locais de segurança.
Posicionamento/Ligações principais
Seleccione o crossover em 80Hz para colunas de grande gama de
frequência ou acima de 80 Hz para colunas de pequenas dimensões
(consulte o Manual de instruções das colunas, veja qual a frequência
mais baixa da sua gama de frequências e seleccione o Crossover para
esse valor). Comece com o volume no 7º ponto. Ajuste o volume até
ficar equilibrado com os seus altifalantes frontais.
Ligação à saída do Amplificador ou ao
Pre-Amplificador ou à saída do Subwoofer
Comandos Manuais
INSTRUÇÕES EM PORTUGUÊS
Detector de falhas
Painel traseiro do Modelo XQ60b Subwoofer
1. LFE/Line in - Entrada Inteligente
2. Controlo de fase
3. Reforço de baixos
4. Controlo de nível
5. Luzes indicadoras Power On Desligado
de tensão
6. Controlo de frequência
7. Interruptor “ON/OFF” (Interruptor Férias)
8. Entrada de corrente AC (230V Euro / 230V UK / 115V US)
9. Ligador para entrada de alto nível (speaker)
Comandos e fichas
Vermelho / Verde
Reforço de Baixos (EQ)
O controlo de reforço de baixos destina-se a ajustar a resposta do
subwoofer para compensar as condições de audição da sala e as
preferências do utilizador. O reforço é comutável entre 0, +6 e +12dB
na faixa dos 40Hz.
K7276 XQ60b Manual 23/12/08 14:31 Page 15
16
17
XQ60b manual-ex_noGK.indd 16 2009-1-6 14:40:54

ES
Es posible ajustar manualmente la configuración del XQ60b en lugar de
usar el amplificador/receptor.
A. Control de frecuencia
El control de frecuencia cambia el umbral superior de la frecuencia del
altavoz de graves. Su intervalo efectivo va desde 40 a 140 Hz a un
régimen de 24 dB por octava. El control de frecuencia debe ajustarse
para obtener la integración más suave entre los altavoces
principal/satélite y los altavoces de graves.
El giro en el sentido de las agujas del reloj incrementa la frecuencia de
corte y en sentido contrario la decrementa.
1. Frecuencia de cambio ideal. Respuesta plana.
2. El punto de frecuencia de cambio fijado demasiado bajo causa una
depresión en la respuesta combinada.
3. El punto de frecuencia de cambio fijado demasiado alto causa una
cresta en la respuesta combinada.
B. Controllo di fase
El Controllo di fase debe estar normalmente en 0˚, pero algunas veces
se puede obtener un mayor nivel de salida en la posición de 180˚,
especialmente cuando el altavoz de graves esta alejado de los
altavoces satélite.
C. Control de nivel
El control de nivel ajusta el nivel de salida del altavoz de graves en
relación con los altavoces AV o satélites. El giro hacia la derecha
incrementa el nivel de salida y hacia la izquierda lo disminuye.
SINTOMA
La luz indicadora de red no se ilumina.
Si la luz indicadora de red sigue sin iluminarse.
Si la luz indicadora de red está iluminada pero el
altavoz de graves no suena.
Si sigue sin emitir sonido.
Luz roja no suena.
Luz verde no suena.
REMEDIO
Compruebe que el altavoz de graves está conectado a la red y que los interruptores
están activados.
Compruebe los fusibles o disyuntores de la red que puedan afectar a la falta de
funcionamiento del altavoz.
Póngase en contacto con el proveedor del equipo para obtener asesoramiento.
Asegúrese de que todo el equipo está conectado.
Compruebe y ajuste el control de nivel.
Compruebe que las clavijas de salida del equipo principal están correctamente
conectadas y ajústelas para proporcionar potencia suficiente para que funcione el altavoz
de graves.
Compruebe que todas las conexiones entre el altavoz de graves y el equipo
principal (fuente) están correctas y ajústelas según sea necesario.
Póngase en contacto con el proveedor del equipo para obtener asesoramiento.
Comprobar niveles.
Puesto que el sonido de baja frecuencia producido por el altavoz de
bajos no es direccional, puede ser colocado en cualquier lugar de la
habitación, aunque no debe ser colocado demasiado cerca del oyente.
Si es posible, pruebe el altavoz en diferentes ubicaciones para
encontrar el lugar en el que no se produce reverberación del sonido.
Se suministra un cable de conexión a la red de acuerdo con los
requisitos del país y las regulaciones relativas a la toma de tierra.
Controles y conexiones
Posicionamiento/Conexión a la red
Controles manuales
INSTRUCCIONES EN ESPAÑOL
Localizacion de averias
Conectar a el amplificador LFE salida subwoofer
Todas las entradas funcionan simultameamente
Seleccione la frecuencia del subwoofer en el amplificador / receptor
80Hz (referido en el manual amplificador/receptor).
Fijar el crossover en el XQ60b a 140Hz
Fijar el volumen en el XQ60b a el 7º punto.
Asegurase que los satélites están fijados según la configuración adecuada al
amplificador/receptor ( especificados en el manual del amplificador/receptor).
Ajustar el volumen del subwoofer en el amplificador/receptor AV al nivel
que desee ( Consultar el manual amplificador/receptor).
Conexión a AV amplificador / receptor
XQ60b Subwoofer Rear Panel
1. LFE/ conector entrada de linea
2. Controllo di fase
3. Realce de graves
4. Control de nivel
5. Luz indicadora de Encendido Power OFF
conexión a red (desconectado)
6. Control de frecuencia
7. Interruptor ON/OFF (botón Vacaciones)
8. Entrada de corriente (CA) (230V Euro / 230V UK / 115V US)
9. Alto nivel (altavoz) entrada de conexiones
Rojo / Verde
Realce de graves (EQ)
El control de realce de graves permite ajustar la respuesta del
subwoofer para compensar las condiciones de la sala y las
preferencias del usuario. El realce se puede poner a 0, +6 y +12 dB en
torno a 40Hz.
Conectar el altavoz del amplificador o preamp o salida de subwoofer.
Configurar el crossover del amplificador a 80Hz para altavoces
grandes o mas alto para altavoces pequeños. Empezar con el volumen
fijado a el 7 punto. Ajustar el volumen para fijar la salida a los
altavoces principales.
Conectar a preamp/ receptor stereo
K7276 XQ60b Manual 23/12/08 14:31 Page 14
P
Ligue à saída LFE do Amplificador.
Todas as entradas funcionam simultâneamente.
Ligação a Pre- Amplificador Stereo / Receiver.
Configurar a frequência do subwoofer no amplificador/receiver para
80Hz (consultar o manual do amplificador/receiver).
Ajuste o crossover no XQ60b para 140Hz
Ajuste o volume no XQ60b no ponto 7
Certifique-se de que os satélites estão definidos para a configuração
adequada no menu do receiver/amplificador (consulte o manual da coluna).
Ajustar o volume do subwoofer no receiver/amplificador AV para o
nível pretendido (consulte o manual do receiver/amplificador).
Ligação ao Amplificador/Receiver AV
É possível ajustar a configuração do XQ60b manualmente em vez de
usar o amplificador/receiver.
A. Controlo de frequência
O controlo de frequência altera a frequência superior de corte do
subwoofer. O seu intervalo efectivo é de 40 Hz a 140 Hz numa
proporção de 24dB por oitava. O controlo de frequência deve ser
ajustado para se obter a mais suave integração possível entre a coluna
principal/ satélite e o subwoofer.
A rotação no sentido dos ponteiros do relógio aumentará a frequência
de corte e a rotação no sentido inverso diminuirá a frequência corte.
1. Confluência Ideal - Resultado monótono.
2. Ponto de confluência fixado demasiado baixo - Provoca descidas nas
respostas combinadas.
3. Ponto de confluência fixado demasiado alto - Provoca elevações nas
respostas combinadas.
B. Controlo de fase
O controlo de fase será fixado normalmente a 0° mas algumas vezes
pode-se conseguir um maior nível de saída numa posição a 180°,
nomeadamente quando o subwoofer se encontra longe das colunas
satélites.
C. Controlo de nível
O controlo de nível ajusta o nível de saída do subwoofer em relação ao
nível de saída da coluna satélite ou AV. A rotação no sentido dos
ponteiros do relógio permite aumentar o nível de saída e a rotação no
sentido inverso permite diminuir o nível de saída.
FALLHAS
O indicador luminoso de tensão não se acende.
Se o indicador luminoso de tensão continua sem
se acender.
Se o indicador luminoso de tensão está aceso
mas não há som do subwoofer.
Se ainda não há som.
Luz vermelha sem som
Luz verde sem som
SOLUÇÕES
Verifique se o subwoofer está ligado à corrente e se todos os interruptores estão ligados.
Verifique todos os interruptores (incluindo a tomada) ou corta-circuitos da tomada que
possam afectar a chegada de corrente ao subwoofer.
Contacte o seu fornecedor para mais conselhos.
Verifique se todo o equipamento está ligado.
Verifique e ajuste o controlo de nível.
Verifique se as fichas de saída do equipamento principal estão correctamente
ligadas e ajustadas para fornecerem um nível suficiente de energia ao subwoofer.
Verifique se todas as conexões entre o subwoofer e o equipamento principal
estão correctas e ajustadas convenientemente.
Contacte o seu fornecedor para mais conselhos.
Verificar os níveis
Como o som sub-baixo (baixa frequência) produzido pelo subwoofer
não é direccional, pode ser posicionado em quase todos os locais da
sala, embora não deva ser colocado muito próximo do ouvinte.
Se possível, tente colocar o subwoofer em diferentes posições até
encontrar o melhor local para obter um som sem ressonância.
É fornecido um cabo de ligação à corrente compatível com os padrões
eléctricos nacionais e de acordo com as normas locais de segurança.
Posicionamento/Ligações principais
Seleccione o crossover em 80Hz para colunas de grande gama de
frequência ou acima de 80 Hz para colunas de pequenas dimensões
(consulte o Manual de instruções das colunas, veja qual a frequência
mais baixa da sua gama de frequências e seleccione o Crossover para
esse valor). Comece com o volume no 7º ponto. Ajuste o volume até
ficar equilibrado com os seus altifalantes frontais.
Ligação à saída do Amplificador ou ao
Pre-Amplificador ou à saída do Subwoofer
Comandos Manuais
INSTRUÇÕES EM PORTUGUÊS
Detector de falhas
Painel traseiro do Modelo XQ60b Subwoofer
1. LFE/Line in - Entrada Inteligente
2. Controlo de fase
3. Reforço de baixos
4. Controlo de nível
5. Luzes indicadoras Power On Desligado
de tensão
6. Controlo de frequência
7. Interruptor “ON/OFF” (Interruptor Férias)
8. Entrada de corrente AC (230V Euro / 230V UK / 115V US)
9. Ligador para entrada de alto nível (speaker)
Comandos e fichas
Vermelho / Verde
Reforço de Baixos (EQ)
O controlo de reforço de baixos destina-se a ajustar a resposta do
subwoofer para compensar as condições de audição da sala e as
preferências do utilizador. O reforço é comutável entre 0, +6 e +12dB
na faixa dos 40Hz.
K7276 XQ60b Manual 23/12/08 14:31 Page 15
16
17
XQ60b manual-ex_noGK.indd 17 2009-1-6 14:40:55

NL
In plaats van via de versterker is de XQ60b ook handmatig in te
stellen.
A. Instelling voor de overgangsfrequentie
Met deze Instelling kiest u tot welke frequentie de aktief blijft. Het
bereik van deze instelling loopt van 40Hz tot 140Hz, met een
filtersteilheid van 24 dB per octaaf. Stel deze regelaar zodanig in, dat
u de soepelste overgang tussen hoofd- en satellietluidsprekers en de
subwoofer bereikt.
Als u de regelaar met de klok mee draait (de overgangsfrequentie
hoger legt), verbreedt u het werkingsgebied van de 20B. Tegen de
klok in gaand versmalt u dit.
1. Ideale overgang - vlakke responscurve
2. Overgangspunt te laag - veroorzaakt een kuil in de
totale frequentiecurve
3. Overgangspunt te hoog - veroorzaakt een berg in de
totale frequentiecurve
B. Fase regelaar
De fases regelaar staat normaal gezien op 0°. Soms kunt u echter een
hoger uitgangsniveau bereiken door de regelaar op 180° te zetten,
vooral als de subwoofer ver weg staat van de satellietluidsprekers.
C. Niveauregeling
Met de niveauregeling regelt u het volume van de subwoofer in
verhouding tot het volume van de satellietluidsprekers of de
AV-luidsprekers. Draai met de klok mee om het volume te verhogen.
Draai in de andere richting om het volume te verlagen.
STORING
Het aan/uit indicatielampje wil niet branden.
Als het aan/uit indicatielampje nog steeds niet oplicht.
Het aan/uit indicatielampje licht op, maar de
subwoofer geeft geen geluid.
Ik hoor nog steeds geen geluid.
Rood licht geen geluid
Groen licht geen geluid
VERHELPEN VAN DE STORING
Controleer of het netsnoer van de subwoofer aangesloten is op een stopcontact en de
aan/uit-schakelaar ingeschakeld is.
Controleer de smeltzekeringen of stroomonderbrekers van het stroomcircuit waarop de
subwoofer is aangesloten.
Raadpleeg uw dealer voor meer informatie.
Vergewis u ervan dat alle toestellen ingeschakeld zijn.
Controleer de volumeregeling en stel deze in.
Ga na of de uitgangspluggen van de geluidsbron het juiste signaal voeren, op het
juiste niveau stann en voldoende vermogen leveren om de subwoofer aan te drijven.
Controleer alle aansluitingen tussen subwoofer en de geluidsbron en voer indien
nodig correcties uit.
Neem contact op met uw handelaar of de importeur.
Controleer de niveau’s
Omdat het oor de herkomst van de lage frequenties van het
subbas-geluid niet kan waarnemen, kunt u de subwoofer plaatsen
waar het u uitkomt. Plaats het toestel echter niet te dicht bij de
luisteraar. Probeer verschillende plaatsen in de woonkamer en kies de
optimale plaats voor een zuiver laagweergave. Het bijgeleverde
netsnoer beschikt over de juiste aardingsaansluiting en voldoet aan de
plaatselijke veiligheidsnormen.
Regelaars en aansluitingen
Plaats en aansluiting van het netsnoer
Handmatige instelling
NEDERLANDSE HANDLEIDING
Opsporen van storingen
XQ60b Subwoofer achterpaneel
1. Smart Connect LF ingang op lijnniveau
2. Fases regelaar
3. Bass Boost
4. Niveauregeling
5. Aan/uit indicatielampje Netschaklaar Toestel UIT
6. Instelling voor de overgangs-frequentie Niveauregeling
7. Netschakelaar (Vakantiestand)
8. Aansluiting voor netkabel (230V Euro / 230V UK / 115V US)
9. Ingangsblok op luidspreker-niveau
Rood / Groen
Verbind met LF subwoofer uitgang op de versterker.
Alle ingangen werken gelijktijdig.
Zet de subwoofer frequentie van de versterker op 80Hz
(zie gebruiksaanwijzing van uw versterker).
Stel het scheidingsfilter op de XQ60b in op 140 Hz.
Stel het volumeregeling op de XQ60b in op het 7e streepje.
Zorg dat de instellingen voor de overige luidsprekers in de versterker
juist zijn (zie gebruiksaanwijzing van uw versterker en luidsprekers).
Pas in de versterker de luidheid van de subwoofer naar smaak aan
(zie gebruiksaanwijzing van uw versterker).
Aansluiting op AV versterker / receiver
Bass Boost (EQ)
Bass Boost stelt u in staat om de karakteristiek van de subwoofer rond
40 Hz in te stellen op 0, +6 of +12 dB, ter compensatie voor
akoestische omstandigheden of gebruikersvoorkeur.
Verbind met luidsprekeraansluitingen op de versterker, of op
voorversterker dan wel subwoofer uitgang.
Stel het oveneempunt in op 80 Hz voor grote luidsprekers, of hoger
ingeval van kleine luidsprekers. Begin met een volumestand die op het
7e puntje staat en pas vervolgens het volume aan om een goede
akoestische aansluiting bij uw hoofdluidsprekers te bereiken.
Verbinding met de stereo voorversterker of receiver
K7276 XQ60b Manual 23/12/08 14:31 Page 16
DK
Forbind til forstærkerens LFE subwoofer udgang.
Alle indgange virker samtidig.
Sæt subwoofer frekvensen på forstærkeren / modtageren til 80 Hz
(Se forstærker / modtager manualen).
Sæt delefrekvensen på XQ60b til 140 Hz.
Sæt volumen på XQ60b på prik nummer 7.
Sørg for satellitterne er indstillet til den korrekte opsætning I
forstærker / modtager menuen (se højttaler manualen).
Indstil subwoofer volumen på AV Forstærker / modtager til den
ønskede styrke (se forstærker / modtager manualen).
Forbindelse til AV forstærker / modtager
Det er muligt manuelt at indstille XQ60b I stedet for at bruge
forstærker / modtager
A. Frekvenskontrol
Frekvenskontrollen kontrollerer subwooferens øverste afskærings
frekvens, dens effektive område ligger fra 40 Hz til 140 Hz med 24 dB
pr. oktav. Frekvenskontrollen bør justeres for at opnå det bedste
samspil mellem hoved/satellithøjttalerne og subwooferen.
Ved at dreje den i urets retning øges afskærings frekvensen og ved at
dreje den mod urets retning formindskes.
1. Ideel overgangsfrekvens - Jævn gengivelse.
2. Overgangsfrekvens sat for lavt - medfører fald i den kombinerede
gengivelse.
3. Overgangsfrekvens sat for højt - medfører en pukkel i den
kombinerede gengivelse.
B. Fase regulering
Faseo regulering er normalt sat til 0° men større udgangsniveau kan
nogle gange opnås i 180° positionen, specielt når subwooferen er
anbragt langt fra satellithøjttalerne.
C. Niveaukontrol
Niveaú kontrollen regulerer subwooferens udgangsniveau i forhold til
satellit- eller AV højttalerne. Ved at dreje den i urets retning øges
udgangsniveauet ved at dreje den mod urets retning formindskes
udgangsniveauet.
MIDDEL
Check at stikket til subwooferen er sat i stikkontakten, og at der er tændt for den.
Check alle sikringer og hovedstrømafbryderen, som har indflydelse på strømmen til
subwooferen.
Kontakt forhandleren for yderligere detaljer.
Check at der er tændt for hele udstyret.
Check og justér lydniveauet
Check at udgangsstikket på dit anlæg er korrekt monteret og justeret til passende niveau
for at trække subwooferen.
Check at alle forbindelser mellem subwooferen og dit anlæg er korrekt
monteret og justeret, om nødvendigt.
Kontakt din forhandler for yderligere detaljer.
Kontroler lydniveauet
Da den lavfrekvente sub-bas lyd fra subwooferen ikke er
retningsbestemt kan den anbringes næsten alle steder i rummet,
dog bør den ikke anbringes for tæt på tilhøreren. Afprøv forskellige
positioner for at finde det bedste sted for en resonans fri lyd.
Udstyret leveres med strømstik med jord, der passer til den
nationale standard.
Betjeningsknapper og stik
Placering / Tilslutning af strøm
Manuel indstilling
DANSKE INSTRUKTIONER
Fejlfinding
FEJL
Net indikatoren lyser ikke.
Hvis net indikatoren stadig ikke tænder.
Hvis net indikatoren lyser, men der ingen lyd
kommer fra subwooferen.
Hvis der stadig ikke er nogen lyd.
Rødt lys ingen lyd
Grønt lys ingen lyd
XQ60b Subwoofer bagside
1. LFE/ Linie ind, med automatisk niveau regulering
2. Fase-regulering
3. Bass Boost
4. Niveaukontrol
5. Indikator for TÆNDT SLUKKET
net spænding
6. Frekvenskontrol
7. TÆND/SLUK afbryder (Hoved afbryder)
8. AC net indgang (230V Euro / 230V UK / 115V US)
9. Højt niveau indgang (Højttaler)
Rød / Grøn
Bass Boost (EQ)
Bass Boost justerer output fra subwooferen som kompensation for
storrelse af stue og brugerens praeferencer. "Boost" kan justeres
trinvis mellem 0, +6 og +12dB omkring 40 Hz.
Forbind til forstærkerens højttaler, forforstærker eller subwoofer udgang.
Sæt crossover frekvensen til 80 Hz for store højttalere, og højere for
mindre højttalere. Start med at sætte volumen til den 7. prik. Juster
volumen til at passe til niveauet på front højttalerne.
Forbind til stereo forforstærker / receiver
K7276 XQ60b Manual 23/12/08 14:31 Page 17
18
19
XQ60b manual-ex_noGK.indd 18 2009-1-6 14:40:55

NL
In plaats van via de versterker is de XQ60b ook handmatig in te
stellen.
A. Instelling voor de overgangsfrequentie
Met deze Instelling kiest u tot welke frequentie de aktief blijft. Het
bereik van deze instelling loopt van 40Hz tot 140Hz, met een
filtersteilheid van 24 dB per octaaf. Stel deze regelaar zodanig in, dat
u de soepelste overgang tussen hoofd- en satellietluidsprekers en de
subwoofer bereikt.
Als u de regelaar met de klok mee draait (de overgangsfrequentie
hoger legt), verbreedt u het werkingsgebied van de 20B. Tegen de
klok in gaand versmalt u dit.
1. Ideale overgang - vlakke responscurve
2. Overgangspunt te laag - veroorzaakt een kuil in de
totale frequentiecurve
3. Overgangspunt te hoog - veroorzaakt een berg in de
totale frequentiecurve
B. Fase regelaar
De fases regelaar staat normaal gezien op 0°. Soms kunt u echter een
hoger uitgangsniveau bereiken door de regelaar op 180° te zetten,
vooral als de subwoofer ver weg staat van de satellietluidsprekers.
C. Niveauregeling
Met de niveauregeling regelt u het volume van de subwoofer in
verhouding tot het volume van de satellietluidsprekers of de
AV-luidsprekers. Draai met de klok mee om het volume te verhogen.
Draai in de andere richting om het volume te verlagen.
STORING
Het aan/uit indicatielampje wil niet branden.
Als het aan/uit indicatielampje nog steeds niet oplicht.
Het aan/uit indicatielampje licht op, maar de
subwoofer geeft geen geluid.
Ik hoor nog steeds geen geluid.
Rood licht geen geluid
Groen licht geen geluid
VERHELPEN VAN DE STORING
Controleer of het netsnoer van de subwoofer aangesloten is op een stopcontact en de
aan/uit-schakelaar ingeschakeld is.
Controleer de smeltzekeringen of stroomonderbrekers van het stroomcircuit waarop de
subwoofer is aangesloten.
Raadpleeg uw dealer voor meer informatie.
Vergewis u ervan dat alle toestellen ingeschakeld zijn.
Controleer de volumeregeling en stel deze in.
Ga na of de uitgangspluggen van de geluidsbron het juiste signaal voeren, op het
juiste niveau stann en voldoende vermogen leveren om de subwoofer aan te drijven.
Controleer alle aansluitingen tussen subwoofer en de geluidsbron en voer indien
nodig correcties uit.
Neem contact op met uw handelaar of de importeur.
Controleer de niveau’s
Omdat het oor de herkomst van de lage frequenties van het
subbas-geluid niet kan waarnemen, kunt u de subwoofer plaatsen
waar het u uitkomt. Plaats het toestel echter niet te dicht bij de
luisteraar. Probeer verschillende plaatsen in de woonkamer en kies de
optimale plaats voor een zuiver laagweergave. Het bijgeleverde
netsnoer beschikt over de juiste aardingsaansluiting en voldoet aan de
plaatselijke veiligheidsnormen.
Regelaars en aansluitingen
Plaats en aansluiting van het netsnoer
Handmatige instelling
NEDERLANDSE HANDLEIDING
Opsporen van storingen
XQ60b Subwoofer achterpaneel
1. Smart Connect LF ingang op lijnniveau
2. Fases regelaar
3. Bass Boost
4. Niveauregeling
5. Aan/uit indicatielampje Netschaklaar Toestel UIT
6. Instelling voor de overgangs-frequentie Niveauregeling
7. Netschakelaar (Vakantiestand)
8. Aansluiting voor netkabel (230V Euro / 230V UK / 115V US)
9. Ingangsblok op luidspreker-niveau
Rood / Groen
Verbind met LF subwoofer uitgang op de versterker.
Alle ingangen werken gelijktijdig.
Zet de subwoofer frequentie van de versterker op 80Hz
(zie gebruiksaanwijzing van uw versterker).
Stel het scheidingsfilter op de XQ60b in op 140 Hz.
Stel het volumeregeling op de XQ60b in op het 7e streepje.
Zorg dat de instellingen voor de overige luidsprekers in de versterker
juist zijn (zie gebruiksaanwijzing van uw versterker en luidsprekers).
Pas in de versterker de luidheid van de subwoofer naar smaak aan
(zie gebruiksaanwijzing van uw versterker).
Aansluiting op AV versterker / receiver
Bass Boost (EQ)
Bass Boost stelt u in staat om de karakteristiek van de subwoofer rond
40 Hz in te stellen op 0, +6 of +12 dB, ter compensatie voor
akoestische omstandigheden of gebruikersvoorkeur.
Verbind met luidsprekeraansluitingen op de versterker, of op
voorversterker dan wel subwoofer uitgang.
Stel het oveneempunt in op 80 Hz voor grote luidsprekers, of hoger
ingeval van kleine luidsprekers. Begin met een volumestand die op het
7e puntje staat en pas vervolgens het volume aan om een goede
akoestische aansluiting bij uw hoofdluidsprekers te bereiken.
Verbinding met de stereo voorversterker of receiver
K7276 XQ60b Manual 23/12/08 14:31 Page 16
DK
Forbind til forstærkerens LFE subwoofer udgang.
Alle indgange virker samtidig.
Sæt subwoofer frekvensen på forstærkeren / modtageren til 80 Hz
(Se forstærker / modtager manualen).
Sæt delefrekvensen på XQ60b til 140 Hz.
Sæt volumen på XQ60b på prik nummer 7.
Sørg for satellitterne er indstillet til den korrekte opsætning I
forstærker / modtager menuen (se højttaler manualen).
Indstil subwoofer volumen på AV Forstærker / modtager til den
ønskede styrke (se forstærker / modtager manualen).
Forbindelse til AV forstærker / modtager
Det er muligt manuelt at indstille XQ60b I stedet for at bruge
forstærker / modtager
A. Frekvenskontrol
Frekvenskontrollen kontrollerer subwooferens øverste afskærings
frekvens, dens effektive område ligger fra 40 Hz til 140 Hz med 24 dB
pr. oktav. Frekvenskontrollen bør justeres for at opnå det bedste
samspil mellem hoved/satellithøjttalerne og subwooferen.
Ved at dreje den i urets retning øges afskærings frekvensen og ved at
dreje den mod urets retning formindskes.
1. Ideel overgangsfrekvens - Jævn gengivelse.
2. Overgangsfrekvens sat for lavt - medfører fald i den kombinerede
gengivelse.
3. Overgangsfrekvens sat for højt - medfører en pukkel i den
kombinerede gengivelse.
B. Fase regulering
Faseo regulering er normalt sat til 0° men større udgangsniveau kan
nogle gange opnås i 180° positionen, specielt når subwooferen er
anbragt langt fra satellithøjttalerne.
C. Niveaukontrol
Niveaú kontrollen regulerer subwooferens udgangsniveau i forhold til
satellit- eller AV højttalerne. Ved at dreje den i urets retning øges
udgangsniveauet ved at dreje den mod urets retning formindskes
udgangsniveauet.
MIDDEL
Check at stikket til subwooferen er sat i stikkontakten, og at der er tændt for den.
Check alle sikringer og hovedstrømafbryderen, som har indflydelse på strømmen til
subwooferen.
Kontakt forhandleren for yderligere detaljer.
Check at der er tændt for hele udstyret.
Check og justér lydniveauet
Check at udgangsstikket på dit anlæg er korrekt monteret og justeret til passende niveau
for at trække subwooferen.
Check at alle forbindelser mellem subwooferen og dit anlæg er korrekt
monteret og justeret, om nødvendigt.
Kontakt din forhandler for yderligere detaljer.
Kontroler lydniveauet
Da den lavfrekvente sub-bas lyd fra subwooferen ikke er
retningsbestemt kan den anbringes næsten alle steder i rummet,
dog bør den ikke anbringes for tæt på tilhøreren. Afprøv forskellige
positioner for at finde det bedste sted for en resonans fri lyd.
Udstyret leveres med strømstik med jord, der passer til den
nationale standard.
Betjeningsknapper og stik
Placering / Tilslutning af strøm
Manuel indstilling
DANSKE INSTRUKTIONER
Fejlfinding
FEJL
Net indikatoren lyser ikke.
Hvis net indikatoren stadig ikke tænder.
Hvis net indikatoren lyser, men der ingen lyd
kommer fra subwooferen.
Hvis der stadig ikke er nogen lyd.
Rødt lys ingen lyd
Grønt lys ingen lyd
XQ60b Subwoofer bagside
1. LFE/ Linie ind, med automatisk niveau regulering
2. Fase-regulering
3. Bass Boost
4. Niveaukontrol
5. Indikator for TÆNDT SLUKKET
net spænding
6. Frekvenskontrol
7. TÆND/SLUK afbryder (Hoved afbryder)
8. AC net indgang (230V Euro / 230V UK / 115V US)
9. Højt niveau indgang (Højttaler)
Rød / Grøn
Bass Boost (EQ)
Bass Boost justerer output fra subwooferen som kompensation for
storrelse af stue og brugerens praeferencer. "Boost" kan justeres
trinvis mellem 0, +6 og +12dB omkring 40 Hz.
Forbind til forstærkerens højttaler, forforstærker eller subwoofer udgang.
Sæt crossover frekvensen til 80 Hz for store højttalere, og højere for
mindre højttalere. Start med at sætte volumen til den 7. prik. Juster
volumen til at passe til niveauet på front højttalerne.
Forbind til stereo forforstærker / receiver
K7276 XQ60b Manual 23/12/08 14:31 Page 17
18
19
XQ60b manual-ex_noGK.indd 19 2009-1-6 14:40:56

.
.
/ -
,
,
.
. .
,
.
. .
.(AV- /
AV- ) ,
.
,
.
RU
K7276 XQ60b Manual 23/12/08 14:31 Page 18
INSTRUKCJA PO POLSKU PL
Subwoofer XQ60b strona tylna
1. Wejście liniowe
2. Sterowanie fazą
3. Ustawienie basu
4. Ustawienie poziomu
5. Wskaźnik eksploatacji Włączony Wyłączony
6. Ustawienie częstotliwości
7. Włącznik sieciowy (ON/OFF) (Wyłącznik urlopowy)
8. Wejście prądu sieciowego (230V Euro / 230V UK / 115V US)
9. Blokada wejścia High Level
OBJAW
Wskaźnik eksploatacji nie zapala się.
Wskaźnik eksploatacji pali się, jednakże z subwoofera
nie ma sygnału wyjściowego.
Wciąż żaden dźwięk.
Czerwona lampka, nie ma dźwięku.
Zielona lampka, nie ma dźwięku.
USUNIĘCIE USTERKI
Upewnij się, czy subwoofer jest podłączony do sieci elektrycznej.
Sprawdź (np. za pomocą jakiegokolwiek innego urządzenia) czy w danym gniazdku znajduje
się napięcie.
Upewnij się, że cały sprzęt jest włączony.
Zwróć sie do sprzedawcy.
Sprawdź i ewentualnie popraw ustawienie poziomu.
Sprawdź, czy zostało aktywowane odpowiednie wyjście wysokiego lub niskiego poziomu
na wzmacniaczu i czy zostało w taki sposób aby na subwoofer został przeniesiony
wystarczający poziom.
Upewnij się czy wszystkie kable przyłączeniowe i wtyczki są osadzone mocno i w
poprawny sposób. Ewentualnie wymienić kable przyłączeniowe.
Zwróć się do sprzedawcy.
Sprawdź ustawienia głośności subwoofera i wzmacniacza.
Subwoofer może być umiejscowiony prawie w każdym miejscu w
pomieszczeniu jednak nie powinien się znajdować zbyt blisko słuchającego.
Najlepiej spróbować różnych ustawień by znaleźć najlepsze miejsce w
pomieszczeniu.
Należy podłączyć do wyjścia LFE subwoofer output we wzmacniaczu.
Wszystkie wejścia działaja równocześnie.
Ustaw częstotliwość subwoofera we wzmacniaczu na 80Hz
(przeczytaj informację w instrukcji obsługi wzmacniacza).
Ustaw częstotliwość XQ60b na 140Hz.
Ustaw głośność XQ60b na siódmą kropkę.
Upewnij się, że satelity są poprawnie podłączone do wzmacniacza (sprawdź w
instrukcji obsługi głośników).
Dopasuj głośność subwoofera we wzmacniaczu według własnego uznania
(sprawdź w instrukcji obsługi wzmacniacza).
Możliwe jest ręczne dopasowanie ustawień XQ60c, bez używania wznacniacza
czy amplitunera.
A. Ustawienie częstotliwości
Ustawienie częstotliwości zmienia górną częstotliwość rozdzielną subwoofera.
Zakres ustawienia sięga od 40Hz do 140Hz; nachylenie zbocza wynosi 12dB na
oktawę. Regulator powinien zostać ustawiony w taki sposób, aby czołowy
głośnik i subwoofer współpracowały w optymanly sposób; nie pojawiają się ani
“luki w częstotliwości” oraz nie ma nadmiernie podkreślonych częstotliwości
rozdzielczych. Poprzez skręt w prawo zostaje zwiększona częstotliwość
rozdzielcza. Poprzez obrót w lewo zmniejszona.
1. Idealna częstotliwość oddzielna; płaska charakterystyka częstotliwości
2. Punkt przejścia jest zbyt niski; powoduje “lukę w częstotliwości” w
kombinowanej charakterystyce częstotliwości.
3. Punkt przejścia jest zbyt wysoki; powoduje nadmierne podkreślenie
określonych frekwencji w kombinowanej charakterystyce częstotliwości.
B. Sterowanie fazowe
Sterowanie fazowe zostaje z reguły ustawione na 0°. Można czasem w pozycji
180° osiągnąć wyższy poziom wyjściowy, w szczególności jeśli subwoofer jest z
dala od głośników satelitarnych.
C. Ustawienie poziomu
Pokrętło ustawienia poziomu dopasowuje głośność subwoofera w stosunku do
głośności satelit. Poprzez obrót w prawo zostaje zwiększony poziom
wyjściowy. Poprzez obrót w lewo, zmniejszony.
Elementy obsługi i przyłącza
Umiejscowienie
Podłączenie do wzmacniacza
Podłącz do wzmacniacza lub przedwzmacniacza do wyjścia subwoofer output.
Ustaw częstotliwość na 80Hz dla dużych głosników lub wyższą dla małych
głośników. Ustaw głośność na siódmą kropkę. Dopasuj głośność by była
odpowiednia z Twoimi kolumnami.
Podłączenie do przedwzmacniacza stereo
Ustawianie ręczne
Usterki
Czerwona/Zielona
Ustawienie basu
Bas ustawia się aby dopasować jego moc do warunków panujących w
pomieszczeniu oraz do indywidualnych upodobań użytkownika. Można
wybierać pomiędzy 0, +6 i +12dB przy około 40Hz.
K7276 XQ60b Manual 23/12/08 14:31 Page 19
20
21
XQ60b manual-ex_noGK.indd 20 2009-1-6 14:40:57
Other manuals for XQ60b
1
Table of contents
Languages:
Other KEF Subwoofer manuals