KEF Q400b User manual

Q400b Subwoofer
GB Installation Manual
FManuel d’installation
DInstallationshandbuch
IManuale d’installazione
ES Manual de instalación
PManual de instalação
NL Installatiehandleiding
DK Installationsanvisning
PL Podręcznik instalacji
RU Инструкция по установке
GR Εγχειρίδιο Εγκατάστασης
JP 取り扱い説明書
CN 安裝手冊
TC 安裝手冊
K설치방법
Q Series
Q400b manual_Iss1_4301-7382+0_20100622.indd 1 2010-6-22 13:19:29

2
(F) Introduction (D) Einleitung (I) Introduzione (ES) Introducción (P) Introdução (NL) Inleiding (DK) Introduktion (PL) Wstęp
(RU) Введение (GR) Εισαγωγή (JP) はじめに (CN) 簡介 (TC) 簡介 (K) 제품 소개
Introduction
GB Thank you for purchasing KEF powered subwoofer Q400b. We are
confident that your Q400b will provide reliable, high performance
sound for many years to come. Please read this manual fully before
you attempt any connections to the Q400b.
FKEF vous remercie de votre achat d’un subwoofer modèle Q400b.
Nous sommes convaincus que votre haut-parleur Q400b vous
procurera un son fiable et de hautes performances pendant de
longues années. Veuillez lire intégralement le présent manuel avant de
procéder à des connexions quelconques.
DVielen Dank fur den Kauf des aktiven Subwoofers KEF Q400b.
Wir sind davon überzeugt, daß Ihr Q400b lange Zeit zuverlässig
funktionieren und eine hohe Klangqualität gewährleisten wird.
Lesen Sie bitte diese Anleitung sorgfältig durch, bevor Sie Ihr Gerät
anschließen.
IVi ringraziamo per aver dato la Vs preferenza al subwoofer attivo KEF,
apparecchio affidabile e dalle elevate prestazioni. Prima di effettuare i
collegamenti si consiglia di leggere per intero il presente manuale.
ES Le damos las gracias por haber adquirido el altavoz para graves KEF
Modelo Q400b. Estamos seguros de que el Q400b le proporcionará
un sonido de calidad y de altas prestaciones durante muchos años.
Por favor, lea este manual antes de intentar conectar y poner en
funcionamiento el altavoz.
PObrigado por ter escolhido o modelo KEF Q400b: um subwoofer
com amplificador. Acreditamos que o seu Q400b lhe oferecerá
durante muitos anos, um som de alta fidelidade. Leia, por favor, este
manual integralmente antes de tentar quaisquer conexões com o
Q400b.
NL Wij danken u van harte voor uw aankoop van de actieve subwoofer
KEF Model Q400b. Wij zijn ervan overtuigd dat uw subwoofer
u jarenlang hoogwaardig luisterplezier zal geven. Lees eerst deze
handleiding aandachtig door alvorens u de subwoofer Q400b aansluit.
DK Tillykke med erhvervelsen af din KEF model Q400b subwoofer med
forstærker. Vi er overbevist om, at din Q400b vil give dig en stabil high
performance sound i mange år fremover. Gennemlæs venligst denne
manual inden du foretager nogen tilslutning til din model Q400b.
PL Bardzo dziękujemy za zakupienie aktywnego subwoofera
KEF Q400b. Jesteśmy przekonani, że Państwa Q400b będzie
działał niezawodnie przez długi czas i zapewni wysoką jakość
brzmienia. Przed podłączeniem urządzenia prosimy starannie
przeczytać niniejszą instrukcję.
RU Благодарим за приобретение сабвуфера KEF Q400b со
встроенным усилителем. Мы уверены, что это надежное
устройство еще долгие годы будет радовать вас
высококачественным звучанием. Перед подключением
Q400b внимательно ознакомьтесь с настоящим
руководством.
GR Σας ευχαριστούμε για την αγορά του subwoofer Q400b της KEF.
Είμαστε βέβαιοι ότι το subwoofer Q400b θα σας προσφέρει
αξιόπιστη και υψηλή απόδοση ήχου για πολλά χρόνια. Διαβάστε
αυτό το εγχειρίδιο πριν να επιχειρήσετε οποιαδήποτε σύνδεση
του subwoofer Q400b.
JP Q400b をお買い上げ有難うございます。ご使用前に必ず本取説をお読
みください。
CN 感謝您購買 Q400b!我們相信,Q400b 將在未來數年裏帶給您可靠的高
性能音質。安装 Q400b 之前,請仔細閱讀本手冊。
TC 感謝您購買 Q400b!我們相信,Q400b 將在未來數年里帶給您可靠的高
性能音質。安裝 Q400b 之前,請仔細閱讀本手冊。
KKEF 파워 서브우퍼 Q400b를 구입해 주셔서 감사합니다. Q400b는 앞
으로도 오랫동안 안정적이고 성능이 뛰어난 사운드를 유지할 것입니다.
Q400b를 연결하기 전에 본 설명서를 자세히 읽어주십시오.
Q400b manual_Iss1_4301-7382+0_20100622.indd 2 2010-6-22 13:19:30

3
Using the manual
(F) Utilisation du manuel (D) Verwendung der Anleitung (I) Uso del manuale (ES) Uso del manual (P) Utilização do manual
(NL) Gebruik van de handleiding (DK) Brug af manualen (PL) Zastosowanie instrukcji (RU) Использование руководства
(GR) Χρήση του Εγχειριδίου (JP) マニュアルの使用にあたって (CN) 使用本手冊 (TC) 使用本手冊 (K) 설명서 기호
GB Correct
FCorrect
DRichtig
ICorretto
ES Correcto
PCorrecto
NL Juist
DK Korrekt
PL Poprawny
RU Правильно
GR Σωστό
JP 正しいです
CN 正確
TC 正確
K옳음
GB Wrong
FIncorrect
DFalsch
IErrato
ES Incorrecto
PErrado
NL Fout
DK Forkert
PL Niepoprawny
RU Неправильно
GR Λάθος
JP 誤りです
CN 錯誤
TC 錯誤
K틀림
GB Caution/Warning
FAttention/Avertissement
DAchtung / Warnung
IAttenzione/Avvertenza
ES Precaución/Atención
PAtenção/ Aviso
NL Opgelet/Waarschuwing
DK Forsigtigt / Advarsel
PL Ostrzegawczy / Ostrzeżenie
RU Внимание/Предупреждение
GR Προσοχή/Προειδοποίηση
JP 注意!警告!
CN 注意警告
TC 注意警告
K주의/경고
GB The following icons are used throughout this manual to help you
safely install your new speakers. Please follow them carefully.
FLes icônes reprises ci-après sont utilisées dans tout le manuel de
manière à vous aider à installer vos nouveaux haut-parleurs en toute
sécurité. Veuillez suivre scrupuleusement leur signification.
DDie folgenden Symbole finden Sie in der gesamten Anleitung. Sie
erleichtern eine sichere Installation Ihrer neuen Lautsprecher.
Bitte achten Sie sorgfältig auf die Symbole.
ILe seguenti icone usate nel manuale aiutano ad installare
correttamente i diffusori. Si raccomanda di seguirle con
attenzione.
ES Se utilizan los iconos siguientes en este manual para ayudarle a instalar
con seguridad sus nuevos altavoces. Sígalas cuidadosamente.
POs seguintes ícones são utilizados no manual afim de o ajudarem
a instalar com segurança as suas novas colunas. Siga-os
cuidadosamente.
NL De hierna volgende pictogrammen worden in de hele handleiding
gebruikt om u te helpen bij het veilig aansluiten en gebruiken van uw
nieuwe luidsprekers. Volg de instructies steeds nauwgezet op.
DK Følgende symboler benyttes i denne manual, for at hjælpe dig med
sikker installation af dine højttalere. Følg dem nøje.
PL W niniejszej instrukcji znajdą Państwo następujące symbole.
Ułatwią one bezpieczną instalację nowych głośników. Prosimy
zwrócić szczególną uwagę na symbole.
RU Приведенные ниже значки используются в данном
ру ководст ве с ц ель ю о бе сп ечен ия необходи мых
мер безопасности при установке вашего сабвуфера.
Пожалуйста, тщательно следуйте этим мерам
предосторожности.
GR Τα παρακάτω εικονίδια χρησιμοποιούνται σε αυτό το εγχειρίδιο
για να σας βοηθήσουν στην ασφαλή εγκατάσταση των νέων
σας ηχείων. Παρακαλούμε ακολουθήστε τα προσεκτικά.
JP 下記の記号は本取説でひんぱんに使用されているものです。本機を安全
に正しくご使用いただくため記号の指示に従ってください。
CN 本手冊用以下圖表幫助您正確地、安全地安裝您新置的揚聲器。請按說明
進行安裝。
TC 本手冊用以下圖表幫助您正確地、安全地安裝您新置的揚聲器。請按說明
進行安裝。
K본 설명서에서 사용되는 다음 기호들은 안전한 스피커 설치를 돕기 위한
것입니다. 신중하게 지시에 따르십시오.
GB Electrical Warning
FDanger électrique
D
Warnung: Gefährliche Spannungen
IRischi elettrici
ES Advertencia eléctrica
PAviso sobre a parte eléctrica
NL Opgelet! Elektriciteit!
DK Elektrisk advarsel
PL Niebezpieczne napięcie
RU Предупреждение об
опасности при обращении
с электрическим
оборудованием
GR Ηλεκτρική Προειδοποίηση
JP 感電注意!
CN 注意强电
TC 注意強電
K감전 경고
GB Option
FOption
DOption
IOpzione
ES Opción
POpcional
NL Optie
DK Tilbehør
PL Opcja
RU дополнительно
GR Επιλογή
JP オプション(任意選択)
CN 選擇
TC 選擇
K옵션
GB Read
F‘A lire’
DLesen
ILeggere
ES Lea
PLeia
NL Lees
DK Gennemlæs
PL Przeczytaj
RU Прочитайте
GR Διαβάστε
JP お読みください
CN 閱讀
TC 閱讀
K읽기
Q400b manual_Iss1_4301-7382+0_20100622.indd 3 2010-6-22 13:19:31

4
GB Switch off appliance
FCouper l’appareil
DGerät abschalten
IDisattivazione dell’ap parecchio
ES Interruptor del aparato
PInterruptor para desligar
NL Het toestel uitschakelen
DK Afbryd apparatet
PL Wyłącznik
RU Отключить устройство
GR Απενεργοποιήστε τη
συσκευή
JP 主電源を切る
CN 切斷電源
TC 切斷電源
K기기 스위치 OFF
GB Positive/RED
FPositif / ROUGE
DPositiv / ROT
IPositivo / ROSSO
ES Positivo / ROJO
PPositivo/Vermelho
NL Positief / ROOD
DK Positiv / RØD
PL Dodatni/CZERWONY
RU Плюс/КРАСНЫЙ
GR Θετικό/ΚΟΚΚΙΝΟ
JP プラス側・赤
CN 正極/紅色
TC 正極/紅色
K포지티브/RED
GB Negative/BLACK
FNégatif / NOIR
DNegativ / SCHWARZ
INegativo / NERO
ES Negativo / NEGRO
PNegativo/ Preto
NL Negatief / ZWART
DK Negativ / SORT
PL Ujemny/CZARNY
RU Минус/ЧЕРНЫЙ
GR Αρνητικό/ΜΑΥΡΟ
JP マイナス側・黒
CN 負極/黑色
TC 負極/黑色
K네거티브/BLACK
Q400b manual_Iss1_4301-7382+0_20100622.indd 4 2010-6-22 13:19:32

5
Important points
(F) Points importants (D) Wichtige Punkte (I) Punti importanti (ES) Puntos importantes (P) Pontos importantes
(NL) Belangrijke aandachtspunten (DK) Vigtige punkter (PL) Ważne instrukcje bezpieczeństwa (RU)
Важные меры предосторожности
(GR) Σημαντικές Οδηγίες Ασφαλείας (JP) 重要安全項目 (CN) 重要安全事項 (TC) 重要安全事項 (K) 중요한 안전 지침
GB Follow this manual carefully for best
results from your speakers
FAfin de tirer les meilleurs résultats des
haut-parleurs, veuillez suivre scrupuleusement les
instructions reprises dans le présent manuel
DFür optimale Ergebnisse mit Ihrem Lautsprecher
befolgen Sie diese Anleitung
IPer ottenere le migliori prestazioni dai
diffusori seguire le istruzioni contenute nel presente
manuale
ES Siga las instrucciones de este manual para obtener
los mejores resultados de los altavoces
PSiga este manual atentamente para obter o melhor
resultado das colunas
NL Volg terwille van een optimaal resultaat
de instructies nauwkeurig op
DK Følg denne manual omhyggeligt for at
opnå det bedste resultat fra højttalerne
PL Aby zapewnić optymalne działanie
głośników,należy stosować się do tego
podręcznika
RU Для получения наилучших результатов от
громкоговорителей, тщательно следуйте
данной инструкции
GR Ακολουθήστε προσεκτικά τις οδηγίες αυτού του
εγχειριδίου για να εξασφαλίσετε την καλύτερη
δυνατή απόδοση των ηχείων σας
JP スピーカーの性能を出し切るためにこのマニュアルを
よくお読みください
CN 請仔細閱讀和遵循本手冊以取得最佳的效果
TC 請仔細閱讀和遵循本手冊以取得最佳的效果
K설치 전 본 매뉴얼을 숙지 하세요
GB Read and return warranty card
FVeuillez lire et renvoyer la carte de garantie
DLesen Sie die Garantiekarte und senden
Sie sie ausgefüllt zurück
ISi prega di restituire la scheda di garanzia, previa
attenta lettura
ES Lea y envíenos la tarjeta de garantía
PLeia e devolva o cartão de garantia
NL U kunt na lezing en invulling de garantiekaart aan
de importeur sturen
DK Gennemlæs og send garantibeviset tilbage
PL Przeczytaj kartę gwarancyjną i odeślij ją
RU Прочтите гарантийный талон
GR Διαβάστε και επιστρέψτε την κάρτα εγγύησης.
JP 日本国内では保証書の発行をいたしておりません。正
規販売店の領収書が保証書に替わります。Q400bシリ
ーズは自然故障においてお買い上げより2年間の無償
修理です。
CN 請閱讀和寄回質量保證卡
TC 請閱讀和寄回質量保證卡
K품질보증서 확인
GB Clean with a dry lint free cloth
FNettoyer à l’aide d’un chiffon humide, non pelucheux
DMit einem angefeuchteten, nicht fusselnden Tuch
abwischen
IPulire con un panno umido non sfilacciato
ES Limpie con un paño húmedo
PLimpe com um pano húmido sem pêlos
NL Reinigen met een vochtige niet pluizende doek
DK Rengør med en fugtig klud, der ikke fnugger
PL Czyść wilgotną szmatką o zwartej strukturze
RU Очищайте влажной тканью, не содержащей
волокон
GR Καθαρίστε με υγρό ύφασμα που δεν αφήνει χνούδια.
JP 毛羽立ちのない柔らかい布に少量の水分を含ませて拭
いてください。
CN 用不含麻質的乾布清潔
TC 用不含麻質的乾布清潔
K부드러운 천 등으로 닦으세요
GB Do not use spirit based cleaners.
FNe pas utiliser d’agents nettoyants à base d’alcool.
DKeine alkoholhaltigen Reinigungsmittel verwenden.
INon utilizzare prodotti a base di alcol
ES No use limpiadores con base de alcohol
PNão utilize produtos de limpeza à base de álcool
NL Gebruik geen reinigingsprodukten op basis van
alcohol
DK Brug ikke rengøringsmidler med alkohol
PL Nie używaj środków czyszczących na bazie
rozpuszczalników
RU Не используйте растворители для чистки
GR Μην χρησιμοποιείτε υγρά καθαρισμού με βάση
το οινόπνευμα
JP
アルコールなど化学物質を一切使用しないでください。
CN 不要使用含酒精的清潔劑
TC 不要使用含酒精的清潔劑
K윤활유 등으로 닦지 마세요
Q400b manual_Iss1_4301-7382+0_20100622.indd 5 2010-6-22 13:19:33

6
GB Avoid damp
FEviter l’humidité
DFeuchtigkeit vermeiden
IEvitare l’umidità
ES Evite la humedad
PEvite a humidade
NL Vermijd vocht
DK Undgå fugt
PL Unikaj wilgoci
RU Избегайте сырости
GR Αποφύγετε την έκθεση σε μέρη με υγρασία
JP 湿気を避けてください
CN 避免潮濕
TC 避免潮濕
K습기 찬 곳은 피하세요
GB SAFETY NOTICE! trailing cables are dangerous,
secure all cables
FNOTE DE SECURITE ! Les câbles de hautparleurs
traînant sur le sol peuvent être source de danger.
Fixer tous les câbles
DSICHERHEITSHINWEIS ! Herumliegende
Lautsprecherkabel sind eine Gefahrenquelle. Bitte
alle Lautsprecherkabel sorgfältig verlegen
INOTA PER LA SICUREZZA: i cavi di uscita dei
diffusori possono essere pericolosi se non sistemati
in un posto sicuro
ES ¡ATENCION! los cables de conexión sueltos de los
altavoces son peligrosos. Fíjelos
PPrecauções de segurança! Os cabos das colunas
espalhados são perigosos, fixe todos os cabos
NL VOOR UW VEILIGHEID! Loshangende
luidsprekerkabels zijn gevaarlijk! De kabels steeds op
een veilige plaats leggen
DK BEMÆRK! skarpe knæk og slid på
PL UWAGA DOTYCZĄCA BEZPIECZEŃSTWA!
Luźno lezące kable są niebezpieczne.
Zabezpiecz wszystkie kable
RU Замечание по безопасности! Не допускайте
образования петель из кабелей, закрепите
все кабели
GR ΠΡΟΕΙΔΟΠΟΙΗΣΗ ΑΣΦΑΛΕΙΑΣ! Τα εκτεθειμένα
καλώδια σας εκθέτουν σε κίνδυνο, ασφαλίστε
όλα τα καλώδια
JP 安全注意!ケーブル類はきれいにまとめ足に引っ掛け
ることのないようにしてください
CN 注意安全!散亂曳尾的連接線和電線有潛在危險,必須
固定所有連接線及電線
TC 注意安全!散亂曳尾的連接線和電線有潛在危險,必須
固定所有連接線及電線
K케이블은 이동이 없는 곳에 설치하세요
GB Avoid temperature extremes
FEviter les températures extrêmes
DExtreme Temperaturen vermeiden
IEvitare temperature troppo alte o troppo basse
ES Evite temperaturas extremas
PEvite temperaturas extremas
NL Vermijd extreme temperaturen
DK Undgå ekstreme temperaturer
PL Unikaj ekstremalnych temperatur.
RU Используйте при нормальной комнатной
температуре
GR Αποφύγετε την έκθεση σε ακραίες θερμοκρασίες
JP 極端な温度は避けてください
CN 避免過高和過低的溫度
TC 避免過高和過低的溫度
K설치 온도
GB Avoid direct sunlight
FEviter l’exposition directe aux rayons du soleil
DDirektes Sonnenlicht vermeiden
IEvitare l’esposizione diretta ai raggi del sole
ES Evite la luz directa del sol
PEvite a exposição directa à luz do sol
NL Vermijd rechtstreeks zonlicht
DK Undgä direkte sollys
PL Unikaj bezpośredniego światła słonecznego
RU Избегайте прямых солнечных лучей
GR Αποφύγετε την άμεση έκθεση στον ήλιο
JP 直射日光を避けてください
CN 避免陽光照射
TC 避免陽光照射
K직사 광선을 피하세요
Q400b manual_Iss1_4301-7382+0_20100622.indd 6 2010-6-22 13:19:34

7
Please take heed of the following before using the KEF Model Q400b. Note also that the word “appliance” shall refer to the KEF Q400b
subwoofer, or any part of it.
1. Read Instructions – All the Safety and Operating Instructions should be read before the appliance is operated.
2. Retain Instructions – The Safety and Operating Instructions should be retained for future reference.
3. Heed Warnings – All warnings on the appliance and in the Operating Instructions should be adhered to.
4. Follow Instructions – All Operating and Use Instructions should be followed. Only use attachments/accessories specified by the manufacturer.
5. Important – Do not defeat the safety purpose of the polarized or grounding type plug. The third prong is provided for your safety. If the provided
plug does not fit into your outlet, consult an electrician for replacement of the obsolete outlet. Refer all servicing to a qualified service personnel.
Servicing is required for any damaged parts such as power-supply cordor plug.
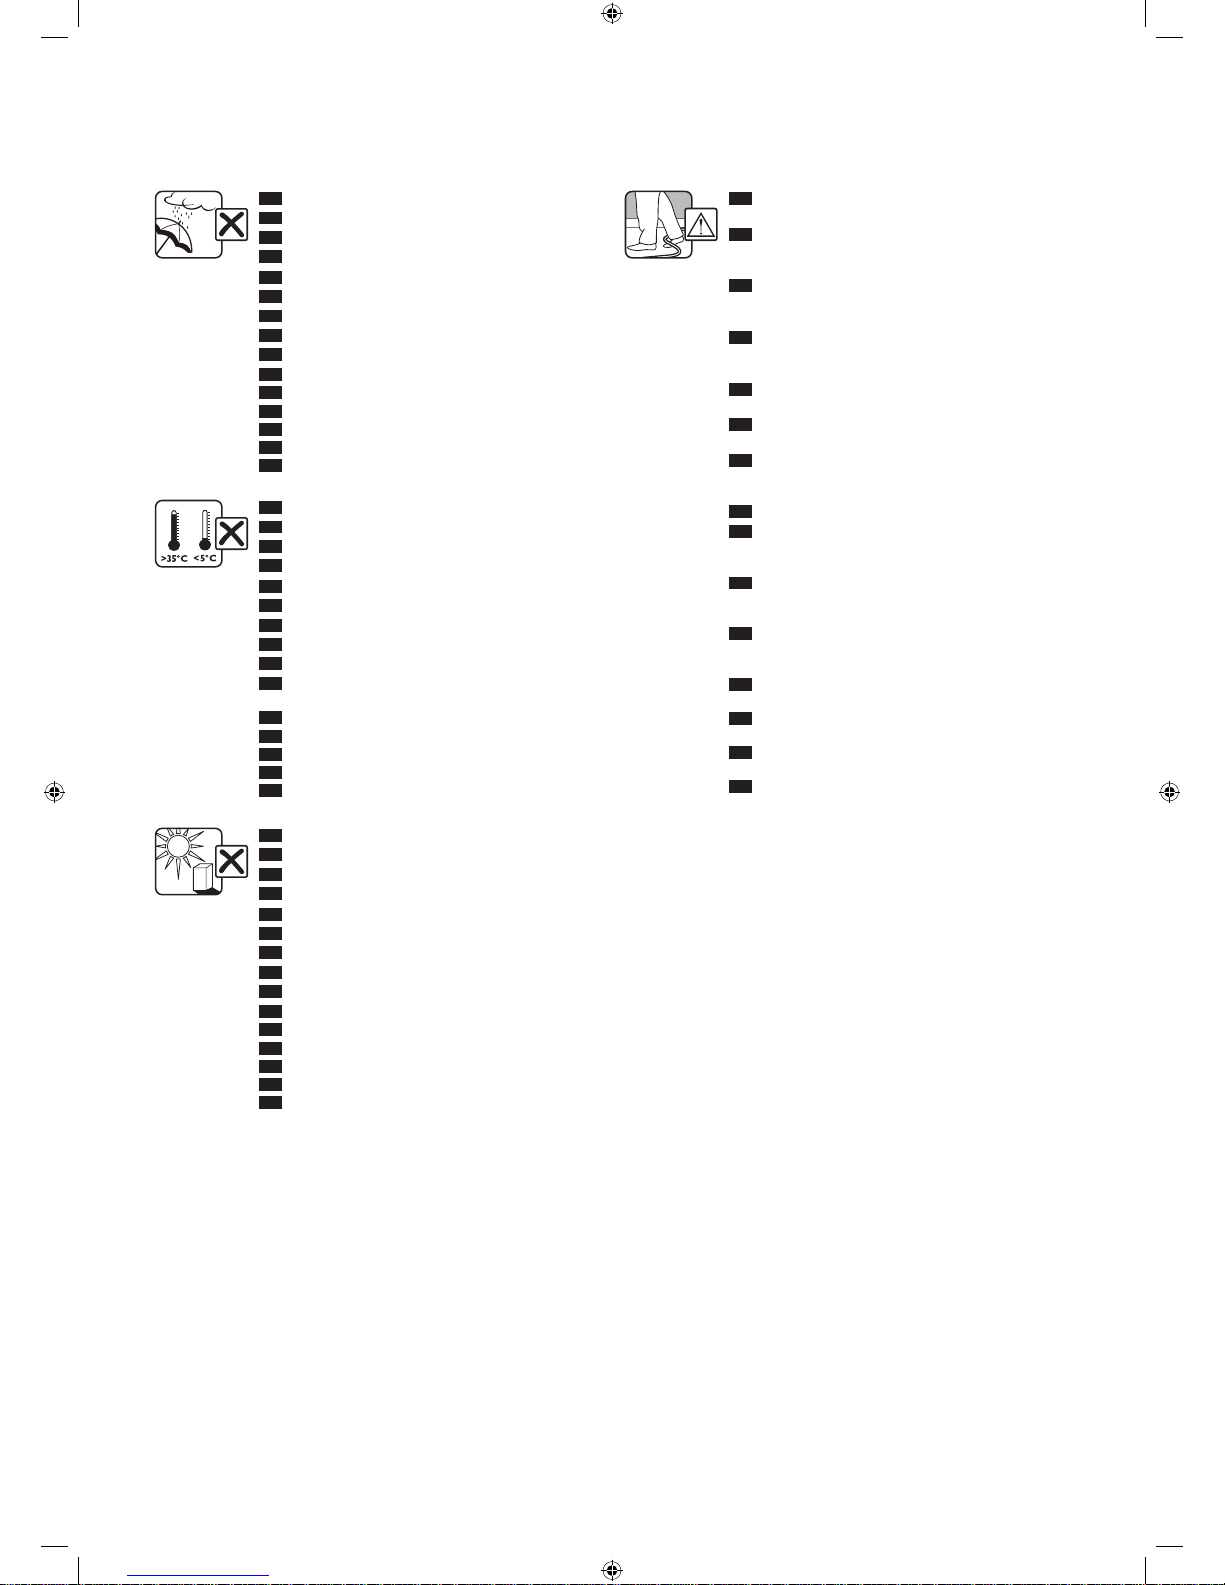
6. Water and Moisture – The appliance should not be used in or near water - for example, near a bathtub, washbowl, kitchen sink, laundry tub, in a
wet basement, or near a swimming pool, and the like. The appliance shall not be exposed to dripping or splashing. Care should be taken so that objects
containing liquids are not placed upon or spilled into the enclosure through openings and that no objects filled with liquids, such as a vase, shall be
placed on the appliance.
7. Ventilation – The appliance should be situated so that its location or position does not interfere with its proper ventilation. For example, the
appliance should not be situated on a bed, sofa, or similar surface that may block any ventilation openings.
8. Heat – The appliance should be situated away from heat sources such as radiators, heat registers, stoves or other appliances (including amplifiers) that
produce heat.
9. Power Sources – The appliance should be connected to a power supply only of the type described in the Operating Instructions or as marked on
the appliance and it shall remain readily operable. Mains plug is used as the disconnect device. To be completely disconnected from the power input,
the mains plug of the appliance must be disconnected from the mains completely.
10. Power-cord Protection – Power supply cords should be routed so that they are not likely to be walked on or pinched by items placed upon or
against them, paying particular attention to cords at plugs, convenience receptacles and the point where they exit from the appliance. The main plug
should not be obstructed OR should be easily accessed during intended use.
11. Attachments and Accessories – Use only attachments/accessories specified by the manufacturer.
12. Handling – The appliance should be transported with the cart, stand, tripod, bracket, or table specified by manufacturer, or sold with the apparatus.
When a cart is used, use caution when moving the cart/appliance combination to avoid injury from tip-over.
13. Non-use Periods – Unplug this appliance during lightning storms or when unused for long periods of time.
14. Damage Requiring Service – The appliance should be serviced by qualified service personnel when:
a) The power supply cord or the plug has been damaged; or
b) Objects have fallen or liquid has been spilled into the appliance; or
c) The appliance has been exposed to rain; or
d) The appliance does not appear to operate normally or exhibits a marked change in performance; or
e) The appliance has been dropped or the enclosure damaged.
15. Servicing – The user shall not attempt to service the appliance beyond that described in the Operating Instructions. All other servicing should be
referred to qualified service personnel.
WARNING
TO REDUCE THE RISK OF FIRE OR ELECTRICAL SHOCK, DO NOT EXPOSE THIS APPLIANCE TO RAIN OR MOISTURE
Important safety instructions
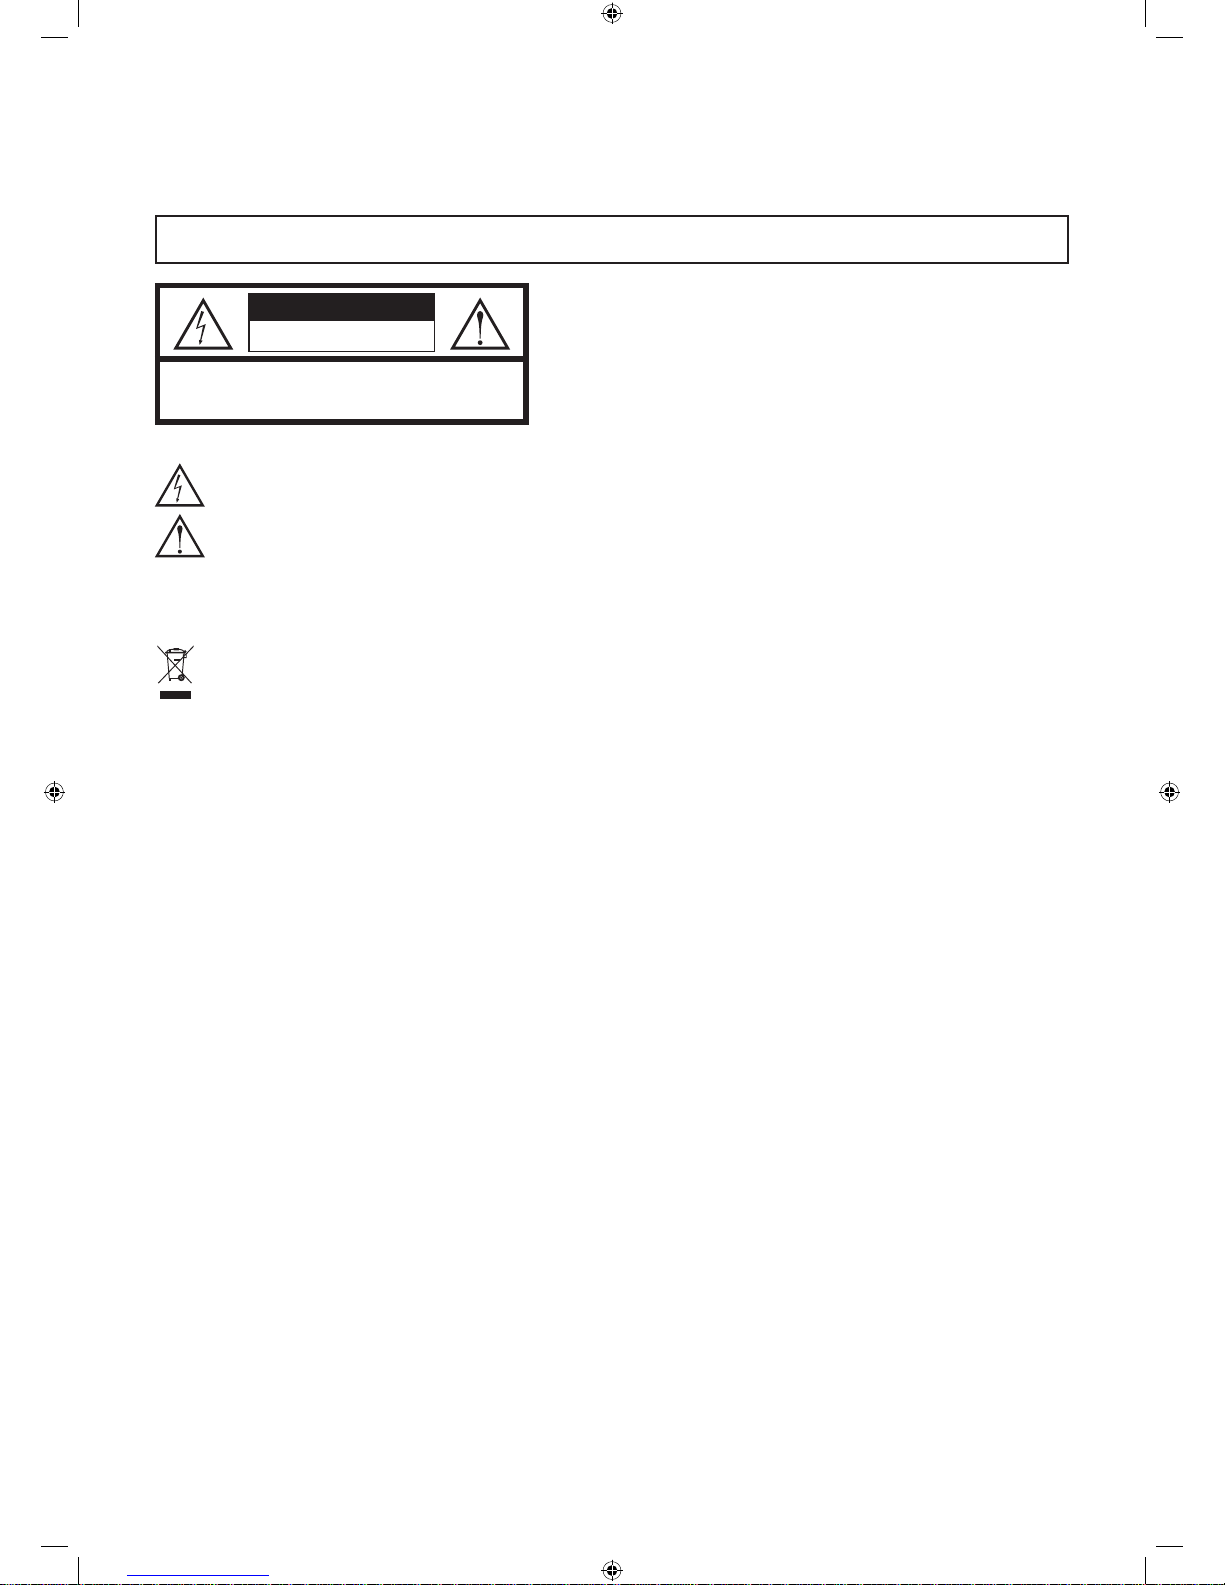
CAUTION
RISK OF ELECTRIC SHOCK
DO NOT OPEN
CAUTION: TO REDUCE THE RISK OF ELECTRIC SHOCK,
DO NOT REMOVE COVER (OR BACK).
NO USER-SERVICEABLE PARTS INSIDE. REFER SERVICING
TO QUALIFIED SERVICE PERSONNEL.
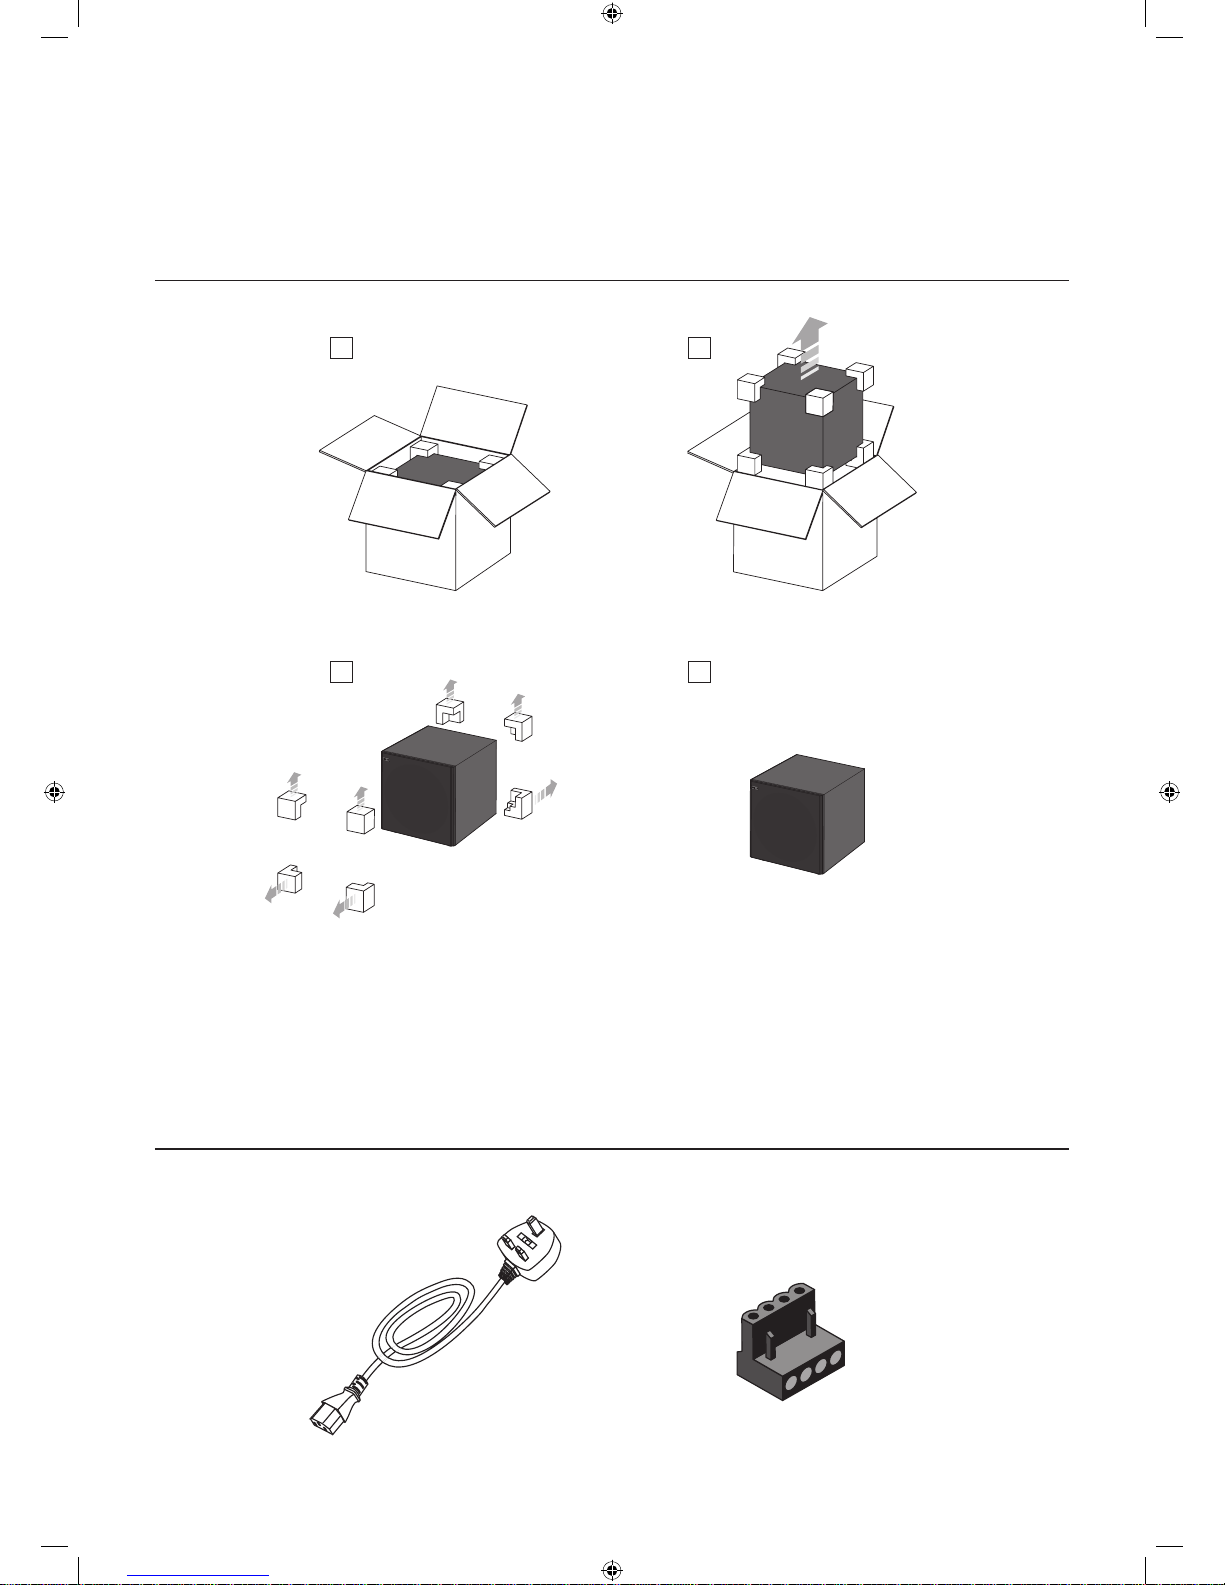
• A combined mains power input lead and country specific mains plug is provided.
• Check before connecting to your local mains supply that the local supply voltage
is the same as that marked on the rear panel. If it is not, check with your supplier
before proceeding.
Explanation of Graphical Symbols
The lightning flash with arrowhead symbol, within an equilateral triangle, is intended to alert the user to the presence of uninsulated “dangerous
voltage” within the products enclosure that may be of a sufficient magnitude to constitute a risk of electrical shock to persons.
The exclamation mark within an equilateral triangle is intended to alert the user to the presence of important operating and maintenance
(servicing) instructions in the literature accompanying the appliance.
WARNING:
Due to the mains switch being located on the rear panel, the appliance must be located in an open area without anything obstructing access to the mains switch.
The apparatus should be connected to a mains socket with a protective earthing connection.
Correct Disposal of this product. This marking indicates that this product should not be disposed with other household wastes throughout the EU.
To prevent possible harm to the environment or human health from uncontrolled waste disposal, recycle it responsibly to promote the sustainable
reuse of material resources.
To return your used device, please use the return and collection systems or contact the retailer where the product was purchased. They can take
this product for environmentally safe recycling.
Q400b manual_Iss1_4301-7382+0_20100622.indd 7 2010-6-22 13:19:34

8
警告・安全上のご注意
ご使用前に必ずお読みください。
警 告
火災や感電の恐れがありますので、絶対に内部を開けたり水に濡らさないでください。
警 告
感電の原因
になります
注意: 感電の危険を減らすため、
カバー(または背面カバー)は取り外さないでください。
内部には、ユーザーが点検・修理できる部品はありません。
点検・修理は資格を持つ技術者に依頼してください。
・ 仕向国の規格にあわせた付属の電源コードとプラグが付属しています。
・ 電源コードを接続する前に、リア・パネルに記されている電源電圧がお使いの地
域の電源電圧に合っていることを確認してください。もし、異なっている場合には
接続せずにお買い求めの販売店にご相談ください。
シンボル・マークの説明
正三角形の中に稲妻が記されているマークは、ケースの内部に感電する恐れのある高い電圧が絶縁されずにかかっていることについての警告
を示しています。
正三角形の中に感嘆符が記されているマークは、セットに付属の印刷物に取り扱いやサービスについての重要な指示があることについて警告
しています。
警告
主電源スイッチは後部パネルにありますので、機器は主電源スイッチにアクセスするのに障害物などがない場所に置いてください。
アース接続をしないで 操作をしないでください。
アース接続はプラグインの前に行ってください。またソケットからプラグを抜いた後アース接続を取り払ってください。
ご使用上の注意
1. 本機を安全にお使いいただくと共に、性能を十分に発揮していただくために、ご使用前に本書を必ずお読みください。
2. 本書は大切に保管してください。
3. 安全にお使いいただくために製品本体や本書に記載されている全ての警告と注意を守ってください。
4. 本機の設置や操作は本書に従ってください。
5. 本機を安全にお使いいただくようアースをおとり下さい。
6. 本機を水の中や水のそばで使わないでください。また、湿気の多い場所での使用も避けてください。(例:バスタブ、洗面所、台所、洗濯場、湿気の多
い地下、プールなど。)
7. 本機の放熱を妨げるような場所に置いたり、物をかぶせたりしないでください。
8. 本機を暖房器具や電熱器、アンプなど発熱の多い機器のそばに置かないでください。
9. 製品本体のリアーパネルに記されている電源仕様のみでお使いいただけます。
10. 電源コードやプラグが歩行の邪魔になったり、ものに挟まれたりすることのないように十分注意してください。
11. アタッチメントやアクセサリーは本書にしたがって使用してください。
12. 取り扱い−本機を移動するときは台車など生産者が指定した物を使って安全に移動してください。特に台車を使うときにはバランスを失うなどして
荷崩れを起こし事故に至ることのないように十分にご注意ください。
13. 長期間お使いにならないときは、必ず電源プラグをACコンセントから抜いてください。
14. 次のような場合は KEF 製品の修理できる資格のあるサービスマンに修理を依頼してください。
a) 電源コードやプラグが不良となったとき。
b) ものを本体内に落としたり、液体をこぼしてしまったとき。
c) 雨など水にぬれてしまった場合。
d) 正常に動作しないとき。
e) 落としたり、キャビネットを損傷したとき。
15. 修理について。お客さまご自身での修理はしないでください。全ての修理は KEF 製品を修理できる資格を持ったサービスマンに依頼してください。
Q400b manual_Iss1_4301-7382+0_20100622.indd 8 2010-6-22 13:19:34

9
重要的安全注意事項
請在使用Q400b之前務必留意以下指引。注意,“本機”在這里是指Q400b超低音音箱或其部分。
1. 在對本機進行操作之前,必須閱讀所有安全信息和操作說明。
2. 務必保留所有安全信息和操作說明以備日后參考。
3. 必須遵守本機和操作說明上的所有警告信息。
4. 必須遵守所有操作和使用說明。只能使用KEF規定的附件。
5. 切勿讓分了極性的或接地型的插頭失去安全效用。第三插腳是用于安全目的的。
如果跟機提供的插頭與您的插座不匹配,請咨詢電工、更換不適用的插座。
請將所有維修事項交給合格維修人員完成。對于受損的零件如電源線或插頭,必須進行維修。
6. 不準在近水地方使用本機,例如在靠近浴缸、洗手盆、廚房洗滌盆或洗衣盆的地方,或在潮濕的地庫內,或靠近泳池的地方使用本機。
本機不得暴露于滴水或濺水中。必須注意,不要將裝有液體的物品放置在本機上,不要讓液體由機箱的開口處進入機內。本機上不應放
置諸如花瓶一類的裝液體的物品。
7. 本機應安裝或放置在不影響正常通風的位置上使用,例如不應將其放在可能堵塞其通風孔的睡床、沙發、毯子或類似表面上。
8. 本機的安裝位置應遠離熱源,例如暖爐、加熱器、火爐或其他產熱裝置(包括功放)。
9. 本機的操作說明或本機上的標識都有對電源要求的描述,只能連接符合此要求的電源,并且要保證便于操作。電源插頭是斷開電源的裝
置,為了完全斷開電源,必須將本機的插頭完全拔出電源插座。
10. 布置電源線時,確保電源線不被踩踏或擠壓,尤其要注意插頭、轉接插座及接出本機處的電源線部分。必須確保電源插頭不被阻擋,便
于操作。
11. 只能使用KEF規定的附件。
12. 本機只能使用KEF規定的或跟機提供的推車、架子、三角架或桌子進行搬運。在使用推車搬運時,必須注意整體移動推車/本機,避免翻
倒引起傷害。
13. 打雷或長期閑置不用時,必須將電源插頭拔掉。
14. 本機在發生下列情形時,必須交給合格維修人員進行維修:
a)電源線或插頭損壞,
b)有異物掉進或液體濺入本機,
c)本機受到雨淋,
d)本機運行不正常或性能上出現明顯變化,
e)本機墜落或機箱受損。
15. 用戶不得試圖對本機進行操作說明所描述的之外的維修操作。所有其他的維修事項必須交給合格的維修人員進行。
警 告
不準打開 以防觸電
注意:為避免觸電,不準打開機殼(或機背)。
機殼內沒有用戶能自行維修的零部件。
本機須由合格維修人員維修。
· 跟機提供了一條帶有插頭的電源線,插頭的類型取決于不同的銷售國。
· 在連接電源之前,必須檢查當地市電與后面板上標識的電壓是否一致。如果
不一致,請聯系銷售商。
圖形標識解釋
左示三角形內加閃電標志,提醒用戶本機內有未經絕緣的“危險電壓”存在,可能足以令人發生觸電危險。
左示三角形內加感嘆號標志,提醒用戶本機附有重要的文字指南,介紹如何操作及維修。
警告:
由于電源開關位于后面板,因此本機必須放置在敞開的區域,電源開關不被阻擋,便于操作。
本機必須連接至帶有保護接地的電源插座。
請正確處置本產品。該標識表示,在全歐洲本產品不得隨其他家庭廢物一起處置。為了防止由于不受控制的廢物處置引起的對人體或
環境可能造成的損害,請盡責地循環使用以促進資源的可持續性再利用。若要退回不再使用的設備,請使用退回收集系統或聯系銷售
商。他們可以將本產品進行有利環境的安全循環利用。
警 告
為避免发生火灾或触电事故,本机不准淋雨或受潮。
Q400b manual_Iss1_4301-7382+0_20100622.indd 9 2010-6-22 13:19:35

10
(F) Accessoires (D) Zubehör (I) Accessori (ES) Accesorios (P) Acessórios (NL) Accessoires (DK) Tilbehør (PL) Akcesoria
(RU) Принадлежности (GR) Εξαρτηματα (JP) アクセサリー (CN) 附件 (TC) 附件 (K) 액세서리
Accessories
(F) Déballage (D) Auspacken (I) Apertura della confezione (ES) Desembalaje (P) Desembalagem (NL) Het toestel uitpakken
(DK) Udpakning (PL) Rozpakowanie (RU) Распаковка (GR) Αφαιρεση απο τη συσκευασια (JP) 開梱 (CN) 拆開包裝
(TC) 拆開包裝 (K) 개봉
Unpacking
1
3
2
4
x1 x1
Q400b manual_Iss1_4301-7382+0_20100622.indd 10 2010-6-22 13:19:35

11
Positioning
(F) Positionnement (D) Aufstellung (I) Posizionamento (ES) Posicionamiento (P) Posicionamento (NL) Plaats en aansluiting van het netsnoer
(DK) Placering (PL) Ustalanie położenia (RU) Размещение (GR) Ρύθμιση (JP) 位置 (CN) 擺放位置 (TC) 擺放位置 (K) 설치 위치
GB The Q400b is a front firing configuration,therefore you may place the unit close to walls or structures on the right and left sides.
FL'évent et le haut-parleur du Q400b étant en configuration frontale,il s'intégrera aisément près des murs,dans une niche ou dans un meuble ouvert.
DDer Q400b hat das Basschassis und den Bassreflexkanal in der Front.Dadurch kann man den Subwoofer nah vor oder an eine Wand stellen ohne
Klangeinbußen befürchten zu müssen.
IIl Q400b ha un reflex frontale,quindi può essere posizionato vicino ad una parete posteriore o laterale.
ES El Q400b tiene un lanzamiento frontal de sonido,por consiguiente puedes situar la unidad pegada a paredes o estructuras en el lado derecho o
izquierdo.
PAs Q400b possuem configuração de projecção frontal,pelo que poderá colocar as colunas junto a paredes ou estruturas nos lados direito e esquerdo.
NL De Q400b straalt aan de voorzijde af,zodat u de subwoofer rustig naast wanden of structuren aan linker- of rechterzijde kunt plaatsen.
DK Q400b har en front strålende basenhed,oq kan defor anbringes tæt på væge og genstande på højre og venstre side.
PL W subwooferze Q400b powietrze jest uwalniane z przodu (konstrukcja front ring), dlatego można go umieszczać blisko ścian lub
przedmiotów znajdujących się po prawej i lewej stronie.
RU Динамик сабвуфера Q400b расположен на лицевой стороне корпуса, что позволяет размещать устройство левой и правой
сторонами близко к стенам или конструктивным элементам помещения.
GR Το Q400b αποτελεί μια διαμόρφωση μπροστινής έναυσης, έτσι ώστε να μπορείτε να τοποθετήσετε τη μονάδα κοντά σε τοίχους ή
κατασκευές στη δεξιά και αριστερή πλευρά.
JP Q400b は前から音が出る構造です。したがって、両サイドとも壁につけられるように設置をしてください。
CN Q400b 向前送音,因此左右兩側可以離墻或其他結構物近一些。
TC Q400b 向前送音,因此左右兩側可以離墻或其他結構物近一些。
KQ400b는 프런트 파이어링(front firing) 설계로서, 좌우측 벽이나 구조물 가까운 곳에 설치할 수 있습니다.
TV
C
TV
C
TV
C
TV
C
Q400b
Q400b
Q400b
Q400b
Q400b Q400b
LF
LF
LF
RF
RF
RF
RR
LR
LR
LR
LF
RF
LR
RR
RR
RR
Q400b manual_Iss1_4301-7382+0_20100622.indd 11 2010-6-22 13:19:36

12
Controls and sockets
(F) Commandes et prises (D) Bedienungselemente und Anschlüsse (I) Comandi e prese (ES) Controles y conexiones (P) Comandos e fichas
(NL) Regelaars en aansluitingen (DK) Betjeningsknapper og stik (PL) Elementy obsługi i przyłącza (RU) Элементы управления и
коммутационные разъемы (GR) Στοιχεια ελεγχου και υποδοχες (JP) コントロールSW及び入出力端 (CN) 控制和接口 (TC) 控制和接口
(K) 제어장치 및 소켓
9
8
7
654321
Q400b manual_Iss1_4301-7382+0_20100622.indd 12 2010-6-22 13:19:36

13
9
8
7
654321
Q400b manual_Iss1_4301-7382+0_20100622.indd 13 2010-6-22 13:19:37

14
9
8
7
654321
Q400b manual_Iss1_4301-7382+0_20100622.indd 14 2010-6-22 13:19:38

15
English instructions GB
Controls and sockets
Q400b Subwoofer Rear Panel
1. LFE / Line in Smart Connect input
2. Phase control
3. Bass boost
4. Level control
5. Mains indicator light Power ON Power OFF
Red / Green
6. Crossover frequency control
7. ‘ON/OFF’ switch (Vacation switch)
8. AC power input (230V Euro / 230V UK / 115V US)
9. High Level (Speaker) Input Block
Positioning
As the sub-bass (low frequency) sound produced by the subwoofer is non-
directional it can be positioned almost anywhere in the room, although it
should not be placed too close to the listener. For optimum performance
try the subwoofer in different positions to find the best place for a boom-
free sound.
Connection to AV amplifier / receiver
Connect to the amplifier LFE subwoofer output.
All inputs work simultaneously.
Set the subwoofer frequency on the amplifier / receiver to 80Hz (refer to
the amplifier / receiver manual).
Set the crossover on the Q400b to 140Hz.
Set the volume on the Q400b to the 7th dot.
Ensure that the satellites are set to the appropriate configuration in the
amplifier / receiver menu (refer to the speaker manual).
Adjust the subwoofer volume on the AV amplifier / receiver to your desired
level (refer to the amplifier / receiver manual).
Connection to stereo preamp / receiver
Connect to amplifier speaker or preamp or subwoofer output.
Set the crossover to 80Hz for large speakers or higher to match small
speakers. Start with the volume set at the 7th dot. Adjust the volume to
match output to your main speakers.
Manual controls
It is possible to manually adjust the set up of the Q400b instead of using the
amplifier / receiver.
A. Crossover Frequency Control
The crossover frequency control changes the upper cut-off frequency of the
subwoofer. Its effective range is from 40Hz to 140Hz at a rate of 24dB per
octave. The frequency control should be adjusted to achieve the smoothest
integration between the main/satellite speakers and the
subwoofer. Clockwise rotation will increase the cut-off frequency and anti-
clockwise rotation will decrease the cut-off frequency.
Combined Output Subwoofer Output Satellite Output
1. Ideal crossover - flat response.
2. Crossover point set too low - causes dip in combined response.
3. Crossover point set too high - causes hump in combined response.
B. Phase Control
The phase control will normally be set at 0º but more output level can
sometimes be achieved in the 180º position, particularly when the subwoofer
is far away from the satellite speakers.
C.Volume Control
The volume control adjusts the output level of the subwoofer in relation to
the satellite or AV speaker output level. Clockwise rotation to increase the
output level or anti-clockwise to decrease the output level.
Bass Boost (EQ)
The bass boost control is intended to adjust the response of the subwoofer
to compensate for room conditions and user preferences. Boost is
switchable between 0, +6 and +12dB at around 40Hz.
FAULT REMEDY
Mains indicator light does not come on. Check that the subwoofer is plugged into the mains supply and that any switches are on.
Check any fuses (including the plug) or circuit breakers on the mains supply which may affect the
power to the subwoofer.
Ensure that all equipment is switched on.
Contact your dealer for further advice.
Mains indicator light is on but no sound comes from
the subwoofer.
Check and adjust the level control.
Check the output sockets on the source equipment are correctly switched and
adjusted to provide sufficient level to drive the subwoofer.
Check that all connections between the subwoofer and the source equipment are
correct and adjust as necessary.
If there is still no sound. Contact your dealer for further advice.
Red light no sound.
Green light no sound.
Check volume levels of subwoofer and amplifier/receiver.
Trouble Shooting
Q400b manual_Iss1_4301-7382+0_20100622.indd 15 2010-6-22 13:19:38

16
PROBLEME REMEDE
Le témoin indicateur de mise sous tension ne s’allume pas. Vérifier que la fiche du subwoofer est bien branchée sur le secteur et que les
commutateurs sont positionnés sur ‘ON’.
Vérifier tous les fusibles (ainsi que la fiche) circuit d’alimentation du subwoofer.
Pour de plus amples conseils, adressez-vous à votre revendeur.
Le témoin indicateur de mise sous tension ne s’allume toujours pas. Vérifier que toute l’installation est branchée.
Le témoin indicateur de mise sous tension est allumé mais aucun son
ne provient du subwoofer.
Vérifier et régler le commande de niveau.
Vérifier que les prises de sortie de l’équipement source sont
correctement commutées et procéder à un réglage de manière à
obtenir un niveau suffisant pour le subwoofer.
Vérifier que toutes les connexions entre le subwoofer et l’équipement
source sont correctes et procéder, si nécessaire, à la correction.
Le subwoofer n’émet toujours aucun son. Pour de plus amples conseils, adressez-vous à votre revendeur.
Voyant rouge pas de son
Voyant vert pas de son
Vérifier les niveaux
Instructions en francais F
Commandes et prises
Panneau arrière du modèle Q400b Subwoofer
1. LFE/ Entrée ligne bas-niveau.
2. Contrôle de phase.
3. Bass Boost
4. Commande de niveau.
5. Témoin de mise MARCHE ARRET
Rouge / Vert
6. Commande de la fréquence de coupure.
7. Commutateur ‘MARCHE/ARRET’ (ON/OFF)
(Interrupteur Vacances)
8. Entrée d’alimentation en c.a. (230V Euro / 230V UK / 115V US)
9. Entrée Haut Niveau (Haut-parleur)
Positionnement/Branchement sur secteur
Dans la mesure où le son infra-grave (basse fréquence) produit par le
subwoofer est non-directionnel, ce dernier peut être placé en n’importe
quel endroit de la pièce. On veillera toutefois à ne pas le positionner trop
près de l’auditeur. Essayez, si possible, de placer successivement le subwoofer
en différents endroits de manière à localiser le meilleur endroit pour un
rendu du son sans grondement. Un fil d’alimentation satisfaisant aux normes
nationales de mise à la terre et répondant aux exigences locales en matière
de sécurité est fourni avec le subwoofer.
Raccordement à un amplificateur ou un récepteur
Audio/Vidéo
Connectez à la sortie LFE subwoofer de l'amplificateur.
Toutes les entrées fonctionnent simultanément.
Réglez, sur l’amplificateur/récepteur, la fréquence de sortie du caisson de
basses a 80Hz (veuillez vous référer au manuel d’utilisation de l’amplificateur/
récepteur).
Régler la fréquence de coupure du Q400b à 140Hz
Régler le volume du Q400b au niveau 7
Assurez vous, sur l’amplificateur/récepteur, que la configuration des satellites
est appropriée (veuillez vous référer au manuel d’utilisation des satellites).
Ajustez le volume du caisson de basses sur l’amplificateur/récepteur (veuillez
vous référer au manuel d’utilisation de l’amplificateur/récepteur).
Connexion à un amplificateur intégré stéréo ou à un
préamplificateur stéréo
Branchez sur la sortie haut-parleurs ou pré-ampli ou subwoofer de
l'amplificateur. Réglez la fréquence de coupure sur 80Hz pour une utilisation
avec des enceintes de type colonne/bibliotheque ou sur une fréquence plus
élevée pour des enceintes de type satellite. Commencez avec le volume
réglé sur le septième point. Ajustez le volume en fonction du niveau sonore
produit par vos enceintes principales.
Reglages manuels
Il est possible de régler le Q400b via ses propres réglages en lieu et place de
ceux de l’amplificateur/récepteur.
A. Commande de la fréquence de coupure.
Cette commande modifie la fréquence de coupure supérieure du subwoofer.
Sa plage de réglage efficace s’échelonne de 40Hz à 140Hz à un taux de 24
dB par octave. La commande de fréquence doit être réglée de manière à
obtenir la parfaite intégration entre les hautparleurs principaux/satellites et
le subwoofer.Une rotation dans le sens horlogique relèvera la fréquence de
coupure et une rotation dans le sens anti-horlogique abaissera la fréquence
de coupure.
Sortie Combinée Sortie Subwoofer Sortie Satellite
1. Croisement idéal - Réponse plate.
2. Point de croisement réglé trop bas - provoque um creux en réponse
combinée.
3. Point de croisement réglé trop haut - provoque une boss en réponse
combinée.
B. Contrôle de phase
Le contrôle de phase sera normalement positionné sur 0º. Un niveau plus
élevé de sortie peut toutefois être obtenu en position 180º, et ce plus
particulièrement lorsque le subwoofer est éloigné des hautparleurs satellites.
C. Commande du niveau
La commande de niveau règle le niveau de sortie du subwoofer en fonction
du niveau de sortie du haut-parleur satellite ou AV. Une rotation dans le sens
horlogique augmentera le niveau de sortie et une rotation dans le sens anti-
horlogique abaissera le niveau de sortie.
Bass Boost (EQ)
La fonction "bass Boost"permet d'adapter la réponse au local ou aux
préférences personnelles. Les basses peuvent etre "poussées" pas par pas,
0,+6 et +12dB a +/- 40Hz
Depannage
Q400b manual_Iss1_4301-7382+0_20100622.indd 16 2010-6-22 13:19:38

17
Deutsche anleitung D
Bedienungselemente und Anschlüsse
Modell Q400b Subwoofer Rückseite
1. LFE/Line in Smart Connect-Eingang
2. Phasensteurung
3. Bassanhebung
4. Pegeleinstellung
5. Betriebsanzeige Betrieb Gerätausgeschaltet
Rot / Grün
6. Frequenzeinstellung
7. Netzschalter (EIN/AUS) (Urlaubsschalter)
8. Netzstromeingang (230V Euro / 230V UK / 115V US)
9. Hi-Level-Lautsprecheranschlussfeld
Aufstellung/Netzkabelanschluß
Da der vom Subwoofer produzierte Tiefbaß ungerichtet ist, kann das Gerät
praktisch fast an jedem Ort im Raum aufgestellt werden. Eine Aufstellung
in direkter Nähe des Zu-hörers ist allerdings nicht empfehlenswert. Nach
Möglichkeit sollten Sie den Subwoofer probeweise an verschiedenen Orten
aufstellen um die beste Position zu ermitteln. Ein Netzkabel, das den gültigen
landesspezifischen Sicherheitsbestimmungen entspricht, ist im Lieferumfang
enhalten.
Anschluss an einen AV-Receiver / -Verstärker
Vom Subwoofer-Ausgang des Verstärkers/Receivers.
Alle Eingänge können gleichzeitig benutzt werden.
Stellen Sie die Übergangsfrequenz des Subwoofers im entsprechenden Menü
des Receivers / Verstärkers auf 80 Hz ein. (Hinweise hierfür finden Sie in der
Bedienungsanleitung des Receivers / Verstärkers).
Stellen Sie die Übergangsfrequenz am Q400b auf 140 Hz ein.
Stellen Sie die Lautstärke des Q400b auf Level 7.
Stellen Sie sicher, dass die Receiver- / Verstärker-Einstellungen für die
Satellitenlautsprecher den Empfehlungen der Bedienungsanleitung
entsprechen. (Hinweise hierfür finden Sie in der Bedienungsanleitung der
Satellitenlautsprecher).
Stellen Sie die Lautstärke des Subwoofers am Receiver / Verstärker auf
den von ihnen gewünschten Wert ein. (Hinweise hierfür finden Sie in der
Bedienungsanleitung des Verstärkers).
Vom Stereoverstärker/Receiver
Verbindung zum Lautsprecherausgang des Verstärkers oder
Vorverstärkerausgang oder Subwoofer-Ausgang.
Wählen Sie die Übergangsfrequenz 80Hz für große oder höher für kleinere
Lautsprecher. Stellen Sie zuerst den Lautstärkeregler auf die Sieben-Uhr-
Stellung und erhöhen Sie die Lautstärke des Subwoofers weiter bis sie zu
der Lautstärke der Hauptlautsprecher passt.
Direkte Einstellung
Sie können Die Subwoofer-Einstellungen auch direkt am Subwoofer
vornehmen, ohne über die Menüs des Receivers / Verstärkers zu gehen.
A. Frequenzeinstellung
Die Frequenzeinstellung ändert die obere Trennfrequenz des Subwoofers,
Der Einstell-bereich reicht von 40Hz bis 140Hz; die Flankensteilheit beträgt
24dB Oktave. Der Regler sollte so eingestellt sein, daß Frontlautsprecher und
Subwoofer optimal zu-sammenarbeiten; d.h. es sind weder “Frequenzlücken”
vorhanden, noch findet eine Überbtonung bestimmter Grenzfrequenzen
statt. Durch Rechtsdrehen (im Uhrzeigersinn) wird die Trennfrequenz
erhöht. Durch Linksdrehen (gegen den Uhrzeigersinn) wird sie gesenkt.
Kombinierter Ausgang
(ungefiltertes Signal)
Subwoofer-Ausgang
(nur tieffrequente
Signalanteile)
Satelliten-Ausgang
(ohne tieffrequente
Signalanteile)
1. Ideale Trennfrequenz : flacher Frequenzgang
2. Übergangspunkt zu niedrig: Verursacht eine “Frequenzlücke” im
kombinierten Frequenzgang
3. Übergangspunkt zu hoch: verursacht eine Überbetonung bestimmter
Frequenzen im kombinierten Frequenzgang
B. Phasensteurung
Der Phasensteurung wird normalerweise auf 0º eingestellt. Allerdings kann
manchmal in der Position 180º ein höherer Ausgangspegel erzielt werden,
insbesondere, wenn der Subwoofer weit von den Satellitenlautsprechern
entfernt ist.
C. Pegeleinstellung
Mit der Pegeleinstellung kann der Ausgangspegel des Subwoofers auf den
Ausgangspegel der Satelliten- oder AV-Lautsprecher eingstellt werden. Durch
Rechtsdrehen (im Uhrzeigersinn) wird der Ausgangspegel erhöht. Durch
Linksdrehen (gegen den Uhrzeigersinn) wird er gesenkt.
Bassanhebung (EQ)
Die Einstellung der Bassanhebung erlaubt die Anpassung des Subwoofers
an die Bedingungen des Raums und Ihrem personlichen Geschmack. Die
Anhebung ist schaltbar in folgenden Stufen: 0 dB, +6 dB und +12 dB bei etwa
40 Hz.
SYMPTOM FEHLERBESEITIGUNG
Betriebsanzeige leuchtet nicht auf. Vergewissern Sie sich, daß der Subwoofer an das Stromnetz angeschlossen ist.
Überprüfen Sie (z.B. mit irgendeinem anderen Gerät), ob an der betreffenden Netzsteckdose
Spannung anliegt.
Bitte wenden Sie sich an lhren Fachhändler.
Betriebsanzeige leuchtet immer noch nicht auf Vergewissern Sie sich, daß alle Geräte eingeschaltet sind.
Betriebsanzeige leuchtet, jedoch kein Ausgangssignal aus dem
Subwoofer.
Pegeleinstellung überprüfen und ggf, korrigieren.
Überprüfen Sie, ob der entsprechende Hoch-oder Niederpegel-Ausgang am
Verstärker aktiviert ist und so eingestellt ist, daß ein ausreichender Pegal an
den Subwoofer übertragen wird.
Vergewissern Sie sich, daß alle Anschlußkabel bzw. - stecker fest und
ordnungsgemäß sitzen. Tauschen sie ggf, die Anschlußkabel aus.
Immer noch kein Ausgangssignal aus dem Subwoofer. Bitte wenden Sie sich an lhren Fachhändler.
Rotes Licht kein Klang.
Grünes Licht kein Klang.
Überprüfen Sie die Einstellung für die Lautsärke.
Fehlersuche
Q400b manual_Iss1_4301-7382+0_20100622.indd 17 2010-6-22 13:19:39

18
Istruzioni in italiano I
Comandi e prese
Modello Q400b Subwoofer Pannello posteriore
1. Ingresso LFE/Line in
2. Interruttore di fase
3. Bass Boost
4. Regolazione di livello
5. Indicatore luminoso Acceso Spento
di alimentazione
Rosso / Verde
6. Regolazione di frequenza
7. Interruttore ON/OFF (Interruttore Vacanze)
8. Alimentazione a c.a. (230V Euro / 230V UK / 115V US)
9. Ingresso Alto Livello (diffusori)
Posizionamento/collegamento del cavo di
alimentazione
Il subwoofer, poiché produce un suono a bassa frequenza nondirezionale,
può essere posizionato in qualunque punto dell’ambiente, purché non
troppo vicino all’ascoltatore. Tuttavia, per ottenere un suono quanto più
pulito possibile si consiglia di provare il subwoofer in diverse posizioni.Viene
fornito un cavo di alimentazione compatibile con le normative di messa a
terra nazionali ed in conformità ai requisiti di sicurezza locali.
Connessioni all’amplificatore A/V
Collegare all’uscita subwoofer LFE dell’amplificatore.
Tutti gli ingressi sono attivi.
Impostare la frequenza del subwoofer sull’amplificatore a 80 Hz (seguire le
istruzioni dell’amplificatore).
Posizionare il crossover del Q400b a 140Hz
Posizionare il volume del Q400b al settimo punto
Assicurarsi che gli altri diffusori acustici siano configurati correttamente
(seguire le istruzioni dell’amplificatore).
Regolare il volume del subwoofer sull’amplificatore al livello desiderato
(seguire le istruzioni dell’amplificatore).
Connessione al preamplificatore stereo / ricevitore
stereo
Collegare alle uscite dei diffusori, o uscita pre out, o uscita subwoofer out.
Posizionare il taglio del crossover a 80Hz con diffusori grandi o ad un
valore maggiore con diffusori piccoli. Iniziare con il volume posizionato su
“7”. Regolare il volume per ottenere un buon accoppiamento con i diffusori
principali.
Controlli manuali
La taratura dell’Q400b può essere effettuata manualmente invece di
utilizzare l’amplificatore.
A. Regolazione di frequenza
Il regolatore di frequenza modifica la frequenza di taglio superiore del
subwoofer, con un intervallo effettivo di 40-140 Hz a 24dB per ottava.
Regolare la frequenza in modo da ottenere la migliore integrazione tra i
diffusori principali/secondari e il subwoofer.
La rotazione in senso orario aumenta la frequenza di taglio, mentre quella in
senso orario la riduce.
Uscita Combinata Uscita Subwoofer Uscita Satellite
1. Crossover ideale - risposta piatta.
2. Frequenza di taglio troppo bassa: provoca una flessione nella risposta
combinata.
3. Frequenza di taglio tropo alta: provoca un innalzamento nella risposta
combinata.
B. Interruttore di fase
In genere l’interruttore di fase viene impostato a 0º ma a volte si ottiene
un maggior livello d’uscita nella posizione a 180º, particolarmente se il
subwoofer è molto distante dagli altoparlanti secondari.
C. Regolazione di livello
Il regolatore di livello consente di regolare il livello d’uscita del subwoofer
in rapporto al livello d’uscita dai diffusori AV o secondari. Ruotare in senso
orario per aumentare il livello d’uscita o in senso antiorario per ridurlo.
Bass Boost (EQ)
Mediante il selettore "bass boost" è possibile apportare piccole enfasi nella
risposta in frequenza del sub-woofer, per compensare differenti situazioni
ambientali o per preferenze personali. Le variazioni possibili sono +6 e +12
dB a circa 40 Hz.
ANOMALIA AZIONE
La spia di alimentazione non si accende. Verificare che il subwoofer sia collegato all’alimentazione di corrente e che gli eventuali interruttori
presenti siano su ON.
Controllare gli eventuali fusibili (spina compresa) o sezionatori sull’alimentazione che possano
influenzare l’alimentazione del subwoofer.
Per ulteriori informazioni rivolgersi al rivenditore.
Se la spia di alimentazione resta ancora spenta Verificare che l’apparecchiatura sia accesa.
Se la spia di alimentazione è accesa ma non arriva
alcun suono dal subwoofer
Controllare il regolatore di livello e regolarlo di conseguenza.
Verificare che le uscite della sorgente (pre o finale) siano correttamente impostate, in
modo da garantire un adeguato livello al subwoofer.
Verificare che tutti i collegamenti tra il subwoofer e la sorgente siano stati realizzati in
modo appropriato e modificarli se necessario.
Se persiste l’assenza del suono. Per ulteriori informazioni rivolgersi al rivenditore.
Spia rossa non c’é suono
Spia verde non c’é suono
Controllare i livelli
Individuazione delle anomalie
Q400b manual_Iss1_4301-7382+0_20100622.indd 18 2010-6-22 13:19:39

19
Instrucciones en español ES
Controles y conexiones
Q400b Subwoofer Rear Panel
1. LFE/ conector entrada de linea
2. Controllo di fase
3. Realce de graves
4. Control de nivel
5. Luz indicadora de Encendido Power OFF (desconectado)
conexión a red
Rojo / Verde
6. Control de frecuencia
7. Interruptor ON/OFF (botón Vacaciones)
8. Entrada de corriente (CA) (230V Euro / 230V UK / 115V US)
9. Alto nivel (altavoz) entrada de conexiones
Posicionamiento/Conexión a la red
Puesto que el sonido de baja frecuencia producido por el altavoz de bajos
no es direccional, puede ser colocado en cualquier lugar de la habitación,
aunque no debe ser colocado demasiado cerca del oyente. Si es posible,
pruebe el altavoz en diferentes ubicaciones para encontrar el lugar en el que
no se produce reverberación del sonido. Se suministra un cable de conexión
a la red de acuerdo con los requisitos del país y las regulaciones relativas a
la toma de tierra.
Conexión a AV amplificador / receptor
Conectar a el amplificador LFE salida subwoofer
Todas las entradas funcionan simultameamente
Seleccione la frecuencia del subwoofer en el amplificador / receptor 80Hz
(referido en el manual amplificador/receptor).
Fijar el crossover en el Q400b a 140Hz
Fijar el volumen en el Q400b a el 7º punto.
Asegurase que los satélites están fijados según la configuración adecuada
al amplificador/receptor ( especificados en el manual del amplificador/
receptor).
Ajustar el volumen del subwoofer en el amplificador/receptor AV al nivel
que desee ( Consultar el manual amplificador/receptor).
Conectar a preamp/ receptor stereo
Conectar el altavoz del amplificador o preamp o salida de subwoofer.
Configurar el crossover del amplificador a 80Hz para altavoces grandes o
mas alto para altavoces pequeños. Empezar con el volumen fijado a el 7
punto. Ajustar el volumen para fijar la salida a los altavoces principales.
Controles manuales
Es posible ajustar manualmente la configuración del Q400b en lugar de usar
el amplificador/receptor.
A. Control de frecuencia
El control de frecuencia cambia el umbral superior de la frecuencia del
altavoz de graves. Su intervalo efectivo va desde 40 a 140 Hz a un régimen
de 24 dB por octava. El control de frecuencia debe ajustarse para obtener la
integración más suave entre los altavoces principal/satélite y los altavoces de
graves.
El giro en el sentido de las agujas del reloj incrementa la frecuencia de corte
y en sentido contrario la decrementa.
Salida Combinada Salida de Subwoofer Saleda de Satélite
1. Frecuencia de cambio ideal. Respuesta plana.
2. El punto de frecuencia de cambio fijado demasiado bajo causa una
depresión en la respuesta combinada.
3. El punto de frecuencia de cambio fijado demasiado alto causa una cresta
en la respuesta combinada.
B. Controllo di fase
El Controllo di fase debe estar normalmente en 0º, pero algunas veces se
puede obtener un mayor nivel de salida en la posición de 180º, especialmente
cuando el altavoz de graves esta alejado de los altavoces satélite.
C. Control de nivel
El control de nivel ajusta el nivel de salida del altavoz de graves en relación
con los altavoces AV o satélites. El giro hacia la derecha incrementa el nivel
de salida y hacia la izquierda lo disminuye.
Realce de graves (EQ)
El control de realce de graves permite ajustar la respuesta del subwoofer
para compensar las condiciones de la sala y las preferencias del usuario. El
realce se puede poner a 0, +6 y +12 dB en torno a 40Hz.
SINTOMA REMEDIO
La luz indicadora de red no se ilumina. Compruebe que el altavoz de graves está conectado a la red y que los interruptores están activados.
Compruebe los fusibles o disyuntores de la red que puedan afectar a la falta de funcionamiento del
altavoz.
Póngase en contacto con el proveedor del equipo para obtener asesoramiento.
Si la luz indicadora de red sigue sin iluminarse. Asegúrese de que todo el equipo está conectado.
Si la luz indicadora de red está iluminada pero el
altavoz de graves no suena.
Compruebe y ajuste el control de nivel.
Compruebe que las clavijas de salida del equipo principal están correctamente
conectadas y ajústelas para proporcionar potencia suficiente para que funcione el altavoz
de graves.
Compruebe que todas las conexiones entre el altavoz de graves y el equipo principal
(fuente) están correctas y ajústelas según sea necesario.
Si sigue sin emitir sonido. Póngase en contacto con el proveedor del equipo para obtener asesoramiento.
Luz roja no suena.
Luz verde no suena.
Comprobar niveles.
Localizacion de averias
Q400b manual_Iss1_4301-7382+0_20100622.indd 19 2010-6-22 13:19:40

20
Instruções em português P
Comandos e fichas
Painel traseiro do Modelo Q400b Subwoofer
1. LFE/Line in - Entrada Inteligente
2. Controlo de fase
3. Reforço de baixos
4. Controlo de nível
5. Luzes indicadoras Power On Desligado
de tensão
Vermelho / Verde
6. Controlo de frequência
7. Interruptor “ON/OFF” (Interruptor Férias)
8. Entrada de corrente AC (230V Euro / 230V UK / 115V US)
9. Ligador para entrada de alto nível (speaker)
Posicionamento/Ligações principais
Como o som sub-baixo (baixa frequência) produzido pelo subwoofer não é
direccional, pode ser posicionado em quase todos os locais da sala, embora
não deva ser colocado muito próximo do ouvinte. Se possível, tente colocar
o subwoofer em diferentes posições até encontrar o melhor local para
obter um som sem ressonância. É fornecido um cabo de ligação à corrente
compatível com os padrões eléctricos nacionais e de acordo com as normas
locais de segurança.
Ligação ao Amplificador/Receiver AV
Ligue à saída LFE do Amplificador.
Todas as entradas funcionam simultâneamente.
Ligação a Pre- Amplificador Stereo / Receiver.
Configurar a frequência do subwoofer no amplificador/receiver para 80Hz
(consultar o manual do amplificador/receiver).
Ajuste o crossover no Q400b para 140Hz
Ajuste o volume no Q400b no ponto 7
Certifique-se de que os satélites estão definidos para a configuração
adequada no menu do receiver/amplificador (consulte o manual da coluna).
Ajustar o volume do subwoofer no receiver/amplificador AV para o nível
pretendido (consulte o manual do receiver/amplificador).
Ligação à saída do Amplificador ou ao
Pre-Amplificador ou à saída do Subwoofer
Seleccione o crossover em 80Hz para colunas de grande gama de frequência
ou acima de 80 Hz para colunas de pequenas dimensões (consulte o Manual
de instruções das colunas, veja qual a frequência mais baixa da sua gama
de frequências e seleccione o Crossover para esse valor). Comece com
o volume no 7º ponto. Ajuste o volume até ficar equilibrado com os seus
altifalantes frontais.
Comandos Manuais
É possível ajustar a configuração do Q400b manualmente em vez de usar o
amplificador/receiver.
A. Controlo de frequência
O controlo de frequência altera a frequência superior de corte do
subwoofer. O seu intervalo efectivo é de 40 Hz a 140 Hz numa proporção
de 24dB por oitava. O controlo de frequência deve ser ajustado para se
obter a mais suave integração possível entre a coluna principal/ satélite e o
subwoofer.
A rotação no sentido dos ponteiros do relógio aumentará a frequência de
corte e a rotação no sentido inverso diminuirá a frequência corte.
Saída Combinada Saída de Subwoofer Saída de Coluna Satélite
1. Confluência Ideal - Resultado monótono.
2. Ponto de confluência fixado demasiado baixo - Provoca descidas nas
respostas combinadas.
3. Ponto de confluência fixado demasiado alto - Provoca elevações nas
respostas combinadas.
B. Controlo de fase
O controlo de fase será fixado normalmente a 0º mas algumas vezes pode-
se conseguir um maior nível de saída numa posição a 180º, nomeadamente
quando o subwoofer se encontra longe das colunas satélites.
C. Controlo de nível
O controlo de nível ajusta o nível de saída do subwoofer em relação ao
nível de saída da coluna satélite ou AV. A rotação no sentido dos ponteiros
do relógio permite aumentar o nível de saída e a rotação no sentido inverso
permite diminuir o nível de saída.
Reforço de Baixos (EQ)
O controlo de reforço de baixos destina-se a ajustar a resposta do
subwoofer para compensar as condições de audição da sala e as preferências
do utilizador. O reforço é comutável entre 0, +6 e +12dB na faixa dos 40Hz.
FALLHAS SOLUÇÕES
O indicador luminoso de tensão não se acende. Verifique se o subwoofer está ligado à corrente e se todos os interruptores estão ligados.
Verifique todos os interruptores (incluindo a tomada) ou corta-circuitos da tomada que possam
afectar a chegada de corrente ao subwoofer.
Contacte o seu fornecedor para mais conselhos.
Se o indicador luminoso de tensão continua sem
se acender. Verifique se todo o equipamento está ligado.
Se o indicador luminoso de tensão está aceso mas
não há som do subwoofer.
Verifique e ajuste o controlo de nível.
Verifique se as fichas de saída do equipamento principal estão correctamente ligadas e
ajustadas para fornecerem um nível suficiente de energia ao subwoofer.
Verifique se todas as conexões entre o subwoofer e o equipamento principal estão
correctas e ajustadas convenientemente.
Se ainda não há som. Contacte o seu fornecedor para mais conselhos.
Luz vermelha sem som
Luz verde sem som
Verificar os níveis
Detector de falhas
Q400b manual_Iss1_4301-7382+0_20100622.indd 20 2010-6-22 13:19:40
Other manuals for Q400b
1
Table of contents
Languages:
Other KEF Subwoofer manuals