manuals.online logo
Brands
  1. Home
  2. •
  3. Brands
  4. •
  5. Ken A Vision
  6. •
  7. Document Camera
  8. •
  9. Ken A Vision Video Flex 2000 Explorer User manual

Ken A Vision Video Flex 2000 Explorer User manual

44Video Flex2000 Explorer Series Instruction Manual
Video FlexMagnification Chart (1/4” CCD)
Monitor Size Magnification Distance from object Field of View Depth of View
13” (33cm) 10X 1-7/8” (48mm) 1-5/16” x 1-5/16” (33mm x 33mm) 1/8”
(3mm)
13” (33cm) 20X 7/8” (22mm) 5/8” x 5/8” (16mm x 16mm)
1/16” (2mm)
20” (51cm) 10X 2-7/8 (73mm) 2” x 2” (51mm x 51mm) 5/8”
(16mm)
20” (51cm) 20X 1-1/2” (38mm) 1” x 1” (26mm x 26mm) 3/8”
(9mm)
20” (51cm) 30X 5/8” (16mm) 1/2” x 1/2” (13mm x 13mm)
1/8” (3mm)
20” (51cm) 40X 1/4” (6mm) 5/16” x 5/16” (6mm x 6mm
1/16” (2mm)
27” (63cm) 10X 3-3/4” (95mm) 2-3/4” x 2-3/4” (70mm x 70mm) 1-1/16”
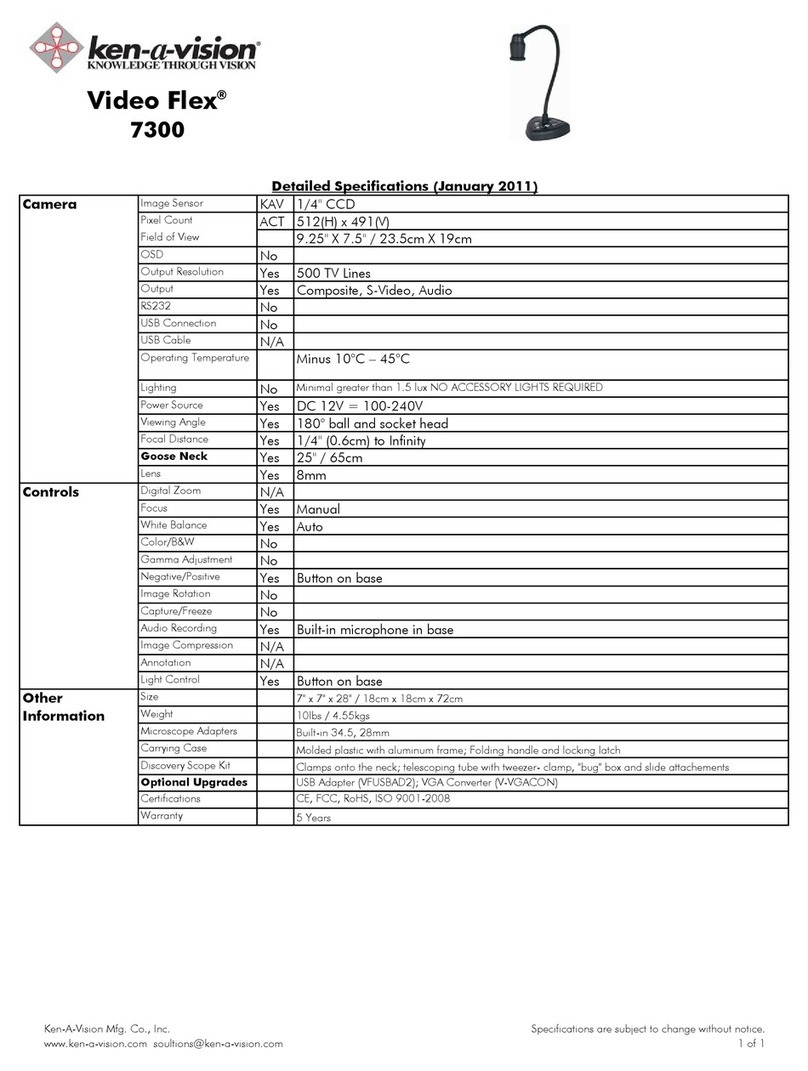
Video Microscope Specifications:
Weight: 5.25 lbs. (2.4kg.) Neck (coated): 40”
(101.6cm)
Head: 90° Fixed Lens: 8mm
QuickFocusC-mount: 1/4” turn Focal Distance: 1/4” (6mm) to

Magnification: 50:1 Resolution: 380 Lines
Picture Element: 542 x 496 TV System: NTSC/PAL
Output Signal: Composite Microscope Adapter: 28mm & built-in
Warranty: 2 year 34.5mm
Includes Ken-A-Vision’s 100% Satisfaction guarantee!
Camera complies with Class A and B, part 15 of the FCC Rules.
A - Microscope Polarizing
Adapter
VFEAPKO
B - Explorer Discovery Scope Kit
(includes Explorer Clamp-G)
VFDS2000
C - Discovery Scope Polarizing Filter
(accessory to Discovery Scope Kit)
VFDCPF
D - Cameras Lenses
VF4MM..................................
................4mm
VF25MM................................
............25mm
E - Eyepiece Adapters
(for use with microscopes and tele-
scopes--other sizes available)
VFEA230................................
............23mm
VFEA250................................
............25mm
VFEA280................................
............28mm
OPTIONAL ACCESSORIES
Learn more about the complete line of
Video Flexmulti-purpose flexible video cam-
eras and Ken-A-Visionvideo microscope
solutions--call 1.800.334.8407, or explore
our website at: www.ken-a-vision.com
WARRANTY
To activate your 2 year limited warranty
on your new Video Flex, simply fill out the
enclosed warranty card and mail it to
Ken-A-VisionManufacturing Co. Failure
to return your warranty card will limit your
Video Flexwarranty to 90 days. Should
your Video Flexfail during the warranty
period, contact your Ken-A-VisionDealer
to arrange shipment to the factory for
evaluation. The warranty will not apply if
your Video Flexserial number has been
removed or if the product has been tam-
pered with, disassembled or damaged by
misuse, accident, modification or unau-
thorized repair. To contact Ken-A-Vision
Pan the classroom...
View the world...
Explore the universe!
Try the Explorer Discovery
Scope Kit--you’ll be amazed at all
of the different uses----Capture
images from 35mm slides,
specimens from a petri dish or
a bug-box!
Kit Includes Explorer Clamp,
Zoom Bar, Tweezers Clamp,
INFORMATION TO THE USER - Changes or modifications not expressly approved by the party responsible for compliance could void the user’s
authority to operate the equipment. NOTE: This equipment has been tested and found to comply with the limits for a Class B digital device, pur-
suant to part 15 of the FCC rules. These limits are designed to provide reasonable protection against harmful interference in a residential installation.
This equipment generates, uses and can radiate radio frequency energy and, if not installed and used in accordance with instructions, may cause
harmful interference to radio communications. However, there is no guarantee that interference will not occur in a particular installation. If this equip-
ment does cause harmful interference to radio or television reception, which can be determined by turning the equipment off and on, the user is
encouraged to try to correct the interference by one or more of the following measures: Reorient or relocate the receiving antenna; and/or Increase
the separation distance between the equipment and the receiver; and/or Connect equipment into an outlet on a circuit different from that which the
receiver is connected; and/or Consult the dealer or an experienced radio/TV technician for help.
The worlds first flexible video microscope that works anywhere---
and now it’s yours!
Made in the U.S.A. by
Ken-A-Vision Manufacturing Co., Inc. Copyright 1998
Video Flex®2000
EXPLORER
using your new
Pan the classroom...
View the world...
Explore the universe!
Applications for your
Video Flex 2000 Explorer
are endless.
• Art & Animation
• Astronomy
• Video Microscopy
• Biology
• Botany
• Classroom Lectures
• Desktop Publishing
• Dissection
• Distance Learning
• Earth Science
• Experimentation
• Geography
• Geology & Mineralogy
• Graphic Illustration
• In-Field
• Multimedia
• PC Image Capture
• Physics
• Presentations
The list goes
on and on...
USERS MANUAL
Get ready to experience-----REAL TECHNOLOGY!
22Video Flex2000 Explorer Series Instruction Manual
Using your Video Flex
is as easy 1, 2, 3...
UNPACK YOUR NEW VIDEO FLEX2000 EXPLORER
Remove your Video Flexfrom the
Travel Pack
container. When removing,
note that there are no parts to assemble--its ready to use. Just point and
shoot high-resolution, precision video from any angle, anywhere! Your
Video Flex2000 Explorer comes standard with the following accessories:
a- 5V/DC Power Supply
b- 28mm Microscope Alignment Adapter (the 34.5mm adapter is
built right into the C-mount camera lens)
c- 12’ Video Cable
d- Travel Pack container with plastic handle
Following inspection, if you note any of the components are damaged or
missing, contact your Ken-A-Visiondealer for an immediate replace-
ment.
CONNECT THE VIDEO CABLE
Simply connect one end of the supplied Video Cable into the YELLOW video
out connector extending from the bottom of the Video Flex. Connect the
other end of the cable into the “Video In” connector of the TV/Monitor,
VCR, Video Projector, Computer or any other device with a “Video In” con-
nection. (consult your owner’s manual when using these components for oper-
ating procedures to accept a video signal)
CONNECT THE POWER SUPPLY
Simply connect the end of the power supply into the RED connector extend-
ing from the bottom of the Video Flex. The other end connects into a 110
Volt electrical outlet. There is no “On/Off” button to worry about. Once
the power supply is plugged in, you are ready to go. (For PAL units, a 220 Volt
power supply is provided.)
YOU’RE DONE!
Now, just aim, focus and enjoy using your new Video Flex2000
Explorer!
The Only Video Microscope of its kind!
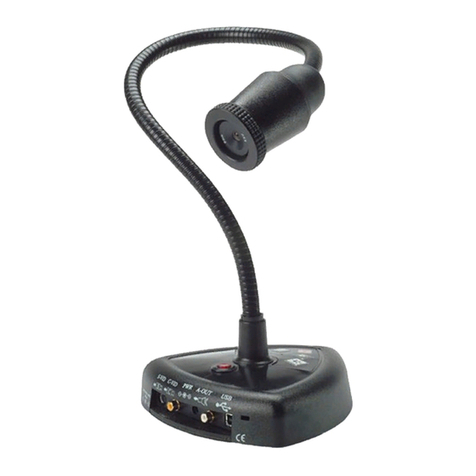
The Video Flexwill focus on objects as close as 1/4” (6mm) out to infinity with
our patented QuickFocusC-mount lens. The focusing ring is located on the
camera head--similar to that of a 35mm camera. The Video Flexcan be eas-
ily maneuvered and focused by using just one hand--our new ergonomic design.
Just a 1/4” turn of the focus ring adjusts focus from close-up, to infinity.
Some Helpful Hints From Professor K.T. VISION, PHD
POSITIONING (limited only by your imagination!)
- You can coil the Video Flex2000 Explorer like a “Cobra”, to stand on its own,
on a desk
top for capturing images from a microscope, stereomicroscope or gemscope,
capture 3-
D images of objects or documents in desktop publishing and-on-and-on...
- Coil it behind your computer for Videoconferencing or Distance Learning appli-
cations!
- Wrap it around your neck, a tree, a telescope, a lamp or any other surface
imaginable!
- You may also use the special clamp (VF2CLAMP sold separately) to mount the
Video Flex
to a mobile cart, the wall above a presentation board or other horizontal/ver-
tical surface!
POWER SUPPLY
Do not use other power supplies (even if they fit). They will produce improper
voltage or reversed polarities. This will seriously damage your Video Flexand
will void your warranty. Should you need a replacement power supply, contact
your Ken-A-Visiondealer.
When using internationally, be sure to use correct voltage output (110V power
1
2
3
Video Flex2000 Explorer Series Instruction Manual 33
USING YOUR MICROSCOPE EYEPIECE ADAPTERS
The Microscope Eyepiece Adapters will allow your Video Flexto be coupled
with microscopes, stereo microscopes, gemscopes, telescopes or other
objects with an eyepiece. You are provided with two (2) Microscope
Eyepiece Adapters--a 28mm and built-in 34.5mm. Other sizes are available
through your Ken-A-Visiondealer.
Before installing a Microscope Eyepiece Adapter, simply measure the size
of the outside diameter of the microscope eyepiece you are attaching to
the Video Flex. (You must first remove the eyepiece cup if one is attached
to the eyepiece.) The 28mm adapter included with your Video Flexwill fit
most compound microscopes, and the built-in 34.5mm adapter will fit most
stereo microscopes, telescopes and gemscopes.
1. Fully extend the lens. Gently rotate the lens counter-clockwise until it is
extend
ed out. This allows for maximum magnification of the viewed objects.
2. Attach the Microscope Eyepiece Adapter. To install the eyepiece adapter,
gently slip the adapter over the Microscope eyepiece. If it does not slide
on easily,
measure to be sure the outside diameter is 28mm or less. Other size
adapters
are available through your Ken-A-Visiondealer. (see page 4 for optional
accessories)
3. Attach the Video Flexto the Eyepiece Adapter. Next, gently slide the Video
Flexcamera head onto the eyepiece adapter by aligning the grove around
the lens
on the Video Flexwith the rounded edge of the eyepiece adapter.
4. Power up. After checking to be sure that the Video Flexis situated
securely,
plug in the power supply and the TV/Monitor or other video device.
Voila!
Put a slide on the microscope stage. Focus the picture on the
TV/Monitor by adjusting the microscope (not the Video Flex).
CHANGING THE CAMERA LENS
There are several different lenses available for your Video Flex. The 8mm
lens is a standard which comes installed onto your unit. A 4mm (VF4mm)
or 25mm (VF25mm) lens is available as an optional accessory and may be
purchased through your local Ken-A-Visiondealer.
To change the lens, simply extend the lens by rotating in a counter-clockwise
rotation until fully extended. Apply a small amount of additional force in this
same direction to free the lens. Screw on the new lens, then when tight,
again apply a small amount of additional force to lock it in place. Rotate the
lens back in a counter-clockwise direction to ensure it extends, rather than
unscrews. If it unscrews, retighten in a clockwise direction, adding an addi-
tional amount of force to lock it in place.
LIGHTING
Never point your Video Flexat direct sunlight. The Video Flexis very light
sensitive and requires very little light to operate. Subjecting the Video Flex
“eye” to direct sunlight will discolor the filter over the CCD chip and create
an adverse picture.
Under certain fluorescent lighting conditions, color can slowly change.
When using the Video Flexfor viewing through a fluorescent microscope,
simply set the disc diaphragm on the smallest diameter hole, or close the
iris diaphram.
CONNECTING TO OTHER DEVICES
TV SET: You will need to use an RF Modulator or a VCR recorder. See
owner’s manual on RF modulator or VCR for connections and operational
procedures.
TV/Monitor: Connect video cable from the “Video Out (yellow)” connector of
the Video Flex to the “Video In” connector of the TV/monitor.
VCR (Recorder): Connect video cable from the “Video Out (yellow)” connector
of the Video Flexinto the “Video In” connector on the VCR.
VIDEO PROJECTOR: Connect video cable from the “Video Out (yellow)” con-
You can use several different devices to
project the high-resolution images
captured with your Video Flex.
TV/Monitors, VCRs, CAM-corders,
Video Projectors, Computers (IBM &
Apple-Macintosh)--anything that has a
“VIDEO IN” connector!
Compatible with CU-SeeMeVideo Chat
Software for the Internet & Intranet!

Other Ken A Vision Document Camera manuals

Ken A Vision Video Flex 7100 User manual

Ken A Vision

Ken A Vision Video Flex 7100 User manual

Ken A Vision StudentCam 910-171-120 User manual

Ken A Vision

Ken A Vision StudentCam 910-171-120 User manual

Ken A Vision Video Flex 7610 User manual

Ken A Vision

Ken A Vision Video Flex 7610 User manual

Ken A Vision FlexCam 910-171-210 User manual

Ken A Vision

Ken A Vision FlexCam 910-171-210 User manual

Ken A Vision Video Flex 7200UM User manual

Ken A Vision

Ken A Vision Video Flex 7200UM User manual

Ken A Vision Vision Viewer 7890B User manual

Ken A Vision

Ken A Vision Vision Viewer 7890B User manual

Ken A Vision Video Flex 7610 User manual

Ken A Vision

Ken A Vision Video Flex 7610 User manual

Ken A Vision Video Flex 7100 User manual

Ken A Vision

Ken A Vision Video Flex 7100 User manual

Ken A Vision Video Flex 7100 User manual

Ken A Vision

Ken A Vision Video Flex 7100 User manual

Ken A Vision Vision Viewer 7890B User manual

Ken A Vision

Ken A Vision Vision Viewer 7890B User manual

Ken A Vision FlexCam 2 910-171-200 Installation guide

Ken A Vision

Ken A Vision FlexCam 2 910-171-200 Installation guide

Ken A Vision Video Flex 7600 User manual

Ken A Vision

Ken A Vision Video Flex 7600 User manual

Ken A Vision Vision Viewer 7890UM User manual

Ken A Vision

Ken A Vision Vision Viewer 7890UM User manual

Ken A Vision Video Flex 7600 User manual

Ken A Vision

Ken A Vision Video Flex 7600 User manual

Ken A Vision Video Flex 7200HD User manual

Ken A Vision

Ken A Vision Video Flex 7200HD User manual

Ken A Vision Vision Viewer 7880YL User manual

Ken A Vision

Ken A Vision Vision Viewer 7880YL User manual

Ken A Vision FlexCam 2 910-171-200 Installation guide

Ken A Vision

Ken A Vision FlexCam 2 910-171-200 Installation guide

Ken A Vision Vision Viewer 7890B User manual

Ken A Vision

Ken A Vision Vision Viewer 7890B User manual

Ken A Vision Vision Viewer 7890UM User manual

Ken A Vision

Ken A Vision Vision Viewer 7890UM User manual

Ken A Vision Video Flex 7200HD User manual

Ken A Vision

Ken A Vision Video Flex 7200HD User manual

Ken A Vision IDCam 910-171-125 User manual

Ken A Vision

Ken A Vision IDCam 910-171-125 User manual

Ken A Vision Video Flex 7300 User manual

Ken A Vision

Ken A Vision Video Flex 7300 User manual

Ken A Vision StudentCam 910-171-120 User manual

Ken A Vision

Ken A Vision StudentCam 910-171-120 User manual

Ken A Vision Vision Viewer 7890B User manual

Ken A Vision

Ken A Vision Vision Viewer 7890B User manual

Popular Document Camera manuals by other brands

AVer M70W instruction manual

AVer

AVer M70W instruction manual

AVer M15-13M instruction manual

AVer

AVer M15-13M instruction manual

Lumens DC-W80 user manual

Lumens

Lumens DC-W80 user manual

HoverCam Ultra 8 user manual

HoverCam

HoverCam Ultra 8 user manual

Dukane AV-P720U Brochure & specs

Dukane

Dukane AV-P720U Brochure & specs

Epson ELPDC11 Document Camera quick start

Epson

Epson ELPDC11 Document Camera quick start

AVer AVerVision300AF+ user manual

AVer

AVer AVerVision300AF+ user manual

Califone DiggiDitto DC596 user manual

Califone

Califone DiggiDitto DC596 user manual

Avermedia AVerVision 150 quick guide

Avermedia

Avermedia AVerVision 150 quick guide

Lumens DC125 user manual

Lumens

Lumens DC125 user manual

WolfVision VZ-8light instructions

WolfVision

WolfVision VZ-8light instructions

Lumens DC136 installation guide

Lumens

Lumens DC136 installation guide

Dukane Camera 101 instruction manual

Dukane

Dukane Camera 101 instruction manual

Lumens DC132U user manual

Lumens

Lumens DC132U user manual

Epson DC-06 quick start

Epson

Epson DC-06 quick start

Elmo TT-02RX Specifications

Elmo

Elmo TT-02RX Specifications

Elmo EV-400AF Specifications

Elmo

Elmo EV-400AF Specifications

Elmo TX-1 quick start guide

Elmo

Elmo TX-1 quick start guide

manuals.online logo
manuals.online logoBrands
  • About & Mission
  • Contact us
  • Privacy Policy
  • Terms and Conditions

Copyright 2025 Manuals.Online. All Rights Reserved.