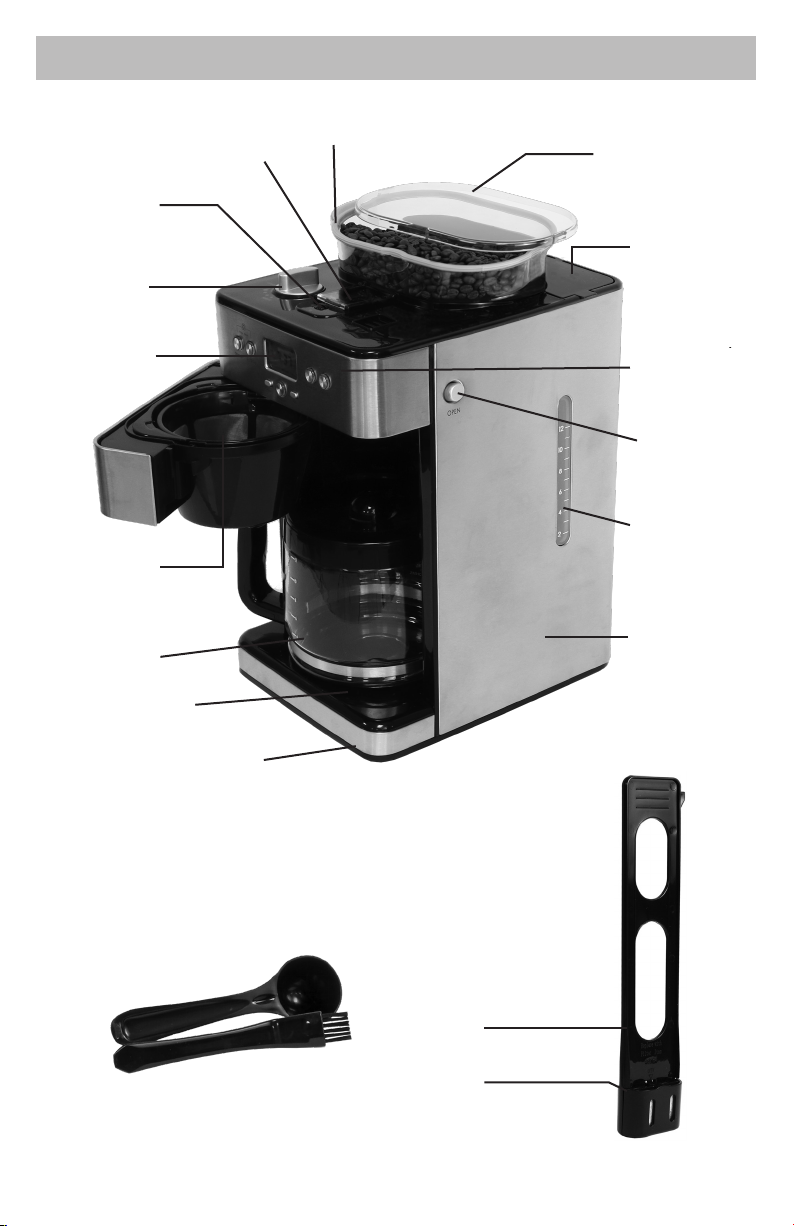
6 7
OPERATING YOUR COFFEEMAKER OPERATING YOUR COFFEEMAKER
BREWING COFFEE
MIN
Button for setting the minutes. Press the MIN (minutes) button to set the minutes. The setting
range can be from 0 to 59 minutes. The clock stops running during this time, the second digit
displays zero, and if you set minutes for brew delay, then brew delay minutes will display.
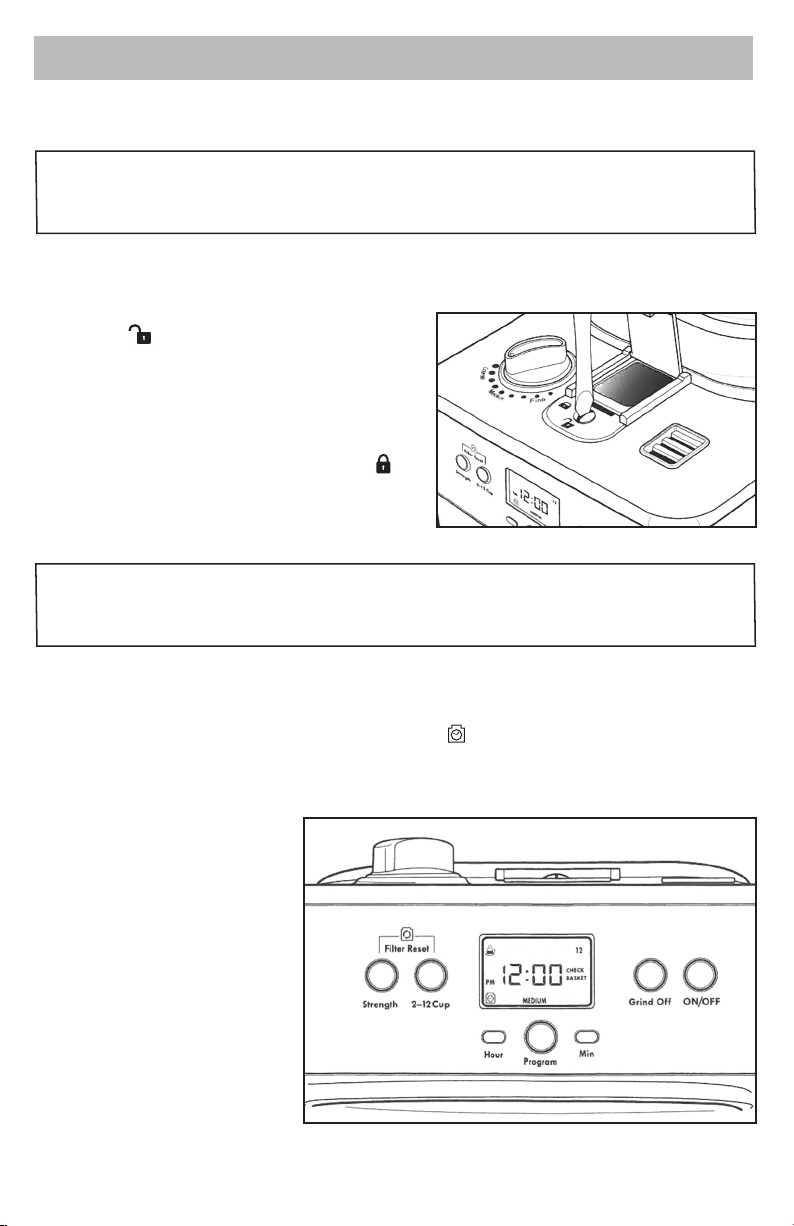
STRENGTH
Strength adjustment knob (light, medium, strong). Press the STRENGTH button to adjust the
strength, and when pressed, the STRENGTH button LED will illuminate.
2-12 CUP
Number of cups selection button (this function allows you to choose the quantity of ground
coee for 2, 4, 6, 8, 10, 12 cups of coee). Use this button to set the desired number of cups. Once
you press this button, the 2-12Cup (2-12 tases) button LED will light up. When you choose 2.4
cups, the heater will run for 20 seconds, then turn o for 10 seconds while brewing. For other
cups, it will heat at full power.
GRIND OFF
Button to select dierent types of coee. When the Grind O button LED is on, this indicates
brewing only. When the Grind O button LED is o, this indicates both grind and brew activation.
Pressing the STRENGTH button and 2-12 CUP button simultaneously will reset lter.
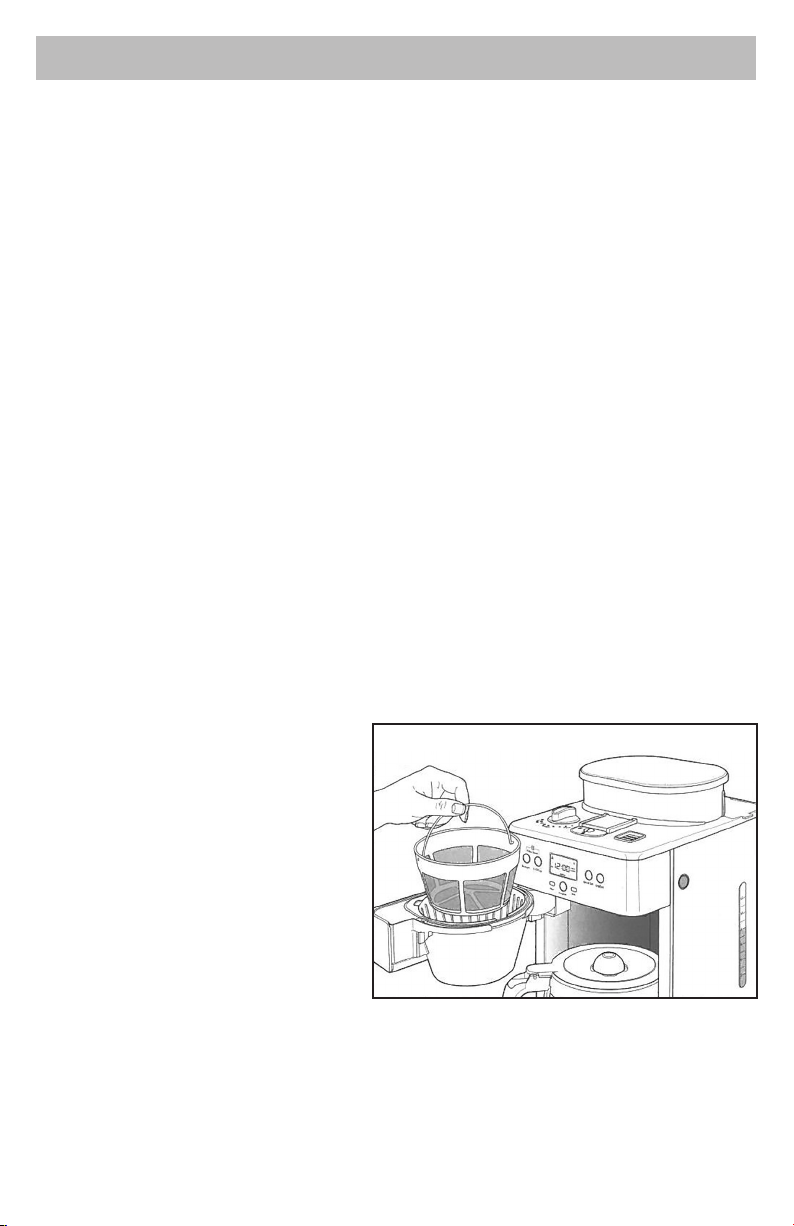
NOTE - When using the gold-tone lter, be sure to position its handle to the front of
the coeemaker. Otherwise the handle may nterfere with the ow of the coee from
the grinder into the lter basket.
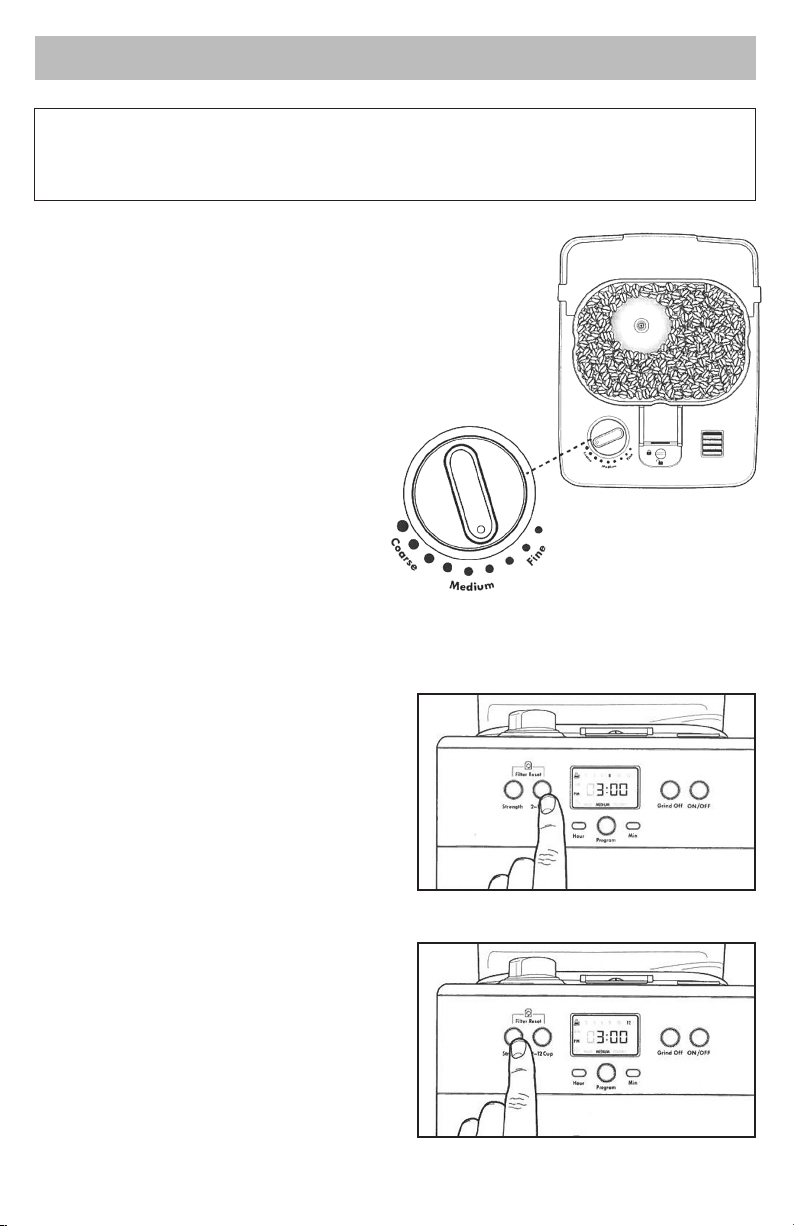
4. Remove the hopper lid and ll the hopper with coee beans. Be
sure to have enough beans in the hopper for the ampunt of coee
you intend to brew. The hopper should always be kept at least half
full, maximum capacity is about 1/2 lb. Do not overpack, as it could
jam the grinder. See Fig. 3.
5. Turn the Grinder Selector Knob to chose the preferred size of the
coee grounds, corase, medium or ne. See Fig. 3a.
6. Plug in the appliance. The LCD display
window lights up and the coeemaker will
beep for about 2 seconds to let you know
the clock is not set.
The clock does not have to be set to brew
coee. To set the clock, see SETTING THE
CLOCK TIMER AND AUTO-BREWING.
Each time you turn the unit on, the
message: Check Basket, shows up on the LCD
display window. THis is s afreminder to see if
used grounds are still in the lter basket. To
remove the message, push the ON/OFF button.
7. Choose the amount of cups you intend to
make by pressing the 2 - 12 Cup Button. Press
button until the desired number of cups is
highlighted in LCD display window. See Fig. 4.
The coeemaker will grind the corresponding
amount of beans. It will also automatically adjust
for low cup settings.
8. To select the strength of the coee, press the
Strength button until the desired strength (mild,
medium, strong) is highlighted in the LCD
display window. See Fig. 5.
9. To use pre-ground coee, push the Grind O
button to disable the grinder feature. The Grind
O button will stay backlit. Add ground coee to
the paper or gold-tone lter. The amount of
coee you use is a matter of personal taste. For
an average strong coee, one measuring spoon
(approx. 4-5g) is sucient per cup (150ml).
The easy-to-use programmable digital controls let you know when the coee is ready, and even
keeps track of the freshness of each brewed carafe. It’s never been easier to brew the perfect cup
of coee.
1. Press the OPEN button on the right side
of the unit and swing out the Filter Basket
Door. See Fig. 2
2. Fill the water reservoir with cold water.
You ca use the coee carafe to ll with the
amount of water you require. There is a
gauge for 2 to 12 cups (270ml to 1730ml)
on both the water reservoir window and
on the glass carafe. These markings apply
for the amount of fresh water. The amount
of brewed coee will dier slightly, as the
coee grinds absorb some water. Be sure
to add no more than 12 cups, or the carafe
may overow.
3. Place the permanent gold-tone lter (or a No. 4 basket paper lter) into the lter basket.You can
use both the gold-tone lter and the paper lter together. Using the gold-tone lter alone will
allow some ne grounds to fall into the coee carafe. This will appear as sediment in the carafe.
Fig. 2
Fig. 3
Fig. 3a
Fig. 4
Fig. 5