4
PREPARING TO USE YOUR COFFEEMAKER
Before the first use of the coffeemaker wash the brew basket, the gold-tone filter, the
carafe and carafe lid in either the top rack of your dishwasher, or by hand in warm,
sudsy water.
The exterior of the coffeemaker, the control panel area and the warming plate should
only be cleaned with a soft damp cloth.
NOTE: NEVER clean the warming plate unless it is completely cool.
After all parts are washed for the first time, pour cold water up to the 5 cup level mark in
the water reservoir. Brew it through as instructed in “BREWING COFFEE”, but do not add
coffee grounds to the filter. When done, turn off the coffeemaker and discard the water
from the carafe.
NOTE: DO NOT use abrasive cleansers or scouring pads when cleaning
your coffeemaker. NEVER immerse the coffeemaker in water or any liquid.
5
Fig. 2
OPERATING YOUR COFFEEMAKER cont.
OPERATING YOUR COFFEEMAKER
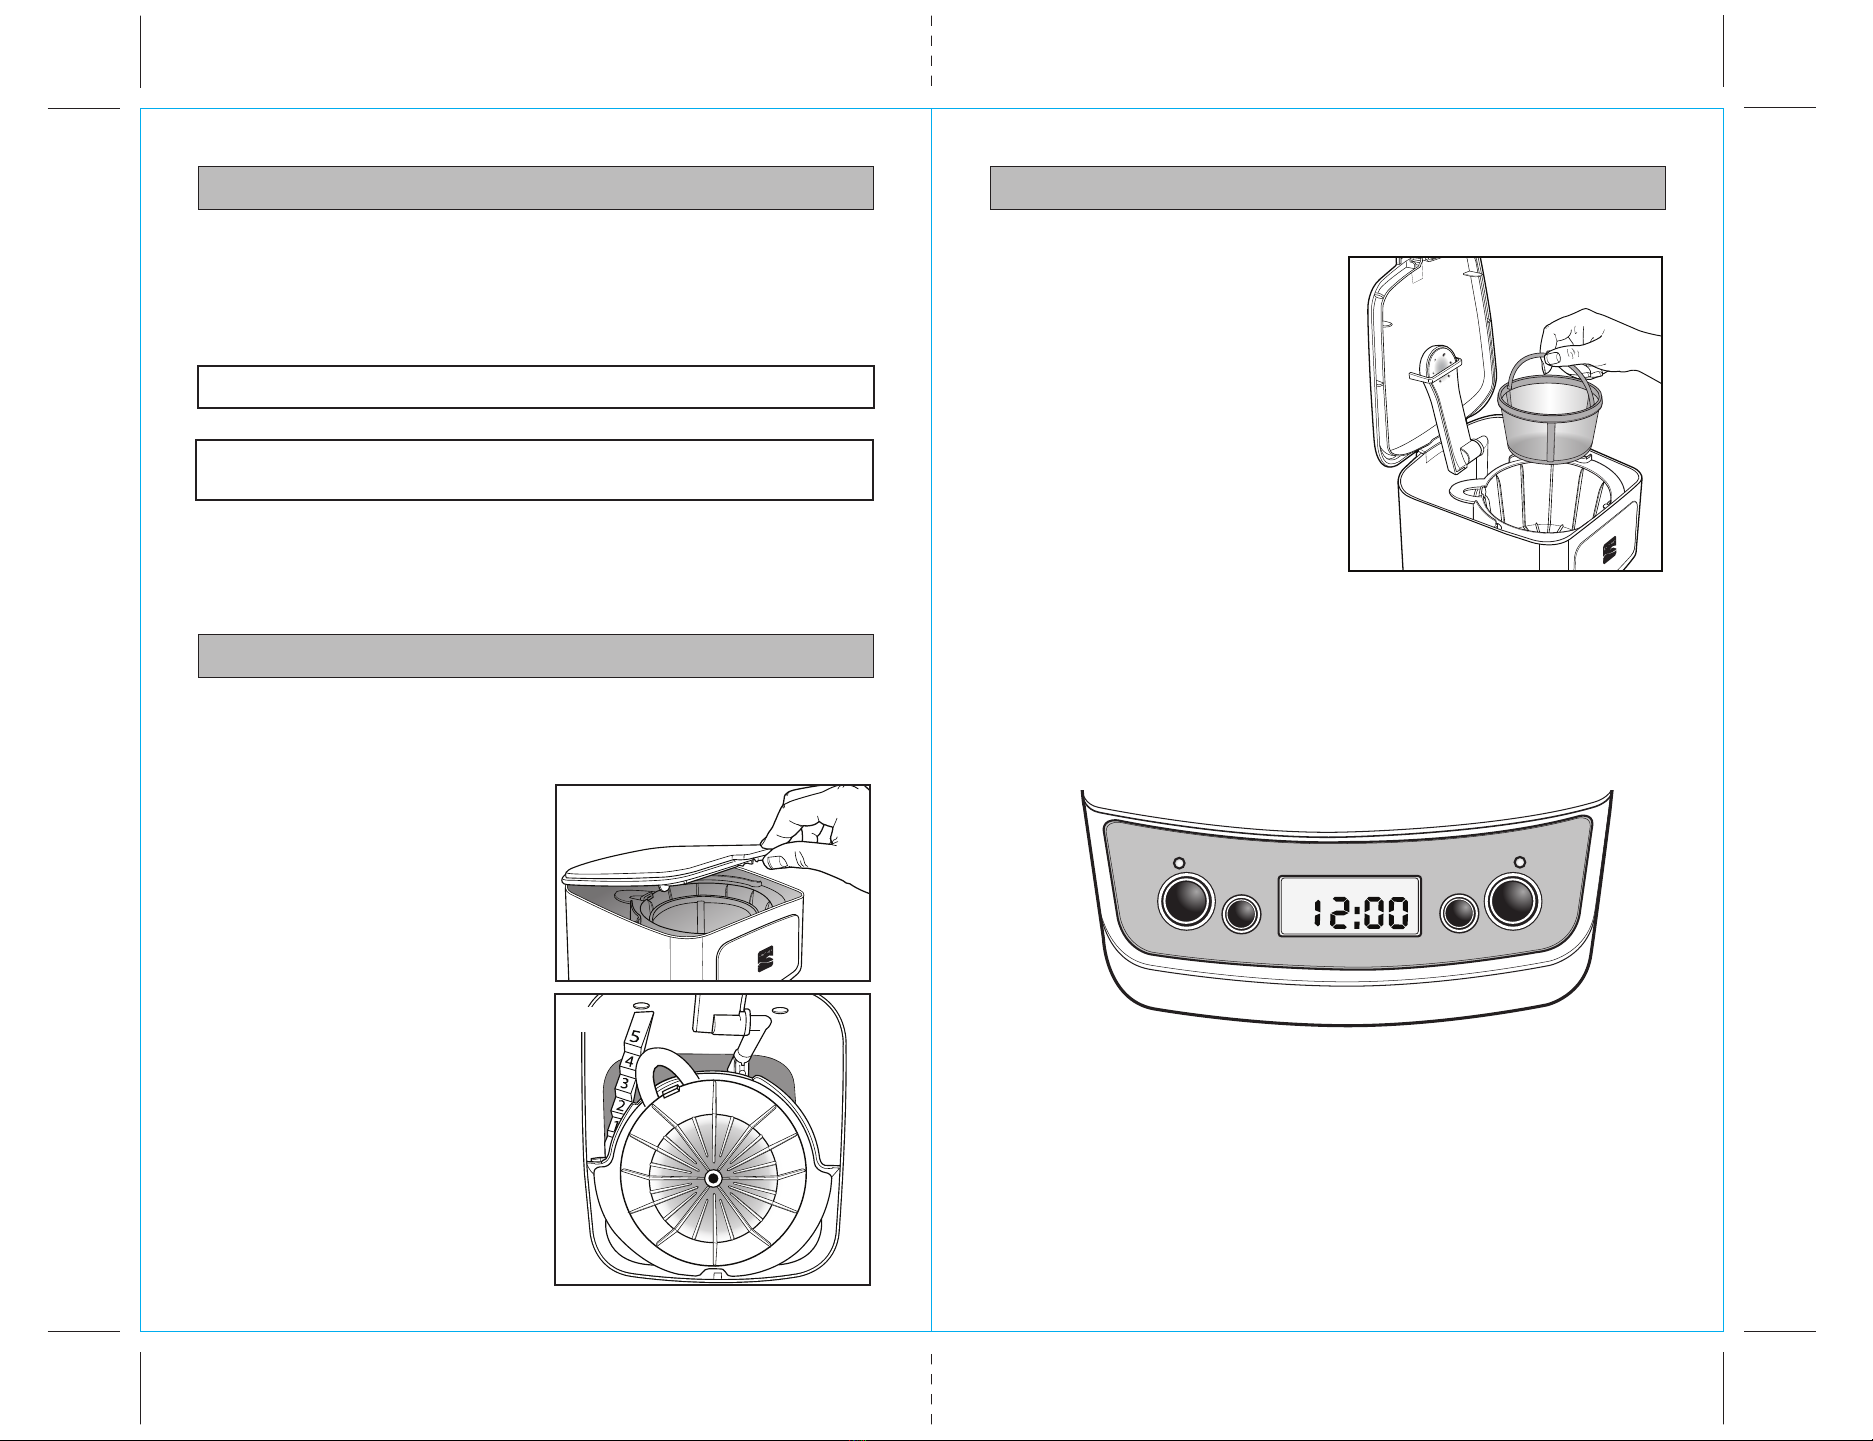
3. Place a Junior size 4 to 6 cup paper filter
or the gold-tone filter into the brew basket
(see Fig 4).
4. Add ground coffee. The amount of
coffee you use is a matter of personal
taste. (We recommend one heaping
tablespoon for every two cups).
Experiment . . . try different amounts
of ground coffee per cup until you
brew your perfect cup of coffee.
You can also try using the paper
filter along with the gold-tone filter.
5. Close the cover. Place carafe on the warming plate and plug in the appliance.
The time flashes at 12:00 AM in the Control Panel Display. The clock does
not have to be set to brew coffee. To set the clock time, see “SETTING THE CLOCK,
TIMER AND AUTO-BREWING”.
6. Turn on the coffeemaker by pushing the “ON AUTO OFF” Button (see Fig. 5). The Green
“ON” LED will illuminate and the coffeemaker will begin brewing. When the coffeemaker
has finished brewing, the warming plate will come on and will keep the carafe warm.
Fig. 4
Fig. 5
Fig. 3
The easy-to-use programmable digital controls let you know when the coffee is ready,
and even keeps track of the freshness of each brewed carafe. It’s never been easier to
brew the perfect cup of coffee.
BREWING COFFEE
1. Pull up tab on force-fitted one-piece
cover to open (see Fig. 2).
2. Use the carafe to fill the water reservoir
of the coffeemaker to the desired level
with cold water. There is a gauge marked
from 1 to 5 cups both in the coffeemaker’s
water reservoir and on the sides of the
carafe (see Fig. 3). These marks show
the amount of cold water needed for
each cup of coffee. The amount of
brewed coffee will differ slightly due
to the amount of water absorbed by
the coffee grounds.
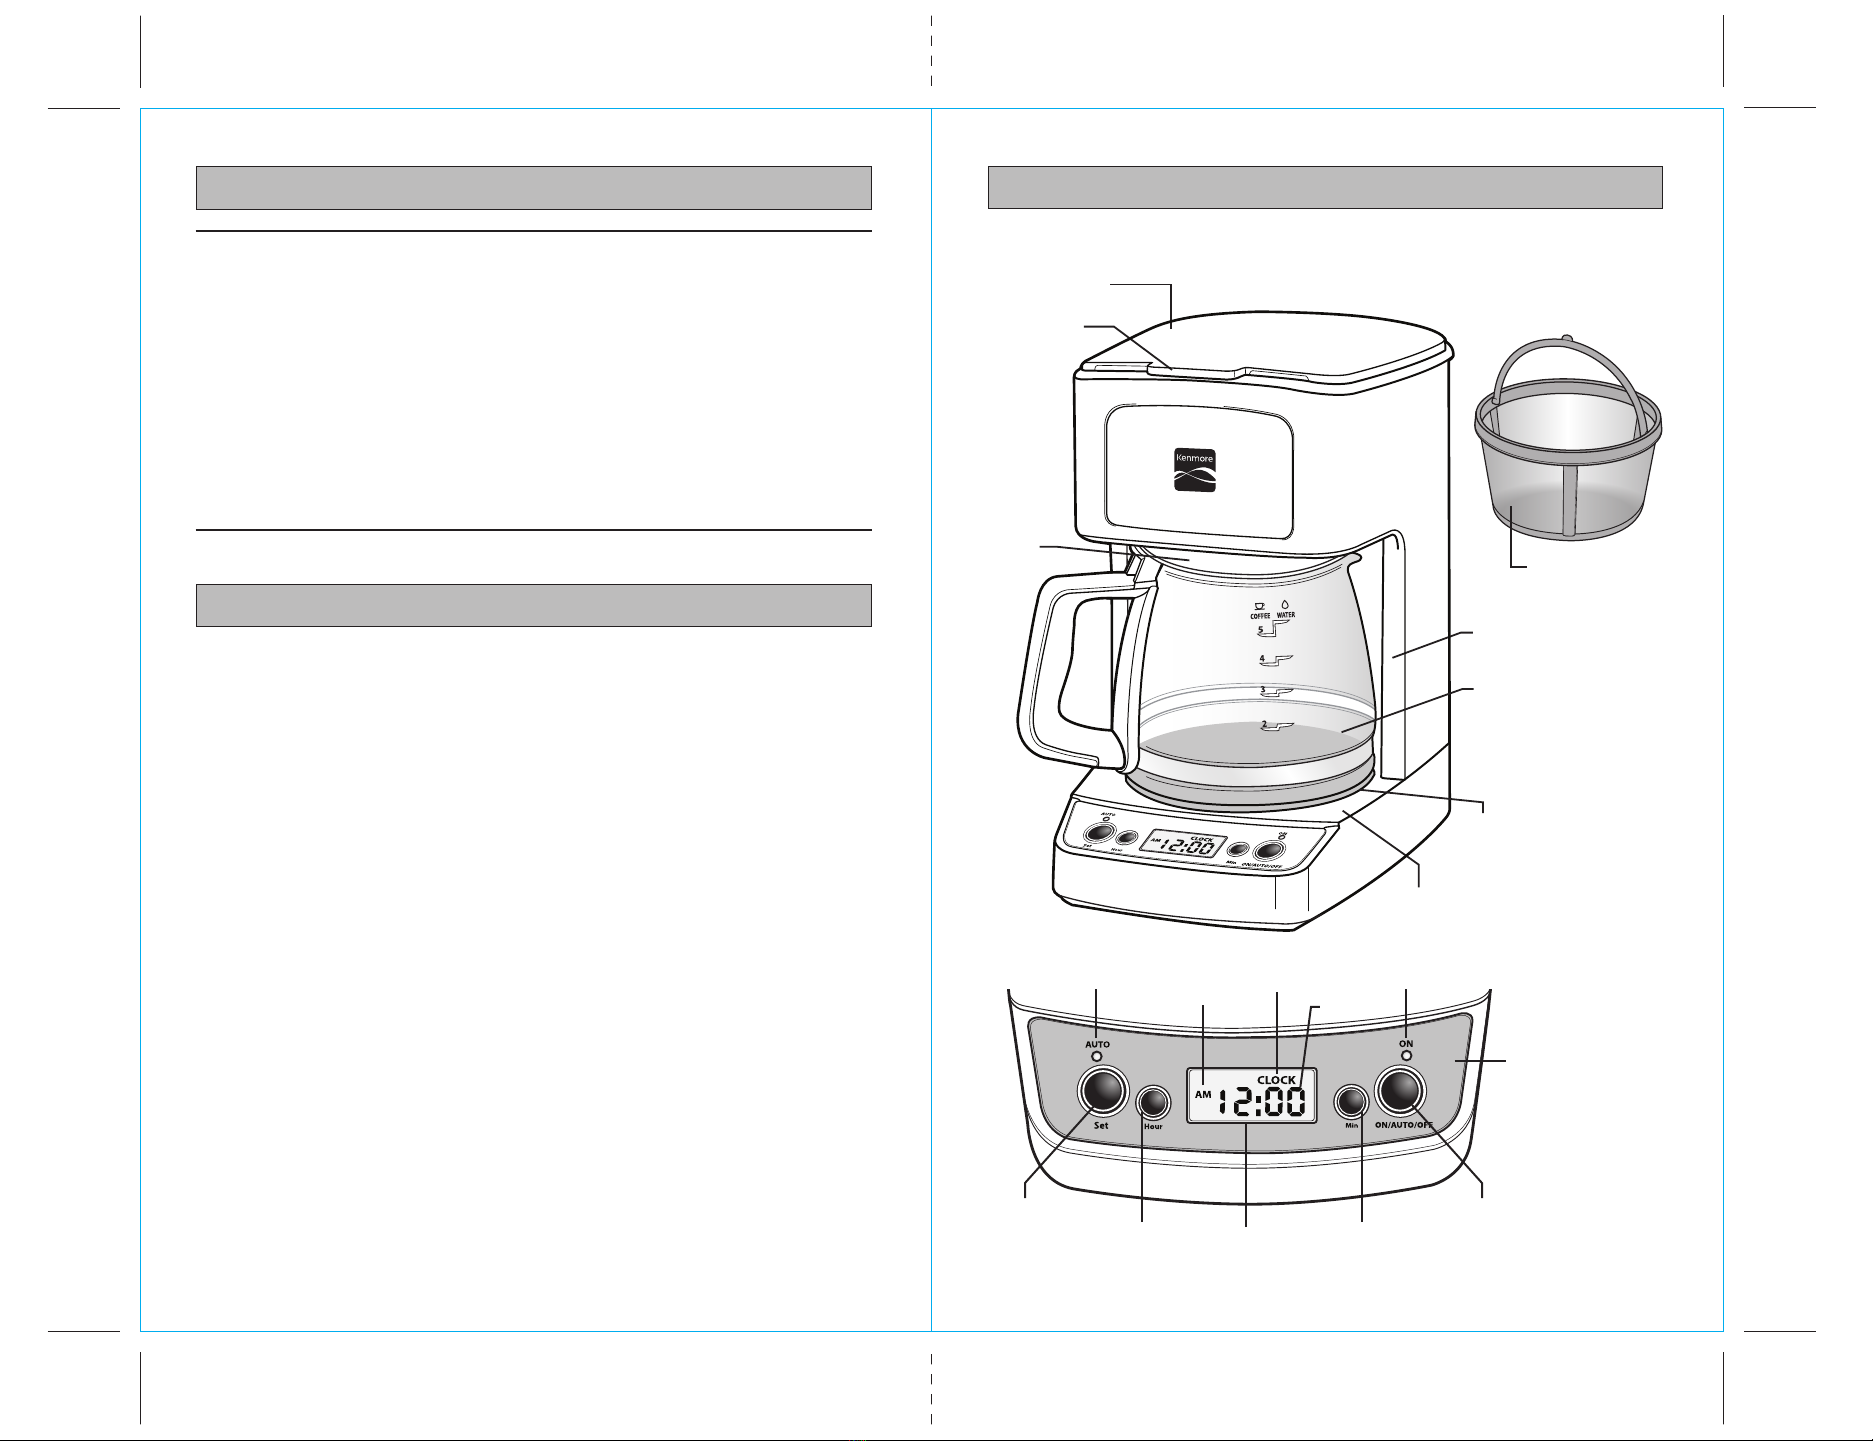
AUTO
Hour
AM
Min
ON
ON/AUTO/OFF
Set
CLOCK
7. This coffeemaker features a Pause and Serve Feature. You can remove the carafe
and pour a cup of coffee before the brewing is finished. The brew stream stops when
the carafe is removed, and resumes when the carafe is replaced.
8. When you are finished using up the coffee in the carafe, press the “ON AUTO OFF”
button to turn off the appliance, and remove the carafe from the warming plate.
NOTE: If the coffeemaker is not turned off, it will automatically shut off after two hours.
9. For storage, the coffeemaker cord can be inserted into the storage area in the back.
Simply push cord into opening.