Fig. 4
Fig. 6
12
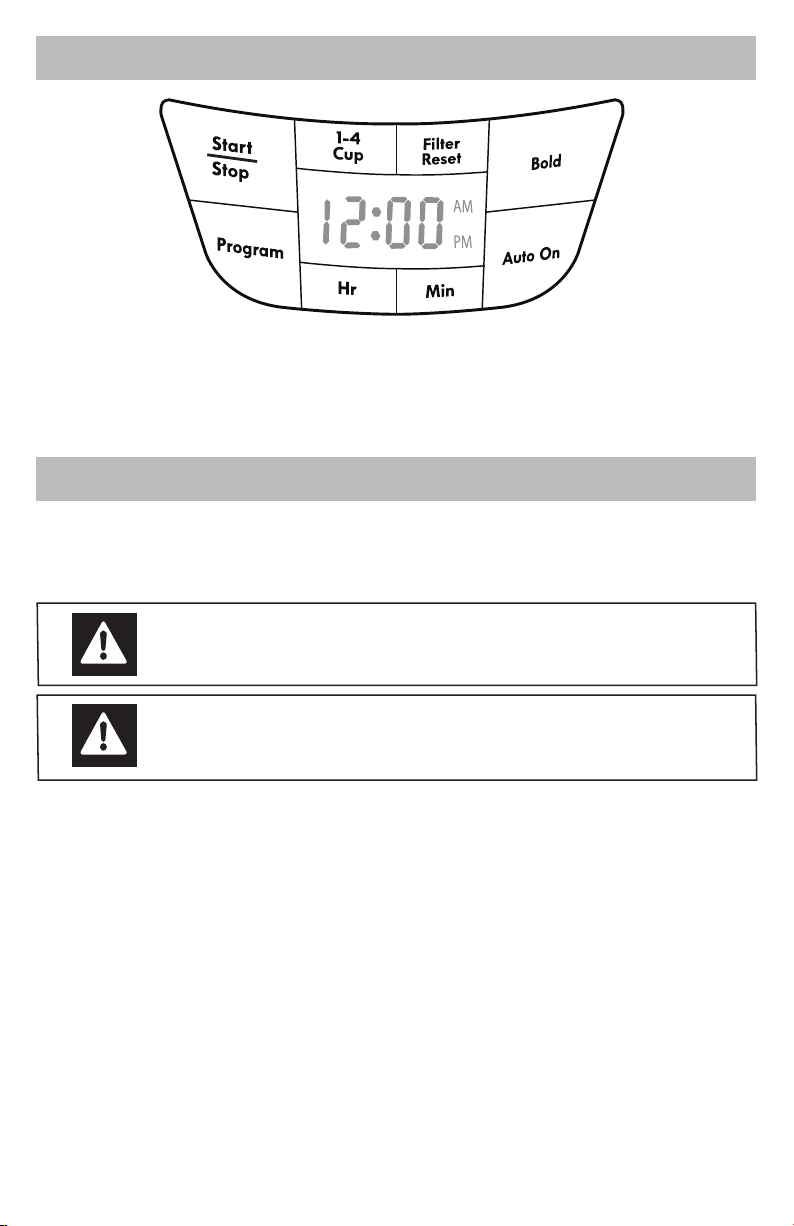
Start
Program
Hr
1-4
Cup
Filter
Reset
Min
Auto On
Bold
Stop
12
10
8
6
4
10
8
6
4
2
Fig. 5
6 7
OPERATING YOUR COFFEEMAKER OPERATING THE CONTROL PANEL
OPERATING THE CONTROL PANEL
BREWING COFFEE cont.
NOTE: To turn o the warming plate before two hours elapse, unplug the coeemaker. However,
the clock setting will be lost. The clock will require resetting, if desired, when the coeemaker is
plugged in again.
PAUSE AND POUR FEATURE
The pause and pour feature enables you to remove the carafe from the Coeemaker
and pour a cup of coee before brewing is nished. When the carafe is removed,
a special valve stops the ow of coee from the brew basket to the carafe. Brewing,
however, does not stop. IMPORTANT: If the carafe is not replaced under the brew
basket after 20 seconds, water and coee will overow from the brew basket.
The easy-to-use programmable digital controls let you
know when the coee is ready, and even keeps track of
the freshness of each brewed carafe. It’s never been
easier to brew the perfect cup of coee.
BREWING COFFEE
1. Plug the coeemaker into a 3-prong receptacle if it is
unplugged. When rst plugged in, clock numerals will
illuminate in the display window. To set the clock time,
see the SETTING THE CLOCK section.
NOTE: The clock does not have to be set to brew coee.
NOTE: If no coee is brewing, the display window goes
dark after 2 minutes. To relight screen, press any control
button except Start/Stop.
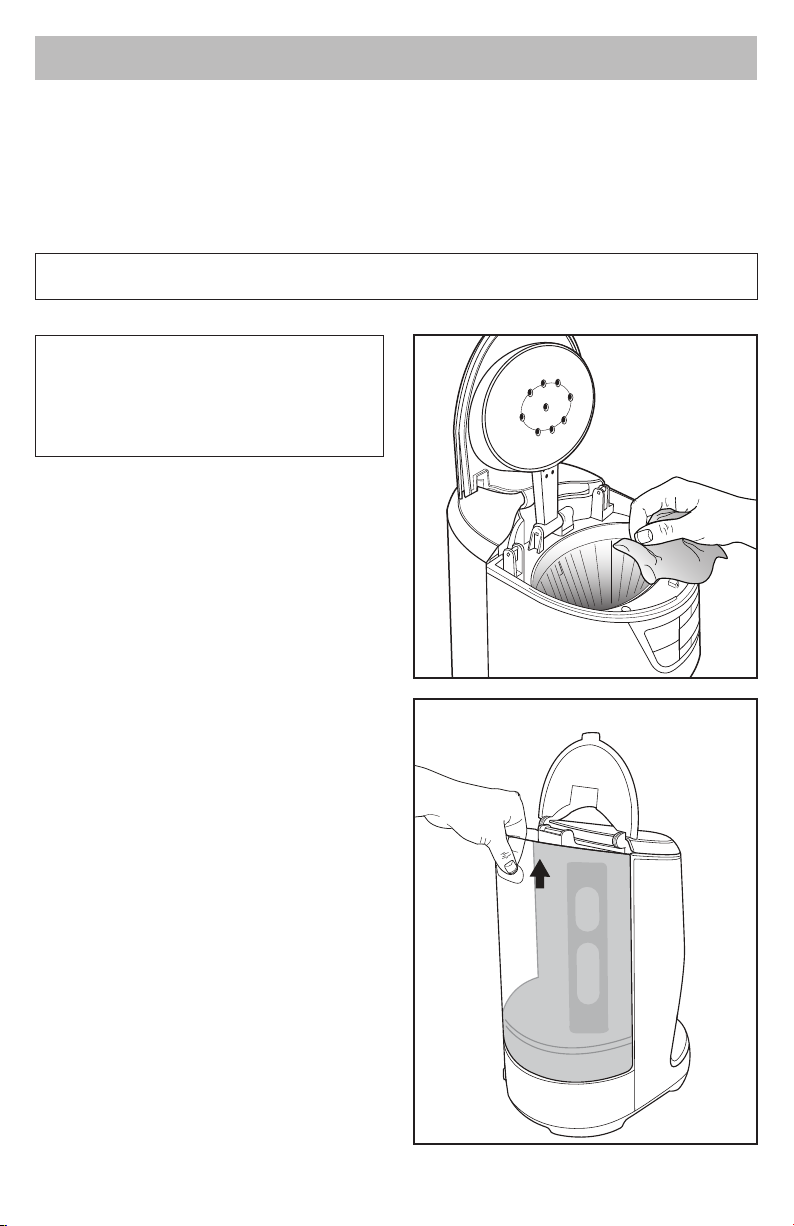
2. Open the tank cover (see Fig.4).
3. Use the carafe to ll the water tank of the coeemak-
er to the desired level with cold water, or you can
remove the tank from the base as shown in Fig. 3 (see
previous page) and ll it directly with cold water from a
faucet. There is a gauge marked from 4 to 12 cups on
both the coeemaker water tank and the sides of the
carafe (see Fig. 5). These marks show the amount of
cold water needed for the designated number of cups.
The amount of brewed coee will dier slightly due to
the coee grinds absorbing some water.
4. Open the top lter cover. Place either the permanent
gold-tone lter or a size #4 cone paper lter into the
brew basket (see Fig. 6).
5. Add ground coee. The amount of coee you use is a
matter of personal taste (we recommend one heaping
tablespoon for every two cups). Experiment with
dierent amounts of ground coee per cup until you
brew your perfect cup of coee.You can also try using a
paper lter along with the gold-tone lter.
6. Close the top lter cover and the water tank lid. Slide
the carafe onto the warming plate.
7. The default setting of the coee maker is regular strength. If desired, choose bold strength by
pressing the Bold button before the Start/Stop button. Press the Start/Stop button to begin
brewing. After a few seconds you will hear water owing into the lter. When all of the water has
passed through the lter and into the carafe as brewed coee, three beeps sound, Start/Stop
button words go out, and the coeemaker automatically switches to warming plate mode. For
delayed brewing, see SETTING THE CLOCK, TIMER AND AUTO-BREWING.
NOTE: A blue light illuminates beneath the water tank when coee is brewing. The light goes out
when the brew cycle is nished.
8. The warming plate will continue to warm for two hours from the time that the coee is brewed.
If all the coee has been poured from the carafe before two hours elapse, remove the carafe from
the warming plate. Do not allow an empty carafe to sit on the warming plate while the plate is
actively warm.
AUDIO SIGNALS
1. When the coeemaker is rst plugged in, one beep will sound.
2. When the coeemaker has nished brewing, three beeps will sound.
3. When the two hour warming plate period has ended, ve beeps will sound.
SETTING THE CLOCK, TIMER AND AUTO-BREWING
USE THE HR (HOUR) AND MIN (MINUTE) BUTTONS TO SET THE CLOCK
1. When the coeemaker is rst plugged in, the clock will ash the default time of 12:00 AM.
2. Press the Hr button to change the setting to any hour number between 12:00 am to 11:00 pm.
3 . Press the Min button to change the setting to any minute number between 1 and 59
4. You can make the hours and minutes move more quickly in the clock display by holding the
buttons down.
5. The clock will begin keeping time at the moment the Hr and Min buttons are released.
PROGRAM AN AUTOMATIC BREW TIME
USE THE‘PROGRAM’, ‘HR’ AND ‘MIN’BUTTONS
1. First set the clock. See directions above.
2. Press the Program button. The Program and Auto On button words will illuminate, and the
display will ash a start of brewing time.
3. Within ve seconds, use the Hr and Min buttons to set the time you wish brewing to begin. If
no input is made within ve seconds, the display will revert to the set time of day.
NOTE: Be sure to set the start of brewing time to AM or PM as desired.
4. Press the Auto On button when the correct start time is displayed within the window. The
Program button words will go out, and the Auto On button words will begin ashing, indicating
that the start of brewing time has been set. The display will revert to the time of day clock setting.
NOTE: To check the start of brewing time setting, press the ashing Auto On button, and then
press the Program button. The previously set start time will ash in the display. Press the Auto On
button again to retain the setting and reactivate the Auto On function.
NOTE: To cancel the Auto On function, press the ashing Auto On button. The button words will
go out.