Page 8
Basic Operation Humidity Control
NOTE: Due to variations in environmental conditions, it is not always possible
to achieve the desired humidification or dehumidification setpoint.
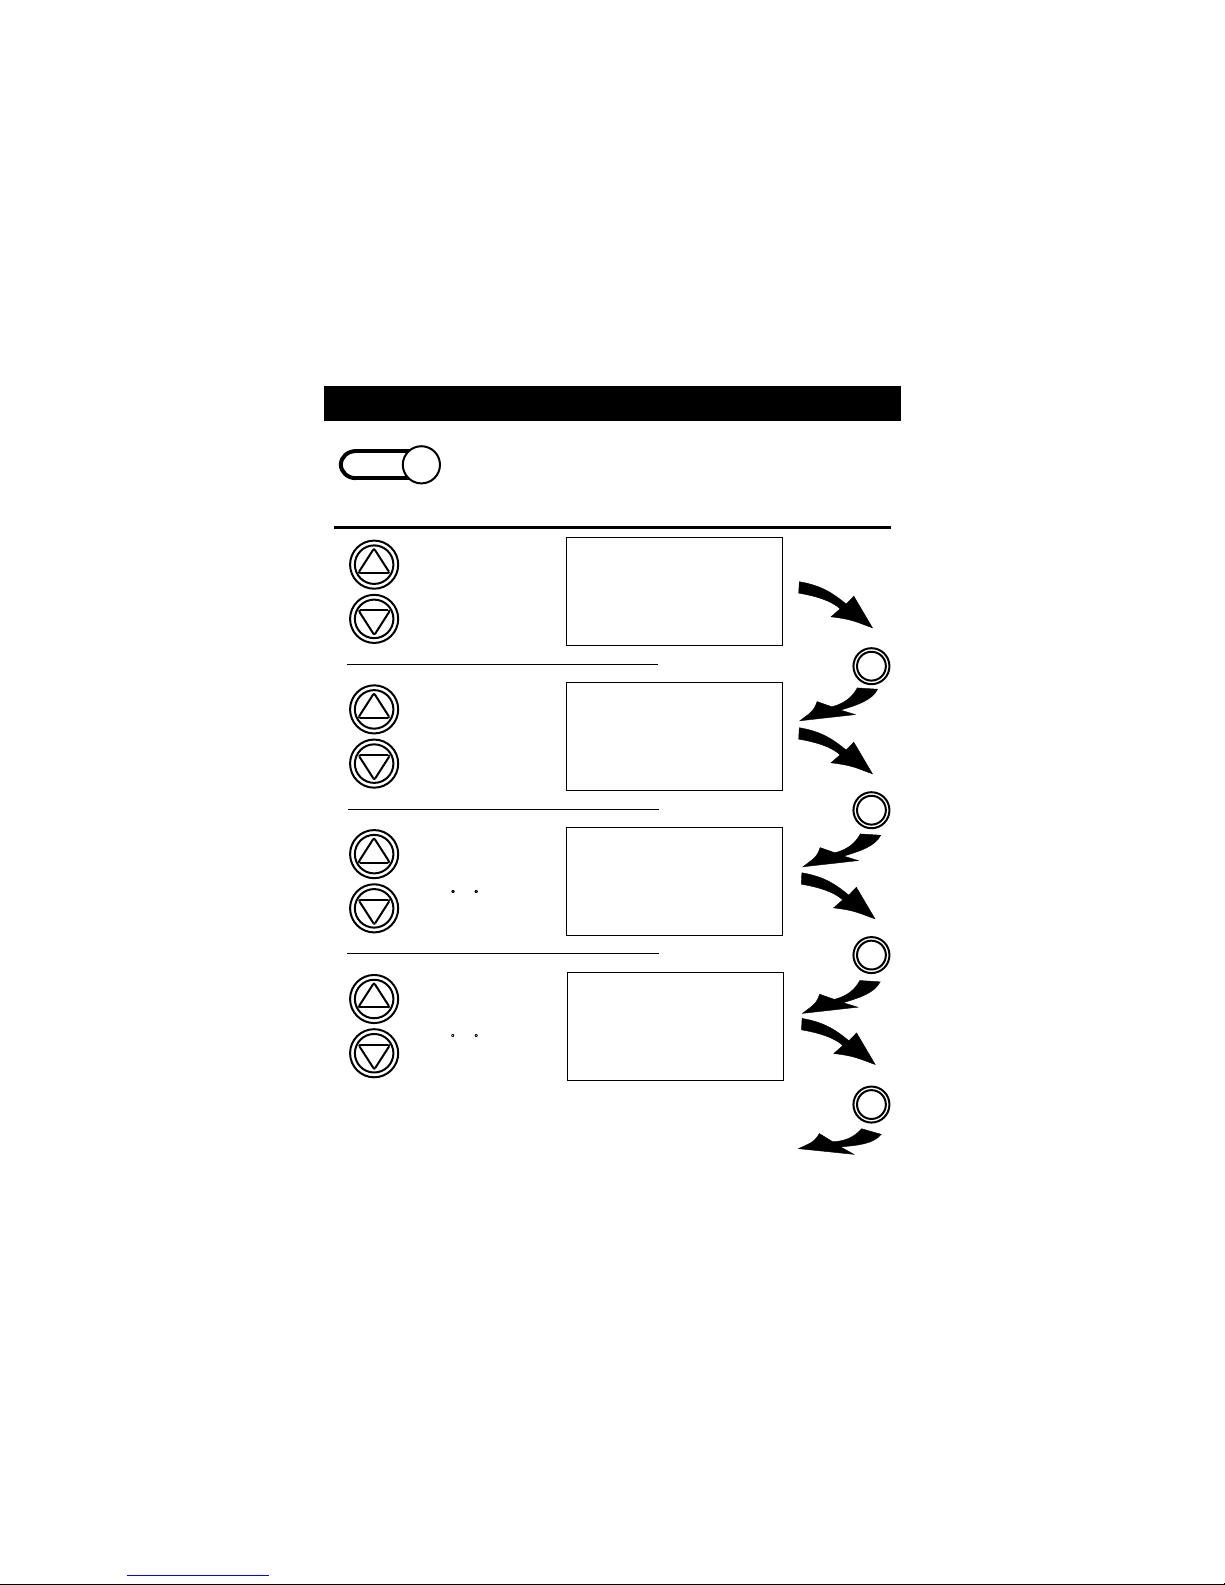
Press the HUMIDITY button to leave the
Humidity Control screens (if no buttons are
pressed, the display will leave the Humidity
Control screens after 60 seconds).
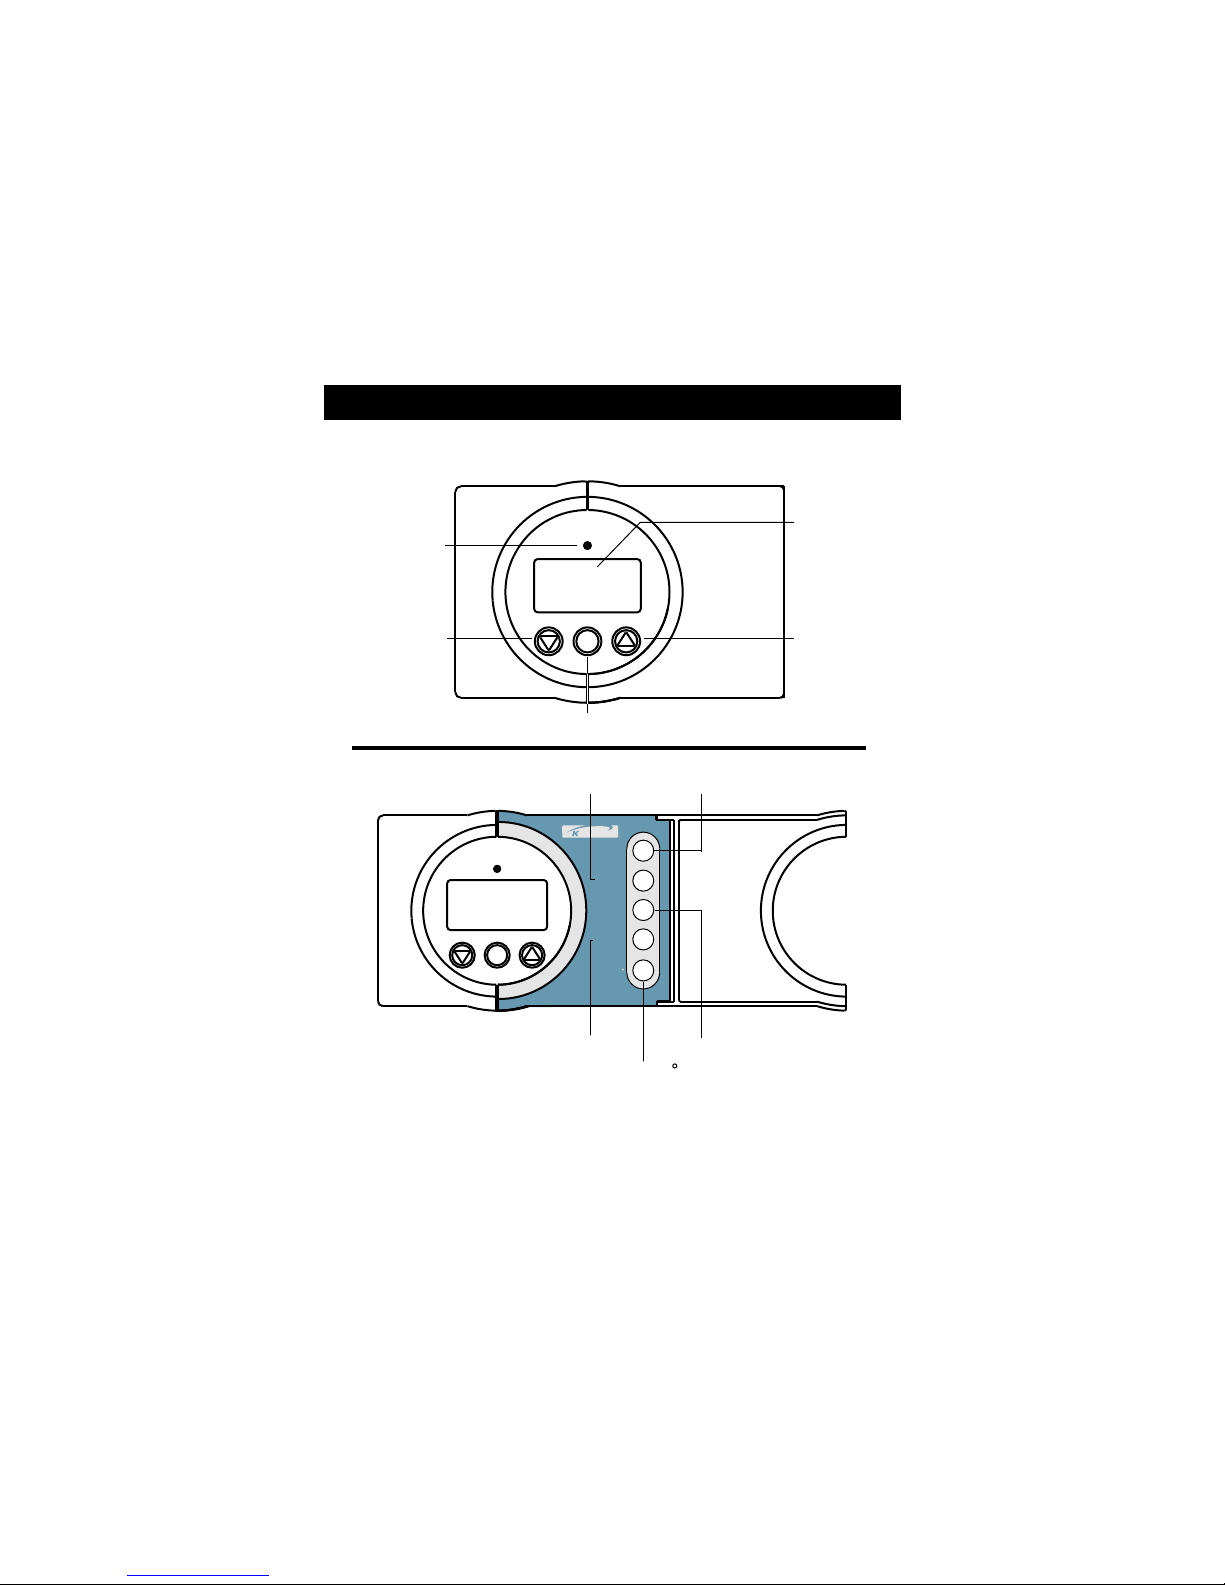
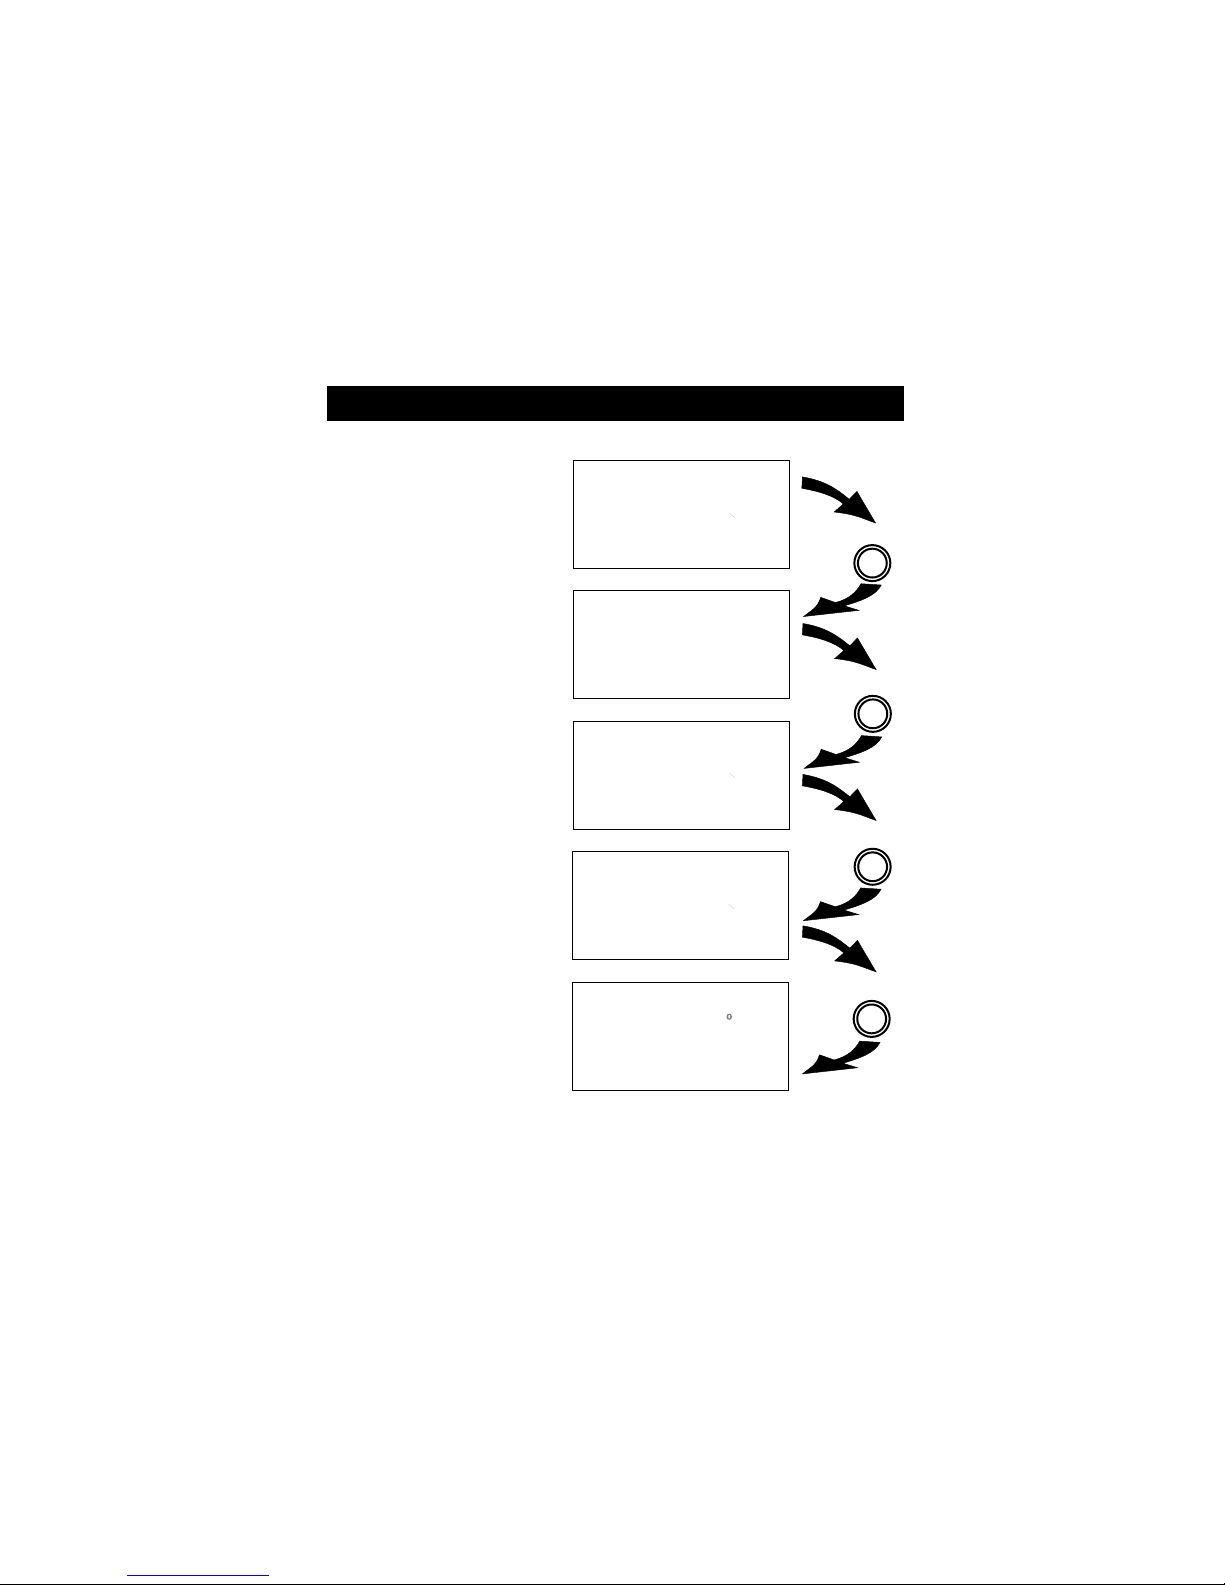
NOTE: Each step # is located at
the top right corner of the
display for easy reference.
Press
Press
Press
Press
NOTE: You cannot set the dehumidify setpoint any lower than the humidify
setpoint; a 5% differential is forced between the humidify and dehumidify
setpoints. When both humidify (step #3) and dehumidify (step #4) are set to
ON, the dehumidify setpoint will automatically be raised to 5% above the humidify
setpoint, when required.
Select On to energize
the humidifier system when
humidity drops below the
desired level. Select Off
if no humidification is
desired.
ON
OFF
45
3
OFF
humidify
Current Room Humidity
Adjust the desired dehumidify
setpoint. There is a forced
5% differential between the
humidify and the dehumidify
setpoints.
Current Room Humidity
2
ON
Dehumidify
45
60
%
Adjust the desired
humidification setpoint
(0%-60%)
Current Room Humidity
I
ON
25
hum i dif y
45
%
ON
OFF
Select On to energize
the dehumidification
system when humidity
rises above the desired
level. Select Off if no
dehumidification is desired.
Current Room Humidity
4
OFF
Dehumidify
45
Step 1 appears only if step 3 is set to “ON”
Step 2 appears only if step 4 is set to “ON”
(25%-99%)
Page 24
Page 24
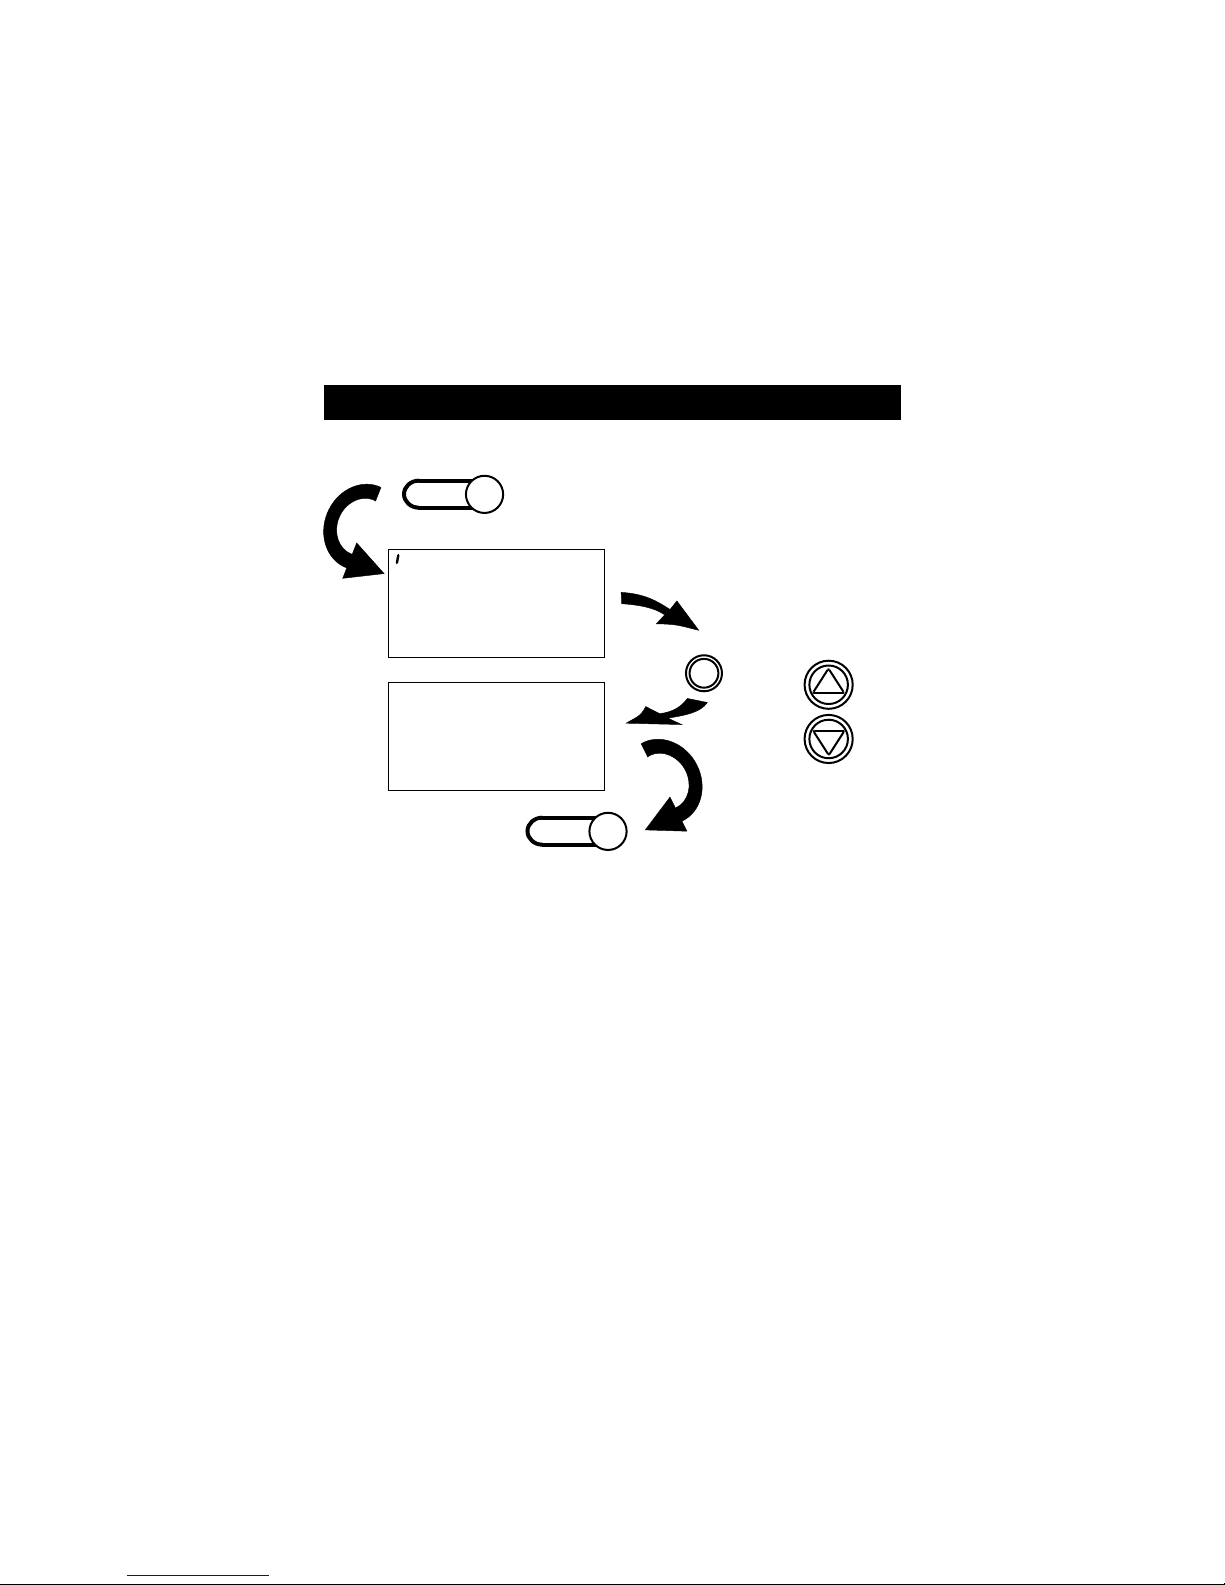
HUMIDITY
Press the Humidity button
to enter Setup screens.
Pages 18-20, 24
HUMIDITY
MODE
MODE
MODE