Kessler-Ellis Products SQUIRT-R User manual

SQUIRT-R
LOOP POWERED INDICATOR
INSTRUCTION MANUAL
99357 01/14/2021
http://www.kep.com
KESSLER-ELLIS PRODUCTS
10 Industrial Way East
Eatontown, NJ 07724
800-631-2165 • 732-649-7100
Fax: 732-649-7099

INDEX
SPECIFICATIONS.............................................................................1
DIMENSIONS ....................................................................................2
TYPICAL WIRING .............................................................................2
DEFINITIONS ....................................................................................3
PROGRAMMING FLOWCHART .......................................................5
ERROR CODES ................................................................................7
BATTERY REPLACEMENT ..............................................................7
DECODING PART NUMBER ............................................................7
WARRANTY ......................................................................................7

1
SPECIFICATIONS
Description:
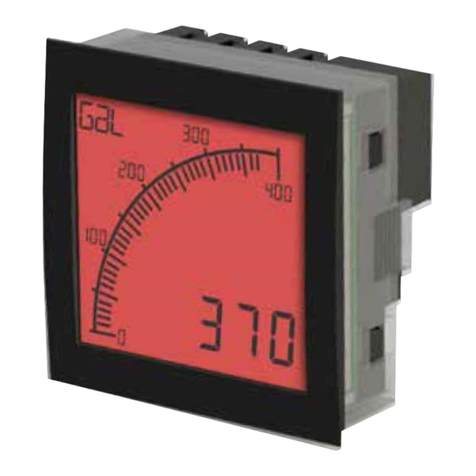
Featuring up to 4 1/2 digits of display, the Squirt-R is a loop
powered indicator capable of accepting either linear or square
root 4-20 mA inputs. Numeric password protection prevents
unauthorized access to the menu. The easy to read menu
prompts make the Squirt-R so easy to program that you will
feel comfortable programming it without the use of a manual.
Specications:
POWER:
Loop powered 4-20 mA
Internal Battery (Memory only):
3 V 250 mA-H Lithium (2 yr. Standby life)
DISPLAY:
Display: (selectable decimal)
3.5 or 4.5 Digits (selectable), 0.35" High, Display up-dates
once every two seconds.
Rate Descriptors: /SEC, /MIN, /HR or "blank"
Units (totalizer) Descriptors: GAL, LIT, FT3, M3, "blank"
Low Battery Error Detection: "BAT" descriptor & ashing
display
Under/Over range Indication: Display ashes when out of
range
ENVIRONMENTAL:
OPERATING TEMPERATURE -4°F (-20°C) to + 158°F
(70°C)
Extended Temp: -22°F (-30°C) to + 158°F (70°C) HUMID-
ITY
0 - 90% Noncondensing
ACCURACY: (Rate @ 20°C)
0.1% Full Scale Resolution, ±1 count
Temperature Drift:
50 ppm/°C Typical 200 ppm/°C Worst Case
LOCKOUT:
Password: Unauthorized menu changes can be prevented by
entering a user selectable password (5 digit number).
Jumper: An internal jumper shunt is provided for applications
requiring a "sealed" menu lockout. Install the jumper to
enable the lock. (see Typical Wiring, Pg. 2)
INPUTS:
Signal Input:
Full Scale Range: 4 to 20 mA DC
Loop Voltage Drop: 6 Volts Maximum
Reverse Polarity Protected
Over Current Protection to 60 mA 16 Bit resolution; 1 sam-
ple every 2 seconds Low Cutoff supplied to inhibit indica-
tions at low ow rates.
CALIBRATION & OPERATION:
Input Scaling: Via front keypad
Calibration: Via front keypad
Decimal Point: Via front keypad
Keypad: 4 tactile feedback keys
Mounting:
0- Circuit Board- OEM option (consult factory)
1- Panel Mount - NEMA 4X Front
2- Wall Mount - NEMA 4X Enclosure
(keypad mounted behind clear cover)
3ΝΕ- Explosion Proof -White, Includes Third Conduit Entry
Class I, Division I, Groups B, C & D
Class II, Division I, Groups E, F & G
3SS- Explosion Proof - Stainless Steel
Class I, Division I, Groups B, C & D
Class II, Division I, Groups E, F & G
5- Wall Mount - NEMA 4X Enclosure
(keypad mounted on cover)
6- Double Ended Explosion Proof -
Class I, Division I, Groups B, C & D
Class II, Division I, Groups E, F & G
(contact factory for details)
NOTE: Meter mounting kits available for styles 2, 3, 5 and 6
Consult Factory
Typical Wiring
Do Not Use 6
Do Not Use 5
Do Not Use 4
Do Not Use 3
Input + (+I) 2
Input - (-I) 1
+
Flowmeter
(4-20mA Transmitter)
Rear View
Jump momentarily to initialize
unit prior to calibration. Use
only after battery replacement.
Loop power must be applied
when initializing.
1 2 3 4 5 6
-
Install jumper
to enable
front panel
lockout.
Data
Acquisition
or
DC Power
Supply
24V Typ.
+
-
Do Not Use 6
Do Not Use 5
Do Not Use 4
Do Not Use 3
Input + (+I) 2
Input - (-I) 1
To Power
Supply
+
-
Flowmeter
(4-20mA Transmitter)
Rear View
4-20mA Loop
1 2 3 4 5 6
Jump momentarily to
initialize unit. Use only after
battery replacement.
Loop power must be applied
when initializing.
Install jumper
to enable
front panel
lockout.
2-Wire Transmitter 4-Wire Transmitter

2
5.10
(130)
4.45
(113)
4.45 (113)
#8 Screw Mounting holes molded directly under cover
screws. Max. screw head .29" (Typ. 4 places)
EM
1.1
(28)
1.97
(50)
.18(5)
BOTTOM VIEW
5.10(130)
TOP VIEW (PANEL INSTALLED)
Optional HF2, HF3
Hub Fitting
Optional H2, H3
Hub Holes
.36
(9.2)
To access terminals, remove cover.
Terminals are on bottom side of PC board.
EM
3.0120 DIAMETER
.900
(22.8)
.992
(25.2)
Mounting holes
.125 Drill (2 places)
.438 Nylon Spacer
Supplied
1.20
(30.5)
2.875
(73)
.10
(2.5)
.438
(11.1)
.900
(22.8)
.992
(25.2)
.10
(2.54)
3.062" (77.77)
Dia. Cutout
Female Plug-In
Connector
4.00
(101.6)
3.582" Dia. Bolt Circle
.125" Holes to be 120°Apart
Outside Dotted Line Shows
Outside Panel Dimension
(4.00" Diameter)
120°
Panel
Cutout
1.20
(30.5)
2.875
(73)
SQUIRTR-1SQUIRTR-0
SQUIRTR-3NESQUIRTR-2
SQUIRTR-3SS
SQUIRTR-6
SQUIRTR-5
4.92
(125)
4.33
(110)
4.33 (110)
#8 Screw Mounting holes molded directly under cover
screws. Max. screw head .29" (Typ. 4 places)
EM
.98
(25)
1.97
(50)
.18(5)
.43
(11)
BOTTOM VIEW
To access terminals, remove cover
and 4 panel screws. Terminals are
on bottom side of PC board.
Panel Screws
4.92(125)
TOP VIEW (PANEL INSTALLED)
Optional HF2, HF3
Hub Fitting
Optional H2, H3
Hub Holes
5.5"
2.375"
5.375"
2.25"
1.188" 5.625"
A
A
4.291 (109)
0.984
(25)
1.575
(40)
Ø 4.331 (110)
Glass
Window
Locking
Screw
5.71 (145)
4.961 (126)
4.941 (125.5)
Ø 0.27 (7)
7 full threads
3/4 NPT
Dimensions in inches (mm)
3/4 NPT
3/4 NPT
ETM-4
EARTH
TERMINAL
4.528 (115)
7 full threads 7 full threads
3RD Conduit
Entry Standard

3
DEFINITIONS
ent code
: (enter code) This prompt will only appear if the panel lock is ON. Enter the password
code to enter the program menu. Press the ↑ key to increment each digit. Press the ←key to
step to the next digit to the left. Press the Ekey to enter the 4 digit code. If the entered code is
correct, the display will advance to the next menu prompt (CLr tot). If incorrect, the display will
return to the run mode.
clr tot
: (clear total) Clears (resets) the totalizer. Press the Ekey to clear the total and return to
the run mode. Press the Mkey to skip and advance to the next menu selection.
3 or 4
: (3.5 or 4.5 digits) Choose between 3.5 or 4.5 digit rate display. Press the ↑ key to step to
the desired choice. Press the Ekey to enter the displayed choice.
dec loc
: (Decimal Location) Sets the decimal location for the display and the
rate lo
&
rate hi
settings. Press the ←key to move the decimal. Press the Ekey to enter the displayed
decimal location.
tot desc
: (totalizer descriptor) This allows you to display one of the available descriptors on the
display (GAL, LIT, FT3, M3 or "blank"). Press the ↑ key to select the descriptor. Press the E
key to enter the selected descriptor.
rat desc
: (ratemeter descriptor) Sets the rate descriptor. Choose rate per hour, minutes,
seconds or "blank". Press the ↑ key to step to the desired choice. Press the Ekey to enter
the displayed descriptor.
input
: (input type) Choose between linear (
lin
) or Square Root Extraction (
SQ.u
) . Press the ↑ to
step to the desired input type. Press the Ekey to enter the displayed choice.
rate lo
: (rate low) Sets the low setting for the 4-20 mA analog input. Key in the low rate value
which corresponds to the 4mA input. Press the ↑ key to increment each digit. Press the ←
key to step to the next digit to the left. Press the Ekey to enter the displayed rate lo value.
rate hi
: (rate high) Sets the high setting for the 4-20 mA analog input. Key in the high rate value
which corresponds to the 20mA input. Press the ↑ key to increment each digit. Press the ←
key to step to the next digit to the left. Press the Ekey to enter the displayed rate hi value.
lo cut
: (low cutoff) Percent of input span (0.1 to 9.9) below which all inputs will assume the rate
lo value. (With
LoCut
set at 9.9, and
rAteLo
set to 0, all inputs below 5.6mA will read 0)
CALCULATION EXAMPLE: Given: Cutoff desired at 9.9% span Compute: mA corresponding
to 9.9% = ((9.9%*16mA)/100%) + 4mA = 5.6mA
3

4
DEFINITIONS
(continued)
cal
: (calibrate; yes or no) Select
YES
to calibrate the unit, select
no
to skip the calibration
procedure. Press the ↑ key to select YES or NO. Press the Ekey to enter the displayed
selection.
cal LO
: (calibrate low) Apply an accurate 4 mA signal to the input and press the Ekey. If the
calibration is successful the unit will display "
DONE cal lo
". If the calibration is not successful
the display will read "
DONE cal err
" see error codes page 7. Press the Mkey to continue.
cal hi
: (calibrate high) Apply an accurate 20 mA signal to the input and press the Ekey. If the
calibration is successful the unit will display "
DONE cal hi
". If the calibration is not successful
the display will read "
DONE cal err
" see error codes page 7. Press the Mkey to continue.
loc code
: (lock code) Sets the 4 digit lock code to be entered when the unit prompts
ent code
.
This allows the user to gain access to the menu when the unit is locked. Press the ↑ key to
increment each digit. Press the ←key to step to the next digit to the left. Press the Ekey to
enter the displayed code. (Factory Default Code = 1000)
Record this number for later use!
loc unit
: (lock unit) Sets the panel lock ON or OFF. Press the ↑ key to select
yes
(ON) or
no
(OFF). Press the Ekey to enter the displayed selection.
NOTE: A hardware jumper menu lockout is also available. (see Typical Wiring Pg. 2)
4

5
PROGRAMMING FLOWCHART
Press the Mkey to enter the programming menu.
RATE
TOTAL
4.5
3 or 4
M
RUN MODE
3.5 or 4.5
DIGITS
0000
ent code
ENTER CODE
If panel
lock ON
If panel
lock OFF
If code
correct
If code
incorrect
1234
dec loc
DECIMAL
LOCATION
E
E
M
E
M
3.5
4.5
TOT DESC
rat desc
TOTAL
DESCRIPTOR
RATE
DESCRIPTOR
(scaling)
GAL
LIT
FT3
M3
"blank"
lin
input
INPUT TYPE
E
M
E
M
E
M
SEC
MIN
HRS
"blank"
lin
s .U
Continue On
Next Page
Press the key to step to the desired number of digits.
Press the Ekey to enter the displayed choice.
Press the M key to skip and keep the existing choice.
If the panel lock is on, you must enter the 4 digit lock code to gain
access to the menu. (Factory Default Code = 1000)
Press the key to increment each individual digit of the code.
Press the key to advance to the next digit.
Press the Ekey to enter the displayed code.
If the code is correct, display advances to "
clr tot
", if not, display
returns to run mode
Press the key to step to the desired input type.
Press the Ekey to enter the displayed choice.
Press the Mkey to skip and keep the existing input type.
Press the key to step to the desired rate descriptor.
Press the Ekey to enter the displayed descriptor.
Press the Mkey to skip and keep the existing descriptor.
Press the key to step to the desired totalizer descriptor.
Press the Ekey to enter the displayed descriptor.
Press the Mkey to skip and keep the existing descriptor.
Press the key to step the decimal to the next digit.
Press the Ekey to enter the displayed decimal location.
Press the M key to skip and keep the existing decimal location.
NOTE: All menu selections are saved upon exiting the program menu and returning to the run mode. When making
menu changes, do not remove loop power until returning to the run mode.
5

6
PROGRAMMING FLOWCHART
(continued)
Press the key to increment each individual digit of the rate high setting.
Press the key to advance to the next digit.
Press the Ekey to enter the displayed value.
Press the Mkey to skip and keep the existing value.
Press the key to increment each individual digit of the rate low setting.
Press the key to advance to the next digit.
Press the Ekey to enter the displayed value.
Press the Mkey to skip and keep the existing value.
0000
rate LO
19999
RATE HI
9.9
LO CUT
RATE LOW
(4mA)
RATE HIGH
(20mA)
LOW CUTOFF
E
M
E
M
E
M
yes
cal
CAL LO
CALIBRATE
YES or NO
yes
no
E
RUN MODE
0000
loc code
LOCK
CODE
E
M
yes
loc unit
E
M
E
If NO
If YES
E
DONE
cal LO
CAL HI
E
DONE
cal HI
M
M
M
M
CALIBRATE LOW
(input 4mA, press E)
CALIBRATE LOW
DONE
CALIBRATE HIGH
(input 20mA, press E)
CALIBRATE HIGH
DONE
Continued From
Previous Page
Press the key to increment each individual digit of the low cutoff setting.
Press the key to advance to the next digit.
Press the Ekey to enter the displayed value.
Press the Mkey to skip and keep the existing value.
Press the key to step to cal YES or cal NO.
Press the Ekey to enter the displayed choice.
Press the Mkey to skip and proceed to loc code.
Press the Ekey when 4mA is supplied to the input.
Press the Mkey to skip and proceed to cal hi.
Done will appear to signal that the cal lo was successful.
Press the Mkey to advance to cal hi.
Press the Ekey when 20mA is supplied to the input.
Press the Mkey to skip and proceed to loc code.
Done will appear to signal that the cal hi was successful.
Press the Mkey to advance toloc code.
Press the key to increment each individual digit of the lock code.
Press the key to advance to the next digit.
Press the Ekey to enter the displayed code.
Press the Mkey to skip and keep the existing code.
Press the key to step to the desired lock setting.
Press the Ekey to enter the displayed lock setting.
Press the Mkey to skip and keep the existing setting.
6

7
0000
RATE ERR
ERROR CODES
WARRANTY
This product is warranted against defects in materials and
workmanship for a period of two (2) years from the date of
shipment to Buyer.
The Warranty is limited to repair or replacement of the
defective unit at the option of the manufacturer. This war-
ranty is void if the product has been altered, misused,
dismantled, or otherwise abused.
ALL OTHER WARRANTIES, EXPRESSED OR IMPLIED,
ARE EXCLUDED, INCLUDING BUT NOT LIMITED TO
THE IMPLIED WARRANTIES OF MERCHANTABILITY
AND FITNESS FOR A PARTICULAR PURPOSE.
done
cal ERR
This error message is displayed when the "RATE LO" value is set equal to or higher than the
"RATE HI" value. Press Mto re-enter the "RATE LO" and "RATE HI" values.
This error message is displayed when the "CAL LO" or "CAL HI" input is set at a value which
is out of range (see "CAL LO" and "CAL HI" in programming section for calibrating input
ranges). Press
M
to re-enter the "CAL LO" and/or "CAL HI" procedure.
e battry
If a low battery / invalid memory condition is detected, the display will flash and the "BAT"
descriptor will come on. Press Mto acknowledge the condition, E BATTERY will be
displayed. Replace the battery, reinitialize and recalibrate the unit. (see "Battery Replace-
ment" below).
Battery Replacement
Suggested Battery:
Panasonic BR2330
The polarity of the battery must be correct. Plus (+) must be on
top as signified on the conductor arm.
Note: The unit must be powered by the loop and reinitialized
immediately after battery replacement to prevent early battery
discharge.
All menu items must be re-entered and the unit must be re-
calibrated.
DECODING PART NUMBER
Example: SQUIRTR 3
ET
SQUIRTR
Loop powered; Rate Only
Mounting:
0 = OEM
1= Panel Mount
2 = NEMA 4X Box (SquirtR behind clear cover)
3 = Explosion Proof Housing
5 = NEMA 4X Box (SquirtR outside opaque cover)
Options:
ET = Extended Temp.: -22°F to 158°F (-30°C to 70°C)
H2 = 0.875" Hole for mounting styles 2 and 5
HF2 = 0.5" Female NPT Hub fitting
H3 = 1.125" Hole for mounting styles 2 and 5
HF3 = 0.75" Female NPT Hub fitting
7
Battery Replacement
Suggested Battery:
Panasonic BR2330
The polarity of the battery must be correct. Plus (+) must
be on top as signied on the conductor arm.
Note: The unit must be powered by the loop and
reinitialized immediately after battery replacement to
prevent early battery discharge.
All menu items must be re-entered and the unit must be
re-calibrated.
WARRANTY
This product is warranted against defects in materials and
workmanship for a period of two (2) years from the date of
shipment to Buyer.
The Warranty is limited to repair or replacement of the
defective unit at the option of the manufacturer. This
warranty is void if the product has been altered, misused,
dismantled, or otherwise abused.
ALL OTHER WARRANTIES, EXPRESSED OR IMPLIED,
ARE EXCLUDED, INCLUDING BUT NOT LIMITED TO
THE IMPLIED WARRANTIES OF MERCHANTABILITY
AND FITNESS FOR A PARTICULAR PURPOSE.
DECODING PART NUMBER
Example: SQUIRTR 3 ET
SQUIRTR
Loop powered; Rate Only
Mounting:
0 = OEM
1 = Panel Mount
2 = NEMA 4X Box (Squirt behind clear cover)
3NE = Explosion Proof Housing, White
Includes Third Conduit Entry
3SS = Stainless Steel Ex-Proof Housing
5 = NEMA 4X Box (Squirt outside opaque cover)
6 = Double Ended Explosion Proof Housing
Options:
ET = Extended Temp.: -22°F to 158°F (-30°C to 70°C)
ATEXCASE** = European Flame Proof
ATEX Case (consult factory)
H2 = 0.875" Hole for mounting styles 2 and 5
CG - Cable Grip with Locking Nut
used for H2 option
HF2=1/2"FemaleNPTHubtting(mount styles 2 & 5)
H3 = 1.125" Hole for mounting styles 2 and 5
HF3=3/4"FemaleNPTHubtting(mount styles 2 & 5)
** Contact factory for latest information
This manual suits for next models
7
Table of contents
Other Kessler-Ellis Products Measuring Instrument manuals
Popular Measuring Instrument manuals by other brands

Kimo
Kimo AQ 100 user manual

Ludlum Measurements
Ludlum Measurements 2241-4 manual

sauermann
sauermann Si-RM3V Simplified user manual

IMV
IMV 4P-420 Specifications and Instruction Manuals

Clas Ohlson
Clas Ohlson E3182-V2 instruction manual

National Instruments
National Instruments PXI-5660 Getting started guide