Fi
. 2
A
G
F
B
FB
A
G
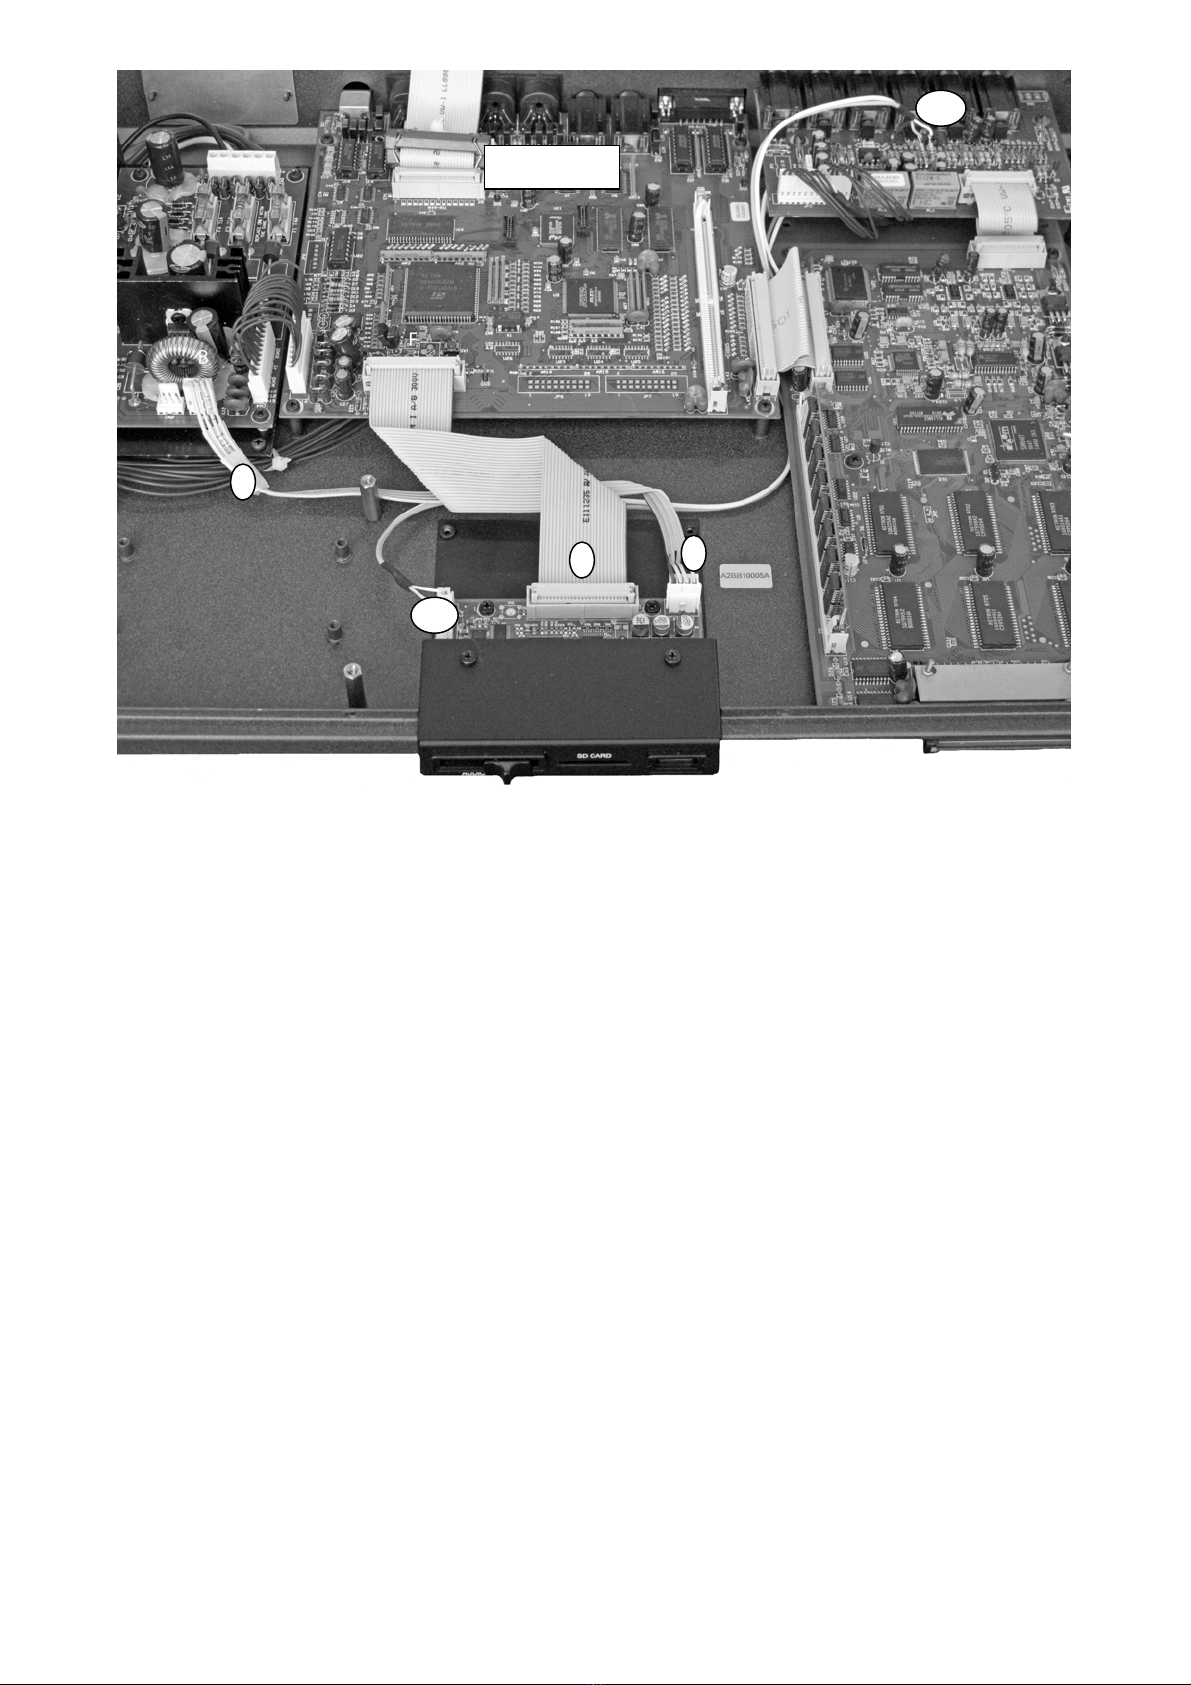
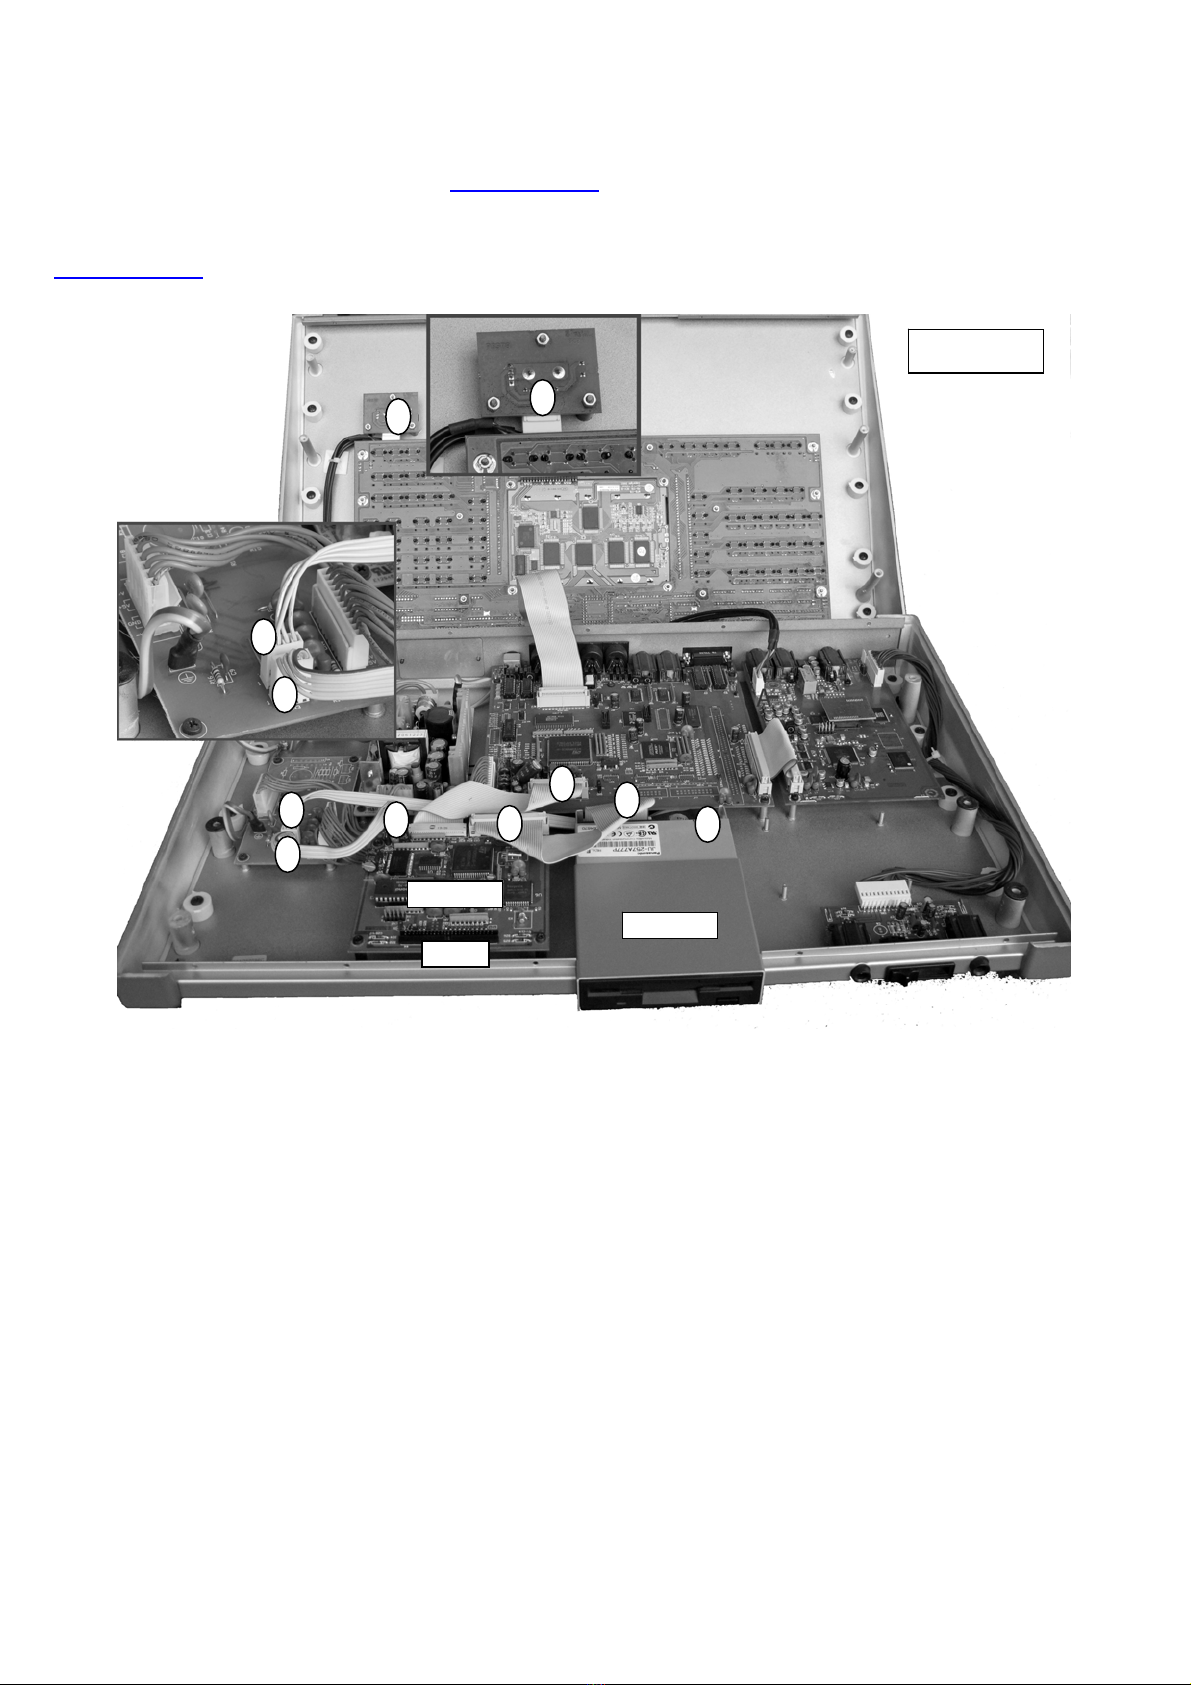
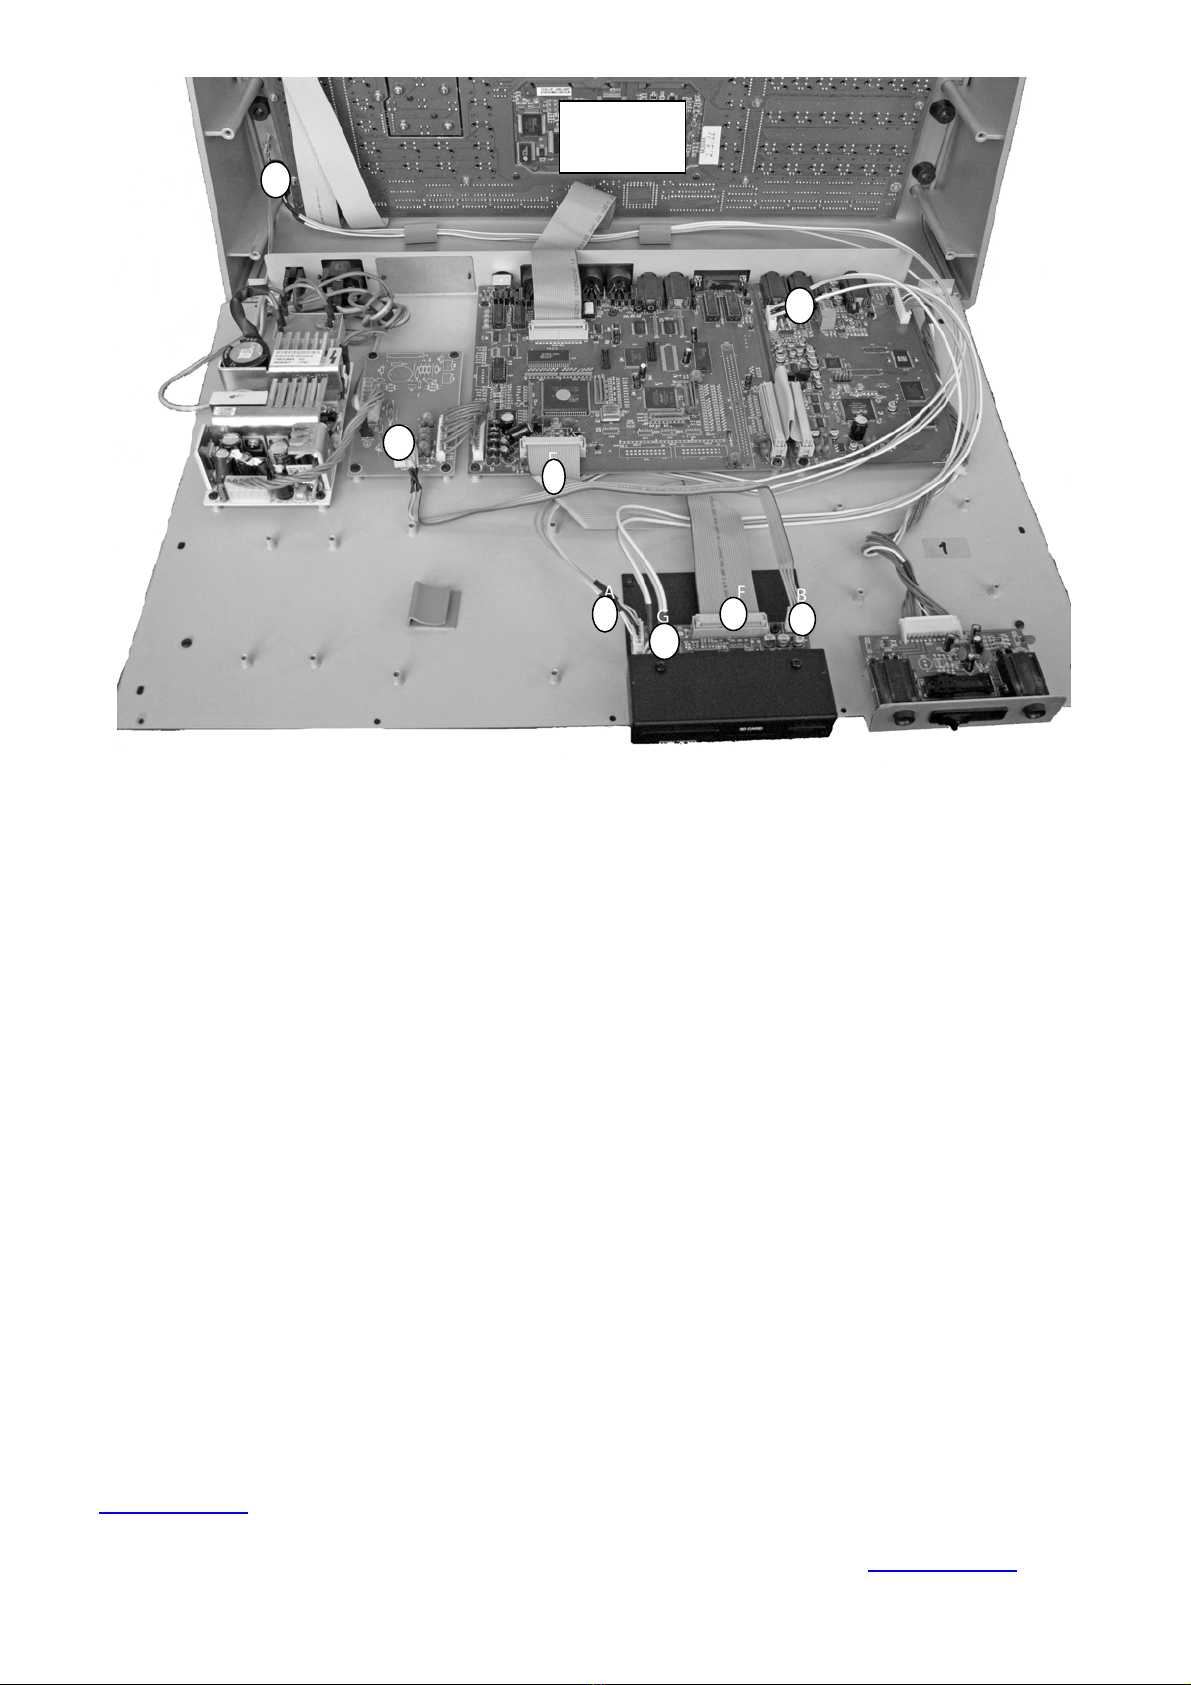
Collegare i cavi presenti nella scatola come segue (Fig. 2):
Cavo schermato 6 vie A dal connettore JP3 del PB469 (USB & SD CARD READER) al connettore
del PB378 (Potenziometro Volume).
Cavo schermato 6 vie G dal connettore JP2 del PB469 (USB & SD CARD READER) al
connettore JP3 del PB379 o successivi (Generazione Suoni).
Cavo piatto 26 vie Fdal connettore J1 del PB469 (USB & SD CARD READER) al connettore JP1
del PB343 (CPU).
Cavo piatto 4 vie Bdal connettore J5 del PB469 (USB & SD CARD READER) al connettore CN1
del PB384 (Alimentatore).
Follow these instructions to carefully connect the cables included in the package (Fig. 2):
Shielded cable 6 way Afrom connector JP3 of PB469 (USB & SD CARD READER) to connector
of PB378 (Volume Potenziometer).
Shielded cable 6 way Gfrom connector JP2 of PB469 (USB & SD CARD READER) to connector
JP3 of PB379 or later (Sound Generation).
Flat cable 26 way Ffrom connector J1 of PB469 (USB & SD CARD READER) to connector JP1
of PB343 (CPU).
Flat cable 4 way Bfrom connector J5 of PB469 (USB & SD CARD READER) to connector CN1
of PB384 (Power Supply).
Chiudere lo strumento.
Close the instrument.
Terminato il montaggio del kit utilizzare una USB pen drive formattata FAT32, creare una nuova
cartella, nominarla “FLOPPY” e copiare i files del nuovo sistema operativo XD3 scaricabile dal nostro
sito www.ketron.it e seguire le istruzione per il caricamento sulla tastiera.
After installing the kit use a USB pen drive (formatted FAT32). Create a new folder “FLOPPY” and
copy the files of the new XD3 O.S. which is downloadable from our web site www.ketron.it and follow
the instruction to load it onto the instrument.