manuals.online logo
Brands
  1. Home
  2. •
  3. Brands
  4. •
  5. KEUCO
  6. •
  7. Indoor Furnishing
  8. •
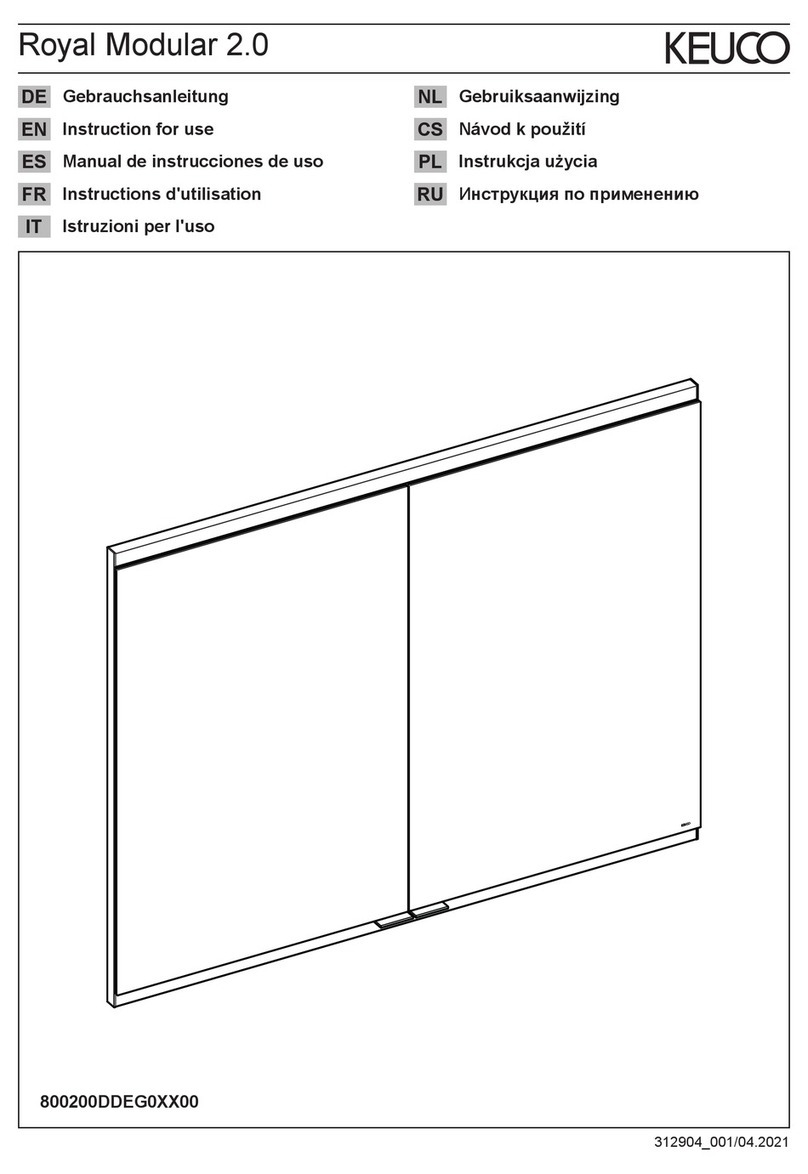
  9. KEUCO Royal Reflex.2 User manual

KEUCO Royal Reflex.2 User manual

US Instruction for use CA Instructions de utilisation
Royal Reflex.2
311958_000/03.2018
24205 171351
24204 171351
2
27-9/16"
(700)
5-7/8"
(150)
39-3/8"
(1000)
27-9/16"
(700)
5-7/8"
(150)
51-3/16"
(1300)
24205 171351
24204 171351
US Mounting dimensions
inch and (mm)
CA Mounting dimensions
inch and (mm)
US Mounting dimensions CA
3
US Important information, please make sure to read!
Important safety information
WARNING!
Deadly risk in case of failure to com-
ply with the documentation!
In order to reduce the risk of injury from
re, burns or electric shock, the safety
instructions and directions in this installa-
tion manual must be followed.
Warranty
– A warranty in terms of the safety, functionality and integrity of
the product is only valid if the instructions in this manual are
followed. In case non-compliance, bodily injury and property
damage may occur.
The manufacturer is not liable for damages occurring due to
noncompliance with the instructions.
– The local regulations as well as the general safety and acci-
dent prevention regulations must be observed.
– The product is exclusively intended to be mounted on the
wall in dry rooms. The construction must be capable of sup-
porting the weight of the product.
– The product has left the factory in perfect and safe working
condition. The product may not be used in case of damage
or malfunction.
General safety information and other information
– Installation may only be carried out by qualied personnel.
– Before carrying out cabling work, ensure that the lines are
free of voltage. During the cabling work, ensure that the lines
remain free of voltage (e.g. prevent power from being turned
on).
– The product must be grounded with a connection to a
grounded metal object or an existing protective conductor.
– Before carrying out drilling work, make sure that no water or
power lines are located behind the drilling area.
– The position of the product must be determined by the user
prior to installation.
– Before installation check whether the fastening materials
included are suitable for the anchoring base. The fastening
materials are suitable exclusively for stud walls or for drywall
constructions with wood reinforcement.
– The product must be installed by at least two people.
– To avoid damage to the product, it must be handled with the
greatest care.
Rings and other objects that could damage the product must
be removed before installation.
– In case of damages or malfunctions, contact your
retailer.
– All dimensions are given in inches and (mm).
The drawings are not to scale.
– Subject to technical changes.
– Large, bulky or heavy items must be installed by
two people.
– The product is only suitable for interior use.
Safety Instructions
WARNING!
Safety instructions on hazards with a
medium degree of risk!
Failure to comply can result in death or
serious injury.
CAUTION!
Safety instructions on hazards with a
low degree of risk!
Failure to comply can result in minor to
moderate injuries.
NOTICE Safety instructions on hazards with a
low degree of risk!
Failure to comply can lead to damages
or to the destruction of the product.
Key to symbols
Warning - risk of electric shock
Warning - risk of water damage
Interior rooms
Note, tip or reference
Correct assembly/functional test
Incorrect assembly
Observe assembly details
Optional/accessories
On/off switch
Front and wall lighting
Washbasin lighting
Light colour - daylight white (cool white)
Light colour warm white
4
US Important information, please read!
Technical specications
– Supply voltage: 230 V AC / 50 Hz
– Max. power consumption:
Prod. No.: Width Weight Light
24204 171351: 38-3/4''
(1000 mm) 61,73 lb
(28 kg) 32 W
24205 171351: 51-3/16''
(1300 mm) 77,16 lb
(35 kg) 40 W
– Protection category: IP20
– Ambient conditions:
Temperature 41° – 104° F
– Light colour 3000 Kelvin
Installation dimensions, refer to page 2
Included items, refer to picture 1 on page 6
Connection diagram, refer to picture 2 on page 6
The product can be operated in two ways.
Operating mode 1 (condition as supplied):
Light on/off on rotary dimmer of the product
(automatically off after power reinstated).
Operating mode 2:
Light on/off on external light switch (automatically on
after power reinstated).
To toggle the operating mode, press and hold the
rotary dimmer 15 seconds while the light is switched
off. The light turns on briey to conrm the change to
the operating mode.
Lighting modes
The product has 3 different lighting modes.
Mode 1: Front illumination
Mode 2: Washbasin illumination
Mode 3: Front and washbasin illumination
Press the rotary dimmer for at least one second to
change the lighting modes.
Installation, refer to picture 3 on page 6
Operation, refer to picture 21 on page 11
Note: When switching off the lights, the type of
lightning and its intensity are saved and will be the
same after switching on the lights again.
For spare parts with order numbers, refer to pages 14
and 15.
The light sources may only be replaced by the
manufacturer, its customer service or by an equally
qualied person.
For information about warranty and maintenance, see
the enclosed Maintenance and Warranty Passport.
Disposal information! Equipment with this labelling
must not be disposed of in household refuse, but must
be disposed of at a collection centre intended for this
purpose.
Consignes de sécurité
AVERTISSEMENT !
Symbole de sécurité indiquant
un danger avec des risques de
moyenne intensité !
Le non-respect peut entraîner la mort
ou de graves blessures.
ATTENTION
!
Symbole de sécurité indiquant un
danger avec de faibles risques !
Le non-respect peut entraîner des
blessures légères ou moyennement
graves.
NOTICE Symbole de sécurité indiquant un
danger avec de faibles risques !
Le non-respect peut entraîner
des endommagements ou une
détérioration du produit.
Explication des symboles
Mise en garde contre les risques d‘électrocution
Mise en garde contre les risques liés à l‘eau
Locaux intérieurs
Remarque, conseil ou renvoi
Montage correct/contrôle fonctionnel
Montage incorrect
Respecter le détail de montage
Option/accessoires
Interrupteur Marche/Arrêt
Éclairage frontal et mural
Éclairage de la vasque
Couleur de la lumière blanc lumière du jour (blanc
froid)
Couleur de la lumière blanc chaud
Informations de sécurité importantes
AVERTISSEMENT !
Danger de mort en cas de non-
respect de la documentation !
An de réduire les risques de
blessures causées par des incendies,
des brûlures ou par une électrocution,
veuillez impérativement suivre
les consignes de sécurité et les
instructions indiquées dans la notice
de montage.
CA Informations importantes, à lire impérativement !
5
Garantie
– Une garantie concernant la sécurité, la fonctionnalité et
l’intégrité du produit peut uniquement être assurée si les
consignes contenues dans cette notice d’utilisation sont
respectées. Un non-respect de ces instructions peut
entraîner des blessures corporelles ainsi que des dommages
matériels.
Le fabricant décline toute responsabilité pour les dommages
dus à non-respect de ces consignes.
– Il est nécessaire de respecter les réglementations locales
ainsi que les règles générales en vigueur sur la sécurité et la
prévention des accidents.
– Le produit est exclusivement conçu pour une xation sur
un mur dans des endroits secs. Le support doit pouvoir
supporter le poids de l’installation.
– Le produit a quitté l’usine dans un état irréprochable en
matière de sécurité. Vous ne devez plus utiliser le produit en
cas d’endommagements ou de dysfonctionnements.
Consignes de sécurité et informations générales
– Seul un personnel spécialisé et qualié est autorisé à
effectuer le montage.
– Avant de commencer les travaux de câblage, veuillez-vous
assurer que les câbles sont hors tension. Lors du câblage,
veuillez-vous assurer que les câbles restent hors tension
(par ex. empêcher toute réactivation).
– Le produit doit être mis à terre à partir d‘une connexion à
un objet métallique mis à la terre ou à un conducteur de
protection existant.
– Avant les travaux de perçage, veuillez-vous assurer qu‘il n‘y
ait aucune conduite d‘eau ni aucun câble électrique derrière
l‘emplacement de perçage prévu.
– L‘utilisateur doit déterminer la position du produit avant de
procéder au montage.
– Avant le montage, vérier si le matériel de xation joint
convient pour le support d‘ancrage. Le matériel de xation
est exclusivement destiné à être utilisé pour des cloisons en
bois ou des cloisons sèches avec renforcement en bois.
– Il est nécessaire de réaliser le montage du produit avec au
moins deux personnes.
– An d‘éviter tout endommagement sur le produit, il faut agir
avec la plus grande précaution possible.
Les bagues ou tout autre objet pouvant endommager le
produit doivent être retirés avant de procéder au montage.
– Veuillez-vous adresser à un commerçant
spécialisé en cas d‘endommagements ou de
dysfonctionnements.
– Toutes les dimensions sont données en pouces et
en (mm). Les schémas ne sont pas à l‘échelle.
– Sous réserves de modications techniques.
– Les éléments lourds et encombrants doivent être
montés à l‘aide de deux personnes.
– Le produit convient uniquement pour une utilisation
dans les locaux intérieurs.
CA Informations importantes, à lire impérativement!
Caractéristiques techniques
– Alimentation en tension : 230 V AC / 50 Hz
– Puissance absorbée max. :
Réf. produit : Largeur Poids Lampe
24204 171351: 1000 mm 28 kg 32 W
24205 171351: 1300 mm 35 kg 40 W
– Indice de protection : IP20
– Conditions ambiantes :
Température 5° – 40° C
– Couleur de la lumière 3000 Kelvin
Cotes d'encombrement, voir page 2
Étendue de la fourniture, voir gure 1 à la page 6
Schéma de câblage, voir gure 2 à la page 6
L'appareil peut être utilisé de deux façons.
Mode de fonctionnement 1 (état à la livraison) :
Marche/arrêt éclairage sur le variateur rotatif de
l'appareil (arrêt automatique après rétablissement de
la tension).
Mode de fonctionnement 2 :
Marche/arrêt éclairage sur l'interrupteur d'éclairage
externe (mise en marche automatique après
rétablissement de la tension).
Pour changer de mode de fonctionnement, appuyer
sur le variateur rotatif pendant 15 secondes,
l'éclairage étant arrêté. Un éclairage bref conrme le
changement de mode de fonctionnement.
Modes d'éclairage
L'appareil comporte 3 modes d'éclairage différents.
Mode 1 : Éclairage de la façade
Mode 2 : Éclairage du lavabo
Mode 3 : Éclairage de la façade et du lavabo
Pour changer de mode d'éclairage, appuyer sur le
variateur rotatif pendant une seconde au moins.
Installation, voir gure 3 à la page 6
Utilisation, voir gure 21 à la page 11
Remarque : Lors de l'arrêt, le mode et l'intensité de
l'éclairage sont enregistrés et seront les mêmes lors
de la prochaine mise en marche.
Pièces de rechange avec numéros de commande, voir
pages 14 et 15.
La lampe ne doit être remplacée que par le fabricant,
son service Clients ou une personne ayant la même
qualication.
Les consignes relatives à la garantie et à l'entretien
gurent sur la carte d'entretien et de garantie jointe.
Consigne de destruction ! Les appareils portant
cette identication ne doivent pasêtre déposés dans
les ordures ménagères mais remis à un point de
collecte prévu à ces ns !
6
6x 6x
1
Operating mode 2 / Mode de raccordement 2
driver
LED
driver
LED
driver
LED
driver
LED
240V
power outlet
Trafo
20VA
sec
BLACK / NOIR
RED / ROUGE
WHITE / BLANCHE
Ground /
Terre
RED / ROUGE
WHITE / BLANCHE
Ground /
Terre
RED / ROUGE
WHITE / BLANCHE
Ground /
Terre
RED / ROUGE
WHITE / BLANCHE
Ground /
Terre
driver
LED
driver
LED
driver
LED
driver
LED
240V
power outlet
Trafo
20VA
sec
BLACK / NOIR
RED / ROUGE
WHITE / BLANCHE
Ground /
Terre
RED / ROUGE
WHITE / BLANCHE
Ground /
Terre
RED / ROUGE
WHITE / BLANCHE
Ground /
Terre
RED / ROUGE
WHITE / BLANCHE
Ground /
Terre
2
Operating mode 1 / Mode de raccordement 1
driver
LED
driver
LED
driver
LED
driver
LED
240V
power outlet
Trafo
20VA
sec
BLACK / NOIR
RED / ROUGE
WHITE / BLANCHE
Ground /
Terre
RED / ROUGE
WHITE / BLANCHE
Ground /
Terre
RED / ROUGE
WHITE / BLANCHE
Ground /
Terre
RED / ROUGE
WHITE / BLANCHE
Ground /
Terre
23
7
2-3/4"
(70)
2-3/4"
(70)
2-3/4"
(70)
2-3/4"
(70)
2-3/8"
(60)
~ 78-13/16"
(~ 2000)
Ø 1/4"
(Ø 6)
39-3/8"
(1000)
(24204 171351)
51-3/16"
(1300)
(24205 171351)
4
5 8
6
7
8
Ø 6
9
WARNING!
Risk of deadly electrical shock!
Before carrying out cabling work,
disconnect the power supply.
Ensure that the lines are free of
voltage.
Ensure that the power supply remains
interrupted during the cabling work.
AVERTISSEMENT !
Danger de mort par électrocution !
Avant les travaux de perçage,
veuillez-vous assurer qu‘il n‘y ait
aucune conduite d‘eau ni aucun câble
électrique derrière l‘emplacement de
perçage prévu.
10
11
12
13
9
14
15
16
17
2.
1.
10
19
18
1.
2.
3.
11
20
1.
2.
3.
+
21
12
13
14
90110000021
90110000016
90110000010
90107000004
90105000037
90106000006
90101000034
407011
90108000001
90108000000
90108000002
90103000000
90105000023
90104000003
90101000033
US Spare parts CA Liste de pièces
24204 171351
15
90110000023
90110000011
90110000010
90107000004
90105000038
90106000006
90101000036
90101000035
90108000001
90108000000
90108000002
90103000000
90105000023
90104000004
90101000033
24205 171351
US Spare parts CA Liste de pièces
DE
KEUCO GmbH Co. KG
Oesestraße 36
D-58675 Hemer
Telefon: +49 2372 904-0
E-Mail: [email protected]
AT
KEUCO GmbH
Söllheimerstraße 16
Objekt 6c
A-5020 Salzburg
Telefon: +43 662 4540560
E-Mail: of[email protected]
CH
KEUCO AG
Winkelweg 3
CH-5702 Niederlenz
Telefon: +41 62 8880020
E-Mail: [email protected]
EN
KEUCO UK Ltd
Amersham House
Mill Street
GB-Berkhamsted HP4 2DT
Phone: +44 10442865220
E-Mail: [email protected]
FR
KEUCO SARL
5, Rue du Martelberg
F-67700 Monswiller
Téléphone: +33 3 88700200
E-Mail: [email protected]
NL
KEUCO GmbH Co. KG
Kantoor Nederland
Postbus 1286
5004 BG Tilburg
Telefoon: +31 88 6 333 999
E-Mail: [email protected]
RU
KEUCO GmbH Co. KG
Представительство в России
Космодамианская набережная ,
дом 4 / 22, корпус Б
115035 Москва
Электронная почта:
US
KEUCO Management Inc.
3675 Crestwood Parkway NW,
Suite 222
Duluth, GA 30096
Phone: +1 877 281 8260
E-Mail: of[email protected]
[email protected]

Other manuals for Royal Reflex.2

1

Other KEUCO Indoor Furnishing manuals

KEUCO Royal Lumos 14317 1713X4 User manual

KEUCO

KEUCO Royal Lumos 14317 1713X4 User manual

KEUCO Royal Lumos 14307 1713 3 Series User manual

KEUCO

KEUCO Royal Lumos 14307 1713 3 Series User manual

KEUCO Stageline 32822 1801 1 Series User manual

KEUCO

KEUCO Stageline 32822 1801 1 Series User manual

KEUCO Royal Match 12811 1713 Series User manual

KEUCO

KEUCO Royal Match 12811 1713 Series User manual

KEUCO iLook move User manual

KEUCO

KEUCO iLook move User manual

KEUCO X-Line 33198 0001 Series User guide

KEUCO

KEUCO X-Line 33198 0001 Series User guide

KEUCO Royal Modular 2.0 800A11050G0 000 Series User manual

KEUCO

KEUCO Royal Modular 2.0 800A11050G0 000 Series User manual

KEUCO Royal Lumos 14313172303 User manual

KEUCO

KEUCO Royal Lumos 14313172303 User manual

KEUCO Royal Modular 2.0 800221DDEG0 00 Series User manual

KEUCO

KEUCO Royal Modular 2.0 800221DDEG0 00 Series User manual

KEUCO Plan 33096 1500 Series User manual

KEUCO

KEUCO Plan 33096 1500 Series User manual

KEUCO Royal Lumos 14317 1723 1 Series User manual

KEUCO

KEUCO Royal Lumos 14317 1723 1 Series User manual

KEUCO Plan 33096 1000 Series User manual

KEUCO

KEUCO Plan 33096 1000 Series User manual

KEUCO Royal Lumos 14327 1723 1 Series User manual

KEUCO

KEUCO Royal Lumos 14327 1723 1 Series User manual

KEUCO Royal Modular 2.0 User manual

KEUCO

KEUCO Royal Modular 2.0 User manual

KEUCO Royal 15 14401 171101 User manual

KEUCO

KEUCO Royal 15 14401 171101 User manual

KEUCO Edition 400 Series User manual

KEUCO

KEUCO Edition 400 Series User manual

KEUCO Royal Modular 2.0 800401 Series User manual

KEUCO

KEUCO Royal Modular 2.0 800401 Series User manual

KEUCO Royal L1 13604 17130 Series User manual

KEUCO

KEUCO Royal L1 13604 17130 Series User manual

KEUCO Royal Lumos 14317 1713X1 User manual

KEUCO

KEUCO Royal Lumos 14317 1713X1 User manual

KEUCO Royal Modular 2.0 800300DDEG0 00 Series User manual

KEUCO

KEUCO Royal Modular 2.0 800300DDEG0 00 Series User manual

KEUCO Royal 15 14402 171351 User manual

KEUCO

KEUCO Royal 15 14402 171351 User manual

KEUCO X-Line 33125 0000 Series User guide

KEUCO

KEUCO X-Line 33125 0000 Series User guide

KEUCO Edition 300 Series User manual

KEUCO

KEUCO Edition 300 Series User manual

KEUCO Royal Modular 2.0 800011DDEG0 00 Series User manual

KEUCO

KEUCO Royal Modular 2.0 800011DDEG0 00 Series User manual

Popular Indoor Furnishing manuals by other brands

Great Little Trading Star Bright L4944 quick start guide

Great Little Trading

Great Little Trading Star Bright L4944 quick start guide

MIDJ PECHINO vt quick start guide

MIDJ

MIDJ PECHINO vt quick start guide

SUNON IRON II CIR69SW-2 installation manual

SUNON

SUNON IRON II CIR69SW-2 installation manual

Regalo 1255 B manual

Regalo

Regalo 1255 B manual

Classic Exhibits Magellan Designs VK-1063 manual

Classic Exhibits

Classic Exhibits Magellan Designs VK-1063 manual

Nilo N33 manual

Nilo

Nilo N33 manual

visplay Stage Instructions for assembly and use

visplay

visplay Stage Instructions for assembly and use

NATHAN JAMES Sophie manual

NATHAN JAMES

NATHAN JAMES Sophie manual

Costway CB10538 manual

Costway

Costway CB10538 manual

Ave Six WST12 quick start guide

Ave Six

Ave Six WST12 quick start guide

sweeek. EVA IEVACOFTABLE manual

sweeek.

sweeek. EVA IEVACOFTABLE manual

Ameriwood HOME 4432855COM manual

Ameriwood HOME

Ameriwood HOME 4432855COM manual

MSI MAG CH120 quick start guide

MSI

MSI MAG CH120 quick start guide

pols potten Table rectangular glass & black 370-010-004 instruction manual

pols potten

pols potten Table rectangular glass & black 370-010-004 instruction manual

Dimplex DTR175C Installation and operating instructions

Dimplex

Dimplex DTR175C Installation and operating instructions

PATIO TIME AT006 instruction manual

PATIO TIME

PATIO TIME AT006 instruction manual

Mayline 1001VTG Assembly instructions

Mayline

Mayline 1001VTG Assembly instructions

Seconique MATLOCK DINING TABLE Assembly instructions

Seconique

Seconique MATLOCK DINING TABLE Assembly instructions

manuals.online logo
manuals.online logoBrands
  • About & Mission
  • Contact us
  • Privacy Policy
  • Terms and Conditions

Copyright 2025 Manuals.Online. All Rights Reserved.