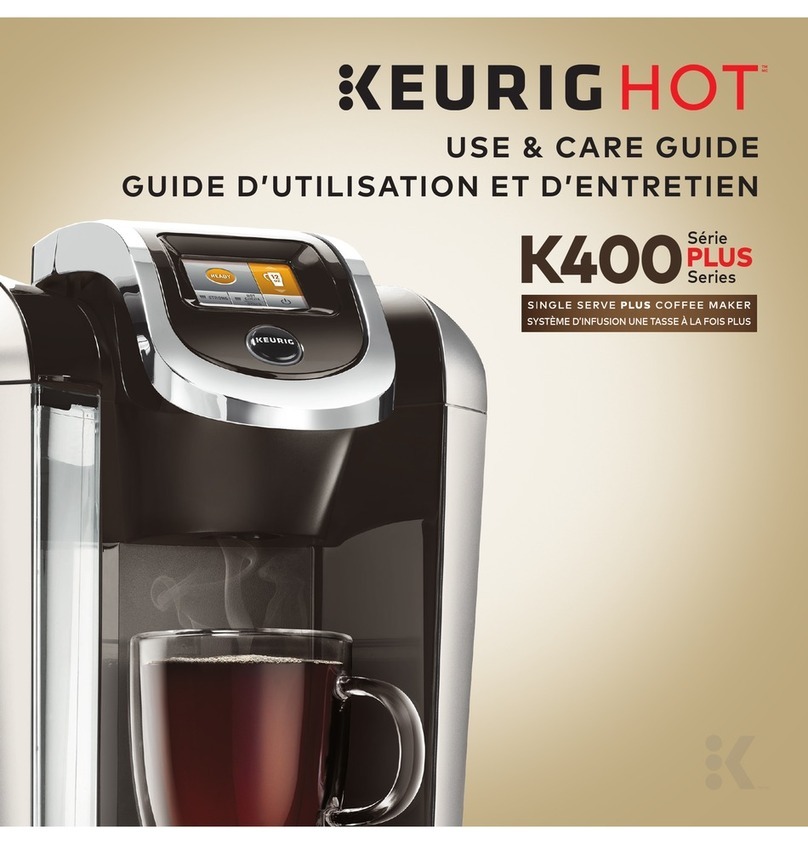
Keurig Hot K-Cup Commercial Series User manual

1
K150PMX
Serie COMERCIAL
SINGLE SERVE COFFEE MAKER
CAFETERA PARA UNA SOLA PORCIÓN
®
Owner’s manual
Keurig® K-Cup® K
1
5
0
PMX Brewer
manual de instrucciOnes
Keurig® Cafetera K-Cup®K
1
5
0
PMX
SERIE COMERCIAL

2 3
MEDIDAS DE SEGURIDAD IMPORTANTES Operación y uso seguros
Cuando se utilizan aparatos eléctricos, se
deben seguir precauciones de seguridad
básicas, que incluyen las siguientes:
1. Lea todas las instrucciones antes de usar la
cafetera.
2. No toque las superficies calientes. Utilice
manijas y perillas cuando estén disponibles.
3. Este aparato debe ser instalado y colocado
apropiadamente por un distribuidor
autorizado Keurig.
4. El uso de accesorios no recomendados por
el fabricante del aparato puede resultar
en fuego, descarga eléctrica o lesión a
personas.
5. No se coloque cerca o sobre un quemador a
gas o eléctrico, o en un horno caliente.
6. No se use en exteriores.
7. Para protegerse de fuego, descarga
eléctrica o lesión, no sumerja los cables,
clavijas, o el aparato en agua o en cualquier
otro líquido.
8. ¡Utilice exclusivamente agua embotellada
o filtrada en este aparato! No utilice ningún
otro líquido ni comida en este aparato.
9. Esta cafetera solo debe limpiarse y recibir
mantenimiento por parte de un distribuidor
autorizado Keurig. Si se requiere servicio o
limpieza, comuníquese con su distribuidor
autorizado Keurig o con el Centro de
Atención al Consumidor mencionado en la
página 3 de esta guía.
10. Para su mejor operación, enchufe el
aparato en su propia toma de corriente
en un circuito dedicado solamente para
este aparato con la finalidad de prevenir
intermitencia eléctrica, que se fundan los
fusibles o que se active un interruptor.
11. No opere ningún aparato con un cable o
clavija dañado ni después de que el aparato
muestre mal funcionamiento o se haya
dañado de alguna forma. Comuníquese
con su distribuidor autorizado Keurig para
informar de cualquier mal funcionamiento o
daño a la cafetera.
12. No deje que el cable de corriente cuelgue
de la orilla de la mesa o mostrador, o toque
superficies calientes.
13. Para desconectar el aparato presione el
interruptor de corriente de la cafetera a
“OFF” (Apagado) y luego remueva la clavija
de la toma de corriente.
14. Se requiere estricta supervisión cuando
niños operen el aparato o este se opere
cerca de ellos.
15. No levante la manija mientras la cafetera
esté funcionando.
16. Este aparato está equipado con un cable
de corriente que tiene un cable de tierra
con una clavija de conexión a tierra. El
aparato debe conectarse a tierra utilizando
una toma de 3 agujeros apropiadamente
conectada a tierra. En caso de un corto
circuito, la conexión a tierra reduce el
riesgo de una descarga eléctrica.
17. Si la toma de corriente es estándar para
2 patas, es su responsabilidad y obligación
personal reemplazarla con una toma
de corriente de 3 patas apropiadamente
conectada a tierra.
18. Bajo ninguna circunstancia corte o remueva
la tercera pata (a tierra) del cable de
corriente ni use un adaptador.
19.Consulte a un electricista calificado si no
entiende perfectamente las instrucciones
de conexión a tierra, o si tiene dudas acerca
de si el aparato está apropiadamente
conectado a tierra.
20.No utilice el aparato para un uso distinto al
previsto.
21. Siempre opere la cafetera con la placa
percutora removible (elemento T en la
página 5) instalada. El no hacerlo dará
por resultado que no se prepare café
apropiadamente.
GUARDE ESTAS
INSTRUCCIONES.

3
ADVERTENCIA A USUARIOS Y PADRES
1. NO permita que los niños usen la cafetera a menos que los supervise un
adulto. La cafetera sirve agua muy caliente.
2. Esta cafetera NO ESTÁ diseñada para su uso con el accesorio de filtro para
café reusable Keurig
®
My K-Cup™ o cualquier otra marca de filtros para café
reusable.
3. AVISO DE COCOA CALIENTE: Keurig recomienda ejecutar un ciclo de agua
caliente en la cafetera sin una cápsula K-Cup
®
inmediatamente después de
usar una cápsula de cocoa caliente K-Cup
®
para reducir la posibilidad de que se
obstruya con cocoa la aguja de salida.
4. EN OCASIONES las burbujas que se forman cuando se agrega agua a la
cafetera pueden dar lugar a un mensaje erróneo de “Agregar agua”. Para
corregir, remueva y vuelva a colocar el indicador de nivel de agua dentro del
depósito de agua fría.
PRECAUCIÓN: Hay dos agujas puntiagudas que perforan la cápsula K-Cup®, una sobre el
portacápsulas K-Cup®y otra al fondo del portacápsulas K-Cup®. Para evitar el riesgo de
lesión, no ponga sus dedos en la carcasa del montaje de cápsulas K-Cup®
PRECAUCIÓN: Hay agua extremadamente caliente en el portacápsulas K-Cup®durante el
proceso de preparación. Para evitar el riesgo de lesión, no levante la manija ni abra la
carcasa del montaje de cápsulas K-Cup®durante el proceso de preparación.
PRECAUCIÓN: Siempre mantenga la cafetera en posición vertical para evitar una posible
lesión y/o daño a su cafetera.
INSTRUCCIONES DE CABLE CORTO: Se proporciona un cable de alimentación corto para
reducir el riesgo de enredarse o tropezarse con un cable más largo.
Si se utiliza una extensión, 1) los valores eléctricos nominales marcados en el cable o
extensión deben ser al menos iguales a los valores eléctricos nominales del aparato
(127V~60Hz 1 390W); 2) el cable debe colocarse de tal forma que no caiga sobre una
mostrador o mesa donde los niños lo puedan jalar o puedan tropezarse con él por accidente, y
3) la extensión debe incluir una clavija de 3 patas de conexión a tierra.
ESTE PRODUCTO ES EXCLUSIVAMENTE PARA USO COMERCIAL.
ADVERTENCIA ADVERTENCIA: PARA REDUCIR EL RIESGO DE
INCENDIO O DESCARGA ELÉCTRICA, NO RETIRE LA
CUBIERTA INFERIOR. NO CONTIENE PIEZAS QUE
PUEDAN SER REPARADAS POR EL USUARIO. TODA
REPARACIÓN DEBE SER EFECTUADA
EXCLUSIVAMENTE POR PERSONAL AUTORIZADO.
RIESGO DE INCENDIO O
DESCARGA ELÉCTRICA
NO ABRIR !
Garantía de un año limitada
Esta garantía cubre todas las piezas y componentes del producto, incluida la
mano de obra. El importador tiene la obligación de reemplazar las piezas o
componentes defectuosos sin costo adicional alguno. Esto incluye el costo de
flete del producto que se derive del cumplimiento de la garantía dentro de la
red de servicio.
Importado por: PLANTAS INDUSTRIALES S.A., Rubén Darío No. 115 Piso 10,
Colonia Bosques de Chapultepec, C.P. 11580, México D.F., PIN 560523 DN1,
Teléfono: 52622600
MARCA REGISTRADA: MODELO
Keurig: K150PMX
Nombre y dirección del lugar en que se puede ejecutar la garantía:
Jugos Del Valle S.A.P.I. de C.V.
PLANTA TEPOTZOTLÁN, EDO. DE MÉXICO
Avenida Insurgentes No. 30, Col. Barrio de Texcacoa,
Tepotzotlán, Edo. de México. C.P. 54600.
Para mayores detalles, llame a los números del Centro de Atención al
Consumidor: 58138885 o 018007044400
Duración de la garantía: 365 días a partir de la fecha de compra.
Lo que cubre la garantía: La garantía cubre toda la cafetera.
Limitaciones o excepciones: Esta garantía no aplica en los siguientes casos:
a) cuando la cafetera se ha utilizado en condiciones distintas a las considera-
das normales, b) cuando no se ha operado la cafetera de acuerdo con el
manual de usuario que viene con la cafetera, c) cuando la cafetera se ha
alterado o reparado por un tercero no autorizado por el correspondiente
responsable fabricante, importador o vendedor nacional.
El consumidor puede obtener el servicio de la garantía dondequiera que se
haya vendido el producto, siempre y cuando se pueda proporcionar la prueba
de compra que muestre los detalles del modelo. No será necesaria
información adicional a la prueba de compra y la fecha de compra.
Fecha en la que el consumidor recibió el producto: (dd/mm/aaaa) .
54
A. Manija
B. Tapa
C. Pantalla LCD
D. Carcasa del
montaje de
cápsulas K-Cup®
HC
M
L
E. Embudo
F. Portacápsulas
K-Cup®(E y F son
el montaje del
portacápsulas
K-Cup®)
G. Placa de la bandeja
de goteo
H. Bandeja de goteo
I. Base de la bandeja
de goteo
J. Carcasa
K. Botón de
PREPARACIÓN
L. Interruptor de
corriente
M. Cable de
alimentación
P. Conector de manguera
de jardín 3/4 Parte
#50-201004-010
(no incluido)
Q. Conducto de entrada
de la cafetera
R. Puerta y perilla de
drenaje
S. Tubos y tapones de
drenaje
T. Placa percutora
removible
K
I
S
R
C
G
F
E
H
J
B
D
A
PQ
Características de la cafetera K150PMX
Cafetera K150P
Vista anterior
T

5
6. Coloque una taza en la
placa de la bandeja de goteo
y seleccione el tamaño de
preparación (fig. 4), luego
presione PREPARACIÓN
(fig. 5).
NOTA: Si no presiona el
botón PREPARACIÓN en
60 segundos, se inhabilitará el botón
PREPARACIÓN para prevenir activación
accidental. Reactive el botón PREPARACIÓN
levantando y bajando la manija completamente.
7. Puede haber una pausa corta antes de que
se sirva el café. Todo el proceso de preparación
dura aproximadamente 1 minuto y termina con
un chorro de aire para eliminar todo el líquido de
la cápsula K-Cup® .
PRECAUCIÓN: El agua en el portacápsulas
K-Cup®es extremadamente caliente durante el
proceso de preparación. Para evitar el riesgo de
lesión, no levante la manija ni abra la carcasa del
montaje de cápsulas K-Cup®durante el proceso
de elaboración.
8. El fin de la preparación se indica con “KEURIG
LISTO DISFRUTE”.
9. Levante la manija, remueva y deseche la cápsula
K-Cup®usada.
PRECAUCIÓN: La cápsula K-Cup®estará caliente.
fig. 2
fig. 3
fig. 1
fig. 5
fig. 4
Lista para preparar su primera taza
1. La pantalla LCD se encontrará en estado inactivo (fig. 1).
2. Levante la manija. El portacápsulas K-Cup®
se abrirá hacia usted (fig.2).
3. Seleccione una cápsula K-Cup®.
NOTA: No remueva la cubierta de aluminio ni
perfore la cápsula K-Cup®.
4. Coloque una cápsula K-Cup®en el portacápsulas K-Cup®(fig. 3).
PRECAUCIÓN: Hay dos agujas puntiagudas que perforan la cápsula
K-Cup®, una encima del portacápsulas K-Cup®y la otra en el fondo del
portacápsulas K-Cup®. Para evitar el riesgo de lesión, no levante la
manija ni abra la carcasa del montaje de cápsulas K-Cup®.
5. Baje la manija para cerrar la tapa sobre el portacápsulas K-Cup®.
(Cuando esté completamente cerrada, el botón de PREPARACIÓN
se iluminará hasta 60 segundos).
OK
OFFON
¡Bienvenido!
Keurig 150,
cafetera diseñada
para dosis K-Cup®
Lift Water Reservoir
Nivel
del agua
Calentando...
espere
English Français
English Français
Nivel
del agua
Calentando...
espere
English Français
Nivel
del agua
Descalcificación
Active. Véase el
Manual del
Propietario.
English Français
Water
Level
Colocar Taza,
Seleccionar
tamaño
Listo, levante
la manija e
inserte una
unidad K-Cup®
¡Keurig Brewed®
Disfrute!
Settings
Brewing
K150 UK Brewer MX UI Rev. A
Bienvenida
Temperatura
Tamaños de infusión
Apagado automático
Limpieza
El idioma
Los datos
Bienvenida
Temperatura
Tamaños de infusión
Apagado automático
Limpieza
El idioma
Los datos
Temperatura
92º C
- +
OK
OK
OK
El idioma
OK
English
Español
Français
OK
Los datos
KEURIG INC.
866-901-2739
ABC.@?!- DEF
JKLGHI MNO
TUVPQRS WXYZ
JOHN SMITH
INGRESAR EMPRESA
,&:’/Delete Space
ABC DEF
JKLGHI MNO
TUVPQRS WXYZ
INGRESAR NOMBRE
. , -Delete Space
@
2 3
54 6
87 9
INGRESAR N°. TELÉFONO
0Delete Space
1
2 3
54 6
87 9
INGRESAR EMPRESA
0Delete -
1
Keurig
¿ Preguntas ?
www.keurig.com.mx
¡Bienvenido!
Keurig 150,
cafetera diseñada
para unidades
de monodosis K-Cup®
English Français
Levantar tanque agua
1. Insertar dosis K-Cup® 2. Bajar el agarradero 3. Colocar la Taza Preparando - Espere Preparando - Espere Preparando - Espere Preparando - Espere Preparando... Preparando... Preparando... Preparando...
Levantar tanque agua
Llenar tanque de agua
Reemplazar tanque agua
Fill Water Reservoir
Listo, levante
la manija e
inserte una
unidad K-Cup®
Presionar para seguir Presionar para seguir Presionar para seguir Presionar para seguir Presionar para seguir Presionar para seguir Presionar para seguir
Nivel
del agua
English Français
Listo, levante
la manija e
inserte una
unidad K-Cup®
Nivel
del agua
English Français
Nivel
del agua
Añadir el agua
English Français
REV. CONEXIÓN AGUA
TOCAR LA PANTALLA
PARA CONTINUAR
Flujo de agua
interrumpido. Para
reiniciar presionar el
botón «Preparar»
¡Keurig Brewed®
Disfrute!
120 ml
350 ml
180 ml
300 ml
240 ml
ABC
abc
123
OK
ABC
abc
123
OK
ABC
abc
123
OK
abc.@?!- def
jklghi mno
tuvpqrs wxyz
INGRESAR EMPRESA
,&:’/Delete Space
ABC
abc
123 OK
èêéàâá ìîí
ùûúòôó ñ
¿?¡! ç
INGRESAR EMPRESA
Delete Space
ABC
abc
123 OK
ÈÊÉÀÂÁ ÌÎÍ
ÙÛÚÒÔÓ Ñ
¿?¡! ç
INGRESAR EMPRESA
Delete Space
ABC
abc
123
OK
ABC
abc
123
Apagado si
14 horas inactiva
120 ml
350 ml
180 ml
300 ml
240 ml
Apagado automático
ACTIVAR
Power On
SCREENSAVER
comes on after
2 minutes
If Plumbed Tank is installed
Water Level always shows full.
Water Level
is below
threshold
Water added.
Return to Menu
without saving
Can be changed
in 1º increments
from 86 to 92º C
?
Return to Menu
and save changes
Return to Menu
and save changes
Water added.
Is the CWT
empty?
YES
NO
Brew Button
Flashing
Brew Button
ON
Brew Button
OFF
Brew Button
OFF
Brew Button
OFF
Water Level
below threshold.
If Handle is lifted,
Brewing screen and animation persists.
There appears to be no time-out.
Return to Menu
without saving
Return to Menu
and save changes
Pressing Activates
Additional
Character Sets
Return to Menu
and save changes
Return to Menu
and save changes
Return to Menu
without saving
Return to Menu
and save changes
Return to Menu
without saving
Return to Menu
and save changes
Pressing any icon toggles
the checkmark to an X
and back again.
See Company Section
See Company Section
Occurs after the water inlet
valve times out
or
a bubble blocks the IR sensor
in the cold water tank.
Occurs after a cold water
pump timeout.
Switches to DISABLED (DESACTIVAR)
if Auto OFF is off.
OK
OFFON
¡Bienvenido!
Keurig 150,
cafetera diseñada
para dosis K-Cup®
Lift Water Reservoir
Nivel
del agua
Calentando...
espere
English Français
English Français
Nivel
del agua
Calentando...
espere
English Français
Nivel
del agua
Descalcificación
Active. Véase el
Manual del
Propietario.
English Français
Water
Level
Colocar Taza,
Seleccionar
tamaño
Listo, Levantar
el agarradero y
Insertar una
unidad K-Cup®
¡Keurig Brewed®
Disfrute!
Settings
Brewing
K150 UK Brewer MX UI Rev. A
Bienvenida
Temperatura
Tamaños de infusión
Apagado automático
Limpieza
El idioma
Los datos
Bienvenida
Temperatura
Tamaños de infusión
Apagado automático
Limpieza
El idioma
Los datos
Temperatura
92º C
- +
OK
OK
OK
El idioma
OK
English
Español
Français
OK
Los datos
KEURIG INC.
866-901-2739
ABC.@?!- DEF
JKLGHI MNO
TUVPQRS WXYZ
JOHN SMITH
INGRESAR EMPRESA
,&:’/Delete Space
ABC DEF
JKLGHI MNO
TUVPQRS WXYZ
INGRESAR NOMBRE
. , -Delete Space
@
2 3
54 6
87 9
INGRESAR N°. TELÉFONO
0Delete Space
1
2 3
54 6
87 9
INGRESAR EMPRESA
0Delete -
1
Keurig
¿ Preguntas :
www.keurig.com.mx
¡Bienvenido!
Keurig 150,
cafetera diseñada
para unidades
de monodosis K-Cup®
English Français
Levantar tanque agua
1. Insertar dosis K-Cup® 2. Bajar el agarradero 3. Colocar la Taza Preparando - Espere Preparando - Espere Preparando - Espere Preparando - Espere Preparando... Preparando... Preparando... Preparando...
Levantar tanque agua
Llenar tanque de agua
Reemplazar tanque agua
Fill Water Reservoir
Listo, Levantar
el agarradero y
Insertar una
unidad K-Cup®
Presionar para seguir Presionar para seguir Presionar para seguir Presionar para seguir Presionar para seguir Presionar para seguir Presionar para seguir
Nivel
del agua
English Français
Listo, Levantar
el agarradero y
Insertar una
unidad K-Cup®
Nivel
del agua
English Français
Nivel
del agua
Añadir el agua
English Français
REV. CONEXIÓN AGUA
TOCAR LA PANTALLA
PARA CONTINUAR
Flujo de agua
interrumpido. Para
reiniciar presionar el
botón «Preparar»
¡Keurig Brewed®
Disfrute!
120 ml
350 ml
180 ml
300 ml
240 ml
ABC
abc
123
OK
ABC
abc
123
OK
ABC
abc
123
OK
abc.@?!- def
jklghi mno
tuvpqrs wxyz
INGRESAR EMPRESA
,&:’/Delete Space
ABC
abc
123 OK
èêéàâá ìîí
ùûúòôó ñ
¿?¡! ç
INGRESAR EMPRESA
Delete Space
ABC
abc
123 OK
ÈÊÉÀÂÁ ÌÎÍ
ÙÛÚÒÔÓ Ñ
¿?¡! ç
INGRESAR EMPRESA
Delete Space
ABC
abc
123
OK
ABC
abc
123
Apagado si
14 horas inactiva
120 ml
350 ml
180 ml
300 ml
240 ml
Apagado automático
ACTIVAR
Power On
SCREENSAVER
comes on after
2 minutes
If Plumbed Tank is installed
Water Level always shows full.
Water Level
is below
threshold
Water added.
Return to Menu
without saving
Can be changed
in 1º increments
from 86 to 92º C
?
Return to Menu
and save changes
Return to Menu
and save changes
Water added.
Is the CWT
empty?
YES
NO
Brew Button
Flashing
Brew Button
ON
Brew Button
OFF
Brew Button
OFF
Brew Button
OFF
Water Level
below threshold.
If Handle is lifted,
Brewing screen and animation persists.
There appears to be no time-out.
Return to Menu
without saving
Return to Menu
and save changes
Pressing Activates
Additional
Character Sets
Return to Menu
and save changes
Return to Menu
and save changes
Return to Menu
without saving
Return to Menu
and save changes
Return to Menu
without saving
Return to Menu
and save changes
Pressing any icon toggles
the checkmark to an X
and back again.
See Company Section
See Company Section
Occurs after the water inlet
valve times out
or
a bubble blocks the IR sensor
in the cold water tank.
Occurs after a cold water
pump timeout.
Switches to DISABLED (DESACTIVAR)
if Auto OFF is off.

6
Preparar bebidas heladas
Su té helado y el café helado saben mejor cuando se les vierte frescos
sobre hielo.
1. Llene una taza de 473ml (no use vidrio) hasta arriba con hielo y coloque
una cápsula K-Cup®en su cafetera.
2. Seleccione el tamaño de preparación; recomendamos seleccionar una
preparación de 180ml o 240ml. Presione el botón PREPARACIÓN.
3. ¡Agite y disfrute!
Busque mensajes de Preparar sobre hielo o Probar sobre hielo en paquetes
selectos de cápsulas K-Cup®. ADVERTENCIA: No sirva en una taza de vidrio.
Hacerlo puede causar que el vidrio se agriete o quiebre.
Preparar agua caliente
Su cafetera puede producir agua caliente para
usar al cocinar, preparar sopas, avena, etc.
Simplemente levante y baje la manija de la
cafetera sin agregar una cápsula K-Cup®. El botón
PREPARACIÓN parpadeará. Asegúrese de que
haya una taza en la placa de la bandeja de goteo y
luego presione el botón PREPARACIÓN.
10. Disfrute su primera taza de café, té o cocoa caliente gourmet preparada
por Keurig.
NOTA: Después de preparar una cápsula de cocoa caliente K-Cup®,
recomendamos ejecutar un ciclo de agua caliente sin una cápsula K-Cup®.
11. Su cafetera puede mostrar “CALENTANDO ESPERE” mientras calienta
el agua para el siguiente ciclo de preparación.
Detener el proceso de preparación
Si tiene que detener la preparación después de que inició el proceso,
presione y suelte el interruptor de corriente para “APAGAR” la cafetera.
El flujo de café, té o cocoa caliente se detendrá y el elemento de
calentamiento y la pantalla LCD se apagarán. NOTA: Es posible que obtenga
menos café, té o cocoa caliente en su taza durante su próxima preparación.
Recomendamos que realice un ciclo de limpieza solamente con agua después
de un ciclo interrumpido. Así su próxima preparación tendrá el volumen que
haya seleccionado.

7
Limpiar el montaje del
portacápsulas K-Cup®
1. Limpiar las partes. La carcasa del montaje
del portacápsulas K-Cup®se puede colocar
sobre la bandeja superior de un lavavajillas.
NOTA: Utilice ciclos de baja temperatura en
el lavavajillas. Para remover el montaje del
portacápsulas K-Cup®de la cafetera, abra
la cubierta levantando la manija.
fig. 6
Tome la parte superior del portacápsulas
K-Cup®con una mano mientras empuja la
parte inferior del portacápsulas K-Cup®desde
abajo con la otra mano hasta que se desprenda
(fig. 6). Después de limpiar, alinee el
portacápsulas K-Cup®con la abertura usando
las dos lengüetas frontales como guía, y
colóquelo en su lugar desde la parte superior.
2. Limpiar el embudo. El embudo se puede
remover del portacápsulas K-Cup®jalándolo
hasta que se desprenda (fig. 7). El embudo
puede lavarse en el lavavajillas. Para volver a
colocarlo, solo insértelo de vuelta en el
portacápsulas K-Cup®.
!
fig. 7
3. Limpiar la aguja de salida. La aguja de salida se
ubica en la parte inferior dentro del montaje
del portacápsulas de K-Cup®. Si se presenta
una obstrucción por granos de café, se puede
limpiar con un clip o herramienta similar.
Remueva el montaje del portacápsulas
K-Cup®y separe el embudo. Inserte un clip
(como se muestra en la fig. 7) en la aguja de
salida para aflojar la obstrucción, luego
enjuague con agua. El montaje del
portacápsulas K-Cup®se puede colocar sobre
la bandeja superior de un lavavajillas.
NOTA: Utilice ciclos de baja temperatura en
el lavavajillas.
4. Limpiar la placa percutora. La placa percutora puede removerse
tomando las hendiduras dactilares de ambos lados y empujando hacia
adelante (fig. 8). Una vez que la haya removido, rocíe la placa percutora
con detergente, limpie con un cepillo y enjuague de ser necesario.
Asegúrese de volver a colocar la placa percutora después de limpiar
para garantizar la operación de preparación apropiada.
PRECAUCIÓN: Hay agujas puntiagudas que perforan la cápsula K-Cup®por
encima del portacápsulas K-Cup®y en el fondo del portacápsulas K-Cup®.
Para evitar el riesgo de lesión, no levante la manija ni abra la carcasa del
montaje de cápsulas K-Cup®.
fig. 8

32
IMPORTANT SAFEGUARDS Safe Operation & Use
When using electrical appliances, basic
safety precautions should be followed,
including the following:
1. Read all instructions before using.
2. Do not touch hot surfaces. Use handles
and knobs when available.
3. This appliance must be properly installed
and located by a Keurig Authorized
Distributor.
4. The use of accessory attachments
not recommended by the appliance
manufacturer may result in fire, electrical
shock or injury to persons.
5. Do not place on or near a hot gas or electric
burner, or in a heated oven.
6. Do not use outdoors.
7. To protect against fire, electric shock and
injury do not immerse cords,
plugs, or the appliance in water or
any other liquid.
8. Use only bottled or filtered water in this
appliance! Do not use any other liquids or
foods in this appliance.
9. This brewer should only be cleaned
and maintained by a Keurig Authorized
Distributor. If service or cleaning is
required, please contact your Keurig
Authorized Distributor or the Consumer
Care Center listed on Page 3 of this guide.
10. For best operation, plug the appliance
into its own electrical outlet on a dedicated
circuit to prevent flickering of lights, blowing
of fuses or tripping a circuit breaker.
11. Do not operate any appliance with
a damaged cord or plug or after
the appliance malfunctions or is damaged
in any manner. Contact your Keurig
Authorized Distributor to report
any malfunction of or damage to
the brewer.
12. Do not let the Power Cord hang over the
edge of the table or counter, or touch hot
surfaces.
13. To disconnect, press the Power Switch on
the brewer to “OFF” status and then remove
the plug from the wall outlet.
14. Close supervision is necessary
when any appliance is used by or
near children.
15. Do not lift the Handle while
brewing is in progress.
16. This appliance is equipped with a Power
Cord having a grounding wire with a
grounding plug. The appliance must be
grounded using a 3-hole properly grounded
outlet. In the event of an electrical short
circuit, grounding reduces the risk of
electrical shock.
17. If the outlet is a standard 2-prong wall
outlet, it is your personal responsibility
and obligation to have it replaced with a
properly grounded 3-prong wall outlet.
18. Do not, under any circumstances, cut or
remove the third (ground) prong from the
Power Cord or use an adapter.
19.Consult a qualified electrician if the
grounding instructions are not completely
understood, or if doubt exists as to whether
the appliance is properly grounded.
20.Do not use the appliance for other than its
intended use.
21. Always brew with the Removable Puncture
Plate (item T on page 5) installed. Failure
to do so will result in a failure to properly
brew.
SAVE THESE
INSTRUCTIONS.

3
WARNING TO USERS AND PARENTS
1. DO NOT permit children to use brewer unless there is adult supervision.
Brewer dispenses very hot water.
2. This brewer IS NOT designed for use with Keurig®My K-Cup™ Reusable
Coffee Filter accessory or any other brand reusable coffee filter.
3. HOT COCOA NOTICE: Keurig recommends running a hot water brew cycle
without a K-Cup®pod immediately after using a Hot Cocoa K-Cup®pod to
reduce the possibility of clogging the exit needle with cocoa.
4. OCCASIONALLY bubbles created when adding water to the brewer can
cause a false “Add Water” message. To correct, remove and replace the float
level track inside the cold water tank.
CAUTION: There are two sharp needles that puncture the K-Cup®pod, one above the
K-Cup®Pod Holder and the other in the bottom of the K-Cup®Pod Holder. To avoid risk
of injury, do not put your fingers in the K-Cup®Pod Assembly Housing.
CAUTION: There is extremely hot water in the K-Cup®Pod Holder during the
brew process. To avoid risk of injury, do not lift the Handle or open the K-Cup®
Pod Assembly Housing during the brewing process.
CAUTION: Please always keep the brewer in its upright position to avoid potential
injury and/or damage to your brewer.
SHORT CORD INSTRUCTIONS: A short power supply cord is provided to reduce the
risk of becoming entangled in or tripping over a longer cord.
If an extension cord is used, (1) the marked electrical rating of the cord set or
extension cord should be at least as great as the electrical rating of the appliance
(127V~60Hz 1 390W); (2) the cord should be arranged so that it will not drape over
the countertop or tabletop where it can be pulled on by children or tripped over
unintentionally; and (3) the extension cord must include a 3-prong grounding plug.
THIS PRODUCT IS FOR COMMERCIAL USE ONLY.
WARNING WARNING: TO REDUCE THE RISK OF FIRE OR
ELECTRIC SHOCK, DO NOT REMOVE THE
BOTTOM COVER. NO USER SERVICEABLE
PARTS ARE INSIDE. REPAIR SHOULD BE DONE
BY AUTHORIZED SERVICE PERSONNEL ONLY.
RISK OF FIRE OR
ELECTRIC SHOCK
DO NOT OPEN !
Limited One Year Warranty
This warranty covers all the pieces and components of the product including
labor. The importer is obligated to replace any piece or component with
defects without any additional cost. That includes the freight cost of the
product derived from the compliance of the warranty within the service
network.
Imported by: PLANTAS INDUSTRIALES S.A., Rubén Darío No. 115 Piso 10,
Colonia Bosques de Chapultepec, C.P. 11580, México D.F., PIN 560523 DN1,
Teléfono 52622600
TRADE MARK: Keurig
MODEL: K150PMX
Name and address of the place where the warranty can be executed:
Jugos De Valle SAPI de CV
PLANTA TEPOTZOTLÁN EDO. DE MÉXICO
Avenida Insurgentes No. 30, Col. Barrio de Texcacoa,
Tepotzotlán, Edo. de México. C.P. 54600.
For further details call the Consumer Care Center numbers: 58 13 88 85 or
01 800 70444 00
Duration of the warranty: 365 days from the purchase date.
What is covered by the warranty: This warranty covers the whole brewer.
Limitations or exceptions: This guarantee will not apply in the following
cases. a) When the brewer has been used in conditions different to those
considered as normal. b) when the brewer has not been operated in
accordance to the user manual provided with the brewer, c) when the
brewer has been altered or repaired by any third party not authorized by
the respective responsible national manufacturer, importer, or seller.
The consumer can obtain warranty service wherever the product was sold
provided they can provide the proof of purchase showing the model details.
No additional information would be necessary except the proof of purchase
and date of purchase.
Date when the product is received by the consumer: (dd/mm/yyyy) .

54
A. Handle
B. Lid
C. LCD Screen
D. K-Cup®Pod
Assembly Housing
HC
M
L
E. Funnel
F. K-Cup®Pod Holder
(E and F are the
K-Cup®Pod Holder
Assembly)
G. Drip Tray Plate
H. Drip Tray
I. Drip Tray Base
J. Housing
K. BREW Button
L. Power Switch
M. Power Cord
P. 3/4 Garden Hose
Connector
Part #50-201004-
010
(not included)
Q. Brewer Inlet Connect
R. Drain Hatch and Knob
S. Drain Tubes and Plugs
T. Removable Puncture
Plate
K
I
S
R
C
G
F
E
H
J
B
D
A
PQ
Features K150PMX Brewer
K150P Brewer
Back view
T

5
6. Place a mug on the Drip
Tray Plate and select your
brew size (fig. 4), then
press BREW (fig. 5).
NOTE: If you do not push the
BREW Button within 60
seconds, the BREW Button
will be disabled to prevent
accidental activation. Re-activate the
BREW Button by lifting and lowering the
Handle completely.
7. There may be a short pause prior to coffee
being dispensed. The entire brew process lasts
for approximately 1 minute and ends with a burst
of air to remove all liquid from the K-Cup® pod.
CAUTION: Water is extremely hot in the K-Cup®
Pod Holder during the brew process. To avoid risk
of injury, do not lift the Handle or open the K-Cup®
Pod Assembly Housing during the brew process.
8. The end of brew is indicated by “KEURIG
BREWED ENJOY.”
9. Lift the Handle, remove and dispose
of the used K-Cup® pod.
CAUTION: K-Cup®pod will be hot.
10. Enjoy your first cup of Keurig Brewed
gourmet coffee, tea, or hot cocoa!
fig. 2
fig. 3
fig. 1
Ready, Choose
Your K-Cup®
pod and lift
Handle
Water
Level
Español Français
fig. 5
fig. 4
120 ml
350 ml
180 ml
300 ml
240 ml
Place Mug,
Select
Brew Size
Ready to Brew Your First Cup
1. The LCD Screen will be in its idle state (fig. 1).
2. Lift the Handle. The K-Cup®Pod Holder
will open toward you (fig. 2).
3. Select a K-Cup®pod.
NOTE: Do not remove the foil lid
or puncture the K-Cup®pod.
4. Place a K-Cup®pod in the K-Cup®Pod Holder (fig. 3).
CAUTION: There are two sharp needles that puncture the K-Cup®pod,
one above the K-Cup®Pod Holder and the other in the bottom of the
K-Cup®Pod Holder. To avoid risk of injury, do not put your fingers in the
K-Cup®Pod Assembly Housing.
5. Lower the Handle to close the Lid over the K-Cup®Pod Holder.
(When it is completely closed, the BREW Button will flash up to
60 seconds.)

6
Brewing Iced Beverages
Your iced tea and iced coffee taste best when fresh-brewed hot over ice.
1. Fill a 473 ml mug (do not use glass) to the top with ice and place a K-Cup®
pod into your brewer.
2. Select your brew size, we recommend selecting a 180 ml or 240 ml brew.
Press the BREW Button.
3. Stir and enjoy!
Look for Brew Over Ice or Try Over Ice messaging on select K-Cup®pod
packages. WARNING: Do not brew into a cup made of glass. Doing so may
cause the glass to crack or break.
Brewing Hot Water
Your brewer is able to produce hot water for use
in cooking, making soups, oatmeal, etc. Simply lift
and lower the Handle on the brewer without adding
a K-Cup®pod. The BREW Button will flash. Be
sure to have a mug on the Drip Tray Plate and then
press the BREW Button.
NOTE: After brewing a hot cocoa K-Cup®pod, we recommend running a hot
water brew cycle without a K-Cup®pod.
11. Your brewer may display “HEATING PLEASE WAIT” as it heats water for
the next brew cycle.
Stopping the Brew Process
If you need to stop the brewing after the process has started, press and
release the Power Switch to turn the brewer ‘OFF.’ The flow of coffee, tea, or
hot cocoa will stop and the heating element and the LCD Screen will shut off.
NOTE: You may get less coffee, tea, or hot cocoa in your cup during
your next brew. We recommend that you perform a cleansing brew with
water only after a terminated brew. Then your next brew will be the volume
you have selected.

7
Cleaning the K-Cup®Pod
Holder Assembly
1. Cleaning the Parts—The K-Cup®Pod
Holder Assembly can be placed onto the
top shelf of a dishwasher. NOTE: Use low
temperature cycles in the dishwasher.
To remove the K-Cup®Pod Holder
Assembly from the brewer, open the
cover by lifting the Handle.
fig.6
Grasp the top of the K-Cup®Pod Holder with
one hand while pushing up on the bottom of the
K-Cup®Pod Holder from underneath with the
other until it releases (fig. 6). After cleaning,
align the K-Cup®Pod Holder with the opening
using the two front ribs as a guide, and snap
them into place from the top.
2. Cleaning the Funnel—The Funnel can be
removed from the K-Cup®Pod Holder by
pulling on it until it pops off (fig. 7). The Funnel
is dishwasher safe. To replace it, just snap it
back onto the K-Cup®Pod Holder.
!
fig.7
3. Cleaning the Exit Needle—The exit needle is
located on the inside bottom of the K-Cup®Pod
Holder Assembly. Should a clog arise due to
coffee grounds, it can be cleaned using a paper
clip or similar tool. Remove the K-Cup®Pod
Holder Assembly and detach the Funnel. Insert
the paper clip (as shown in fig. 7) into the exit
needle to loosen the clog, then flush with fresh
water. The K-Cup®Pod Holder Assembly can be
placed onto the top shelf of a dishwasher.
NOTE: Use low temperature cycles in
the dishwasher.
4. Cleaning the Puncture Plate—The Puncture Plate can be removed by
grasping the finger grips of either side and pulling forward (fig. 8).
Once removed, spray the Puncture Plate with detergent, brush clean, and
rinse if necessary. Be sure to replace the Puncture Plate after cleaning to
ensure proper brewer operation.
CAUTION: There are sharp needles that puncture the K-Cup®pod above the
K-Cup®Pod Holder and in the bottom of the K-Cup®Pod Holder. To avoid risk
of injury, do not put your fingers in the K-Cup® Pod Assembly Housing.
fig.8

14
© 2017 Keurig Green Mountain, Inc.
All rights reserved
Todos los derechos reservados
P/N DC0000000981
1/17
For Household and Commercial Use
Para uso doméstico y comercial
To learn more about Keurig, visit www.Keurig.com.mx
Para saber más sobre Keurig, visite: www.Keurig.com.mx
Other manuals for K-Cup Commercial Series
1
This manual suits for next models
1
Table of contents
Languages:
Other Keurig Hot Brewing System manuals