KHS Movo 1.0E User manual

E-BIKE
Owner's Manual
E
Movo 1.0

Pull
1. Insert the key into the battery keyway. Turn counterclockwise to unlock the battery.
2. With one hand holding the end of the rear rack and the other hand hold the end of the battery, pull
the battery backwards away from the bicycle to dismount the battery.
BATTERY DISMOUNTING INSTRUCTIONS
For safety reasons and to meet regulation of international freight shipping, the lithium-ion battery
was NOT fully charged and placed in hibernate state.
Please charge your battery BEFORE the very first use.
Carefully read and follow all instructions and guidelines in this manual.
1

Push
1. Make sure the key is in the unlock position.
2. With one hand holding the end of the battery and the other
hand holding the end of the rear rack, slide and push the
battery all the way into the battery rack.
3. Lock the battery by key. Failure to lock the battery can
result in inconsistent power while in
BATTERY DISMOUNTING INSTRUCTIONS
*The KEY is only for the locking and unlocking the battery.
When in “locked” position, don’t leave the key in the keyway.
Take the key off and keep it with the bike to prevent losing the
key. We recommend to keep the spare key with the charger.
LOCKUNLOCK
2

One Switch version
1
2
3
1
2.Switch On or Off
The key on the LCD.
a: Press for 1 second to turn on.
b: Press for 2 seconds to shut off.
3. Automatic shutdown system
To save power, the
will automatically shut off if it stops for 10
minutes.
1. Makes sure the key
(2) is in the locked position. The battery is secure
and stable in the rack. Once locked, pull out the key
for safekeeping. Keep the Spare
Key with the charger is recommended.
MOVO1.0E
2

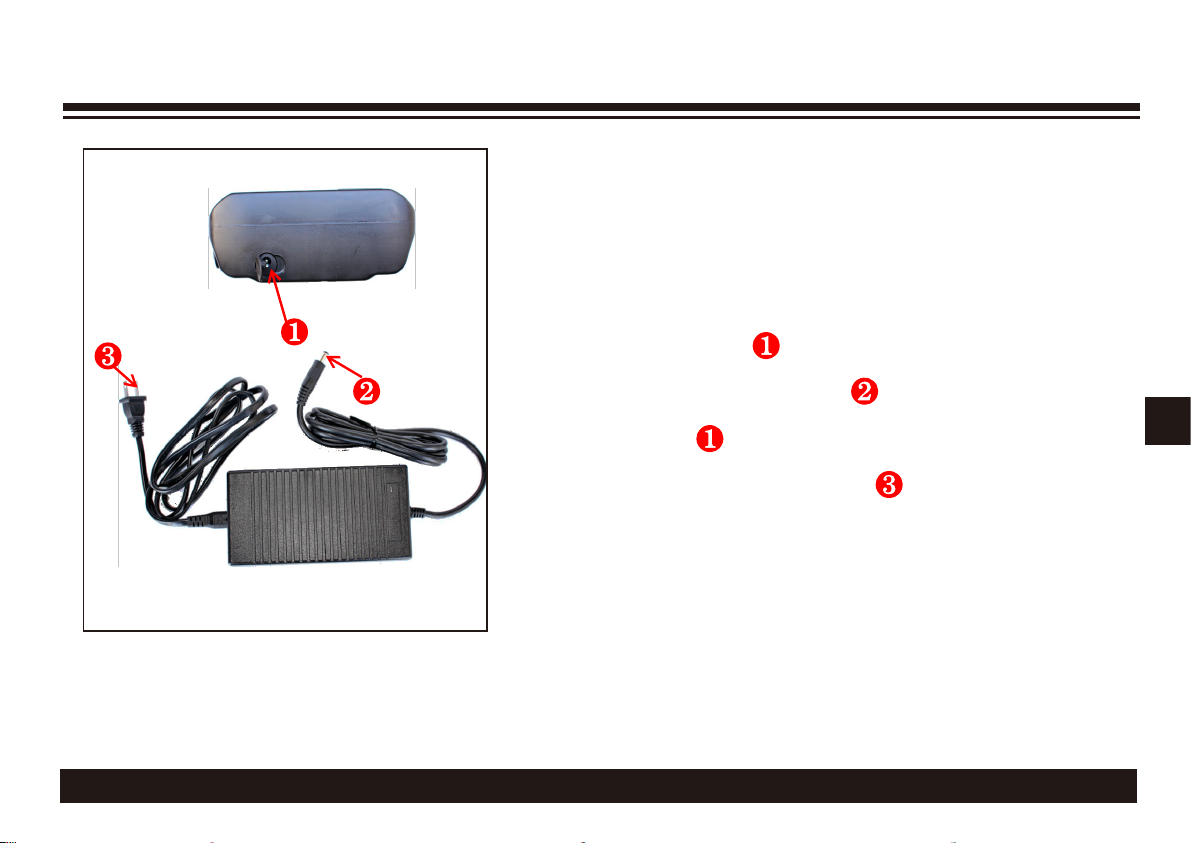
1 .Make sure the battery voltage is accordance
with the charger.
36V battery can only be charged by 36V (42V) charger.
48V battery can only be charged by 48V (54V) charger.
2. Open the soft cover of the battery charging port.
3. Insert the charging connector into the battery
charging port .
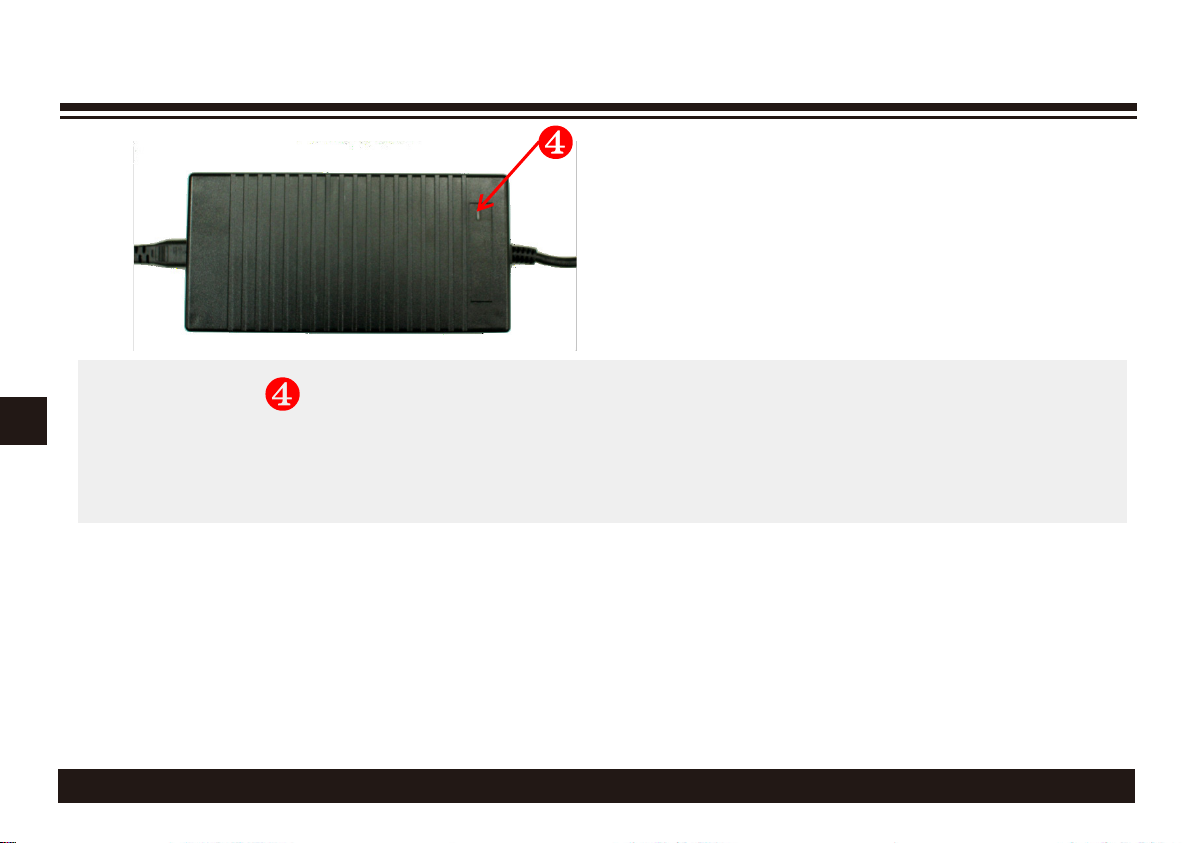
4.Connect the charger power plug to 100V/240V AC,
the charger LED indicator is GREEN Light.
5.The charger LED indicator turn to RED Light.
CHARGING THE BATTERY
6. When Charger LED indicator turn GREEN, again. The charging process is completed. Pull out the
charger connector with battery, store the charger for next charge.
4
(a) Make sure the battery voltage is accordance
with the charger.
1>36V battery can only be charged by 36V (42V) charger.
2>48V battery can only be charged by 48V (54V) charger.
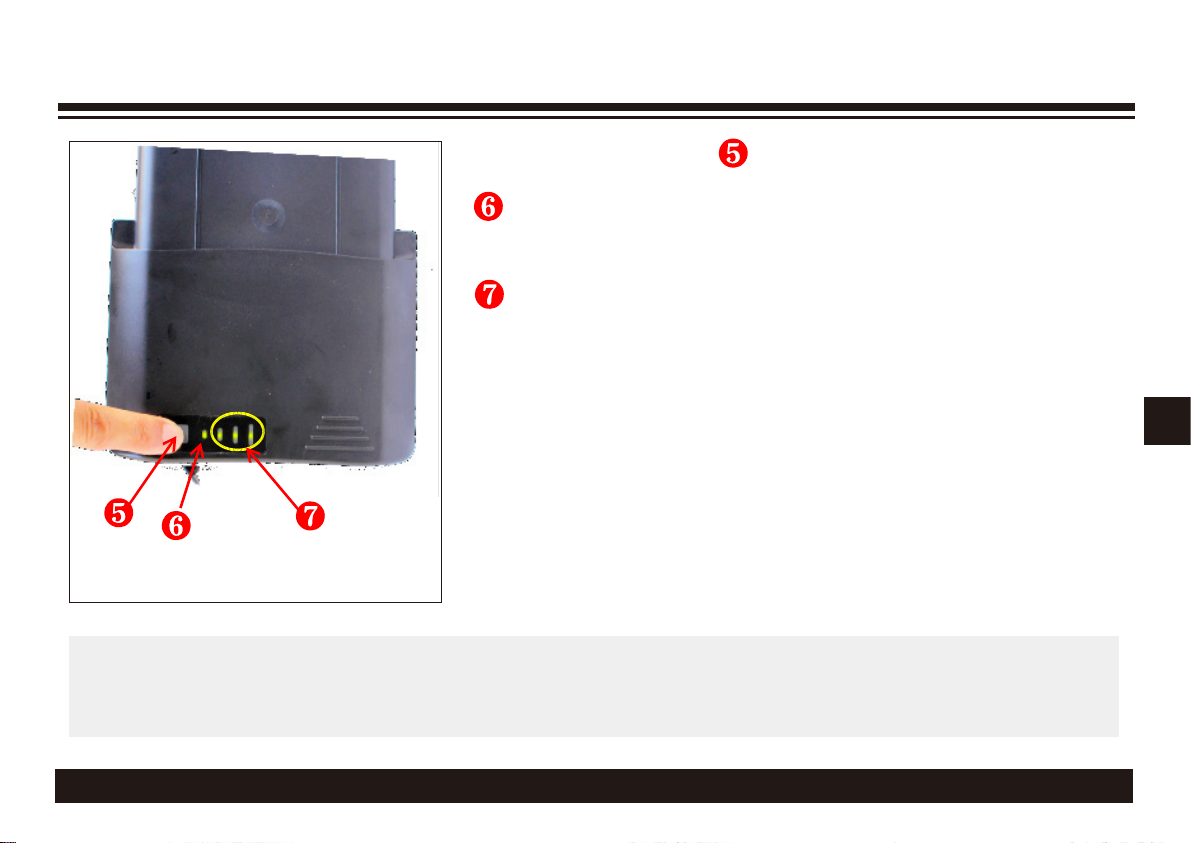
(b) Open the soft cover (5) of the battery charging port.
(c) Insert the charging connector (6) into the battery
charging port (5). The charger LED indicator is off.
(d) Connect the charger power plug (7) to 100V/240V AC,
the charger LED indicator is GREEN Light.
(e) Turn On the battery for charging. The charger
LED indicator turn to RED Light.

LED indicator 『Red』light indicates charging.『Green』light indicates fully charged.
If after 8 hours of charging and the LED indicator is still Red, the charging seems abnormal.
Please stop the charging and report to supplier for service.
CHARGING THE BATTERY
Charger LED indicator
8
5
48V/2A

BATTERY POWER INDICATOR
Push the soft button to activate the capacity meter.
flashes red light, means no power or not enough
power, need to be charged.
LED green bars indication
3 green lights = full energy capacity
2 green lights = mid energy capacity
1 green light = low energy capacity
1 steady red light = few energy left
※We recommend to always charge the battery after every ride.
6

• If used the bike in or after a rainy day, remove the battery and wipe it dry.
• When not using the battery for a long period of time or after charge, keep or store it without plug
ging into the bike.
• Check the battery energy status, and charge every three months.
CAUTIONS when charging:
(a) It is strictly forbidden to charge the battery with uncertified charger.
(b) Avoid direct sunlight. Charge in dry and weld ventilated environment .
(d)
Battery performance deteriorates over time whether the battery is used or not. This is known as
"calendar fade". Performance also deteriorates with usage and this is known as "cycle fade".
Follow the instructions indicated here could effectively extend the battery life and perfor mance.
BATTERY STORAGE
Model Battery Charger
Easy 24 36V 36(42)V
Envoy 200 48V 48(54)V
Movo 1.0E 48V 48(54)V
Extended 2.0 48V 48(54)V
E. Model vs Battery vs Charger
7

8
LCD OPERATION
On & Off
On :Push for 1 second.
Off :Push for 2 seconds.
LCD dashboard content description
Power output and battery level indicators section
(1).POWER output indicator:
Each cell means 2A (current) of output
8
(2). BATTERY level indicator:
LCD OPERATION:
When the battery is empty, all six cells are blank and red light will flash . Motor will Stop
and show ERROR code ( 1 ) . *Please charge or change the battery… ASAP..

LCD OPERATION
Power assistance level indicator section
Push to increase power assistance level (0.1.2.3.4.5)
Push to decrease power assistance level (5.4.3.2.1.0)
Push and simultaneously for 2 seconds
to change the speed unit between Miles Per Hour (MPH)
and Kilometers Per Hour (KM/H).
2Speed Endizator section : MPH vs KM/H
9

LCD OPERATION
Additional information section
Push button briefly each time will cycle through the
following functions:
Cycle through the information automatically
Odometer recorded by the system since the manual reset.
Time since the system was turned on.
Distance traveled since system was turned on.
Max speed since system was turned on.
* NOTE 1: Distance and speed units will depend on the selected MPH or KM/H unit in the
Speed Indicator section.
* NOTE 2: To clear all info except for odometer, push and together for 2 seconds.
* NOTE 3: To clear all info including odometer, push and together for 10 seconds.
310

4
LCD OPERATION
Throttle
Push the throttle lever, the bike will go without pedaling.
Walking Mode
Press On comtrol panel button for 2 seconds to start the walking mode.
Releasing the button will immediately stop the walking mode.
Walking mode will cause the motor to run up to 3.8MPH (6KM/H).
It is designed to assist when pushing the bike up hill or need to go slowly.
When engaged, the power assistance indicator will show AUTO 6.
LCD Backlight and Front & Rear lights
On:Press and hold On comtrol panel for 1.5 seconds to turn on.
Off :Press and hold On comtrol panel for 1.5 seconds to turn off.
3.8MPH(6KM/H)
11
NOTE: Bicycle battery must be "ON" for the bicycle lights to work.

12
LCD OPERATION
If shows up, there is an error. The indicated numeric codes are defined as follows:
Definition Solution(s)
Error
code
Voltage too low
48V is under 42V // 36V is under 32V Charge battery, or replace .
Brake is stuck or shorted
1. Check the brake to make sure it’s not stuck.
2. Unplug the brake wire to see if message goes
away. If it does, the wire maybe shorted.
Crank sensor no signal or no phase
At power on with power assistance level (0),
error code (4) may appear. The code should
disappear automatically after 30 seconds, or
when you start pedaling.
If you start pedaling, but the code stays on
within the first 30 seconds, then it indicates
there is no flash signal from the crank sensor.
*Sensor is to be replaced
Motor overload, reduce motor output
1. Shutdown and restart the system.
2. Put on max assistance level.
3. Motor requires repair.
.
1
2
4
5

LCD OPERATION
Controller temperature exceeds
158ºF (70℃)
Power off and wait until the temperature decrease
back to normal about 10 min..
Motor Hall is abnormal
1. Is the connection between motor and controller
loose or broken?
2. Motor requires repair.
Motor overcurrent 1. Shutdown and restart the system.
2. Motor requires repair.
Wheel diameter Sensor abnormal Check wheel sensor or wheel magnet
Voltage too high
48V system: battery is above 60V
36V system: battery is above 44V
Replace the battery.
Lost or abnormal communication
between LCD and controller.
1. Shutdown and restart the system.
2. Is the wire between the LCD and controller
loose or broken?
3. Controller or LCD may require repair.
8
6
9
15
14
17
13

MENO
14

KHS, Inc
2840 E. Harcourt St.
Rancho Dominguez, Ca.90221 USA
Tel:310-632-7173
www. khsbicycles.com
This manual suits for next models
3
Table of contents