Installation Instructions
READ ALL INSTRUCTIONS BEFORE UNPACKING THE PRODUCT
Important
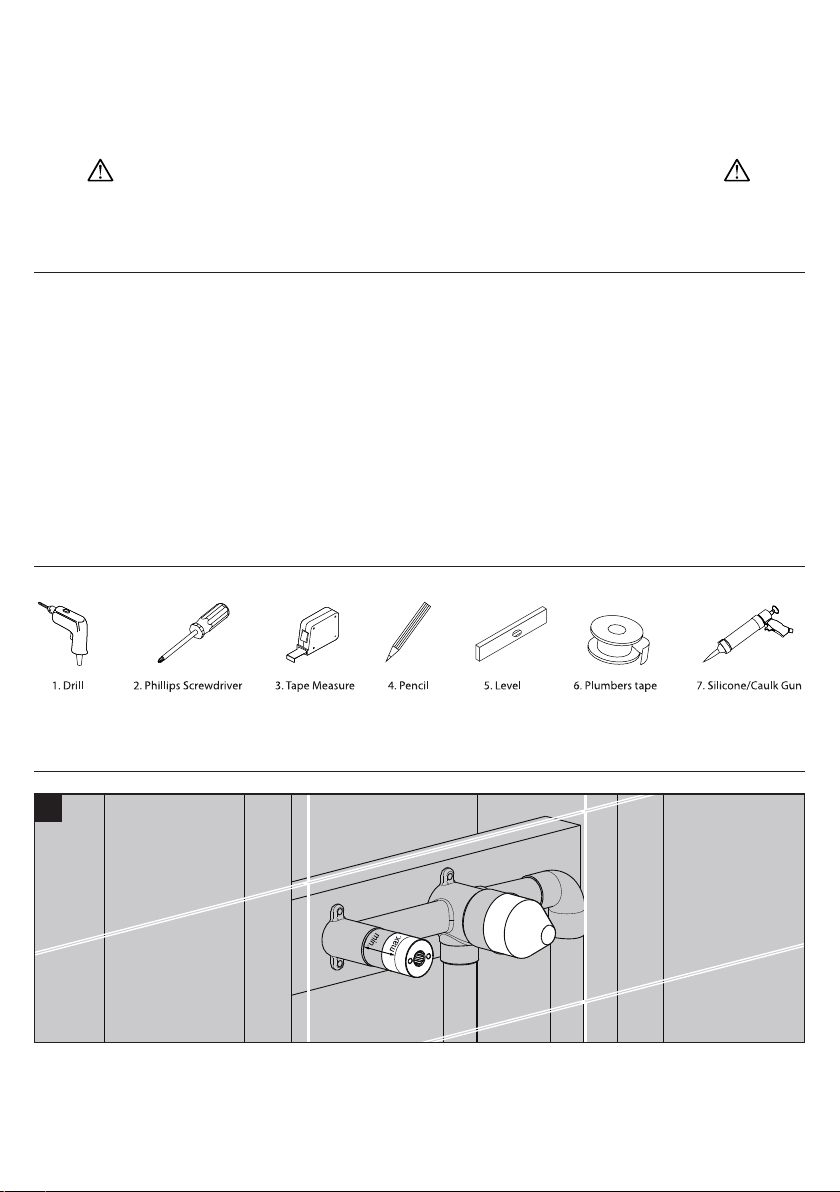
Tools you may need
Installation
1- For best results, we recommends that this unit be installed by a licensed, professional plumber.
2- Please read over these instructions thoroughly before beginning installation. Make sure that you have all tools
and supplies needed to complete the installation.
3- Please flush the water system to ensure that no metal swarf, solder, and other impurities can enter the faucet that
might damage the cartirdge. (Most of the leakages and water flow issues are from avoilding this very necessary
step).
4- Turn off the hot and cold water lines at the angle valve and turn on the old faucet to release any built-up pressure.
5- Keep this booklet and the receipt (or other proof of date and place of purchase) for this product in a safe place.
The receipt is required should it be necessary to request warranty parts.
6- Please keep the box and packaging materials until your product is completely installed and functional.
7-Do not return to store if problems, Contact Customer Service ASAP at 855-883-0888 or email support@kibiusa.com
to get help.
Construct a suitable stud brace for mounting of the valve body. Refer to the roughing-in dimension located on the plaster guard sleeve on valve body.
NOTE: The surface of the finished wall must fall between the "min" and "max" markings.
If tile or another surface is to be added after installation, this must be considered. A suggested framing example is shown above. Your installation may
have different framing requirements than those shown.
1


