OPERATION - GENERAL
NOTE: IF THE UNIT IS IN STAND-BY MODE ONLY AN ORANGE RUN LED
WILL BE ILLUMINATED. TO TURN ON YOUR UNIT PLEASE HOLD THE
ON/OFF SWITCH DOWN UNTIL THE RUN LED CHANGES TO GREEN
AND THE TEMPERATURE READ-OUT DISPLAY IS ILLUMINATED.
Temperature setting range:-18ºC~10ºC, 0ºF~50ºF
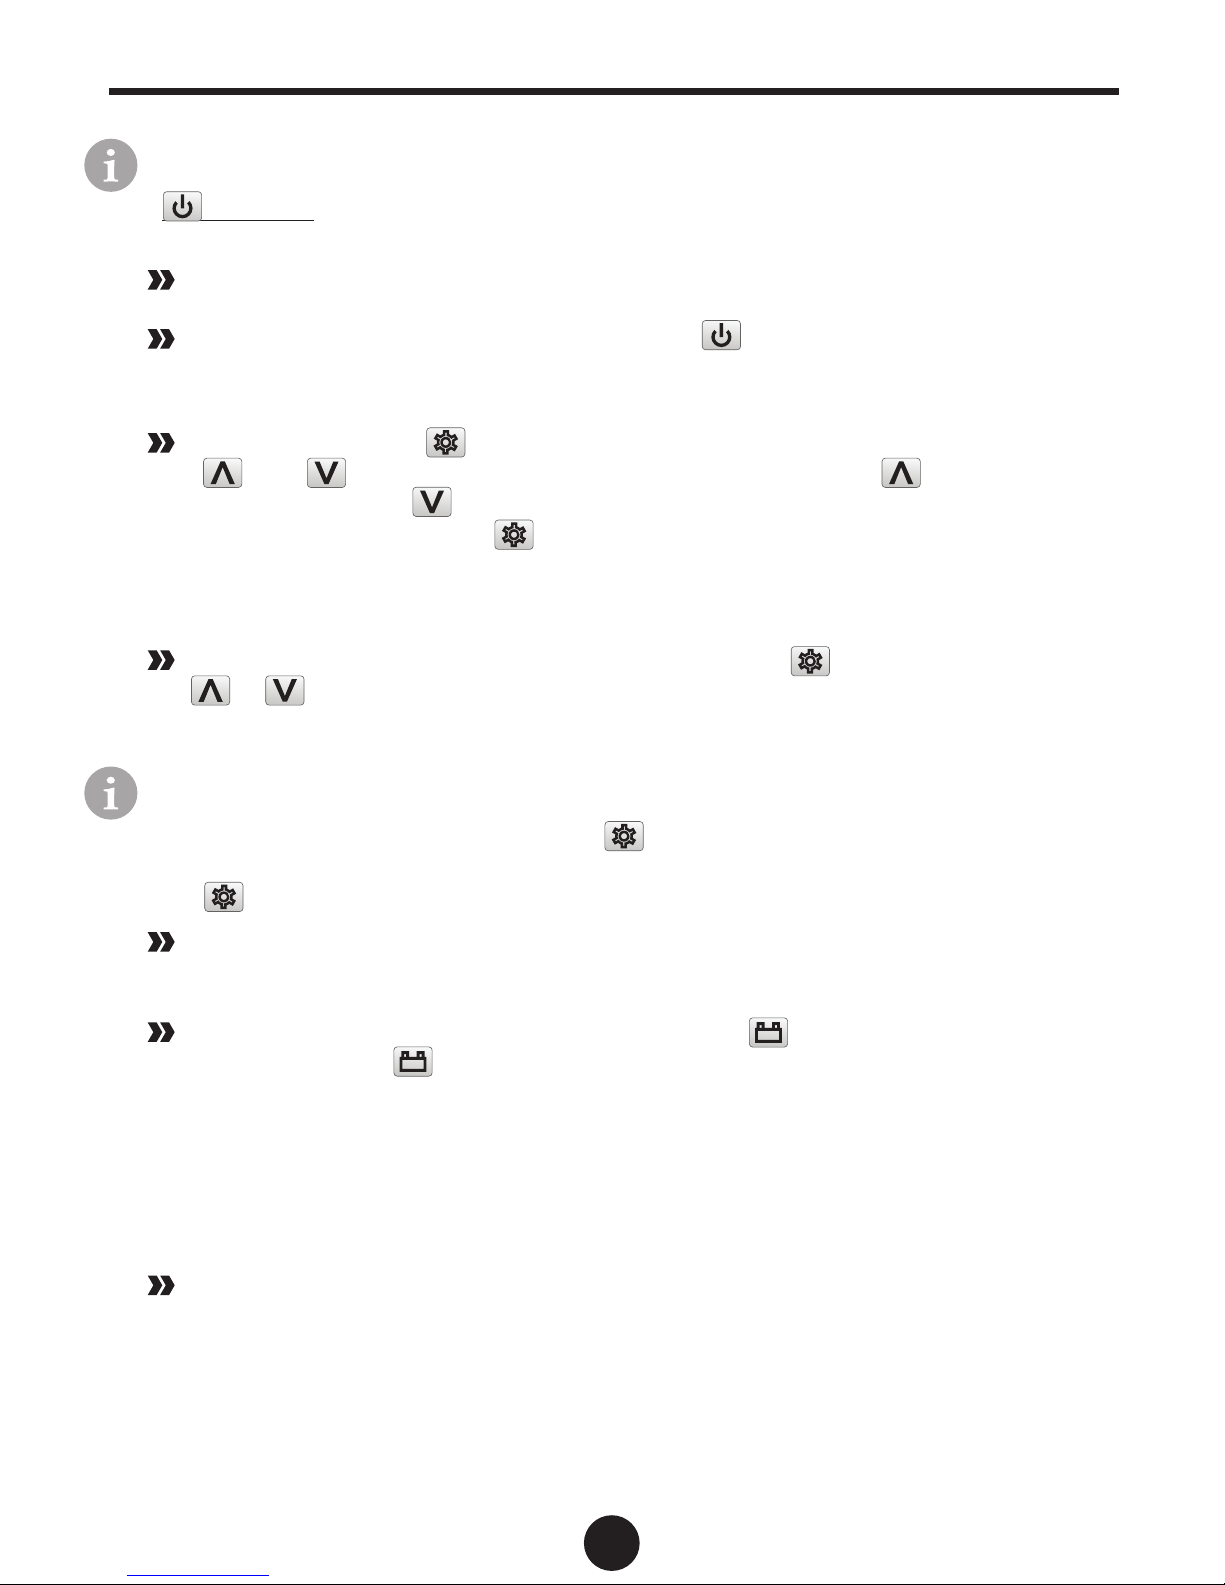
Plug in the DC or AC power cable. Use the ON/OFF power button located
on the electronic thermostat to power on the fridge. The LED display on the
control panel will light up and the interior temperature will be displayed.
Thermostat: Press on the electronic thermostat and then press the
and buttons to adjust the temperature. Press the button to
increase while the button to decrease the temperature. To lock in the
target temperature press twice or leave for 5 seconds. The LCD display
will indicate the current temperature inside the unit after the target temperature
is set. After approximately 5 minutes the displayed temperature will start to
decrease.
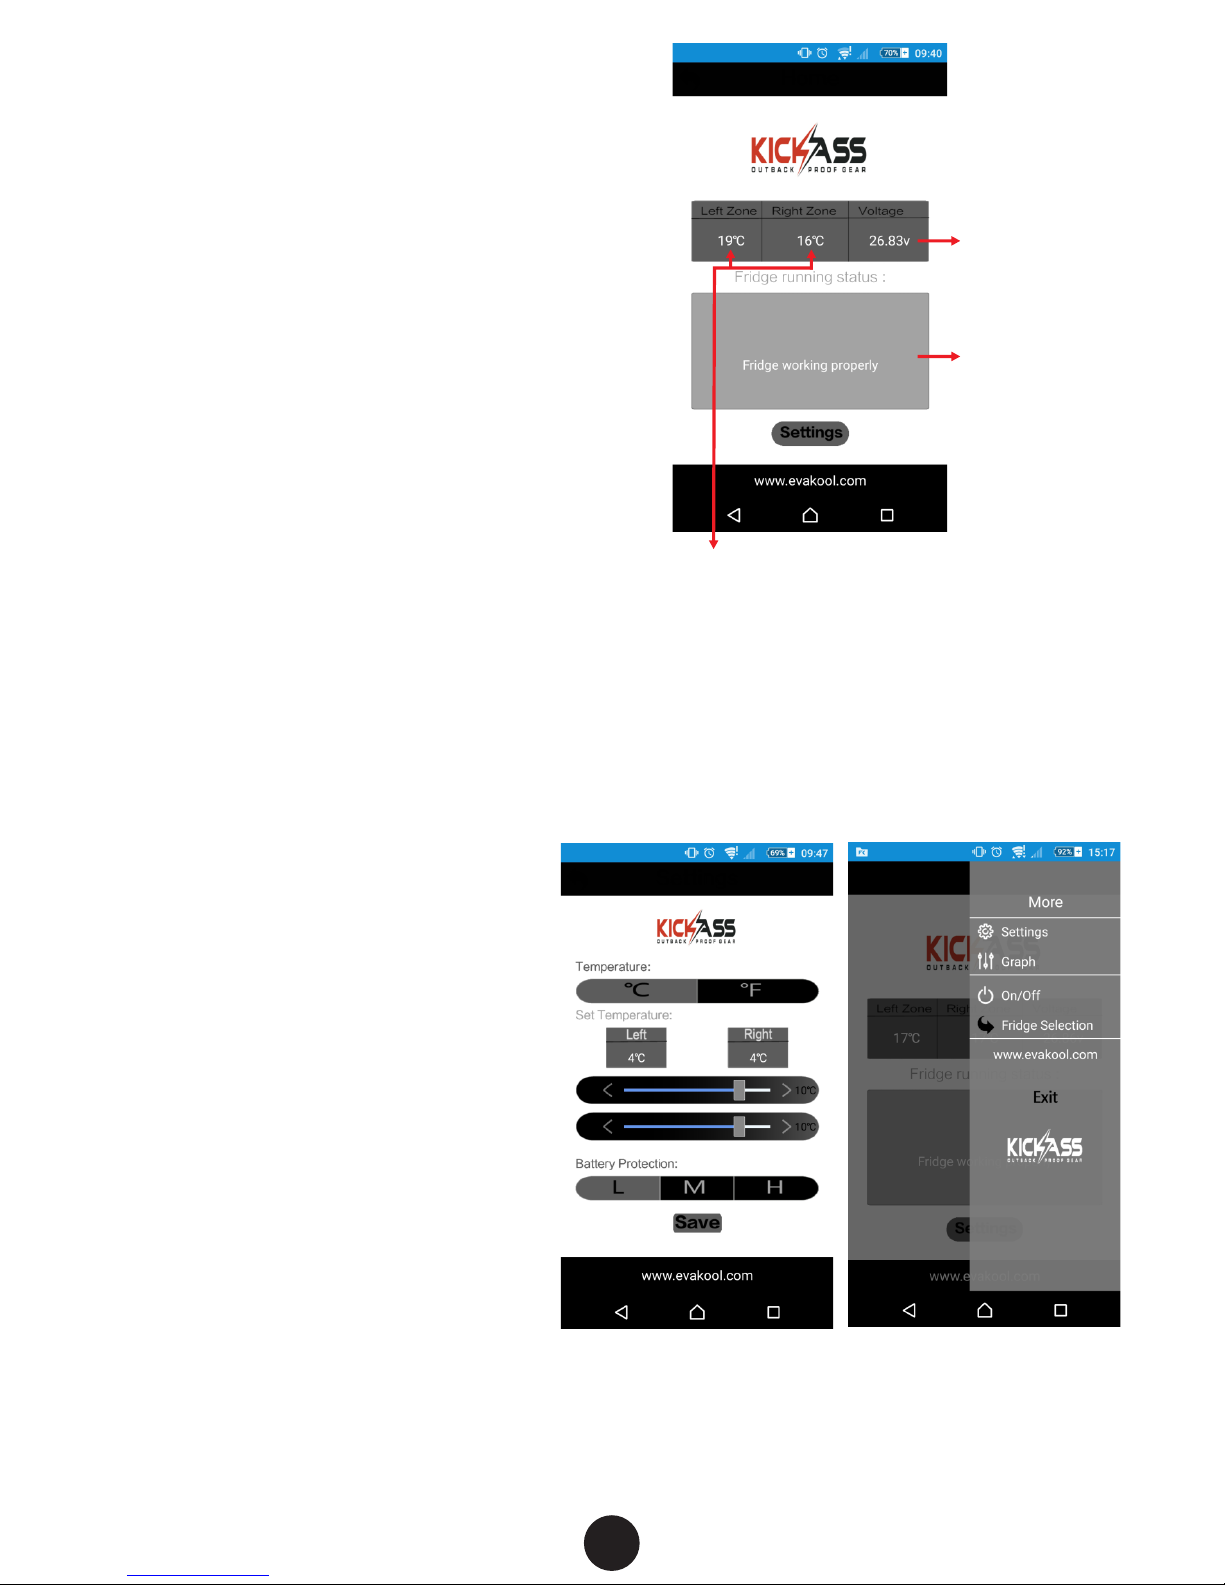
Note! For models with the Dual Zone feature the LCD display has 2 Temperature
Read-out’s, one for each bin compartment. To set the temperature of each
individual bin compartment press the button once to set left bin temperature
and twice to set right bin. To change between ºC and ºF display mode press
the button three times.
If the power supply is cut off, the refrigerator will switch off automatically and
then automatically switch on again when the unit receives power.
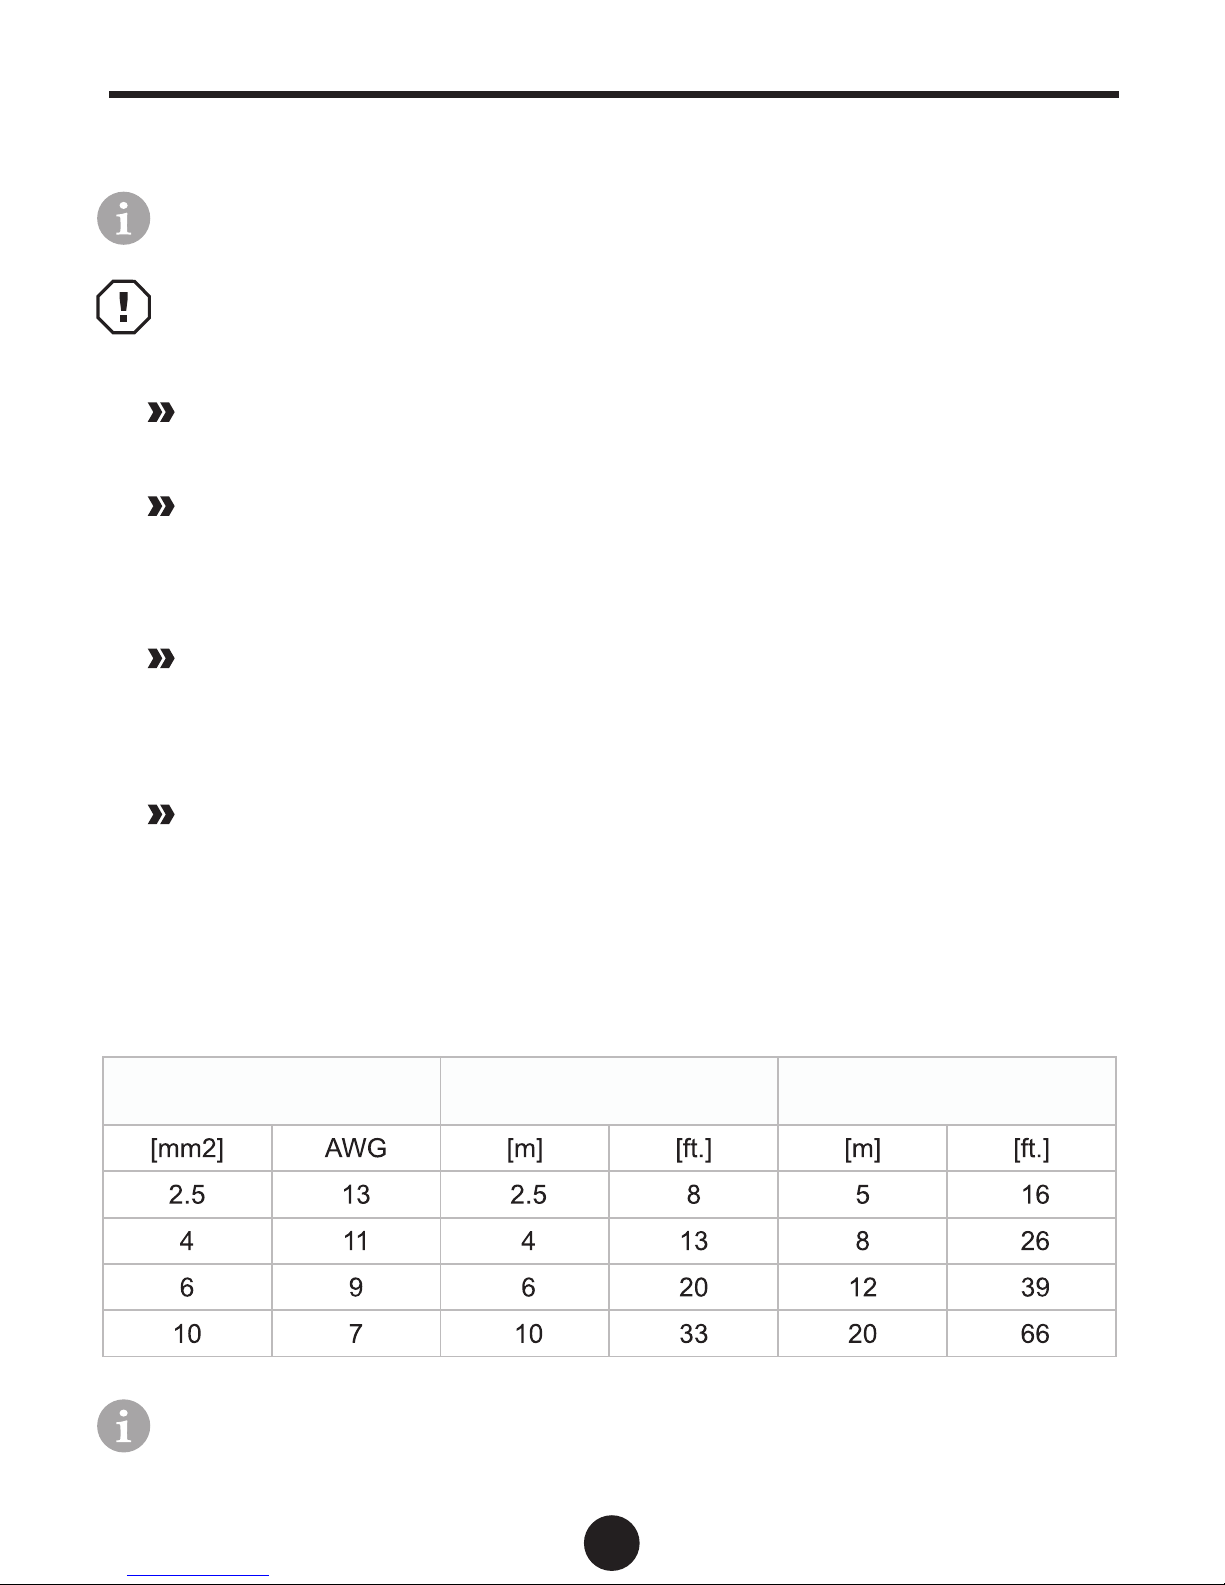
To change the battery voltage setting press the button for three seconds
and then use the button to change between the settings. Leave the unit for
5 seconds to set this setting. The three voltage settings are approximately
as follows: - (We advise to keep the setting on LOW)
• LO – 11.0 Volts
• MED – 12.0 Volts
• HI – 12.5 Volts
LED explanation.
• Orange “RUN” LED – Fridge has reached set temperature and cycled off
• Green “RUN” LED – Fridge cooling to set temperature
To change the fridge between ºC and ºF. Press the button twice and then
or to change the setting.
4