Legend
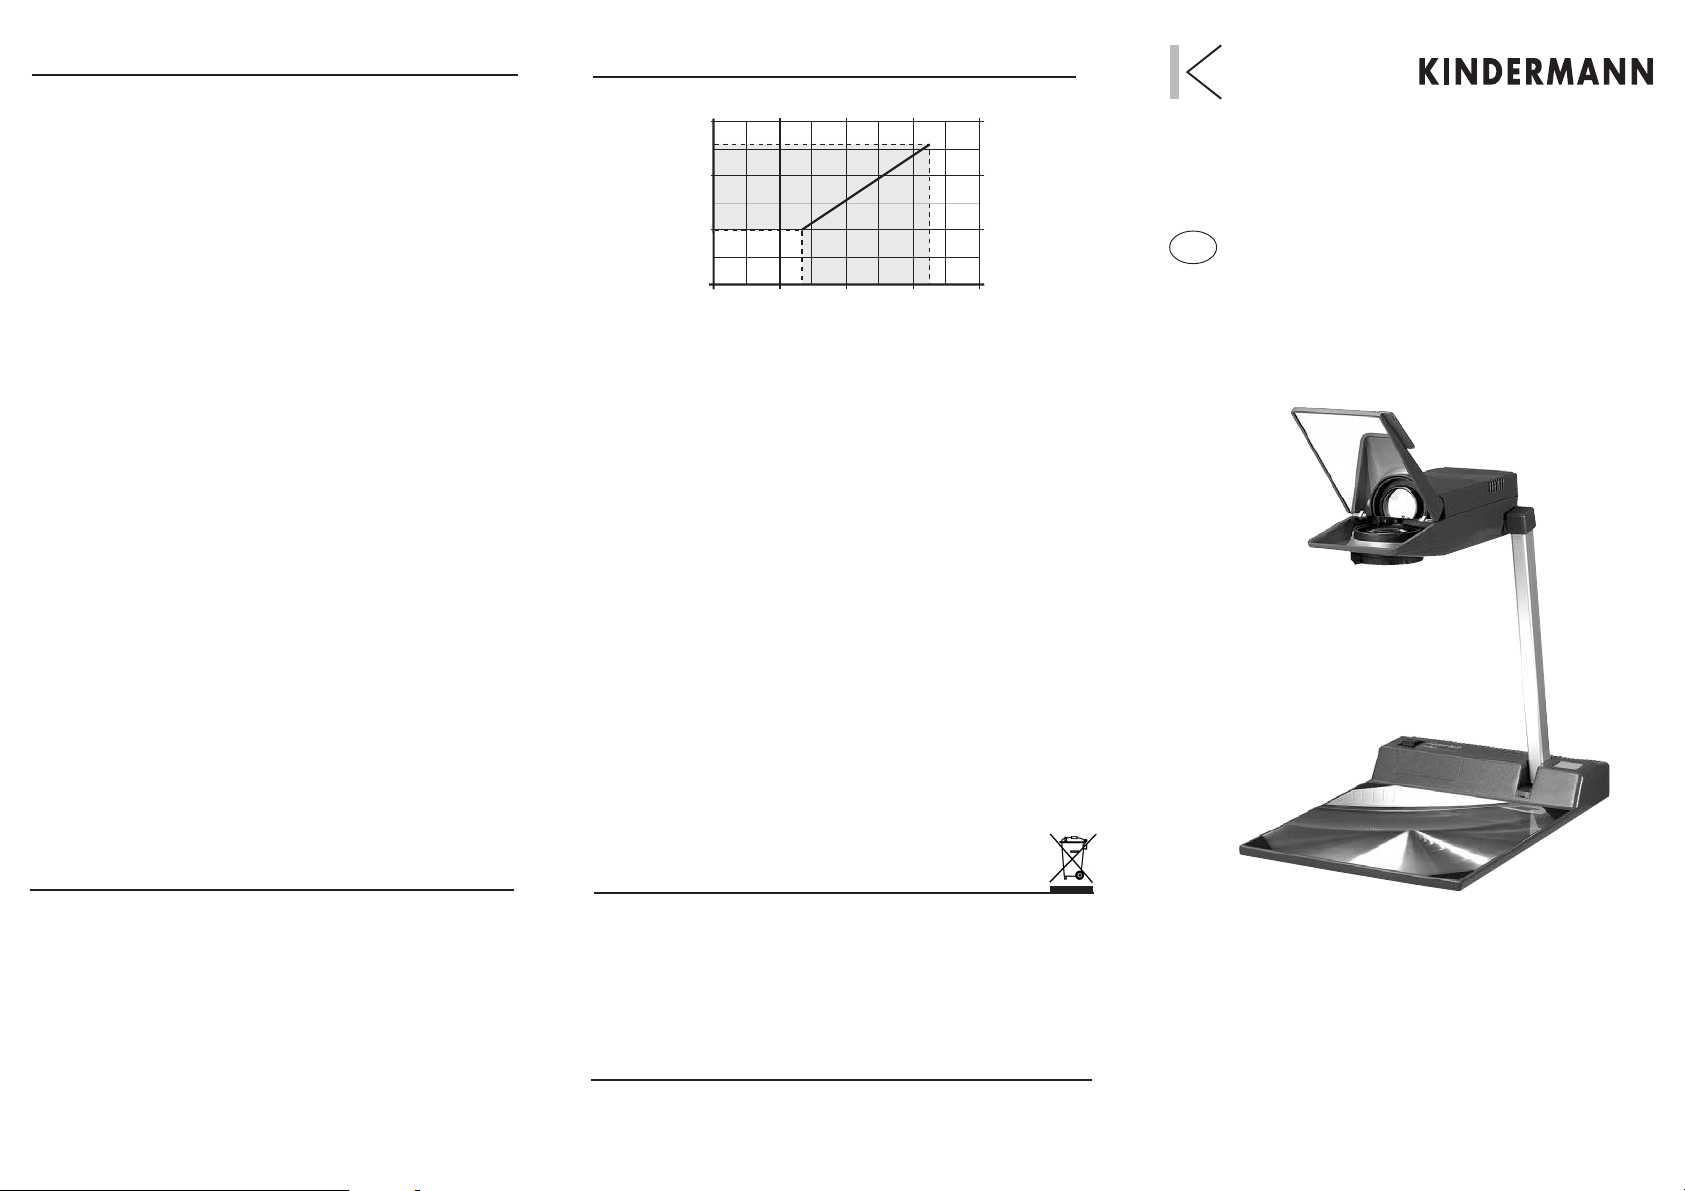
Take the projector out of its carton and place it on a horizontal and
solid surface.
Lift the projection arm upward (8) until you can feel and hear it
engaging. Swivel the projection head (9) forward until it is in horizontal
position (fig. 2).
Open the lens mirror (10) completely at its grip.
Connect the power cable (14) with the socket (1) on the projector, and
then plug in.
Note:
Before you plug in, compare the voltage on the label (2) with your local
voltage. The focal point of the lens mirror (10) can reach high
temperatures. Therefore keep the lens mirror open as long as the
projector is in operation!
The first steps before use
Hints for projection
a) Switch on the projector with the main switch (3).
The metal halide lamp reaches full brightness after approx.
1 minute.
After starting the cold projector, do not switch off the lamp before a
minimum operation time of 5 minutes!
The hot lamp, however, can be switched off and on at any time.
Adjust the picture height with the lens mirror (10).
On the working surface (6) you can project DIN A 4 transparencies
(vertical or horizontal format).
Adjust the sharpness of the image by moving the pin at the
projection lens (11).
In upward projection the automatic focusing device provides a
razorsharp image.
Note:
The protective glass (12) in front of the lamp gets very hot during
operation. Don´t touch it with your fingers.
If the glass is dirty, remove the dust with a damp cloth. First unplug
the projector, then let it cool down and take off the glass after
loosening the 3 holding screws. The fan does not stop for about
1–3 more seconds after switching off the projector.
b) The overheating protection switches off the lamp in case of too much
heat. After the unit has cooled down (approx. 1–2 min.), switch it
on again via the on/off switch (3).
Make sure that the ventilation grilles at the projection head and at
the body are unobstructed during operation.
c) The projector has a high light output!
Do not look directly into the projection light.
d) For achieving a good image, make sure that the transparency is
taken out of its cover and lies flat on the surface.
Switch off the projector via on/off switch (3), let it cool down and
disconnect from the mains.
Protect the working surface with the foam layer.
Close the lens mirror (10), grip the projection head (9) at its bottom
and swivel it back until it engages.
Gently press the projection column (8) backward, while simultaneously
pressing the release button (7); then the projection column with the
projection head can be carefully folded forward.
Getting the projector ready for transport
Colour fringes on the projected image
may occur if the fresnel lens (6) is not properly positioned in its base.
In this case press down the edges of the lens onto the frame.
Use a cloth and not your bare fingers.
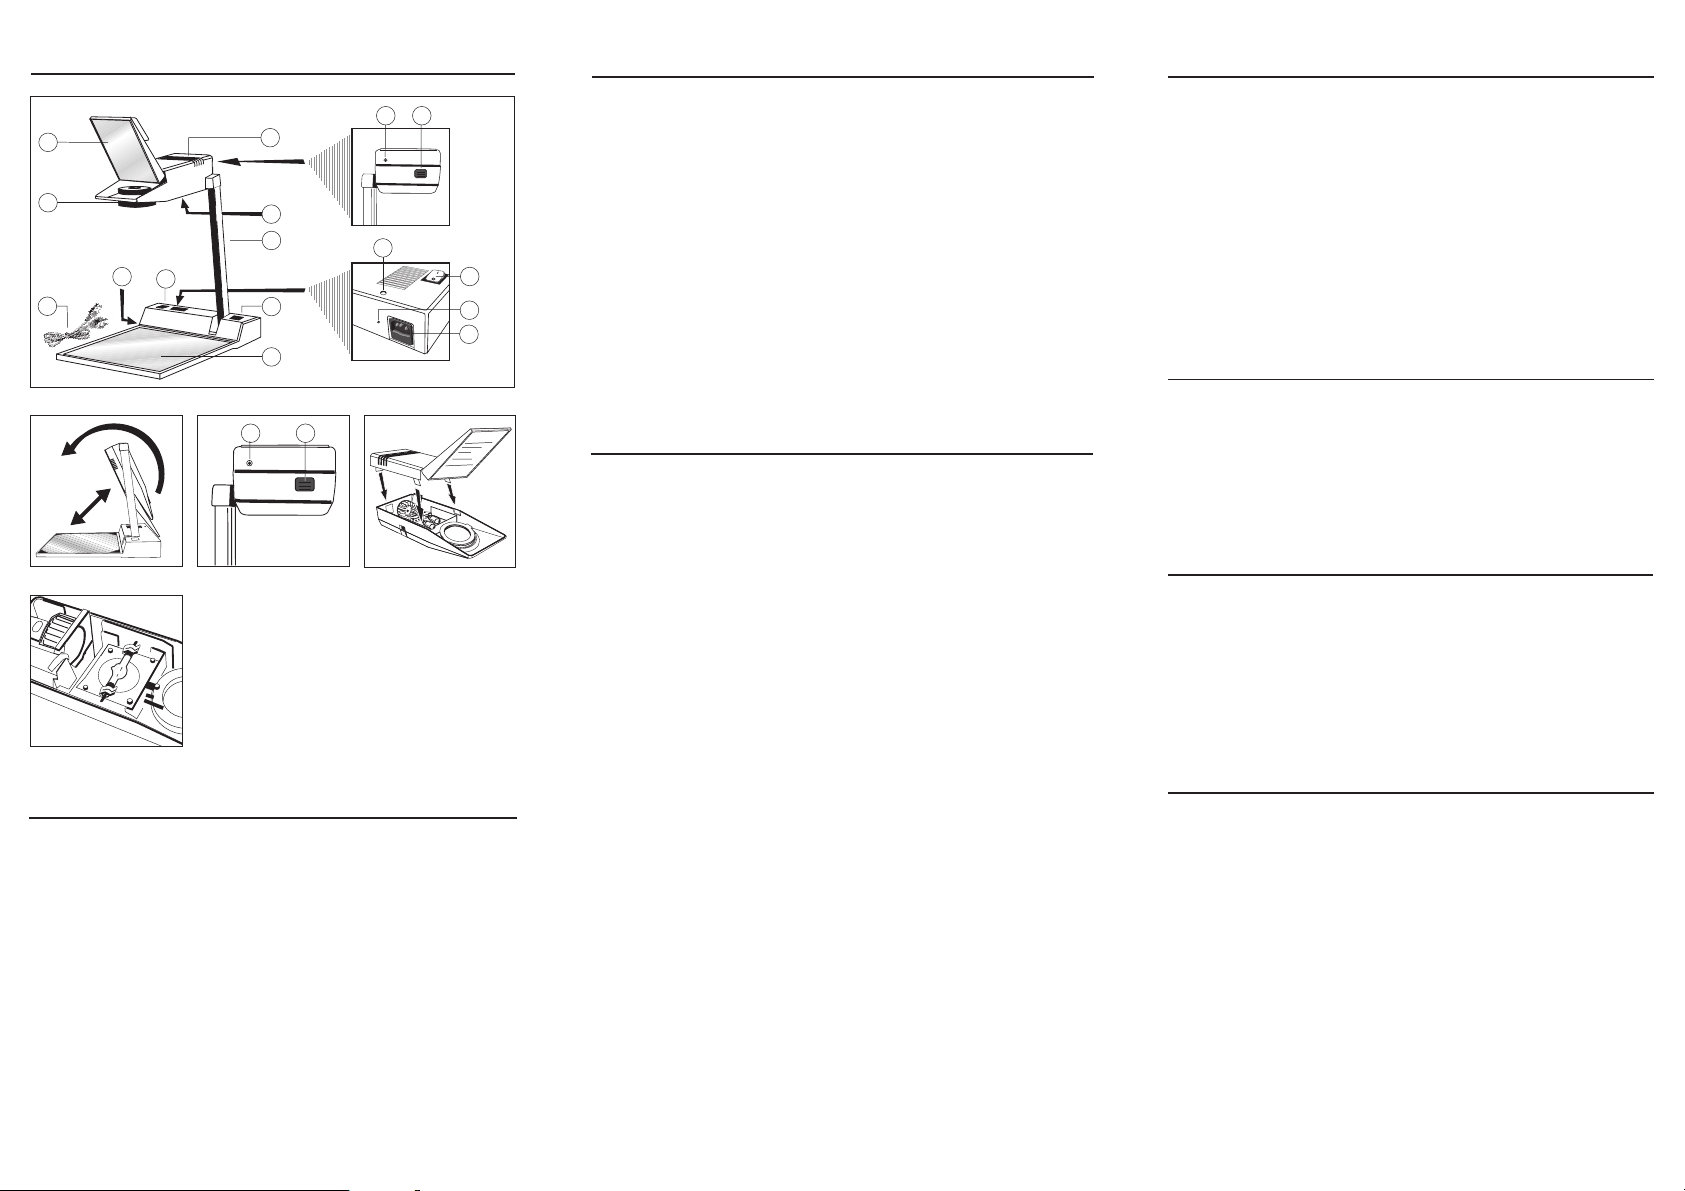
1 Socket for power cable with fuse holder
2 Label
3 On/off switch
4 LED for lamp change
5 „0“button of lamp life indicator
6 Working surface
7 Release button
8 Projection arm
9 Projection head
10 Lens mirror
11 Projection lens
12 Protective glass
13 Safety screw
a) Catch for upper part
14 Power cable
Operating elements
Fuse change
Fuse T 6.3 AH.
The fuse is defective if the lamp and the fan fail.
For checking and for changing the fuse, pull out the fuse holder at the
socket (1).
The active fuse is inside, the spare fuse outside.
2
8
10
7
11
14
9
1
3
4
5
3
6
12
13
13a
13a
13
1
234
5
LED for lamp change
The metal halide lamp has an average life time of 750 hours.
The LED for lamp change (4) indicates in time when to replace the
lamp:
a) several flashes of the LED after switching on –normal function.
b) permanent flashing –risk of lamp failure, change the lamp as
soon as possible.
c) permanent light –imminent lamp change required.
Note:
After the normal life time there is an increased risk that the lamp
may burst.
Some lamps may fail even earlier because of other circumstances.
Our warranty depends on the condition of the lamp, not on what the
LED indicates.