pag. 4/16
Senza sistema
Without system
54
8
65
72
159
54
57
133
A A
B
B - B
B
A - A
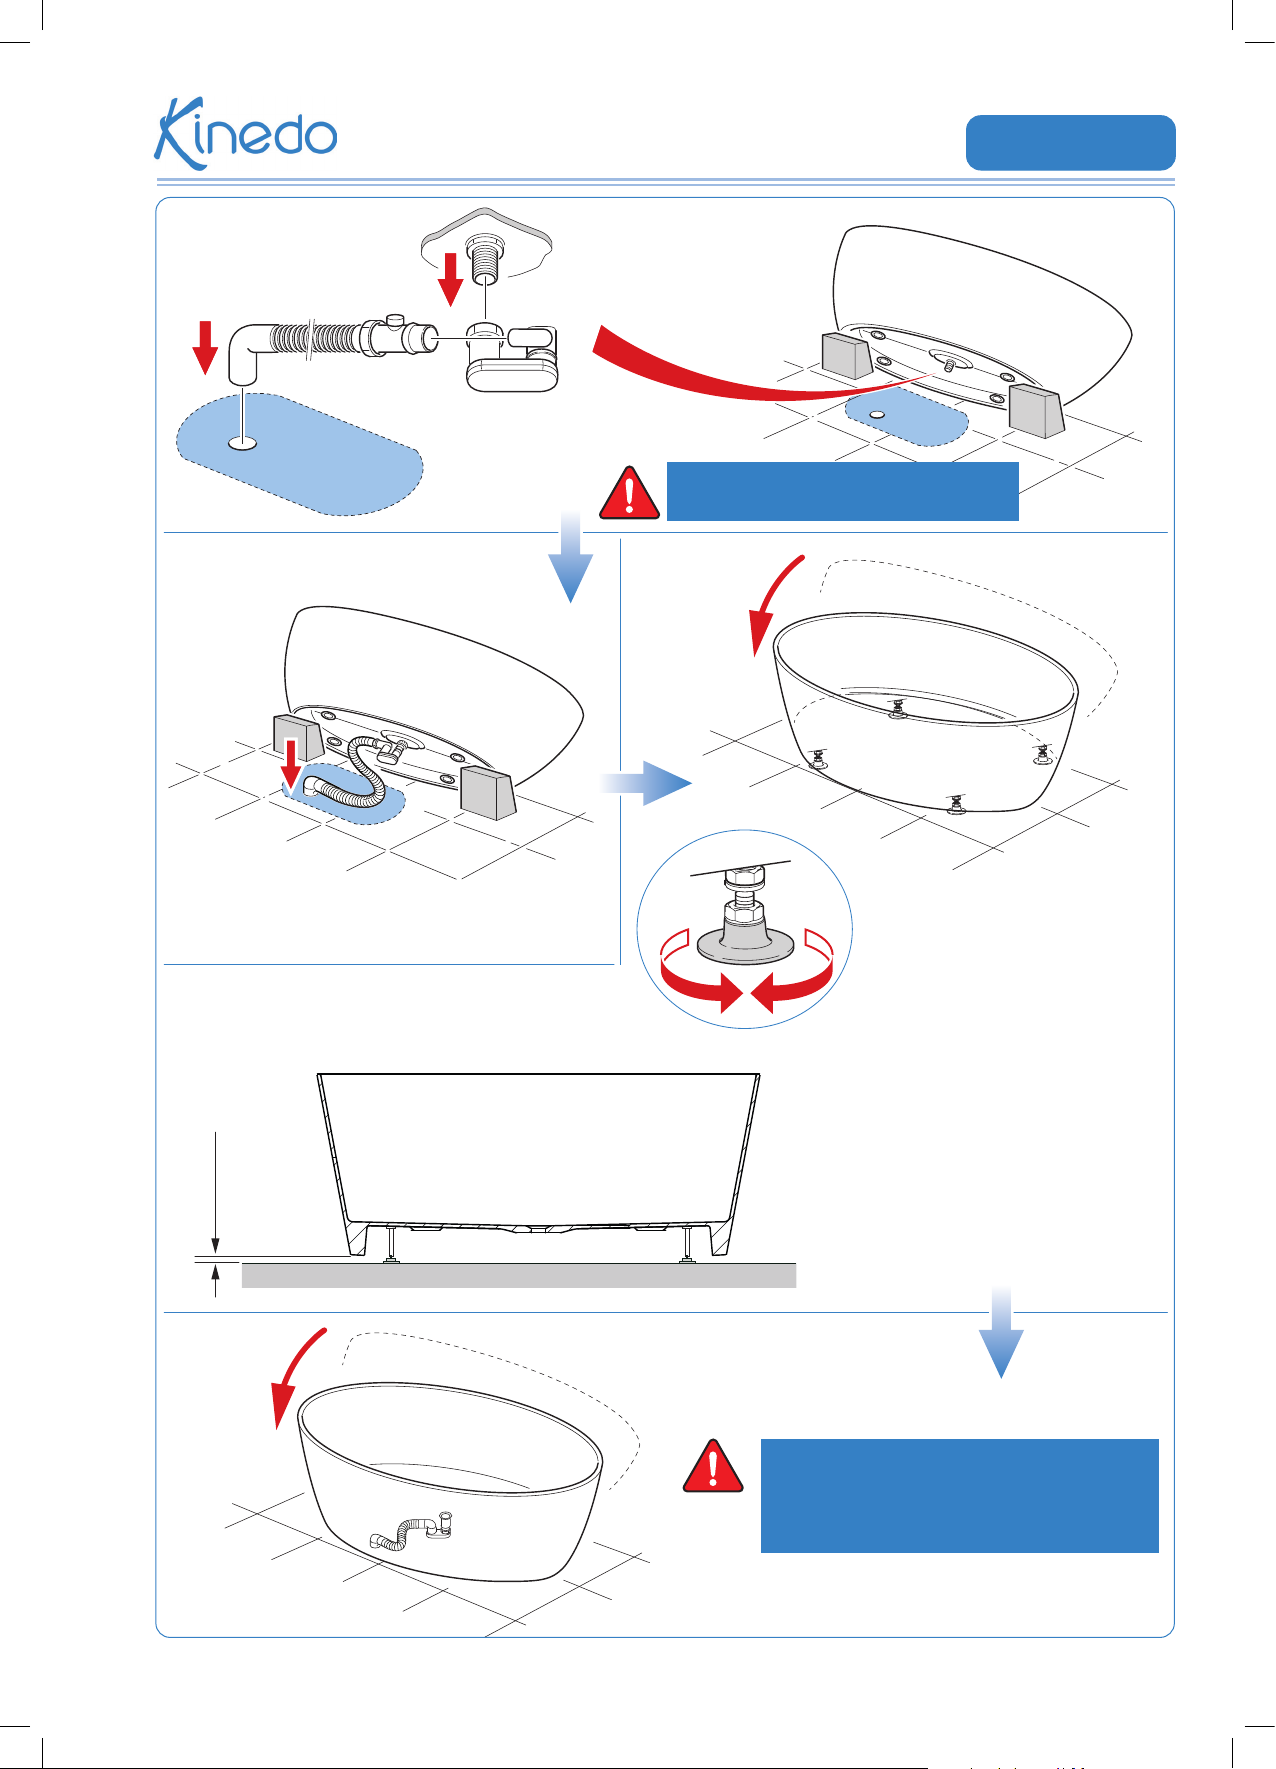
Troppopieno
NO !
Overow
Piletta anti debordo
OK !
Anti overow drain
Supercie antibatterica
Antibacterial surface
Versione “unica” - “Single” version
Dimensioni in “cm” (tolleranza ± 5mm) - Dimensions in “cm” (tolerance ± 5mm)
Dati tecnici e ingombri
Techinical data and overall dimensions
DATI TECNICI TECHNICAL DATA
• Tensione • Voltage - - -
• Frequenza • Frequency - - -
• Potenza totale assorbita • Total power absorbtion - - -
• Corrente massima • Max current - - -
• Allaccio acqua fredda e calda • Cold and hot waret ttings - - -
• Scarico acqua • Water waste trop
ø 40 mm
• Dimensioni vasca • Bathtub dimensions 159 x 72 x h65 cm
• Capacità acqua • Water volume 400 l
• Spessore minimo vasca • Minimum bathtub thickness 1,3 cm
• Altezza interna vasca (lo bordo) • Bathtubinternalheight(ushwiththeedge) 54 cm
• Peso a vuoto • Empty weight 84,5 kg
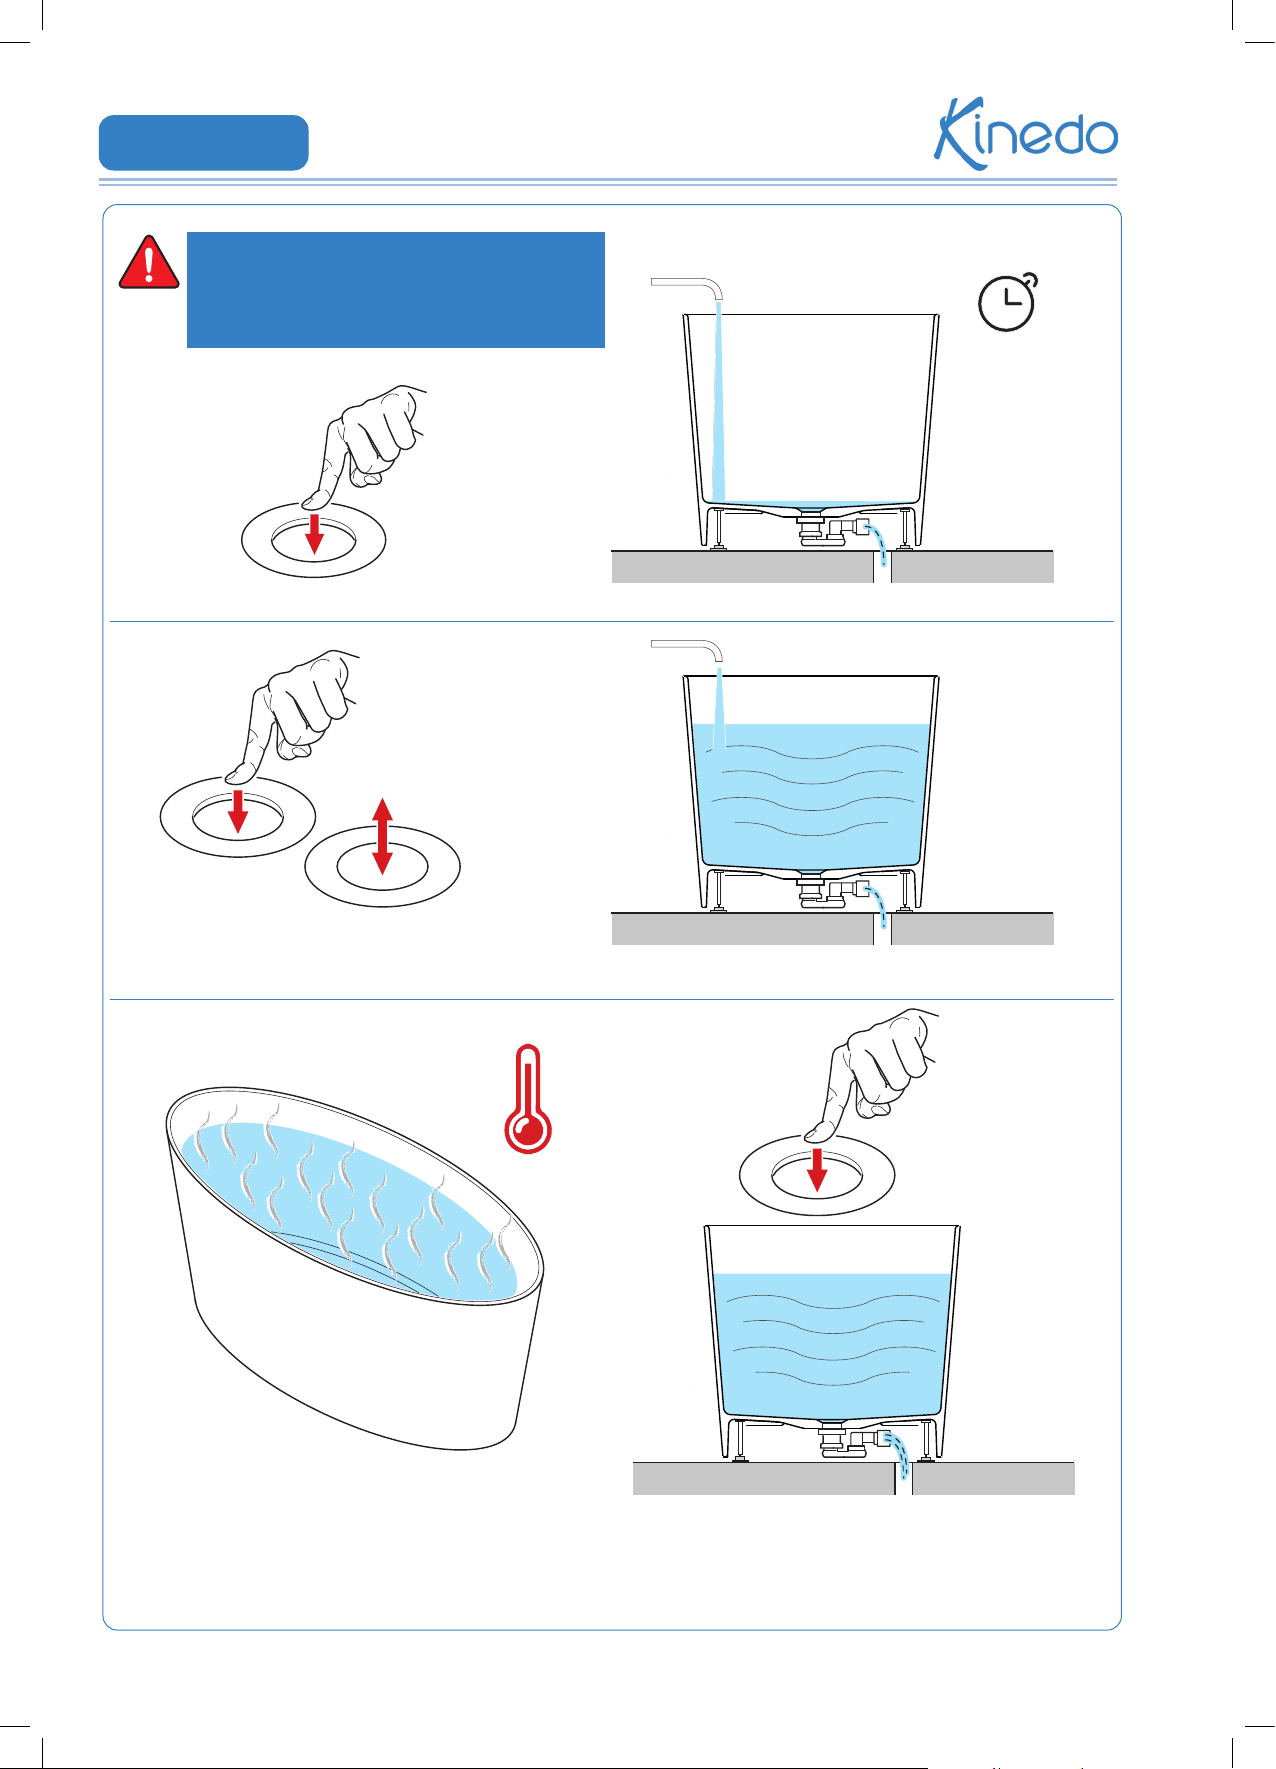
• Durevole nel tempo • Durable over time Si / Yes
• Temperatura acqua costante • Constant water temperature Si / Yes
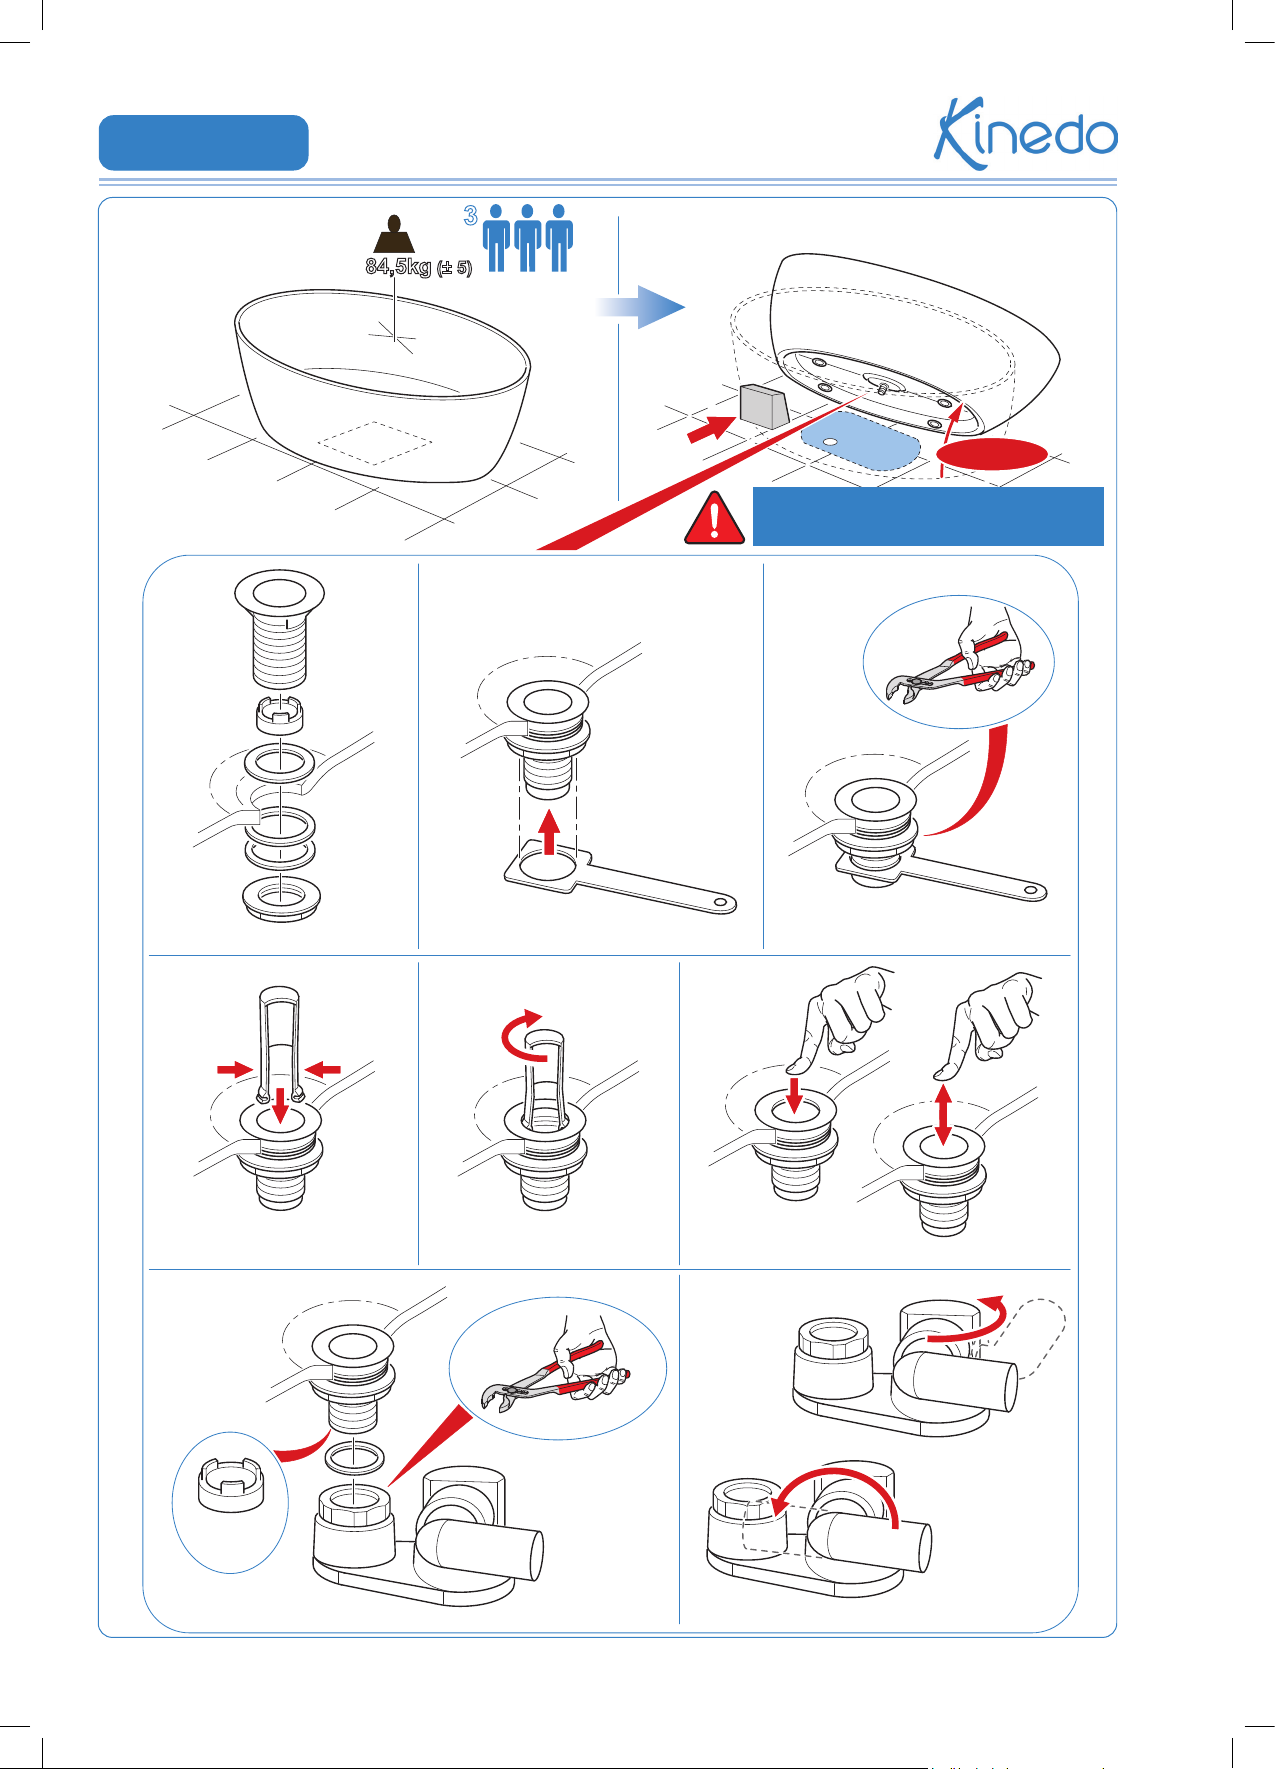
• Piletta Iconik (di serie) • Iconik drain (standard) Si / Yes
• Sifone • Siphon
Non fornita / Not supplied
• Rubinetteria • Tap
Non fornita / Not supplied
• Ottima capacità di trattenere il calore, con una temperatura ambiente di 22° l’acqua in 60 minuti passa da 55° a 47°.
• Excellent ability to retain heat, with an ambient temperature of 22° the water goes from 55° to 47° in 60 minutes.