ADJUSTMENTS AND OPERATION
ADJUSTMENTS
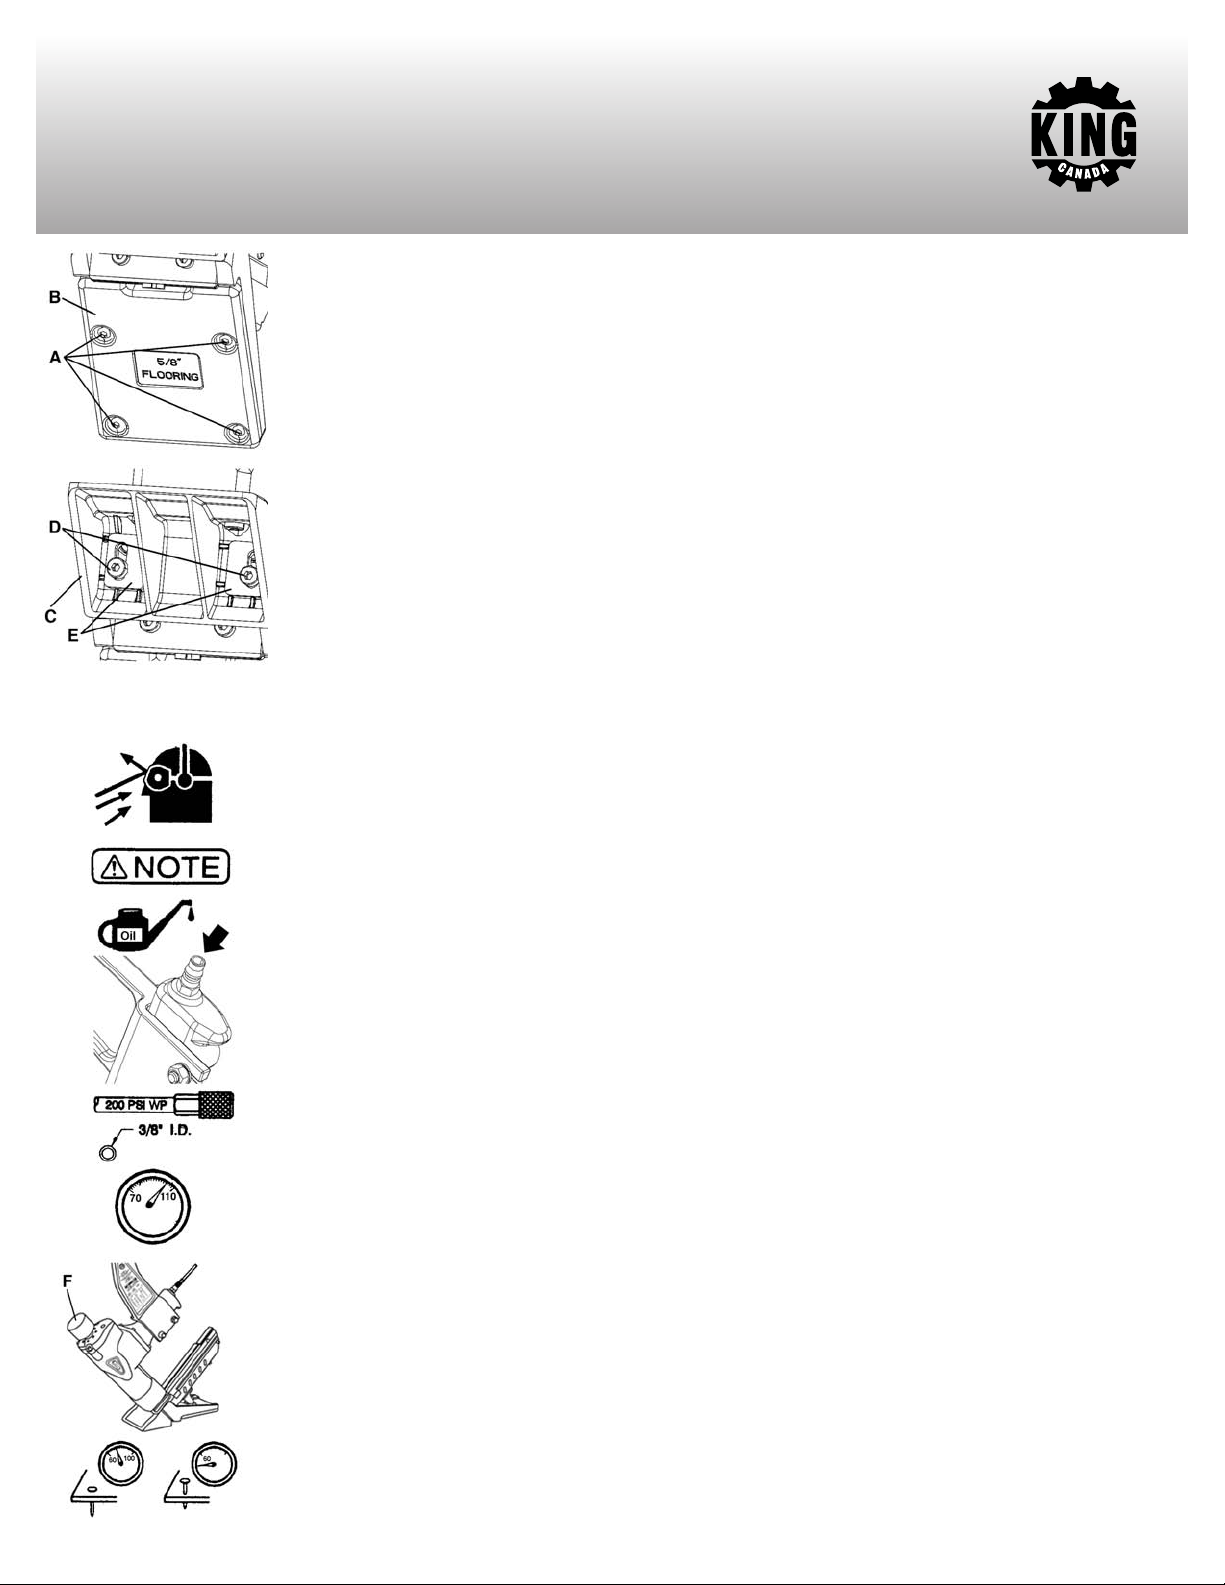
Changing Non-Marring Bases
This flooring stapler/nailer comes with 2 non-marring bases (3/4” & 5/8”). These bases reduce scratches and
damage but they also allow you to set the height at which the staple/cleat nail penetrates your workpiece
depending on the thickness of the floor and the position of the tongue.
WARNING! Make sure the tool is disconnected from the air supply and that there are no staples or nails
in the magazine before changing base.
Due to the variety of flooring thicknesses on the market, this flooring stapler/nailer may be used for other
flooring thicknesses by choosing the 5/8” non-marring base and shimming between the base of the tool to get
the desired staple or nail location. See your flooring manufacturer for more information.
•Place the tool on its side to expose the base. Loosen and remove the 4 countersunk head screws (A) and then
remove the non-marring base (B). Install the desired base and secure it with the 4 countersunk screws
removed previously. Make sure the correct bases is installed by firing into a scrap piece of flooring and
checking for proper fastener placement.
Adjusting Front Block
This flooring stapler/nailer is equipped with an adjustable front block (C), which gets adjusted for 5/8” or 3/4”
wood flooring. The flooring stapler/nailer is shipped with the front block adjusted for 3/4” wood flooring.
WARNING! Make sure the tool is disconnected from the air supply and that there are no staples or nails
in the magazine before adjusting front block.
•Place the tool on its side to expose the 2 cap screws (D), 2 small plates (E) and front block (C). Loosen the 2
cap screws just enough to allow the front block to slide up or down.
•Adjust the position of the front block according to the actual thickness of the wood flooring and retighten the 2
cap screws. Make sure the adjustment is correct by firing into a scrap piece of flooring and checking for
proper fastener placement.
OPERATING YOUR FLOORING STAPLER/NAILER
WARNING! Protect your eyes and ears. Wear Z87 safety glasses with side shields. Wear hearing
protection. Employers are responsible for ensuring the user or anyone near the flooring stapler/nailer
wears the above mentioned safety protection.
WARNING! Check and replace any damaged or worn components.
•Add one/two drops of 30W oil for air tools into the air inlet.
•Connect the flooring stapler/nailer to an air compressor using a 3/8” I.D. hose having a quick connect coupler.
Make sure the magazine does not contain any staples or nails and that the air hose has a rated working
pressure exceeding 200 PSI.
•For peak performance, regulate the air compressor air pressure at 100 PSI.
•Load magazine with staples or nails following the instructions in this manual.
•Position the non-marring base of the flooring stapler/nailer on the workpiece, make sure the non-marring base
is flat and is firmly contacting the work surface. Using the mallet, strike the driving cap (F) to drive fasten-
er into the workpiece.
Warning! It is not necessary to hit the driving cap hard to activate it, excessive force will damage the tool.
•Test for proper staple penetration, drive staples or nails into scrap flooring. If the staples or nails do not achieve
the desired penetration, regulate the air pressure to a higher setting until the desired penetration is achieved.
Do not exceed 100 PSI.