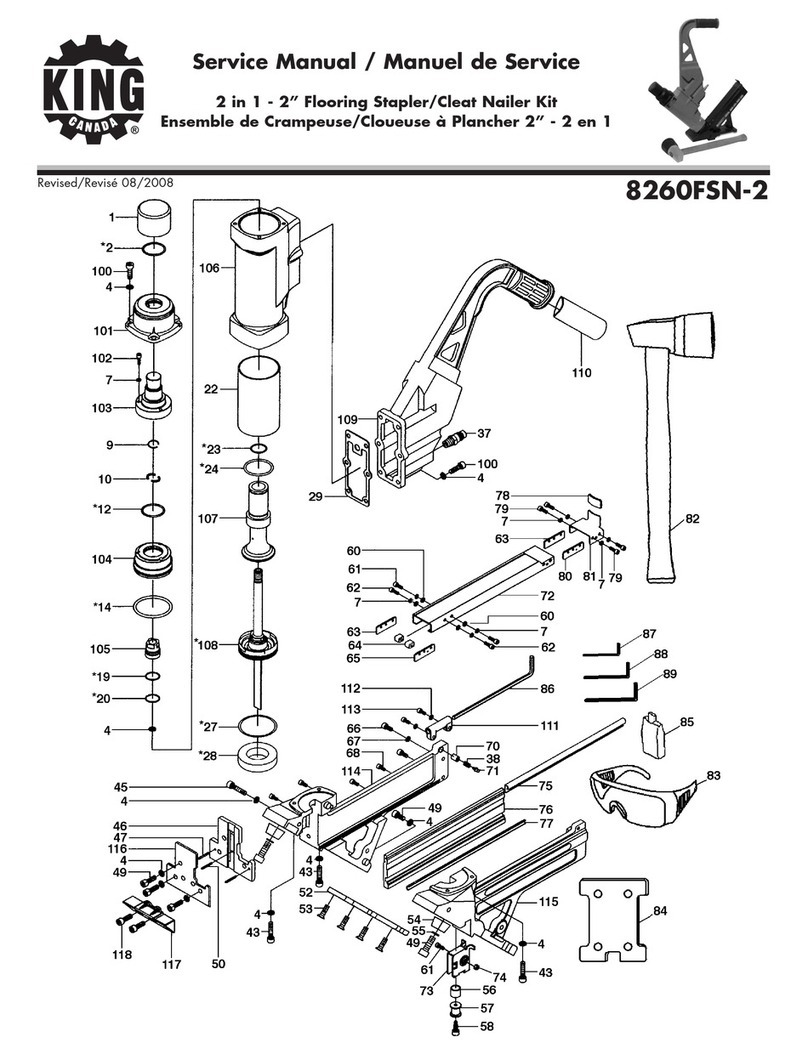
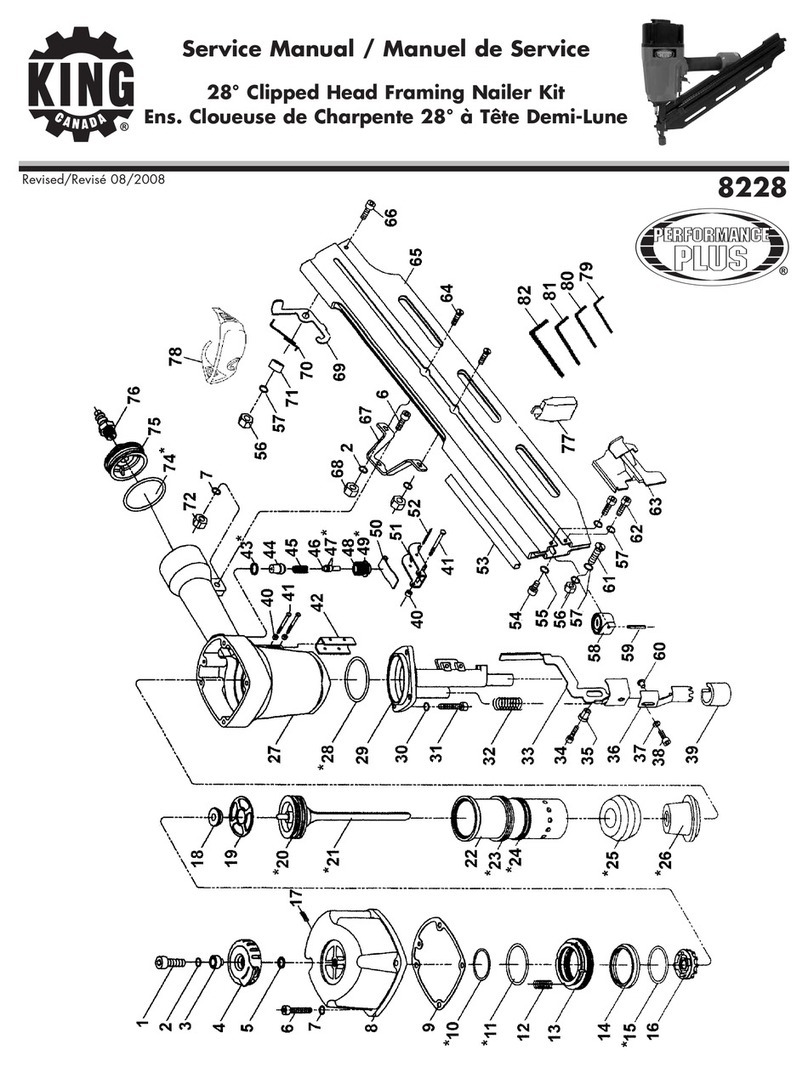
King Canada 8235GFN User manual

INSTRUCTION MANUAL
COPYRIGHT ©2009 ALL RIGHTS RESERVED BY KING CANADA TOOLS INC.
MODEL: 8235GFN
34º CLIPPED HEAD
CORDLESS GAS FRAMING NAILER
plusplus
performanceperformance

WARRANTY INFORMATION
2-YEAR
LIMITED WARRANTY
FOR THIS CORDLESS GAS FRAMING NAILER
KING CANADA TOOLS
OFFERS A 2-YEAR LIMITED WARRANTY
FOR NON-COMMERCIAL USE.
PROOF OF PURCHASE
Please keep your dated proof of purchase for warranty and servicing purposes.
REPLACEMENT PARTS
Replacement parts for this product are available at our authorized King Canada service centers across Canada.
LIMITED TOOL WARRANTY
King Canada makes every effort to ensure that this product meets high quality and durability standards. King Canada warrants to the
original retail consumer a 2-year limited warranty as of the date the product was purchased at retail and that each product is free from
defects in materials. Warranty does not apply to defects due directly or indirectly to misuse, abuse, normal wear and tear, negligence
or accidents, repairs done by an unauthorized service center,alterations and lack of maintenance. King Canada shall in no event be
liable for death, injuries to persons or property or for incidental, special or consequential damages arising from the use of our products.
To take advantage of this limited warranty, return the product at your expense together with your dated proof of purshase to an
authorized King Canada service center. Contact your retailer or visit our web site at www.kingcanada.com for an updated listing of our
authorized service centers. In cooperation with our authorized serviced center,King Canada will either repair or replace the product if
any part or parts covered under this warranty which examination proves to be defective in workmanship or material during the
warranty period.
NOTE TOUSER
This instruction manual is meant to serve as a guide only.Specifications and references are subject to change without prior notice.
KING CANADA INC. DORVAL, QUÉBEC, CANADA H9P 2Y4
www.kingcanada.com

GENERAL & SPECIFIC
SAFETY INSTRUCTIONS
1. KNOW YOUR TOOL
Read and understand the owners manual and labels affixed to the
tool. Learn its application and limitations as well as its specific
potential hazards.
2. KEEP WORK AREA CLEAN.
Cluttered areas and benches invite accidents. Make sure the floor
is clean and not slippery due to wax and sawdust build-up.
3. AVOID DANGEROUS ENVIRONMENT.
Don’t use power tools in damp or wet locations or expose them to
rain. Keep work area well lit and provide adequate surrounding work
space.
4. KEEP CHILDREN AWAY.
All visitors should be kept a safe distance from work area.
5. USE RIGHT TOOL.
Don’t force the tool or the attachment to do a job for which it was
not designed.
6. WEAR PROPER APPAREL.
Do not wear loose clothing, gloves, neckties or jewelry (rings,
watch) because they could get caught in moving parts. Non-slip
footwear is recommended. Wear protective hair covering to contain
long hair.Roll up long sleeves above the elbows.
7. ALWAYS WEAR SAFETY GLASSES.
Always wear safety glasses (ANSI Z87.1). Everyday eyeglasses
only have impact resistant lenses, they are NOT safety glasses.
8. DON’T OVERREACH.
Keep proper footing and balance at all times.
9. MAINTAIN TOOL WITH CARE.
Keep tools sharp and clean for best and safest performance. Follow
instructions for lubricating and changing accessories.
10. DISCONNECT TOOLS.
Before servicing, when changing accessories or attachments.
11. USE RECOMMENDED ACCESSORIES.
Consult the manual for recommended accessories. Follow the
instructions that accompany the accessories. The use of
improper accessories may cause hazards.
12. CHECK DAMAGED PARTS.
Before further use of the tool, a guard or other parts that are
damaged should be carefully checked to ensure that they will
operate properly and perform their intended function. Check for
alignment of moving parts, breakage of parts, mounting, and any
other conditions that may affect its operation. A guard or other
parts that are damaged should be properly repaired or replaced.
Read and understand tool labels and all of the operating
instructions, safety and warnings in this manual before operating
or maintaining this nailer. Failure to follow warning could result in
death or serious injury.
This nailer is powered by internal combustion device (fuel cell). This
nailer shall only be used with dispensers of combustible gas which are
listed in this instruction manual.
1. OPERATOR MUST WEAR SAFETY GLASSES WITH SIDE
SHIELDS.
When operating the nailer, always wear safety glasses with side
shields, and make sure other in work area wear safety glasses too.
2. NEVER USE IN PRESENCE OF FLAMMABLE LIQUIDS OR
GASES.
This nailer must not be used in a combustible environment or in the
presence of flammable liquids or gases, e.g. lacquer,paint,
benzine, thinner or gasoline. This nailer produces hot exhaust
gases that may ignite flammable materials and produces
sparks during operation.
3. DO NOT TOUCH AROUND THE EXHAUST OUTLET.
This nailer produces hot exhaust gases that may ignite materials.
The push lever and nose will become hot and get heated up after
prolonged or rapid use. Do not touch with bare hands.
4. EXPLOSION AND FIRE HAZARD.
The fuel cell is an aerosol dispenser with flammable contents. Keep
the nailer, fuel cells and battery away from sunshine and from
temperature exceeding 50°C(120°F). Fuel cell and/or battery may
burst, releasing flammable gas. Do not pierce or burn the
container, even after use. Do not incinerate, refill, reclaim or
recycle the fuel cell. Do not spray on a naked flame or any
incandescent material. Keep away from ignition sources - no
smoking. Keep out of reach of children.
5. NEVER POINT TOOL AT YOURSELF OR OTHERS.
Always assume the nailer contains fasteners. Never point the nailer
at yourself or others, whether it contains fasteners or not. If
fasteners are mistakenly driven, it can lead to severe injuries.
continued on following page.....
SPECIFIC SAFETY INSTRUCTIONS FOR CORDLESS GAS FRAMING NAILER

SPECIFIC SAFETY INSTRUCTIONS
FOR CORDLESS GAS FRAMING NAILER
6.USE OUTSIDE OR IN WELL-VENTILATED AREAS.
This nailer exhausts carbon monoxide which is a danger to health
when inhaled. This nailer must not be used in enclosed or poorly
ventilated areas. Do not inhale.
7. OPERATE WITHIN PROPER TEMPERATURE RANGE.
The operating environment for this nailer is between 0°C (32°F)
and 40°C (104°F) so ensure use within this temperature range.
This nailer may fail to operate below 0°C (32°F) or above 40°C
(104°F).
8. STORE NAILER WITH FUEL CELL AND BATTERY REMOVED.
When not in use, the nailer, fuel cell and battery should be stored
in tool case and in a dry place. Store indoors at temperature below
50°C (120°F). Keep the nailer, fuel cell and battery out of direct
sunlight and outside a vehicle. Keep out of reach of children. Lock
in a storage area.
9. CHECK PUSH LEVER BEFORE USE.
Remove fuel cell and battery,and then make sure the push lever
operates properly. (The push lever may be refered as a “safety”).
Never use the nailer unless the push lever is operating properly,
otherwise the nailer could drive a fastener unexpectedly. Do not
tamper with or remove the push lever,otherwise the push lever
becomes inoperable.
10. DO NOT LOAD FASTENERS WITH TRIGGER OR PUSH LEVER
DEPRESSED.
When loading fasteners into the nailer, do not depress the trigger,
do not depress the push lever and keep the nailer pointed
downward.
11. PLACE NAILER PROPERLY ON WORKPIECE.
Do not drive fasteners on top of other fasteners or with the nailer at
too steep of an angle; the fasteners can ricochet and hurt
someone.
12. DO NOT DRIVE FASTENERS INTO THIN BOARDS OR NEAR
CORNERS AND EDGES OF WORKPIECE.
The fasteners can be driven through or away from the workpiece
and hit someone.
13. NEVER USE ANAILER WHICH IS DEFECTIVE OR OPERATING
ABNORMALLY.
If the nailer appears to be operating unusually,making strange
noises or otherwise appears defective, stop using it immediately
and arrange for repairs by an authorized service centre.
14. TAKE FUEL CELL AND BATTERY OUT OF NAILER.
Take fuel cell and battery out of nailer when doing maintenance and
inspection, clearing a jam, when it is not in use, when you are
leaving work area, moving it to another location or handing it to
another person. Never attempt to clear a jam or repair the
nailer unless you have taken fuel cell and battery out of the
nailer and removed all remaining fasteners from the nailer. The
nailer should never be left unattended since people who are not
familiar with the nailer might handle it and injure themselves.
15. HANDLE NAILER CAREFULLY.
Do not drop the nailer or strike the nailer against hard surfaces and
do not scratch or engrave signs on the nailer.
16. NEVER MODIFY OR ALTER THIS NAILER.
Doing so may cause it to malfuction and personal injuries may
result.
17. DISPOSAL OF THE EXHAUSTED BATTERY.
Do not dispose of the exhausted battery. The battery will explode if
it is incinerated. The product that you have purchased contains two
rechargeable batteries. These batteries are recyclable. At the end
of their useful life, under various state and local laws, it may be
illegal to dispose of these batteries into the municipal waste
stream. Check with your local solid waste officials for details in your
area for recycling options or proper disposal.
FUEL CELLS
WARNING! Fuel cell, fuel and propellant are flammable under
pressure.
1. Explosion / Fire Hazard
Failure to follow all instructions may result in fire and explosion
when handling dispensers of combustible gas for the purpose of
storage, transportation, inserting into and taking out of the tool and
disposal.
Do not smoke when handling the fuel cell.
2. Do not inhale its contents.
In the case of being inhaled, the person affected should be taken
into open air and brought into a comfortable position.
3. Expanding gases cause low temperatures.
Fluid gases might cause injuries when getting in touch with skin or
eyes. In case of contact with skin, wash the contact surface
carefully with warm water and soap and apply a skin cream when
dry. In case of contact with eyes, rinse the open eyes under running
water. Contact a doctor if necessary.
4. Store in well-ventilated area.
Do not store above 50°C (120°F) (e.g. direct sunlight or in a vehicle.)
Do not expose to an open flame and sparks.
Do not puncture or open the fuel cell.
Do not refill, reclaim or recycle the fuel cell.
5. Dispose of according to local regulations for aerosol products.
Do not dispose of fuel cell with other scrap for recycling. Keep out
of reach of children.
BATTERIES
Improper use or the battery or battery charger can lead to serious
injury. To avoid these injuries.
1. Never disassemble the battery.
2. Never incinerate the battery,even if it is damaged or is completely
worn out. The battery can explode in a fire.
3. Never insert any objects into the battery charger’s air vents. Electric
shock or damage to the battery charger may result.
4. Never charge outdoors. Keep the battery away from direct sunlight
and use only where there is low humidity and good ventilation.
5. Never charge when the temperature is below 10°C (50°F) or above
40°C (104°F).

GETTING TO KNOW YOUR TOOL
SPECIFICATIONS
34º Cordless Gas Framing Nailer
Model ......................................................................................................................................................................................8235GFN
Nail degree range ................................................................................................................................................300-340paper collated
Nail length range ....................................................................................................................................2” to 3-1/2” clipped head nails
Nail diameter range........................................................................................................................................................0.113” to 0.131”
Clipped head diameter range ........................................................................................................................................0.226” to 0.303”
Nailer discharge rate ................................................................................................................................2 nails/sec., 1,000 nails/hour
Magazine capacity ..............................................................................................................................................50 paper collated nails
Battery type ..................................................................................................................................................................6V, 1.8Ah Ni-Mh
Battery charge time ................................................................................................approx. 1 hour (varies depending on temperature)
Recommended nails ....................................................................................................................................PaslodeTM-340,SencoTM-340
Recommended fuel cells ................................................................................PaslodeTM-mod.816000, 816050, SencoTM-mod. PC1192
1. Air intake
2. Fuel cell cover latch
3. Fuel cell cover
4. Trigger
5. Battery indicator light (green=ready, red=recharge)
6. Battery latch
7. 6V,1.8Ah Ni-Mh battery (1 of 2)
8. Paper collated nail strip insertion area
9. Nail charger
10. Feeder knob
11. Nail feeder latch
12. Push lever (safety) & depth adjustment
13. Exhaust outlet
14. 6V,1.8Ah Ni-Mh battery (2 of 2)
15. Battery charger pilot light (green=charged, red=charging)
16. Battery charger
Paslode is a registered trademark of Illinois Tool Works Co, Ltd.
Senco is a registered trademark of Senco Products Inc.

PREPARING NAILER BEFORE USE
CHARGING BATTERY BEFORE INITIAL USE
Warning! Do not charge battery using a higher voltage than indicated on the charger nameplate
orelse the charger will burn up. If charger power cord is damaged, have it replaced before
attempting to charge battery.
1. Insert the battery (A) Fig.1 into the battery charger (B). Make sure it contacts the bottom of the
charger.
2. Plug the charger power cord into a polarized 120V receptacle.
3. Once the charger is plugged, the charger pilot light (C) will turn on and the charging of the
battery will begin. A red pilot light indicates the battery is charging. In approximately 60
minutes, at 200C, when the battery is fully charged the pilot light will turn green.
Note: The battery charging time becomes longer when the temperature is low or the voltage is
too low. If charging for more than 100 minutes and the pilot light still has not turned green, stop
charging battery and contact an authorized service centre.
4. Once battery is charged, disconnect the power cord from the receptacle and pull out the
battery.
Regarding electric discharge in case of new batteries
As the internal chemical substance of new batteries and batteries that have not been used for an extended period is not activated, the electric
discharge might be low when using them the first or second time. This is a temporary phenomenon, and normal time required for recharging will
be restored by charging the batteries 2-3 times.
How to make the batteries perform longer
Recharge the batteries before they become completely exhausted. Once you feel that the power of the tool becomes weaker,stop using the tool
and recharge its battery. If you continue to use the tool and exhaust the electric current, the battery may be damaged and its life will become
shorter.Avoid recharging at high temperatures. A rechargeable battery gets hot after use, if such battery is recharged immediately after use, its
internal chemical sustance will deteriorate, battery life will be shortened. Recharge battery once is has cooled down, this also applies to the
charger.
WORKING ENVIRONMENT
Warning! Use outside in well ventilated area. Keep away from ignition sources such as flammable gas, liquid
or other flammable objects, do not smoke. Keep nailer,fuel cell and batteries away from temperatures
exceeding 500C(1200F).
Cold weather care
Do not store the nailer, fuel cell and batteries in a cold weather environment. Keep the nailer, fuel cell and
batteries in a warm area until beginning work. If they are already cold, bring them in a warm area and allow the
nailer to warm up before use. This nailer may not drive completely if fuel cell is too cold, fuel cell will loose the
required propellant force. If fuel cell is too hot, fuel cell will overdose. Do not use this nailer in rain or where
excessive moisture is present. This nailer is not recommended for use in temperatures below 00C(320F).
INSTALLATION AND REMOVAL OF BATTERY
Installation of battery: Align the battery (A) Fig.2 with the groove in the tool handle and slip it into
place. Insert it all the way until the battery latch (B) clicks and lock the battery in place.
Removal of battery: Remove the battery (A) Fig.2 from the tool handle while pressing the battery
latch (B).
Battery Indicator Light
This nailer comes with a built-in battery indicator light (C) Fig.2.
Flashing GREEN:Enough power remaining (the light turns steady during operation).
Flashing RED:Insufficient power remaining, recharge battery or replace with fully charged
battery.
Figure 1
Figure 2

PREPARING THE FUEL CELL (sold separately)
Warning! Read SPECIFIC SAFETY INSTRUCTIONS FOR FUEL CELLS before proceeding with fuel cell
installation.
Recommended fuel cells: PaslodeTMmod. 816000, 816050 and Senco mod. PC1192.
Paslode is a registered trademark of Illinois Tool Works Co, Ltd. Senco is a registered trademark of Senco Products Inc.
DANGER!
-The fuel cells are flammable.
-Keep away from ignition sources.
-Do not spray to a naked flame or incandescent material.
- Do not smoke when handling fuel cells.
-Keep stem of fuel cell away from face or skin. Expanding gases cause low temperatures.
-Do not inhale.
-Keep out of reach of children.
CAUTION!
-If the gas leaks from the metering valve or the gas cartridge after attached the metering
valve, replace with new metering valve.
- Do not attempt to use a damaged metering valve. Replace with new metering valve.
Attaching metering valve to fuel cell. Fig.3.
1. Seperate the metering valve (A) Fig.3 and the cap from the fuel cell (B).
2. Press forward (stem side) and downward on the front side of the metering valve.
3. Press downward on the rear of the metering valve until it seals.
Check metering valve:
Press the metering valve stem on fuel cell two or three times against a stationary object
and release. If gas is not dispersed, fuel cell is empty. Replace it.
The fuel cell is now ready to insert into the nailer.
INSERTING FUEL CELL INTO NAILER
1. Pull the fuel cell cover latch (A) Fig.4 and open the fuel cell cover (B).
2. Make sure the fuel cell adaptor (E) is in position as shown and then insert the fuel cell
(C) into nailer.
3. Insert the stem (D) of the fuel cell into the slot of adaptor (E).
4. Close the fuel cell cover.
RECOMMENDED PAPER COLLATED CLIPPED HEAD FRAMING NAILS
(sold separately) Fig.5
Recommended framing nails: PaslodeTM 340clipped head framing nails and SencoTM
340clipped head framing nails
Paslode is a registered trademark of Illinois Tool Works Co, Ltd. Senco is a registered trademark of Senco Products Inc.
Nail degree range: 300-340paper collated
Nail length range: 2” to 3-1/2” clipped head nails
Nail diameter range: 0.113” to 0.131”
Clipped head diameter range: 0.226” to 0.303”
Magazine capacity: 50 paper collated framing nails
Note: This nailer employs a preventive mechanism for unloaded operation. This nailer
enters a state where the push lever cannot be pushed up. This happens when the
magazine is not loaded with nails or when the remaining number of nails becomes less
than 7 or 8.
PREPARING NAILER BEFORE USE
Figure 3
Figure 4
Figure 5
Only nails shown in illustration above can be driven by this framing nailer.This
nailer is not recommended for use with 3” - 3-1/2” ring shank nails.

TESTING NAILER BEFORE LOADING FRAMING NAILS
WARNING! Before actually beginning the nailing work, test the nailer by using the instructions below.
Conduct the tests in the following order. If abnormal operation occurs, stop using the nailer and contact
anauthorized service centre immediately.
1. Remove your finger from the trigger (A) Fig.6 and press the push lever (safety) (B) against the
workpiece and pull back the feeder knob (C).
-THE NAILER MUST NOT OPERATE.
2. Seperate the push lever (B) from the workpiece. Next, point the nailer downward, pull the trigger (A)
and then wait in that position for 5 seconds or longer.
-THE NAILER MUST NOT OPERATE.
3. Without touching the trigger (A), depress the push lever (B) against the workpiece. Pull the trigger.
-THE NAILER MUST OPERATE.
4. If no abnormal operation is observed, you may load nails in the nailer.Drive nails into the workpiece that is the same type to be used in the
actual application.
-THE NAILER MUST OPERATE.
LOADING/REMOVING PAPER COLLATED FRAMING NAILS
WARNING! When loading framing nails into nailer,do not depress trigger,do not
depress push lever (safety) and keep nailer pointed downward.
1. Insert framing nail strip into the back of the magazine, see Fig.7.
2. Slide the nail strip forward into the magazine using your fingers.
3. Push down on the nail feeder latch (A) Fig.7 and then pull the nail feeder knob (B)
past the rear of the framing nail strip inside the magazine. To avoid damaging the
connecting paper of the nail strip, slowly release and nail feeder latch and knob to
secure nail strip in magazine. Make sure you have installed a framing nail strip of
more than 10 framing nails.
4. To remove a framing nail strip from the magazine, push down on the nail feeder
latch (A) Fig.7, pull the nail feeder knob (B) backwards slightly then push it forward
passed the framing nail strip inside the magazine, remove framing nail strip by
sliding it out of the magazine.
TESTING & PREPARING NAILER
BEFORE USE
Figure 7
Figure 6

OPERATION
Read and understand tool labels and all of the operating instructions, safety and warnings in this
manual before operating or maintaining this nailer. Failure to follow warning could result in death or
serious injury.
This nailer is powered by internal combustion device (fuel cell). This nailer shall only be used with fuel cells
which are listed in this instruction manual.
1. OPERATOR MUST WEAR SAFETY GLASSES WITH SIDE SHIELDS.
When operating the nailer, always wear safety glasses with side shields, and make sure other in work
area wear safety glasses too.
2. NEVER USE IN PRESENCE OF FLAMMABLE LIQUIDS OR GASES.
This nailer must not be used in a combustible environment or in the presence of flammable liquids or
gases, e.g. lacquer, paint, benzine, thinner or gasoline. This nailer produces hot exhaust gases that
may ignite flammable materials and produces sparks during operation.
3. DO NOT TOUCH AROUND THE EXHAUST OUTLET.
This nailer produces hot exhaust gases that may ignite materials. The push lever and nose will become hot and get heated up after prolonged
or rapid use. Do not touch with bare hands.
4. EXPLOSION AND FIRE HAZARD.
The fuel cell is an aerosol dispenser with flammable contents. Keep the nailer, fuel cells and battery away from sunshine and from
temperature exceeding 50°C (120°F). Fuel cell and/or battery may burst, releasing flammable gas. Do not pierce or burn the container, even
after use. Do not incinerate, refill, reclaim or recycle the fuel cell. Do not spray on a naked flame or any incandescent material. Keep away
from ignition sources - no smoking. Keep out of reach of children.
OPERATION
This nailer is equipped with a FULL SEQUENTIAL ACTUATION MECHANISM. This nailer is equipped with
push lever and does not operate unless the push lever is depressed (upward position).
Note: This nailer employs a preventive mechanism for unloaded operation. This nailer enters a state where
the push lever cannot be pushed up. This takes place when the magazine is not loaded with nails or when
the remaining number of nails becomes less than 7 or 8.
1. Position the nailer push lever (safety) (A) Fig.8 on the workpiece with finger off the trigger (B).
2. Depress the push lever firmly until is completely depressed.
3. Pull and squeeze the trigger to drive a nail.
4. Remove finger from the trigger.
5. To continue nailing in a seperate location, move the nailer along the wood,repeating steps 1-4 as required.
CAUTION! Use caution not to throw the push lever tip onto wood when the push lever cannot be pushed up.
Squeeze the trigger when driving a nail, otherwise the piston cannot return correctly.
ADJUSTING THE NAILING DEPTH
To assure that each nail penetrates to the same depth, be sure that the nailer is always held firmly against
the workpiece. If nails are driven too deep or too shallow into the workpiece, adjust the nailing depth in the
following order.
1. Remove the fuel cell (A) Fig.9 and the battery (B) from the nailer.
2. Loosen the centre cap screw (C) with hex. key.
3. If nails are driven too deep, move the push lever (D) forward. If nails are driven too shallow, move the push
lever (D) backward.
4. Stop moving the push lever when a suitable position is reached for a nailing test. Retighten centre cap
screw (C).
5. Connect the fuel cell and the battery to the nailer.ALWAYS WEAR SAFETY GLASSES. Perform a nailing
test.
6. If further adjustment is needed, repeat steps 1-5.
Figure 8
Figure 9

OPERATION & MAINTENANCE
CLEARING JAMMED NAIL
If nails are jammed in the firing head, open nailer and remove jammed nail in the
following order.
1. Remove the fuel cell (A) Fig.10 and the battery (B) from the nailer.
2. Remove paper collated nail strip from the nailer magazine.
3.Remove both cap screws (C), cap screw sleeves (D) and the internal spacers
(E) from the nailer using a hex. key.
4. Pull firing head away from the magazine and clear jam using pliers.
5. Once jam is cleared, reassemble the firing head to the magazine using the same
parts removed in step 3. Internal spacers must be repositioned with the convex
side facing the magazine.
6. Connect the fuel cell and the battery to the nailer.
USING THE RAFTER/BELTHOOK
CAUTION! If this framing nailer falls, there is a risk that malfunction and/or
physical damage can occur.It is recommended that you use the supplied rafter/belt
hook as well as fall-preventing wires, etc.
To use the hook (A) Fig.11, simply pull it out from the magazine. When not using the hook, push it back
in towards the magazine.
MAINTENANCE
Warning! Before making adjustments, maintenance and inspection, remove the fuel cell and battery from
the nailer.
Cleaning
Regular cleaning and lubrication will extend the life of your nailer and will provide maximum nail driving
power.Use a degreaser to clean nailer, make sure the selected degreaser will not damage rubber, o-rings
inside this nailer are made of rubber, chemical damage to these o-rings may render nailer inoperable. Use
degreaser on the cylinder head, wipe degreaser off using a clean, lint-free cloth. Use lubricating oil on
0-rings, make sure it is applied evenly. The cleaning interval depends on the number of nails driven and
the operating conditions, see Fig.12 as reference. If the operating condition is very dirty, it will be
necessary to clean the nailer after 20,000 nails are driven. It is recommended to use this nailer is the
cleanest conditions possible.
Storage
Store nailer with fuel cell and battery removed. When not in use, the nailer, fuel cell and batteries should
be stored in the carrying case and in a dry place. When not in use for an extended period, apply a thin
coat of lubricant to the steel parts to avoid rust. Do not store in a cold weather environment, keep them
in a warm area.
Cleaning or replacing spark plug
If you notice that the fan is working, the battery indicator light shows a flashing green light yet the
nailer doesn’t drive a nail, it may be required to clean or replace the internal combustion spark plug,
especially after 50,000 shots. To do this, remove the 4 cap screws that fix the air intake cover to the
nailer, pivot the intake cover to the opened position.
Pull the spark plug wire (A) Fig.13 off the spark plug (B). Using the appropriate socket wrench, loosen
and remove the spark plug, clean it or replace it with the replacement spark plug supplied with this
kit. Reinstall the spark plug wire to the top of the spark plug. Close the air intake cover and secure it
in place using the same 4 cap screws removed earlier.
Figure 10
Figure 11
Figure 13
50,000
40,000
30,000
20,000
0
Clean Moderate Dirty Very dirty
OPERATING CONDITIONS
NAILS DRIVEN
Figure 12

TROUBLESHOOTING
PROBLEM CHECK METHOD CORRECTION
Nailer operates, but no
nail is driven.
Check for a jam. Clear a jam.
Check function of nail feeder.
Ribbon spring weakened or damaged?
Check for proper nails.
Check if the driver blade is down or not
Clean and lubricate.
Replace ribbon spring.
Use only recommended nails
Push the driver blade with a slotted-head
screw driver,and put back the piston to the
highest position.
Skipping nails,
intermittent feed.
Check for proper nails.
Check function of nail feeder.
Ribbon spring weakened or damaged?
Nail feeder worn or damaged?
Check for returning of piston
Check for proper nails.
Check for moving of piston smoothly.
Check push lever’smoving track, debris?
Use only recommended nails.
Clean and lubricate.
Replace ribbon spring.
Replace nail feeder.
Pull the trigger all the way.
Too low temperature, warm up fuel cell under
50°C(120°F).
Contact local dealer for replacement.
Replace piston.
Replace piston ring.
Replace cylinder o-ring.
Nails jam.
Driven nail is bent.
Check for proper nails.
Driver blade worn.
Nail feeder worn or damaged?
Use only recommended nails.
Contact local dealer for replacement.
Contact nail feeder.
The operation of the push
lever not smooth.
Push lever bent?
Check push lever’s moving track, debris?
Contact local dealer for replacement.
Fan is working, light
indicator shows GREEN
yet it doesn’t drive a nail
or operation unstable.
Check for returning of piston
Check fuel cell, insufficient?
Check spark plug wire, worn out?
Check spark plug, grease or debris?
Pull the trigger all the way.
Too low temperature, warm up fuel cell under
50°C (120°F).
Exchange it with a new fuel cell.
Contact local dealer for replacement.
Check filter,clogged?
Fan does not operate
when push lever is
pressed.
Magazine empty.
Note the color of light indicator.
Load more nails in the magazine.
If red: charge the battery.
If green: contact local dealer for replacement.
Unable to charge battery. Check the electrical cord.
Other control malfuction. Remove the battery and reinstall it.
ACTION WHY HOW
Clean magazine and
feeder mechanism. Prevent a jam. Blow clean daily.
Keep push lever working
properly.
Promote operator safety and efficient nailer
operation. Blow clean daily.
PARTS DIAGRAM & PARTS LISTS
Refer to the Parts section of the King Canada web site for the most updated parts diagram and parts list.
Table of contents
Other King Canada Nail Gun manuals

King Canada
King Canada 8201N User manual

King Canada
King Canada 8260FSN-2 User manual

King Canada
King Canada 8125N User manual

King Canada
King Canada 8225N User manual

King Canada
King Canada 8234 User manual

King Canada
King Canada 8201NL User manual

King Canada
King Canada 8228N User manual

King Canada
King Canada 8201N User manual

King Canada
King Canada 8225NL User manual

King Canada
King Canada 8260FSN-2 User manual