manuals.online logo
Brands
  1. Home
  2. •
  3. Brands
  4. •
  5. Kingkraft
  6. •
  7. Bathtub
  8. •
  9. Kingkraft Multibath SE User manual

Kingkraft Multibath SE User manual

Instructions for use
Multibath SE
PLEASE READ THESE INSTRUCTIONS CAREFULLY BEFORE USE
Contents
yGeneral description
yImportant safety information
yCleaning
yOperating instructions
yTap options
yWhirlpool lights and music
yBathing cushions and supports
yInstallation
yMaintenance
ySample bath markings
yGuarantee
GENERAL DESCRIPTION
The Multibath SE is designed to be used in Hospitals, Nursing and
Residential homes and domestic properties.
This bath is used to assist the carers in the bathing of a person who
generally has some reduction in mobility by raising and lowering the bath
to a convenient height. The traversing seat allows transfer in and out of the
bath.
WARNING: PROVISION MUST BE MADE TO BE ABLE
TO REMOVE THE USER FROM THE BATH SAFETLY
IN CASE OF EMERGENCY OR POWER FAILURE. THIS
MUYT BE FEASABLE WHEN THE BATH IS IN ANY OF
ITS RAISED POSITIONS. (I.E A MOBILE HOIST IN CASE
THE CEILING TRACK HOIST FAILS)
This user manual should be read thoroughly before use and we would
recommend putting laminated user and safety instructions on the wall
for other carers / users. Please ask Kingkraft if you would like some
copies.
WARNING!
IMPORTANT
SAFETY INSTRUCTIONS
WARNING: ANY PERSON WHO IS INCAPABLE OF FULLY HELPING
THEMSELVES MUST NEVER BE LEFT ALONE IN THE BATH-EVEN FOR A
SHORT WHILE
yThis manual contains information on the standard Multibath SE. Special
designed baths by Kingkraft may dier from herein. Please contact
Kingkraft if you have any queries on how to use your product.
yDo not stand in the bath at any time
yKingkraft products are intended for domestic and commercial use only
yKingkraft baths are intended for bathing people only
yDo not exceed the maximum weight load 133kg (21st)
yOnly one person should be in the bath at one time
yOnly Kingkraft manufactured accessories have been tested by Kingkraft
for safe use with this bath under normal conditions of use.
yThe bath is tted with a handset, this should not be submerged in the
water, if it happens to fall in, quickly wipe it dry and see advice if unsure
yNote that UK regulations, in general, no person should lift a mass greater
than 25kg unaided. Use appropriate lifting equipment if this is required to
help disabled people to get in and out of the bath.
CLEANING
Certain bath additives may damage the bath, if the contain bleach or other
corrosives due to the product the bath is made from. Use only water,
normal soaps and approved cleaning agents. Under no circumstances
should bleach be used.
We recommend Chemgene which can be purchased from Kingkraft.
Regular cleaning routines should be followed.
yDo not use pressurised jets
yDo not steam clean
yIf a whirlpool is tted, we recommend Bronte 6 month whirlpool cleaner
which can be purchased through Kingkraft
Cleaning the whirlpool (if tted)
Regular cleaning is recommended for the whirlpool.
yRemove all cushions and supports in the bath
yRinse any debris from the bath
yClose drain by operating pop-up waste control
yFill bath with water to a level of 25mm (1”) above the whirlpool jets
yPut in the whirlpool cleaner to the guidelines stated on packaging
yRun whirlpool for 15 minutes
yDrain bath
yFill bath with clean water to measurements as above
yRun whirlpool for 5 minutes
yDrain bath
yChemgene is also recommended for general cleaning of the bath.
RISK OF SCALDING
Although safety devices are tted to minimise any risk of scalding, users
must be aware that these are not fail safe. The temperature of the unit must
be independently veried on each occasion it is used-this should be tested
ideally with a calibrated thermometer.
Refer to Kingkraft if the water is too hot or too cold and do not use the bath
until the problem has been corrected
Operating instructions
This bath is mains powered and has a short life battery backup system in the
event of a power failure. This is for one time emergencies only.
Please note
The seat will only function with the bath in its lowest position
The bath will only raise / lower if the seat mechanism is inside the bath at its
lowest position.
To use the changing top with the bath:
yRaise bath to lowest position – ensuring the chair is inside the bath
yRemove the chair carefully=this will require at least two people to remove
this chair
yPlace the removable changing top securely onto the bath ensuring the
feet are secured into position
yThe bath can now be raised up and down
If required, the whole seat and arm may be removed for cleaning by unscrewing
the knob on top of the lifting column. Please take care when replacing the seat
that it locates securely in the correct position with the protecting locator screw
properly inserted into the slot provided.
‘Please note, this chair is very heavy and needs to be moved with care. Two people
are required to remove and ret this chair.’
Raise seat up Lower seat down
Raise bath up Lower bath down
To raise the bath:
Firstly check the raising the bath will not cause damage to persons who
surrounding objects. If all clear, press the up button on the handset.
To lower the bath:
Firstly check the raising the bath will not cause damage to persons who
surrounding objects. If all clear, press the down button on the handset.
If the unit fails to operate, check the power supply is turned onto the bath.
Operating the seat
The Multibath SE has a powered lift and traverse seat.
To operate the seat, rst ensure the user is comfortable in the seat with the
straps as required. Ensure the users and operators hands are clear of any
potential trapping hazard.
yLower the bath to its lowest position
yPress the handset button (as shown in the picture above) and the seat will
rise automatically outwards at the top of its stroke
yIt will continue to move through its cycle as long as the button is
depressed.
yEnsure the users legs are helped to clear the side of the bath
yWhen the seat has reached the end of its travel in either direction,
pressing the other seat button will reverse the process.
Tap options
TMV3 mixer tap bath ll
RADA Sense bath TMV3-bath ll only
CAT 3 Shower Option CAT 5 Shower Option
RADA Sense Bath / shower TMV3-bath /
shower ll
RADA Autotherm TMV3 Mixer tap bath/
shower ll
To ll the bath
If the bath has been supplied with a Opac Caremix H3 Thermostatic
Mixer Tap
Turn the left hand lever top regulate the temperature and turn the right hand
lever to turn the tap on and regulate the pressure..
If the bath has been supplied with a Rada Authomerm-3 Thermostatic
Mixer Tap
Turn the main ow lever to the right hand side of the unit, which will begin the
water ow from the tap spout. To stop the ow, turn the lever to the middle
position, above the spout. The temperature can be adjusted by using the
temperature control knob on the top of the mixer tap.
If the bath has been supplied with a Rada Sense Digital Adjustable
Mixer Valve System
The control panel can be mounted on the bath tub, a bracket or wall mounted
near to the bath.
Move your hand in front of the ‘bath ll’ symbol / sensor to start the ow of water.
The temperature of the water can be increased by holding / waving a hand in
front of the red ‘hot’ sensor on the right of the control panel. The temperature of
the water can also be reduced by holding / waving a hand in front of the blue
‘cold’ sensor on the left of the control panel. Lights will indicate where between
the minimum and maximum temperature the water temperature is currently set.
To stop the bath lling, hold / wave a hand in front of the ‘bath ll’ symbol.
The above bath ll options should be set to a maximum temperature of 43°C
when the valve control is fully turned / set at its maximum. Always allow time for
the mixed water to run through the systems.
REMEMBER: THE TEMPERATURE OF THE WATER MUST BE CHECKED ON EVERY
OCCASION BEFORE A PERSON IS PLACED IN THE BATH OR THE SHOWER USED.
To use the optional hand shower unit
If the bath has been supplied with a Rada Authomerm-3 Thermostatic
Mixer Tap
Turn the main ow lever to the left hand side of the unit, which will begin
the shower ow. The lever automatically reduces the maximum hot water
temperature by 3 degrees from the bath ll maximum temperature. The
temperature can be adjusted by using the temperature control knob on the top
of the mixer tap.
If the bath has been supplied with a Rada Sense Digital Adjustable Mixer
Valve System
The control panel can be mounted on the bath tub, a bracket or wall mounted
near to the bath.
Move your hand in front of the ‘shower’ symbol / sensor to start the ow of water.
The temperature of the water can be increased by holding / waving a hand in
front of the red ‘hot’ sensor on the right of the control panel. The temperature of
the water can also be reduced by holding / waving a hand in front of the blue
‘cold’ sensor on the left of the control panel. Lights will indicate where between
the minimum and maximum temperature the water temperature is currently set.
To stop the shower, hold / wave a hand in front of the ‘shower’ symbol.
The above shower options should be set to a maximum temperature of 39°C
when the shower valve control is fully turned / set at its maximum.
Whirlpool, lights and music
(IF FITTED)
It is vital for safety and comfort that the operating, cleaning and disinfection
procedures contained in these instructions are followed. Some people with heart
and other medical conditions may be at increased risk when using the whirlpool.
Lights and music, please seek medical advice before using if unsure.
Please note if the bath is installed in a ‘multi-user’ environment, strict regulations
will have to be followed to keep the system regularly cleaned and tested.
Kingkraft can not be held responsible if these are not adhered to.
To start the whirlpool pump:
Press down the on/o control button
To increase the pressure in the bath, turn the control
button on the bath either clockwise to increase or
anti-clockwise to decrease.
Adjusting the eye ball jets:
Can be adjusted by placing a nger in the jet hole and
turning it to the desired position
Switch o:
Press the on/o button
Whirlpool pump protection
Should the whirlpool system be accidently operated at any time with insucient
water, the dry run protection unit will automatically switch the pump o. The
whirlpool system can only then be started when there is sucient water in the
bath. The whirlpool will automatically shut o after 20 minutes. You may restart if
required. Always have regard to the users medical condition and state of health
when using the whirlpool.
Note: Normal bubble baths will froth excessively with whirlpools and can pose a
major safety risk to the user and potentially cause damage to surrounding ttings.
Please refer to cleaning instructions on how to keep your whirlpool clean.
Lights
Your bath may also be tted with lights to help create a sensory experience whilst
bathing. Below are instructions on how to use. There may be risk to some users
with the lights, please check with medical experts before using if unsure.
Music
Your music is connected via Bluetooth via your Smart Phone or Tablet or a device
that has Bluetooth connections, you will nd the below mounted on your bath so
you can adjust the volume whilst bathing.
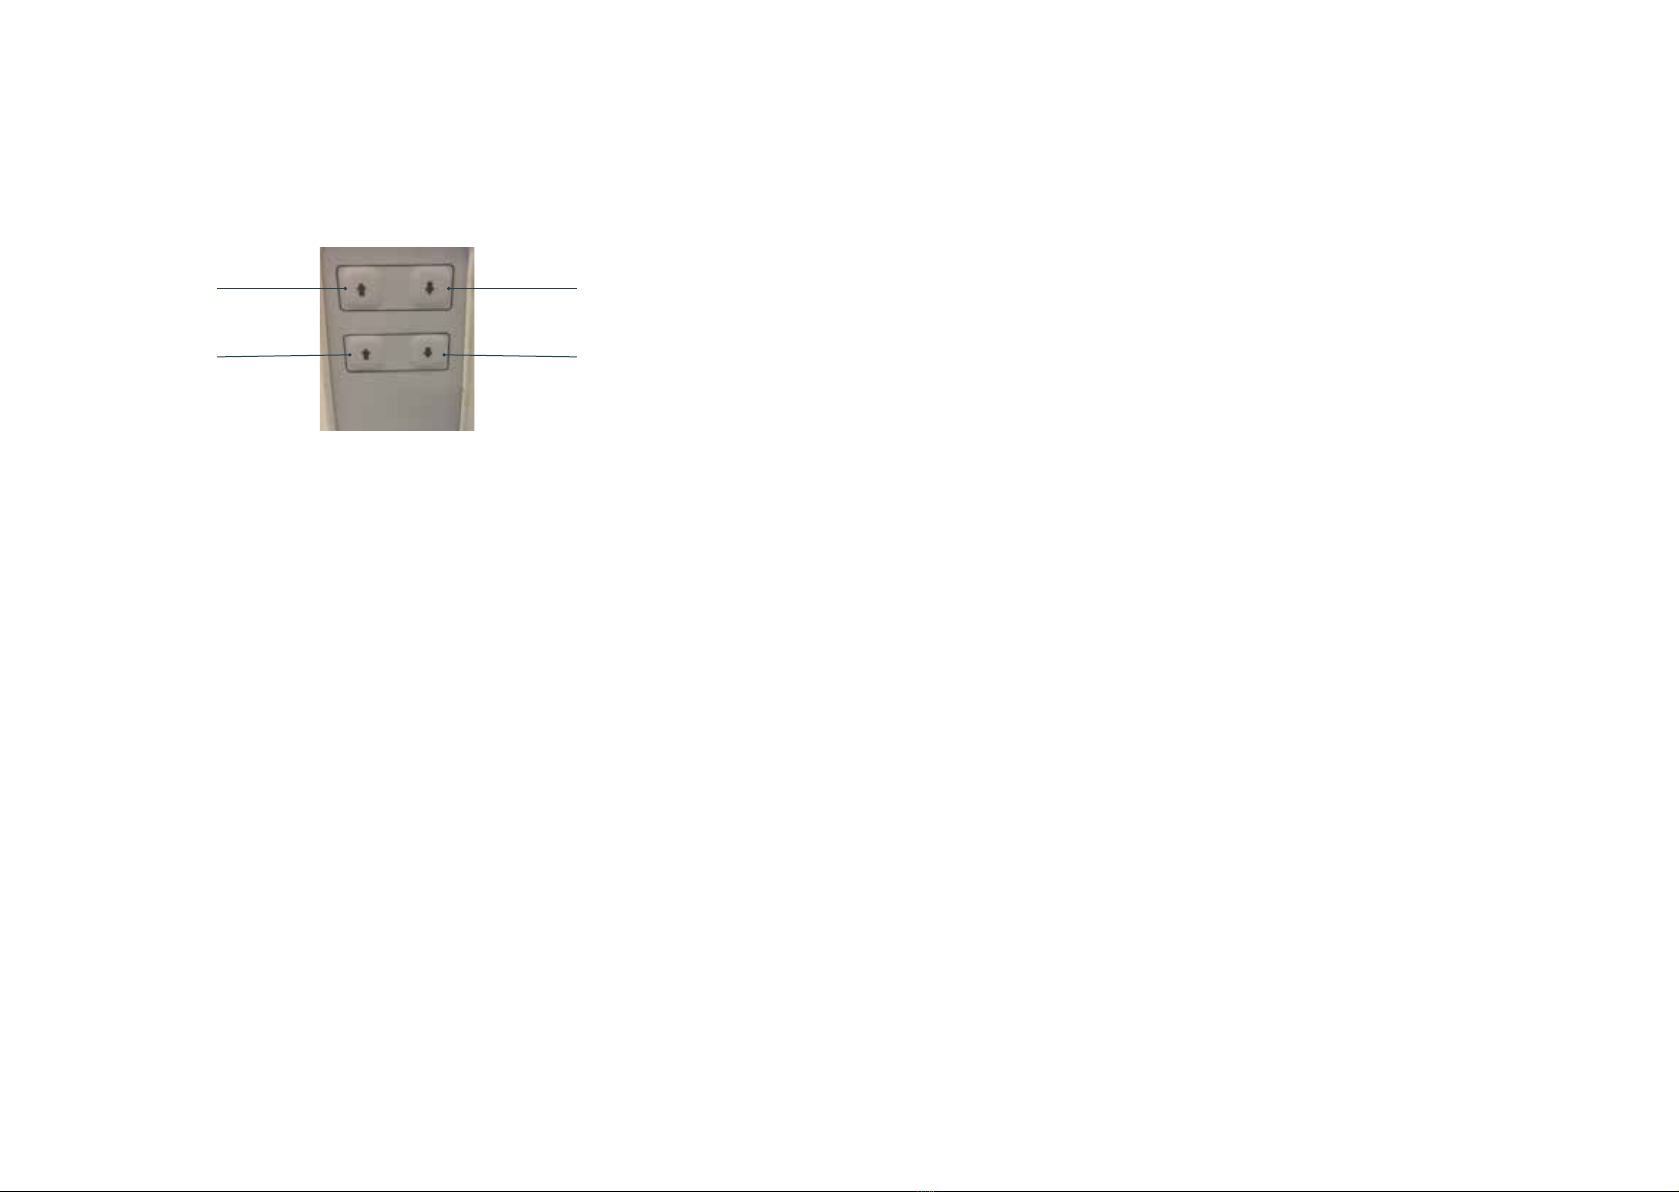
Change the
sequence of lights
Press to turn
on / o
To turn on:
On your music source, turn on Bluetooth and
adjust the volume to mid range.
Ensure your electric supply to your bath is turned
on, the control knob will ash blue (as shown in
picture) as it searches for your device. Use your
device to search for ‘bath sound®’ and pair with
it. You will have 90 seconds to do this before
your ‘bath sound®’ goes to standby mode. When
paired successfully the control knob light will
stay on permanently.
To turn o:
At the end of listening to your music, un-pair the
two devices or switch o your Bluetooth device.
Cushions and supports
(If tted)
IOur cushions are manufactured using PVC and foam ller or polystyrene beads.
There is a risk of oating, pleas ensure they are secured before use.
yEnsure that the bath bottom and mattresses/suckers are clean
yPlace cushions/supports securely onto base / side of bath
yRun a small amount of water into the bath
yPress the mattress rmly onto the bottom of the bath
When removing for cleaning take care that each suckers is prised carefully away
from the bottom of the bath to avoid a tearing action.
Installation
Your Kingkraft product should be installed by a competent installer. If for any
reason you need to move your bath or re-install. Installation guides are available
from Kingkraft.
Units with electrical services must only be wired in accordance with the IEE
Wiring Regulations, especially as regards zoning and equipotential bonding.
Kingkraft products are intended for operation only in a bathroom type location
where exposed mains connections and unsealed switches etc. are not permitted.
The unit must not be connected via a plug and socket
Separate instructions regarding installation and connections is available from
Kingkraft, please contact us if you need a copy of this.
Maintenance
If your bath is not going up and down but making a beeping noise, rstly check
that the power supply has not been turned o to the bath.
Contact Kingkraft for a quote on servicing and LOLER test on your
Multibath SE.
WARNING!
Below is a table to help you keep record of when Kingkraft have attended.
However we will always send a reminder letter when the service is due.
Date Work carried out Kingkraft engineer
Notes
Guarantee details
The Multibath SE and its accessories are guaranteed in the UK for a period
of 24 months from the date of delivery against defects arising from faulty
material, inferior workmanship or construction. The result of incorrect
handling of the bath shall not be covered by any guarantee. In line with the
company’s policy of continual product improvements, we reserve the right to
carry out improvements to the specication without notice.
WEEE (Waste Electrical and Electronic Equipment Regulations 2006)
The aim of this Directive is to minimise the impact of electrical and electronic
equipment on the environment when products become waste. All electrical
components on this product must be disposed of in accordance to the
WEEE 2006 regulations, either through reuse, recovery, recycling or
environmentally sound disposal.
If this Kingkraft product is at the end of its life or electrical parts are replaced
during its life-cycle by people other than Kingkraft Engineers, please contact
Kingkraft to discuss arrangements regarding the disposal of any of the
electrical equipment.
Bath markings
The following are examples markings possibly found on the Multibath bath:
This sticker will display your unique serial number for your bath; make sure you
make a note of your serial number for future reference.
Kingkraft Ltd, 26D Orgreave Crescent,
Dore House Industrial Estate, Sheeld S13 9NQ
phone 0114 2690697 fax 0114 2695145
email [email protected] web www.kingkraft.co.uk
WE PLAN ✚ WE MANUFACTURE ✚ WE INSTALL ✚ WE MAINTAIN
TAILOR-MADE FOR ASSISTED LIVING

Other manuals for Multibath SE

2

Other Kingkraft Bathtub manuals

Kingkraft EASIBATH User manual

Kingkraft

Kingkraft EASIBATH User manual

Kingkraft Lifestyle User manual

Kingkraft

Kingkraft Lifestyle User manual

Kingkraft 1700 User manual

Kingkraft

Kingkraft 1700 User manual

Kingkraft Contour User manual

Kingkraft

Kingkraft Contour User manual

Popular Bathtub manuals by other brands

Jacuzzi Delfi Use & maintenance

Jacuzzi

Jacuzzi Delfi Use & maintenance

BainUltra SCALA 6638 installation instructions

BainUltra

BainUltra SCALA 6638 installation instructions

Appollo TS-1701Q Instructions of installation

Appollo

Appollo TS-1701Q Instructions of installation

Jacuzzi LUXURA F946 Specifications

Jacuzzi

Jacuzzi LUXURA F946 Specifications

Lyons Elite ETLxx663219 Series manual

Lyons

Lyons Elite ETLxx663219 Series manual

Streamline R-5040-67CIFSBCH-FM Owner's manual & installation guide

Streamline

Streamline R-5040-67CIFSBCH-FM Owner's manual & installation guide

Toto Air Bath ABA756 owner's manual

Toto

Toto Air Bath ABA756 owner's manual

Kohler K-1245 Roughing-In Guide

Kohler

Kohler K-1245 Roughing-In Guide

American Standard Heritage 5'x42 2805.002 Specifications

American Standard

American Standard Heritage 5'x42 2805.002 Specifications

Labnet Accublock D1301 instruction manual

Labnet

Labnet Accublock D1301 instruction manual

Kohler K-1800 Installation and care guide

Kohler

Kohler K-1800 Installation and care guide

Vente Unique C-3133 manual

Vente Unique

Vente Unique C-3133 manual

glass 1989 pop 170/70 manual

glass 1989

glass 1989 pop 170/70 manual

American Standard Town Square 2748.002 Specification sheet

American Standard

American Standard Town Square 2748.002 Specification sheet

Jacuzzi AnimaDesign installation manual

Jacuzzi

Jacuzzi AnimaDesign installation manual

SpaVida Whirlpool C642 user manual

SpaVida

SpaVida Whirlpool C642 user manual

Kaldewei CENTRO DUO OVAL 1127 installation instructions

Kaldewei

Kaldewei CENTRO DUO OVAL 1127 installation instructions

JASON Hydrotherapy Integrity owner's manual

JASON Hydrotherapy

JASON Hydrotherapy Integrity owner's manual

manuals.online logo
manuals.online logoBrands
  • About & Mission
  • Contact us
  • Privacy Policy
  • Terms and Conditions

Copyright 2025 Manuals.Online. All Rights Reserved.