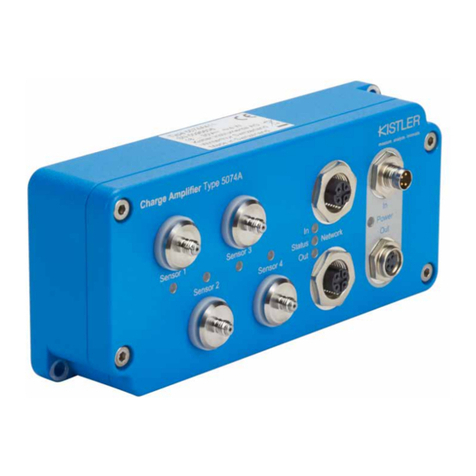
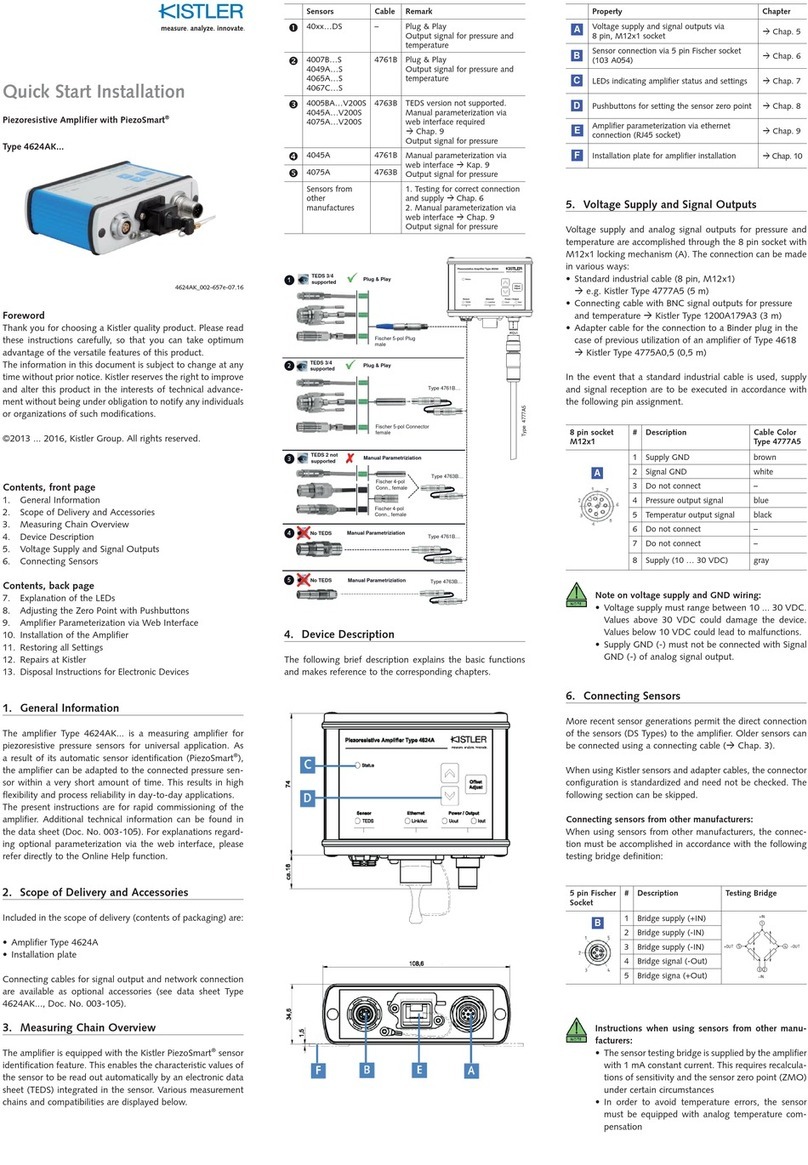
Kistler 5165A Series User manual

Quick Start Guide
Charge Amplifier and Data Acquisition Device
Types 5165A... & 5167A…
516xA_002-800m-09.19
Foreword
Thank you for choosing a Kistler quality product. Please read these instructions
carefully, so that you can take optimum advantage of the versatile features of
this product.
The information in this document is subject to change at any time without
prior notice. Kistler reserves the right to improve and modify the product in
accordance with technical progress without the obligation to inform persons
and organizations based on these changes.
©2019 Kistler Group. All rights reserved.
Contents
1. General Information
2. Device Description
3. Connection Setup via Ethernet
4. Control via Web Interface, Instruction Manual
5. Activation of purchased software features
6. Restoring all Settings
7. Repairs at Kistler
8. Disposal Instructions for Electronic Devices
1. General Information
The Kistler LabAmp Type 5165A… and 5167A… are universal laboratory
measuring amplifiers. Signals from piezoelectric sensors – and in case of the
5165A also from Piezotron® sensors (IEPE) and voltage signals – are digitized
and processed with high resolution. Data acquisition functions as well as
freely configurable analog outputs emphasize the comprehensive application
options of the device.
The laboratory measuring amplifier is configured as well as operated with an
intuitive web interface that is easily available through an external computer
via a standard web browser (Minimal requirements: Chrome 43, Firefox 38,
IE11). The web browser-based data download permits easy further processing
of the acquired signals in an analysis software.
The present instructions are for rapid commissioning of the device.
For initial commissioning of the device, see chapter 3.
2. Device Description
The following brief description explains the basic components of the measur-
ing amplifier and refers to the corresponding chapters with more detailed
descriptions:
Description Chapter
E
D I
F HG
C
A
B
Connector of the 24 V power supply
(e.g. plug-in power supply unit) –
E
D I
F HG
C
A
B
Main switch for the power supply of the device –
E
D I
F HG
C
A B
Sensor inputs:
• BNC neg. →Type 5165A… & 5167Ax0
• Fischer 9-pole neg. →Type 5167Ax1
–
E
D
I
F HG
C
A B
Analog outputs (BNC neg.) –
E
D I
F HG
C
A B
Light-emitting diodes (LEDs), indicating the status
of the corresponding sensor input or analog output 2.1
E
D I
F
HG
C
A B
Remote control connector (D-Sub 9-pole neg.) →
Type 5167A… only:
• Measure/Reset control (Pin 5)
• Start/Stop trigger (Pin 4)
• 24 V supply (Pin 1)
• GND (Pins 2 & 6)
–
E
D I
F H
G
C
A B
USB ports (not supported):
• 1x USB →Type 5165A…
• 2x USB →Type 5167A…
–
E
D I
F
H
G
C
A B
2 Ethernet interfaces (RJ45) with switch functionality
for connection to a network or computer –
E
D
I
F HG
C
A B
Reset button for resetting the device to
factory settings 6
J
K
Ground lug –
J
K
Fold-out feet –
2.1 Status LEDs
The LEDs indicate the status of the corresponding sensor input or analog out-
put and the general operating statuses of the device.
The table below shows the possible statuses:
LED Status Operating Status
Blue
illuminated
Sensor input is measuring /
analog output is active
Blue flashing Sensor input in reset state
(Type 5167A… only)
Red
illuminated
Error (e.g. range overflow, open
IEPE input, etc.)
Switched off Analog output is switched off,
0V at the output
LEDs are illumi-
nated in yellow
from left to right
Initialization after switch-on of
the device or software update
Yellow flashing Temporary status (e.g. device
identification, read TEDS, etc.)
3. Connection Setup via Ethernet
The measuring amplifiers Type 5165A… and 5167A… include an integrated
web server, whose web interface is used to operate the device. Please ensure
that your PC is in DHCP mode and/or Auto-IP mode (network settings).
The following approach is recommended to establish a connection with the
measuring amplifier via Ethernet:
1. Connect the Device to the Network
Connect the measuring amplifier (connector H –> Sync In or Sync Out) via
anetwork cable directly to a computer or a network (e.g. network switch).
2. Find the Device in the Network
a. Start the „Network Setup Wizard“ tool that finds all Kistler network
devices (tool can be found under www.kistler.com in the download area
of the Kistler LabAmp Type 5165A or 5167A).
b. Click on „Network Setup Wizard“ and wait until Kistler network devices
are displayed. In the case of a direct connection, it may take up to
2minutes until the devices are displayed.
c. The table displays now all identified Kistler network devices.
3. Access to the Device via Web Browser
Choose your device in the table by clicking on the table entry and select one
of the following two options:
a. “Open Browser“
Opens the web interface of the respective device in a standard web
browser. The measuring amplifier can now be configured and operated
via the web interface (–> Chap. 4).
b. “Identify“
Permits an identification of the respective device. The identified mea-
suring amplifier signals this through the yellow flashing of all LEDs for
approx. 4 s (–> Chap. 2.1). This function is very useful if several mea-
suring amplifiers are used in the same network.
Adapting Network Settings:
The network settings for the marked device can be adapted by clicking on
„Next“. The following options can be configured for this purpose:
• Device name:
The device name is displayed in the “Network Setup Wizard” as well as in
E
D I
F HG
C
A B
the web interface. In networks that support name resolution, the device
name can be entered directly in the address field of the web browser to
access the device.
• Address mode:
The address modes “DHCP with Auto-IP“ and „Static IP“ are supported.
It is necessary to click „Next“ and then “Update” to ensure that the network
settings are accepted.
Information Regarding Network Connection:
The “Network Setup Wizard” finds Kistler network devices
throughout the network. However, if there are several routers
or switches between the computer and the measuring amplifier,
this search might not be successful under certain circumstances.
4. Control via Web Interface, Instruction
Manual
The measuring amplifier is operated via the web interface. After the first con-
nection with the device (–> Chap. 3), the home screen is displayed.
The user manual which describes all the functionality of the web interface is
accessible by clicking on the “?” in the upper right corner of the web interface.
5. Activation of purchased software features
(from FW version 1.3.0 on)
To activate purchased software features, it is recommended to connect the
device to a computer or network with Internet access (online activation). If the
network installation does not allow this, an offline activation (device without
access to the Internet) is also possible.
Online Activation
For the online activation of purchased software features, proceed as follows:
1. Establish connection to the device via Ethernet, if not already done
( –> Chap. 3)
2. Click on „Activate License“ in the LabAmp web interface under menu
„Maintenance“ – „Software Licensing“
3. Confirm note „License Activation“ with „Next“
4. Note „License activated“ appears and can be confirmed with „Close“
Offline Activation
To activate purchased software features offline, proceed as follows:
1. Establish connection to the device via Ethernet, if not already done
( –> Chap. 3)
2. Click on „Activate License“ in the LabAmp web interface under menu
„Maintenance“ – „Software Licensing“
3. Confirm note „License Activation“ with „Next“
4. Follow the instructions until the activation is complete
6. Restoring all Settings
The device can be reset to the factory settings by using the Reset button (I).
This causes all user and network settings to be reset.
To reset the settings, the Reset button (I) on the back of the device must be
actuated with a pointed object (e.g. needle) for at least 2 seconds.
7. Repairs at Kistler
Repairs at the Kistler factory can be arranged via the local sales company.
Information can be found at www.kistler.com
8. Disposal Instructions for Electronic Devices
Old electronics devices may not be disposed of
with household refuse/residual waste. Please return
obsolete devices to the nearest electronics dis-
posal center for disposal or contact your Kistler Sales
Representative.
516xA_002-800m-09.19 ©2019, Kistler Group
Front side – 5165A… & 5167Ax0
Front side – 5167Ax1
Back side – 5165A… & 5167A…
Kistler Group
Eulachstrasse 22
8408 Winterthur, Switzerland
Tel. +41 52 224 11 11
Fax +41 52 224 14 14
info@kistler.com www.kistler.com
E E
C DK K
H IF
AB G
J
C K
E
D K
E

Kistler Group
Eulachstrasse 22
8408 Winterthur, Switzerland
Tel. +41 52 224 11 11
Fax +41 52 224 14 14
info@kistler.com www.kistler.com
Quick Start Guide
Ladungsverstärker und Datenerfassungsgerät
Typen 5165A... & 5167A…
516xA_002-800m-09.19
Vorwort
Wir danken Ihnen, dass Sie sich für ein Kistler Qualitätsprodukt entschieden
haben. Bitte lesen Sie diese Anleitung sorgfältig durch, damit Sie die vielseitigen
Eigenschaften Ihres Produkts optimal nutzen können.
Die Angaben in diesem Dokument können jederzeit ohne Vorankündigung
geändert werden. Kistler behält sich das Recht vor, das Produkt im Sinne des
technischen Fortschritts zu verbessern und zu ändern, ohne Verpflichtung,
Personen und Organisationen aufgrund solcher Änderungen zu benachrichtigen.
©2019, Kistler Gruppe. Alle Rechte bleiben vorbehalten.
Inhaltsverzeichnis
1. Allgemeine Informationen
2. Gerätebeschreibung
3. Verbindungsaufbau über Ethernet
4. Bedienung via Web-Interface, Benutzerhandbuch
5. Aktivierung von erworbenen Software-Features
6. Zurücksetzen aller Einstellungen
7. Reparaturen bei Kistler
8. Entsorgungshinweise für Elektronikgeräte
1. Allgemeine Informationen
Die Kistler LabAmp Typen 5165A… & 5167A sind universell einsetz-
bare Labor-Messverstärker. Signale piezoelektrischer Sensoren und – im
Falle des 5165A… auch Signale von Piezotron®Sensoren (IEPE) sowie
Spannungssignale – werden hochauflösend digitalisiert und verarbeitet.
Datenakquisitions-Funktionen sowie frei konfigurierbare Analogausgänge
unterstreichen die umfassenden Einsatzmöglichkeiten des Geräts.
Die Konfiguration sowie Bedienung der Labor-Messverstärker erfolgt
über ein intuitives Web-Interface, das bequem via Standard-Webbrowser
(Minimalanforderung: Chrome 43, Firefox 38, IE 11) von einem externen
Rechner zugänglich ist. Der Webbrowser-basierte Daten-Download ermög-
licht die einfache Weiterverarbeitung der erfassten Signale in einer Analyse-
Software.
Die vorliegende Anleitung dient zur schnellen Inbetriebnahme des Geräts.
Für die Erstinbetriebnahme des Geräts siehe Kapitel 3.
2. Gerätebeschreibung
Die nachfolgende Kurzbeschreibung erläutert die Grundkomponenten des
Messverstärkers und verweist auf die entsprechenden Kapitel mit weiterfüh-
renden Beschreibungen:
Beschreibung Kapitel
E
D I
F HG
C
A
B
Anschluss der 24 V Spannungsversorgung
(z.B. Steckernetzteil) –
E
D I
F HG
C
A
B
Hauptschalter für Spannungsversorgung des Geräts –
E
D I
F HG
C
A B
Sensoreingänge:
• BNC neg. →Typ 5165A… & 5167Ax0
• Fischer 9-Pol neg. →Typ 5167Ax1
–
E
D
I
F HG
C
A B
Analogausgänge (BNC neg.) –
E
D I
F HG
C
A B
Leuchtdioden (LEDs), welche den Status
des entsprechenden Sensoreingangs bzw.
Analogausgangs signalisieren
2.1
E
D I
F
HG
C
A B
Stecker für Fernsteuerung (D-Sub 9-Pol neg.) →nur
Typ 5167A…:
• Measure/Reset Steuerung (Pin 5)
• Start/Stopp Trigger (Pin 4)
• 24 V Speisung (Pin 1)
• GND (Pins 2 & 6)
–
E
D I
F H
G
C
A B
USB Ports (nicht unterstützt):
• 1x USB →Typ 5165A…
• 2x USB →Typ 5167A…
–
E
D I
FHG
C
A B
2 Ethernet-Schnittstellen (RJ45) mit Switch-
Funktionalität für die Anbindung an ein Netzwerk
oder Computer
–
E
DI
F HG
C
A B
Reset-Taster für das Zurücksetzen des Geräts auf die
Werkseinstellungen 6
J
K
Masse-Anschluss –
J
K
Ausklappbare Standfüsse –
2.1 Status-Leuchtdioden
Die Leuchtdioden (LED) signalisieren den Status des entsprechenden Sensore-
ingangs bzw. Analogausgangs sowie allgemeine Betriebszustände des Geräts.
Die nachfolgende Tabelle zeigt die möglichen Zustände:
LED-Zustand Betriebszustand
Blau
leuchtend
Sensoreingang misst /
Analogausgang ist aktiv
Blau blinkend Sensoreingang ist im Reset-
Zustand (nur Typ 5167A…)
Rot
leuchtend
Fehler (z.B. Bereichsüberlauf,
offener IEPE-Eingang, etc.)
Ausgeschaltet Analogausgang ist ausgeschaltet,
0 V am Ausgang
LEDs leuchten
gelb von links
nach rechts auf
Initialisierung nach dem
Einschalten des Geräts oder
Software-Aktualisierung
Gelb blinkend
Temporärer Zustand, z.B.
Geräteidentifikation, TEDS
auslesen, etc.
3. Verbindungsaufbau über Ethernet
Die Messverstärker Typ 5165A… & 5167A… enthalten einen integrierten
Webserver über dessen Web-Interface das Gerät bedient wird. Bitte stellen Sie
sicher, dass Ihr PC sich im DHCP-Modus und/oder Auto-IP-Modus befindet
(Netzwerkeinstellungen).
Um eine Verbindung mit dem Messverstärker über Ethernet aufzubauen wird
das folgende Vorgehen empfohlen:
1. Gerät mit Netzwerk verbinden
Messverstärker (Anschluss H –> Sync In oder Sync Out) über ein
Netzwerkkabel direkt mit einem Computer oder einem Netzwerk
(z.B. Netzwerkswitch) verbinden.
2. Auffinden des Geräts im Netzwerk
a. Starten des Tools “Network Setup Wizard“, welches alle Kistler
Netzwerkgeräte auffindet (Tool zu finden auf www.kistler.com im
Downloadbereich des Kistler LabAmp Typ 5165A oder 5167A).
b. Klick auf “Netzwerk-Konfigurationsassistent“ und warten bis Kistler
Netzwerkgeräte angezeigt werden. Im Falle einer Direktverbindung
kann es bis zu 2 Minuten dauern, bis die Geräte angezeigt werden.
c. In der Tabelle werden nun alle erkannten Kistler Netzwerkgeräte
aufgeführt.
3. Zugriff auf das Gerät via Webbrowser
Wahl des Geräts in der Tabelle durch Klicken auf den entsprechenden
Tabelleneintrag. Die folgenden zwei Optionen stehen zur Verfügung:
a. “Browser Öffnen…“
Öffnet das Web-Interface vom entsprechenden Gerät in Ihrem
Standard-Webbrowser. Über das Web-Interface kann der
Messverstärker jetzt konfiguriert und bedient werden (–> Kap. 4).
b. “Identifizieren…“
Ermöglicht eine Identifikation des entsprechenden Geräts. Der iden-
tifizierte Messverstärker signalisiert dies, indem alle LEDs für ca. 4 s gelb
blinken (–> Kap. 2.1). Diese Funktion ist sehr nützlich, wenn mehrere
Messverstärker im selben Netzwerk verwendet werden.
E
D I
F HG
C
A B
Netzwerkeinstellungen anpassen:
Mit einem Klick auf “Weiter“ können die Netzwerkeinstellungen für das
markierte Gerät angepasst werden. Dabei können die folgenden Optionen
konfiguriert werden:
• Gerätename:
Der Gerätename ist im “Network Setup Wizard” als auch im Web-
Interface ersichtlich. In Netzwerken, welche die Namensauflösung
unterstützen, kann der Gerätename direkt in das Adressfeld des
Webbrowsers eingegeben werden, um auf das Gerät zuzugreifen.
• Addressmodus:
Es werden die Adressmodi “DHCP mit Auto-IP“ und “Statische IP“
unterstützt.
Damit die Netzwerkeinstellungen übernommen werden, muss auf „Weiter“
und “Aktualisierung” geklickt werden.
Hinweis zur Netzwerkverbindung:
Der Kistler “Network Setup Wizard” findet Kistler Netzwerkgeräte
im ganzen Netzwerk. Falls jedoch mehrere Router bzw. Switches
zwischen Computer und Messverstärker liegen, kann das
Auffinden unter Umständen fehlschlagen.
4. Bedienung via Web-Interface,
Benutzerhandbuch
Die Bedienung des Messverstärkers erfolgt via Web-Interface. Nach dem ersten
Verbindungsaufbau mit dem Gerät (–> Kap.3) wird der Home-Screen angezeigt
Das detaillierte Benutzerhandbuch, welches sämtliche Funktionalitäten
beschreibt, kann mit einem Klick auf das “?” in der rechten oberen Ecke des
Web-Interfaces aufgerufen werden.
5. Aktivierung von erworbenen
Software-Features (ab FW Version 1.3.0)
Für die Aktivierung von erworbenen Software-Features wird empfohlen das
Gerät mit einem Computer oder Netzwerk mit Internetzugang zu verbinden
(Online-Aktivierung). Falls die Netzwerkinstallation dies nicht zulässt, ist aber
auch eine Offline-Aktivierung (Gerät ohne Zugang zum Internet) möglich.
Online-Aktivierung
Für die Online-Aktivierung von erworbenen Software-Features ist wie folgt
vorzugehen:
1. Verbindungsaufbau zum Gerät via Ethernet, falls noch nicht erfolgt
( –> Kap. 3)
2. Im LabAmp Web-Interface unter Menü „Wartung” – „Software-
Lizenzierung” auf „Lizenz Aktivieren” klicken
3. Hinweis „Lizenz Aktivierung” mit „Weiter” bestätigen
4. Hinweis „Lizenz aktiviert” erscheint und kann mit „Schliessen” bestätigt
werden
Offline-Aktivierung
Für die Offline-Aktivierung von erworbenen Software-Features ist wie folgt
vorzugehen:
1. Verbindungsaufbau zum Gerät via Ethernet, falls noch nicht erfolgt
( –> Kap. 3)
2. Im LabAmp Web-Interface unter Menü „Wartung” – „Software-
Lizenzierung” auf „Lizenz Aktivieren” klicken
3. Hinweis „Lizenz Aktivierung” mit „Weiter” bestätigen
4. Anweisungen bis zum Abschluss der Aktivierung befolgen
6. Zurücksetzen aller Einstellungen
Über den Reset-Taster (I) kann das Gerät in den Werkszustand zurückgesetzt
werden. Dabei werden alle Benutzer- und Netzwerkeinstellungen zurückgesetzt.
Für das Zurücksetzen muss der Reset-Taster (I) an der Rückseite des Geräts mit
einem spitzen Gegenstand (z.B. Nadel) für mindestens 2 Sekunden betätigt
werden.
7. Reparaturen bei Kistler
Reparaturen im Kistler Werk werden über die lokale Verkaufsgesellschaft ver-
anlasst.
Info unter www.kistler.com
8. Entsorgungshinweis für Elektronikgeräte
Elektronik-Altgeräte dürfen nicht mit dem Hausmüll/
Restmüll entsorgt werden. Bitte gebenSie das aus-
gediente Gerät zur Entsorgung an die nächstgelegene
Elektronik-Entsorgungsstelle zurück oder kontaktieren
Sie Ihre Kistler-Verkaufsstelle.
516xA_002-800m-09.19 ©2019, Kistler Group
Vorderseite – 5165A… & 5167Ax0
Vorderseite – 5167Ax1
Rückseite – 5165A… & 5167A…
E E
C DK K
H IF
AB G
J
C K
E
D K
E
This manual suits for next models
1
Table of contents
Languages:
Other Kistler Amplifier manuals

Kistler
Kistler 5073A Series User manual

Kistler
Kistler 5181A Series User manual

Kistler
Kistler 4624AK Series User manual

Kistler
Kistler 5166A Series User manual

Kistler
Kistler 5159A Series User manual

Kistler
Kistler 5028A Series User manual

Kistler
Kistler 5074A Series User manual

Kistler
Kistler 5018A Series User manual

Kistler
Kistler LabAmp User manual

Kistler
Kistler 5995A Series User manual