
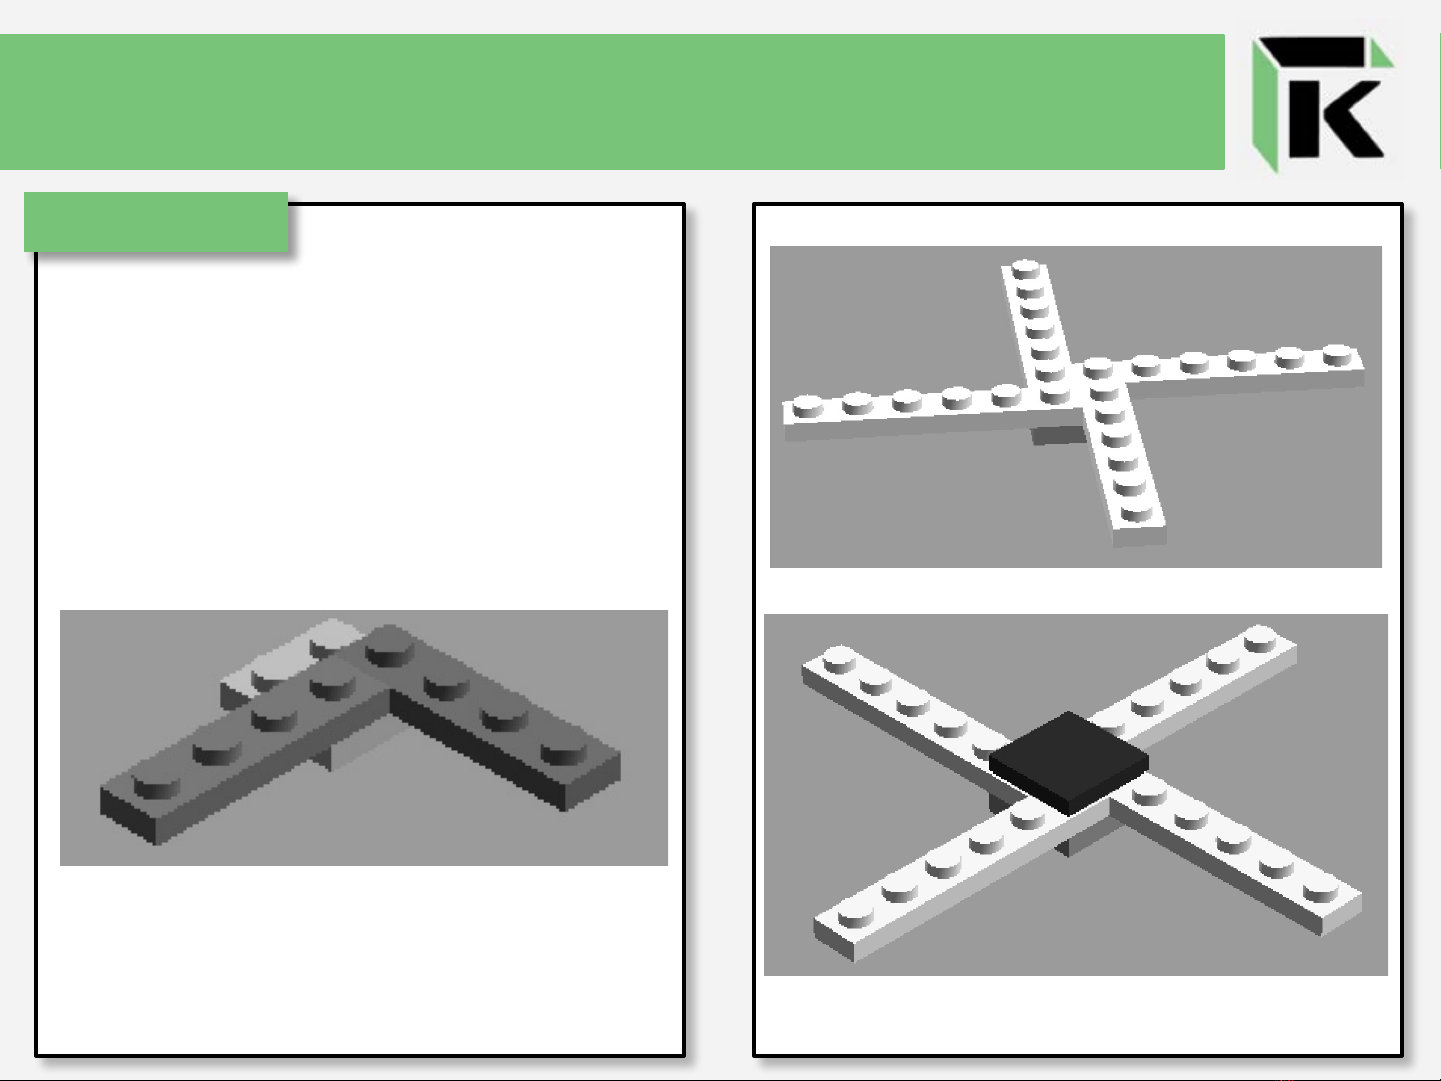
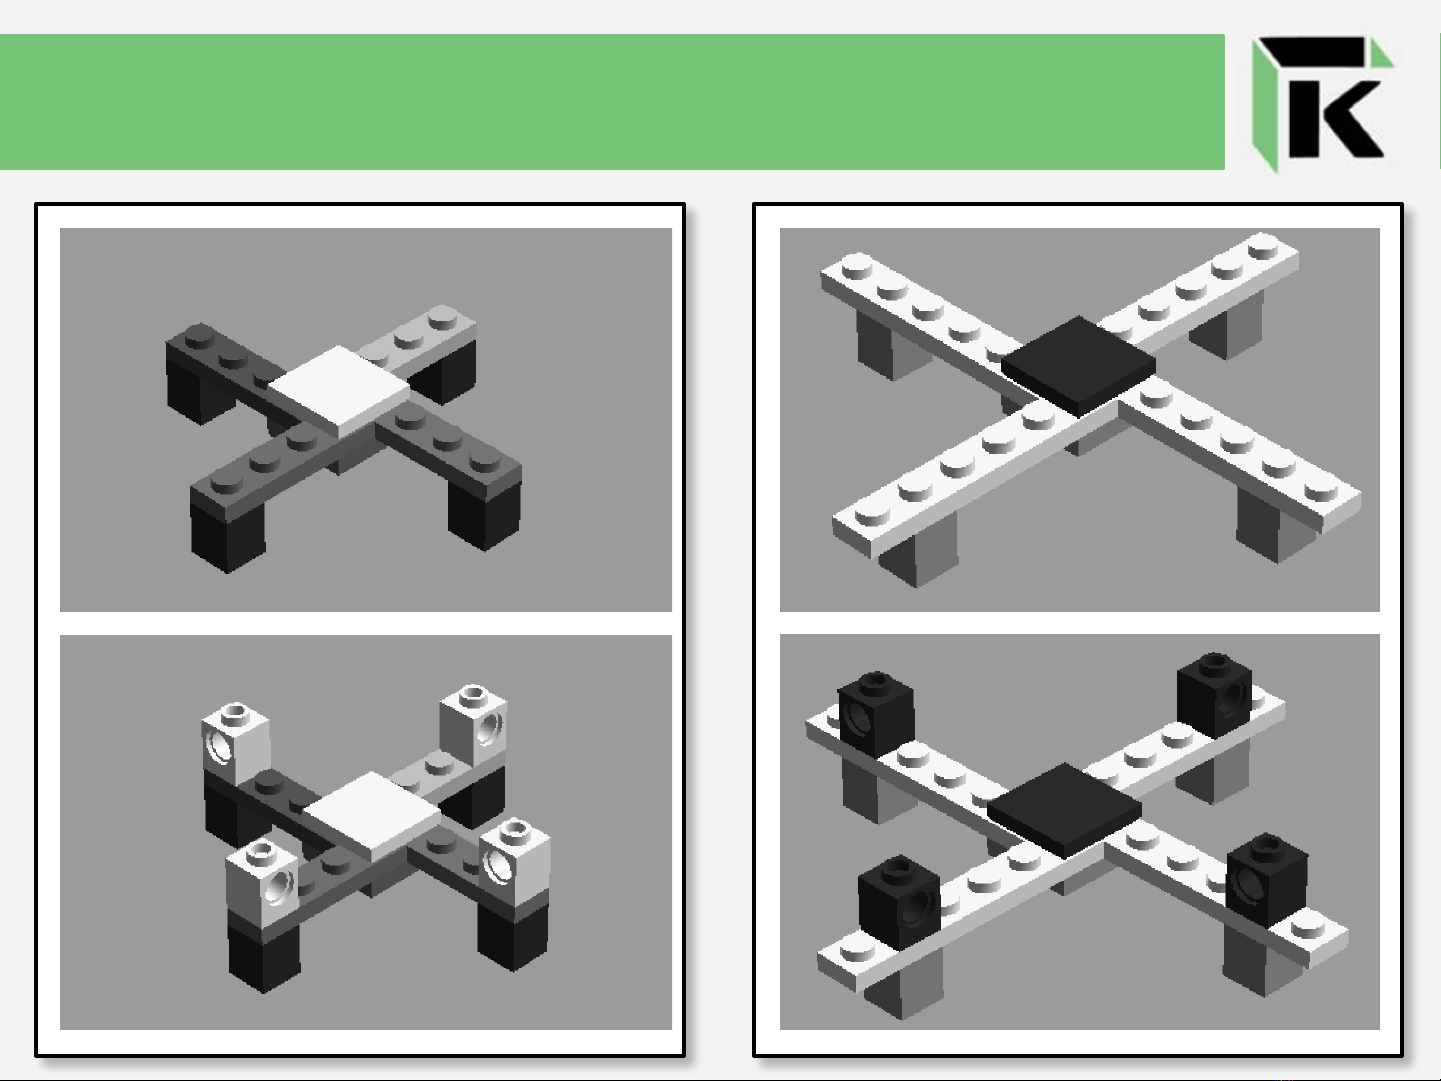
Mini Lego Drone Kit Instructions
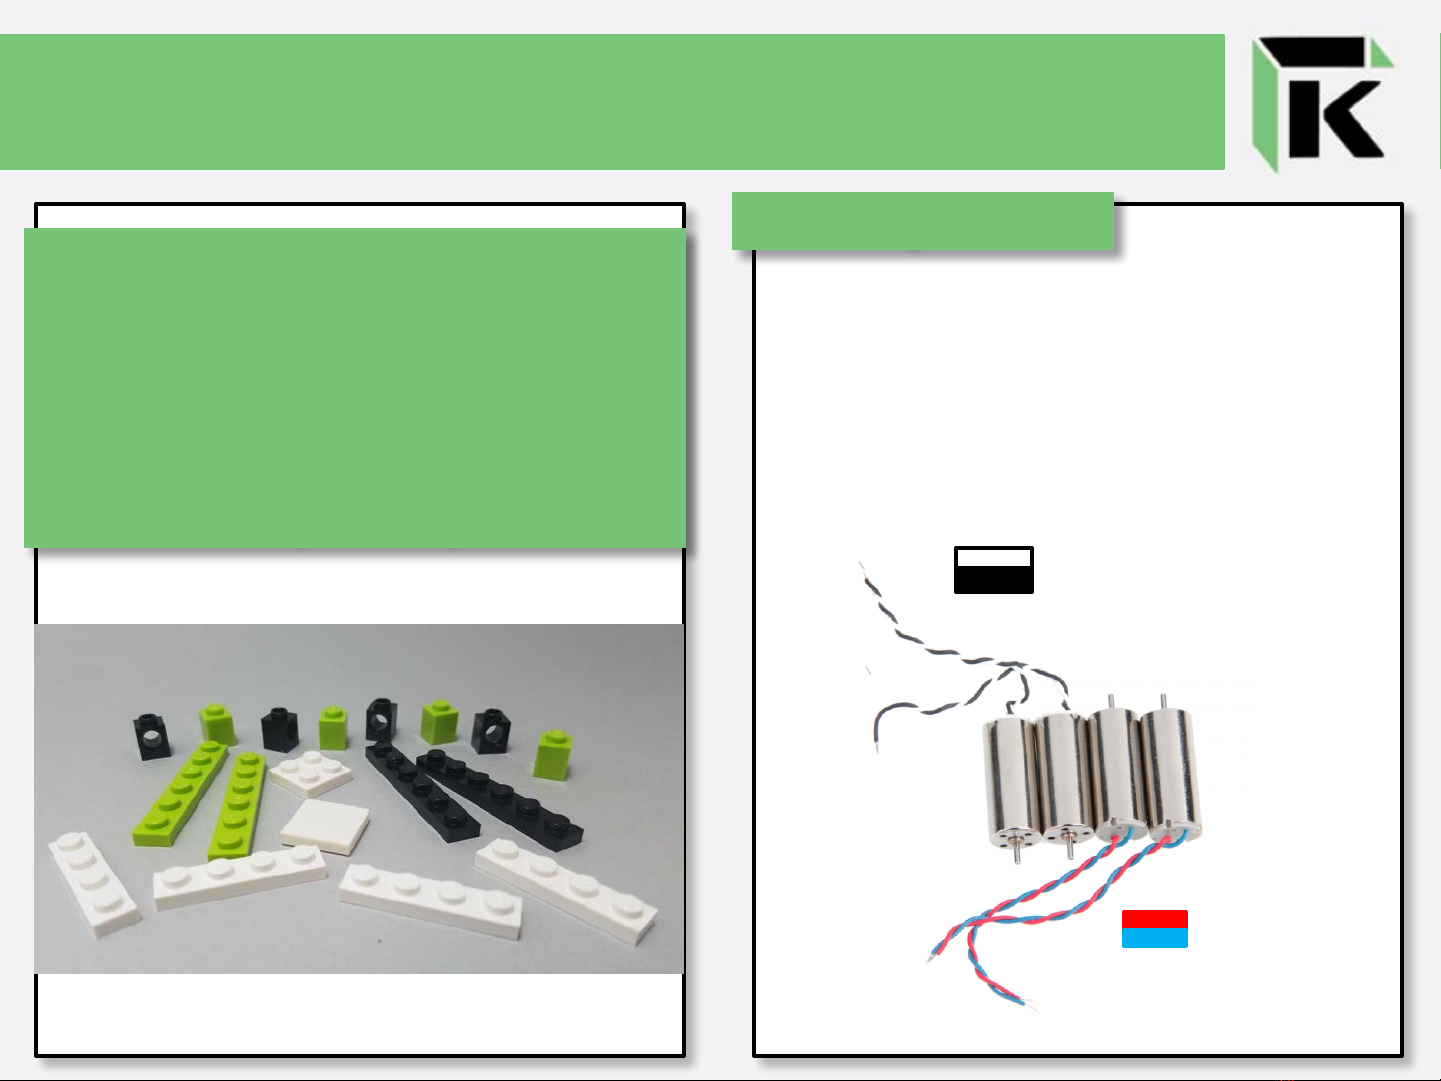
You’ll find a variety of Lego colors in
your pack. We’ve designed this drone
frame to be light and simple! The
lighter the drone, the longer it will fly!
We recommend gluing the bricks of
your frame to prevent breaks during
rough landings.
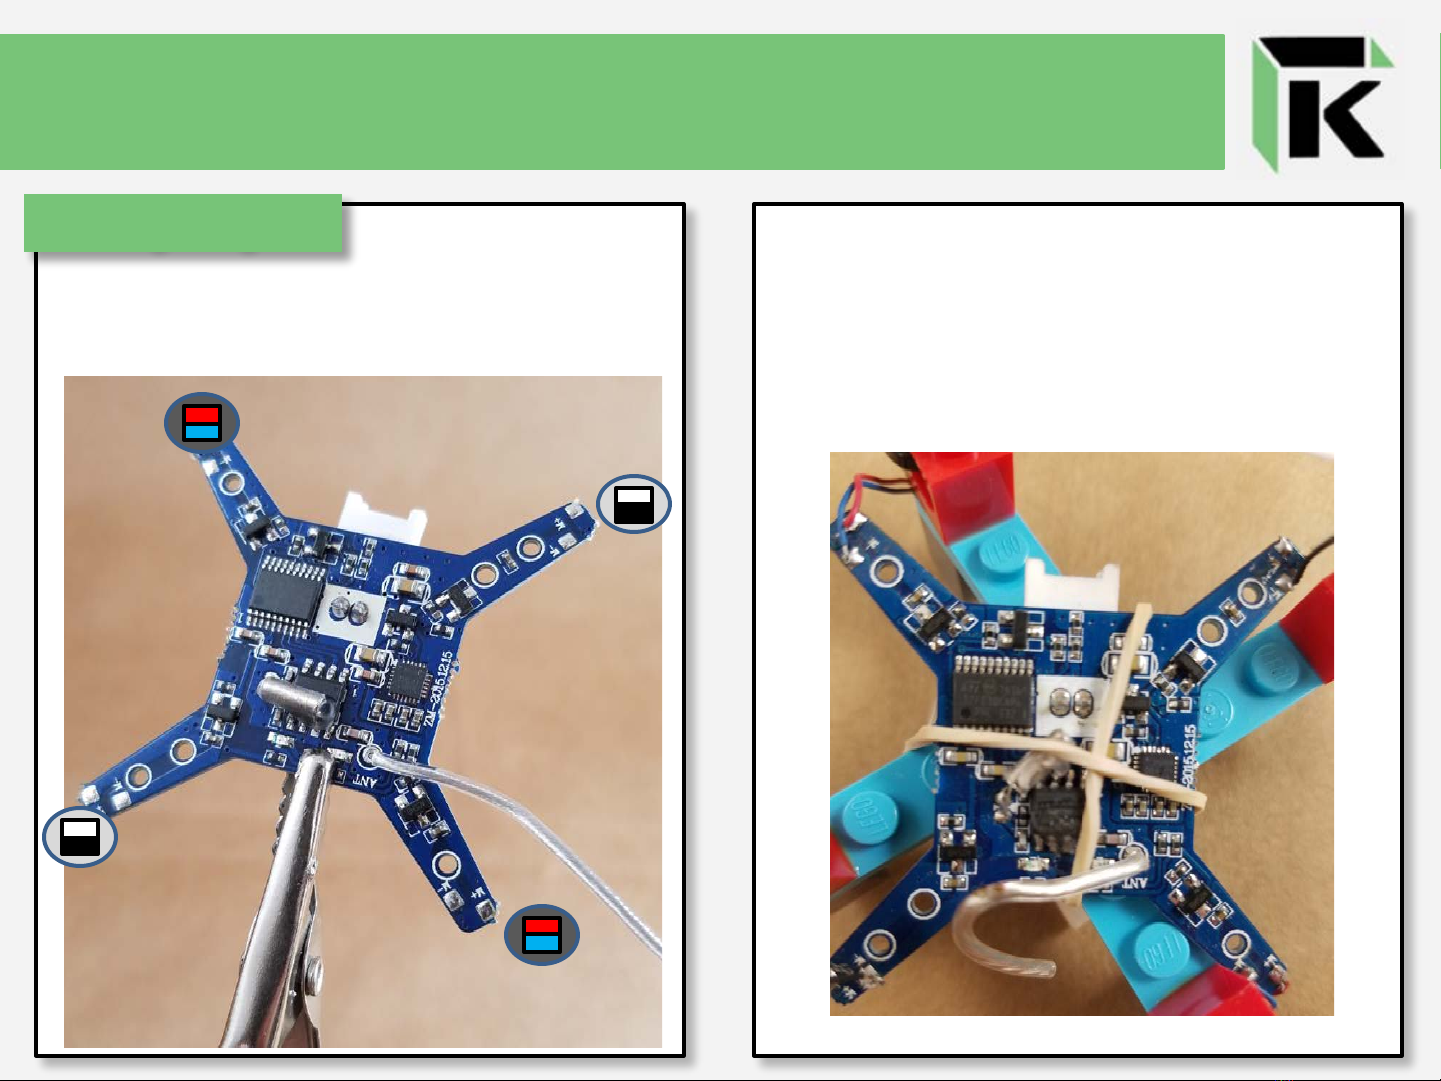
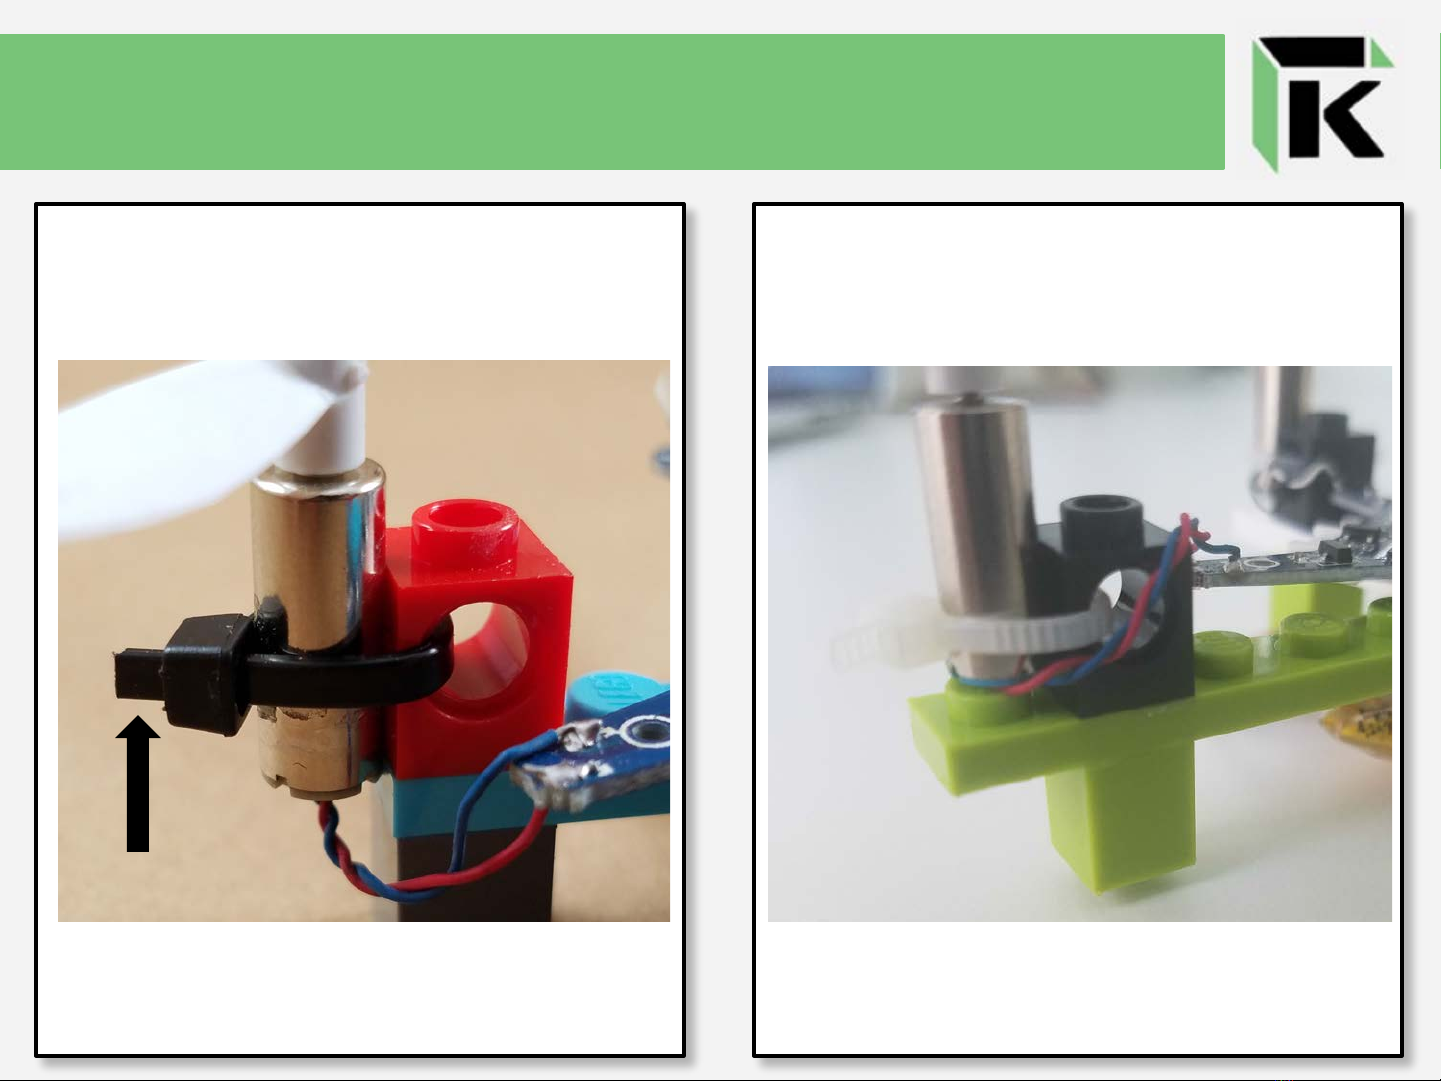
You will need to solder each of the 4 motors (c)
to the receiver board (b). Motor location on the
board matters because 1 set of motors spin in the
clockwise (CW) direction and 1 set of motors
spin in the counterclockwise (CCW) direction.
You can tell the difference based on wire colors.
Get Ready to Solder!


 user manual")