manuals.online logo
Brands
  1. Home
  2. •
  3. Brands
  4. •
  5. Arris
  6. •
  7. Drone
  8. •
  9. Arris M900 User manual

Arris M900 User manual

ARRIS M900 User Manual V1.0
Disclaimer Declaration
The ARRIS M900 industrial drone is not suitable for minors under 18 years of age.
The ARRIS M900 is a semi-assembled quad-copter with DIY use for the customers, we
do not recommend it to beginners without any flying experience. The ARRIS M900 is
great for is great for power inspection, fire search and rescue, traffic patrols, airdrops
of supplier and lifesaving equipment, aerial photography and etc.
Before using this product, any user should carefully read the relevant operating
instructions and this statement. Once the product is used, it shall be deemed to have
recognized and accepted the entire content of this statement. In the process of
using this product, the user promises to be responsible for his actions and all
consequences arising therefrom. The user promises to use this product only for
legitimate purposes, and agrees to abide by these terms and any related policies or
guidelines that ARRIS may formulate.
Know About ARRIS M900
What is in the package?
When you receive the package for the M900, you will find the following items into it:
M900 Arms x 4
Center plate with flight controller and GPS installed x 1
Hand bar with battery plate x 1
Landing skid x 1
H12 Radio x 1 (Generally in another shipment)
Parts you need to prepare to fly the ARRIS M900:
6S 10000mah to 25000mah Lipo Battery x 1 (not included)
6S battery charger x 1 (not included)
1. Assembly the Drone
Tools needed:2.0mm Long Hexagon Screwdriver x 1
2.5mm Long Hexagon Screwdriver x 1
For the ARRIS M900, it is fully assembled, tuned and tested before shipping. Each
drone with test video recorded here. We took it into several parts before packing
(center plates with the flight controller and GPS, arms, landing skid), when you
receive it, please install it according to the assembling video here.
https://www.youtube.com/watch?v=ev__JSUNnk0&t=8s
*After assembling, please recheck the GPS direction, arm sequence and the screws
on the ARRIS M900. Also make sure the antenna for the receiver installed well.
2. Check Motor Rotation
After you assembling it, please check whether the rotation of each motor is right.
Here is a video for reference.
https://youtu.be/Uea32xxf-sw
Know about the Skydroid H12 Radio
3. Connect Wifi on the Radio
The H12 Radio is also regarded as the ground station for the M900 drone, and it need
to connect with the internet. The most convenient way is to use the hotpots on your
phones.
Below videos shows to to operate on your phone and the radio.
https://youtube.com/shorts/Yrt2rsGKkmQ?feature=share
Number
Annotation
Number
Annotation
1
2.4G Antenna
10
Button B
2
Flight Mode Switch
11
Stick X2, Y2
3
Thumbwheel switch G
12
Button D
4
Button C
13
2 Axis gimbal Angle
Adjustment
5
Stick X1、Y1
14
Drop System Control
6
5.5inch screen
15
Speaker
7
MIC port
16
SIM card slot
8
Button A
17
Charging port
9
Power switcher
18
PPM output
Flight Mode Switch: 1. Altitude Hold Mode
2. GPS Mode
3. Return to Home Mode
2 Axis gimbals angle adjustment: Control the pitch angle of the camera with 2 axis
gimbal
Drop system control: Control to dropping the parcels from the drone
Button 5--Throttle (Mode 2): Push the stick up, the drone will rise;
Pull down the stick, the drone will descend
Button 11--Forward/backward/side fly control lever:
-Push the stick up and the drone flies forward
-Pull down the control stick and the drone flies backward
-Toggle the control stick to the left, and the drone flies to the left side
Remote Control Antenna
Make sure the antenna of the remote control is placed correctly.
The antenna should be unfolded and 45°upward.
Introduce the main interface of the Ground Station
The H12 comes with the ARRIS M900 drone all pre-installed the “Skydroid GCS” APP,
in this APP, this is a simplified QGC, easy to operate here.
Here we will introduce the interface of it
Important:
1. Please check the low voltage settings, if there is no settings there, you need to set
one . Enter the Menu--Drone Settings--Battery Set, you will see the following
interface
RTL Volt: When the voltage of the battery reach the voltage you set, the drone will
return to home. Remember to remain enough battery for the drone to return.
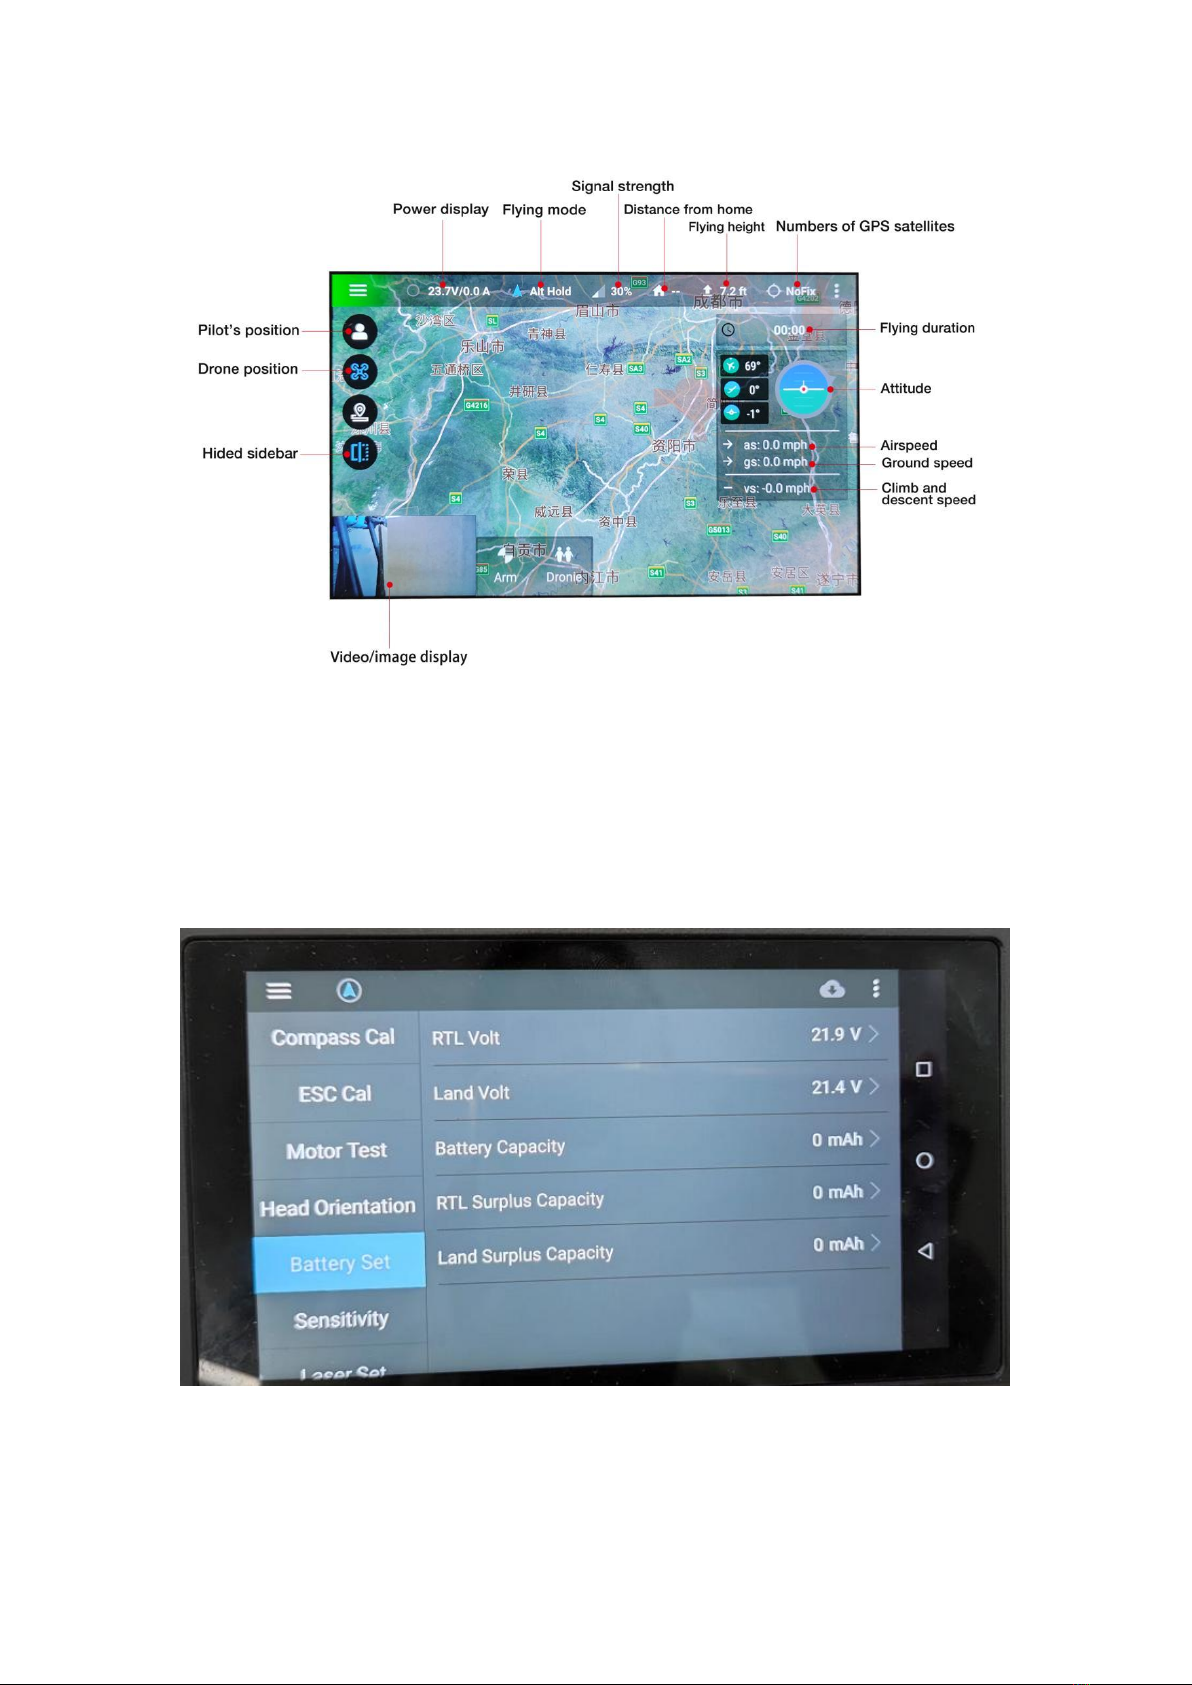
Land Volt: When the voltage of the battery reach the voltage you set, the drone will
land.
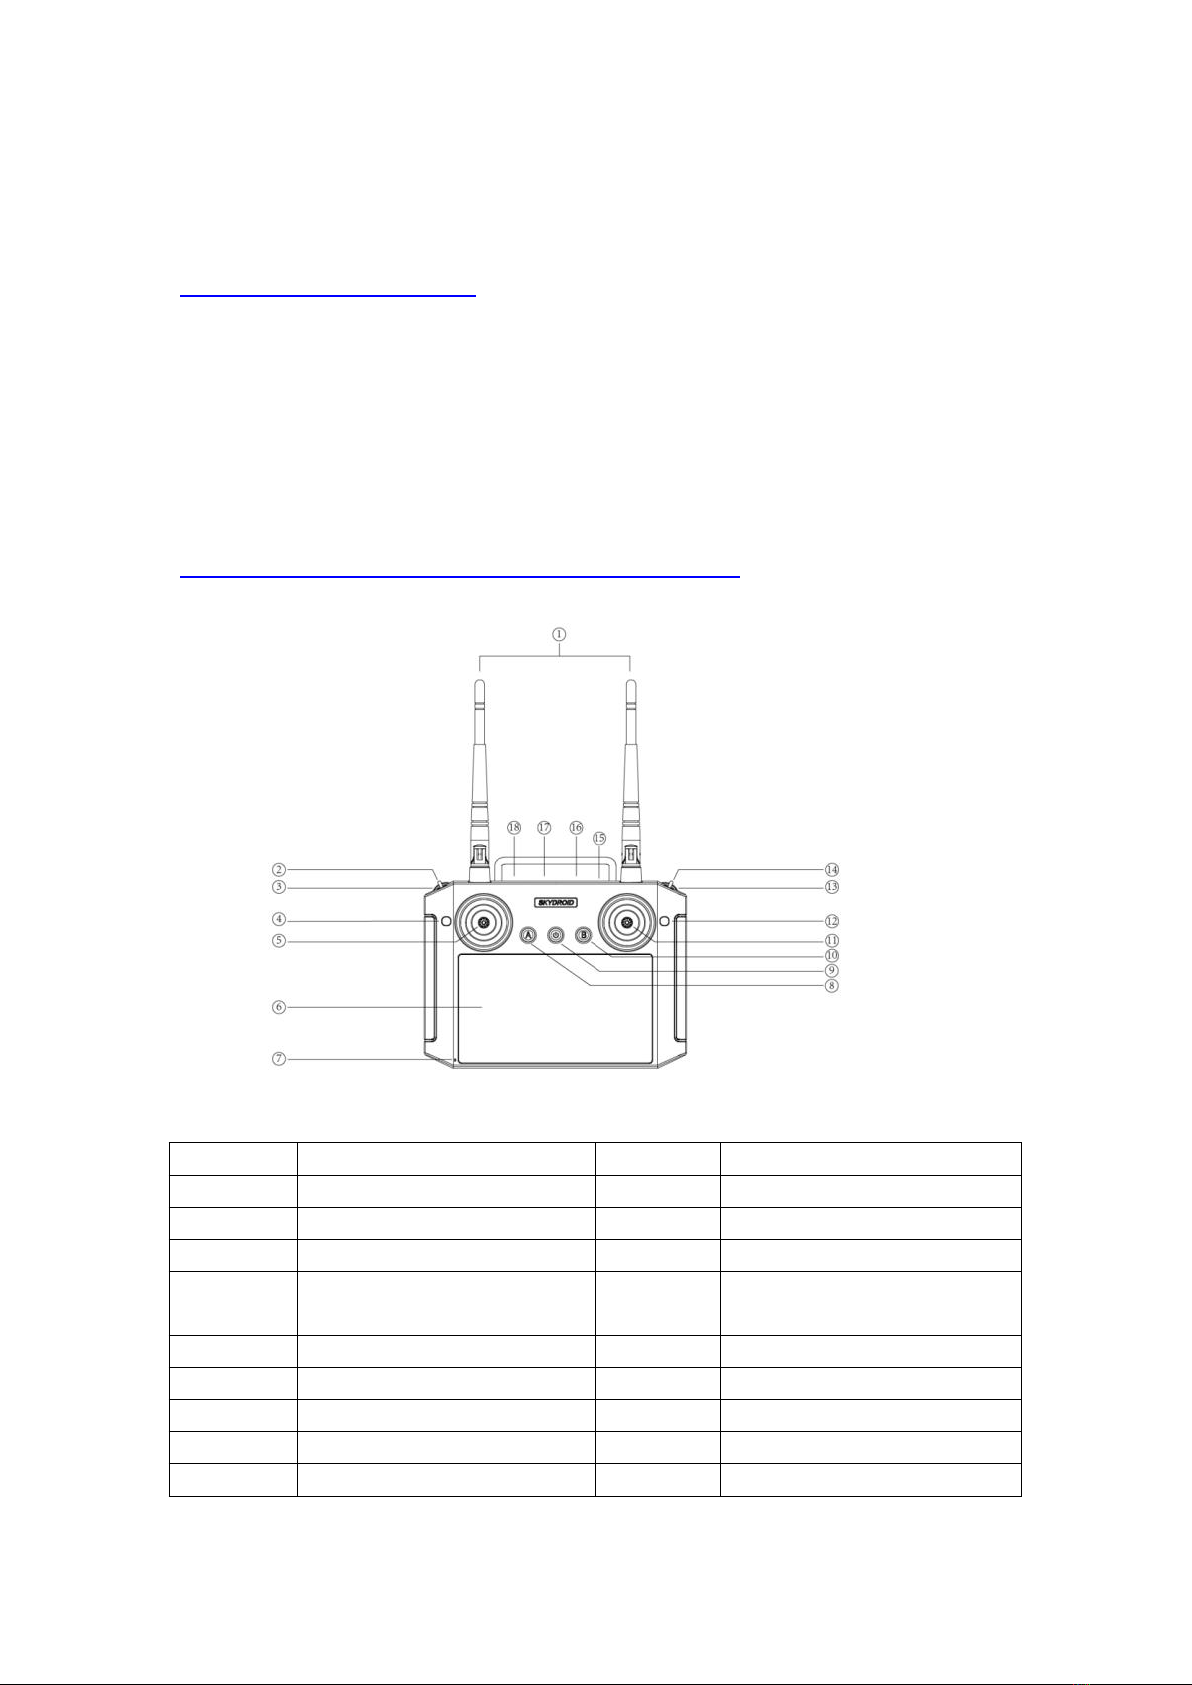
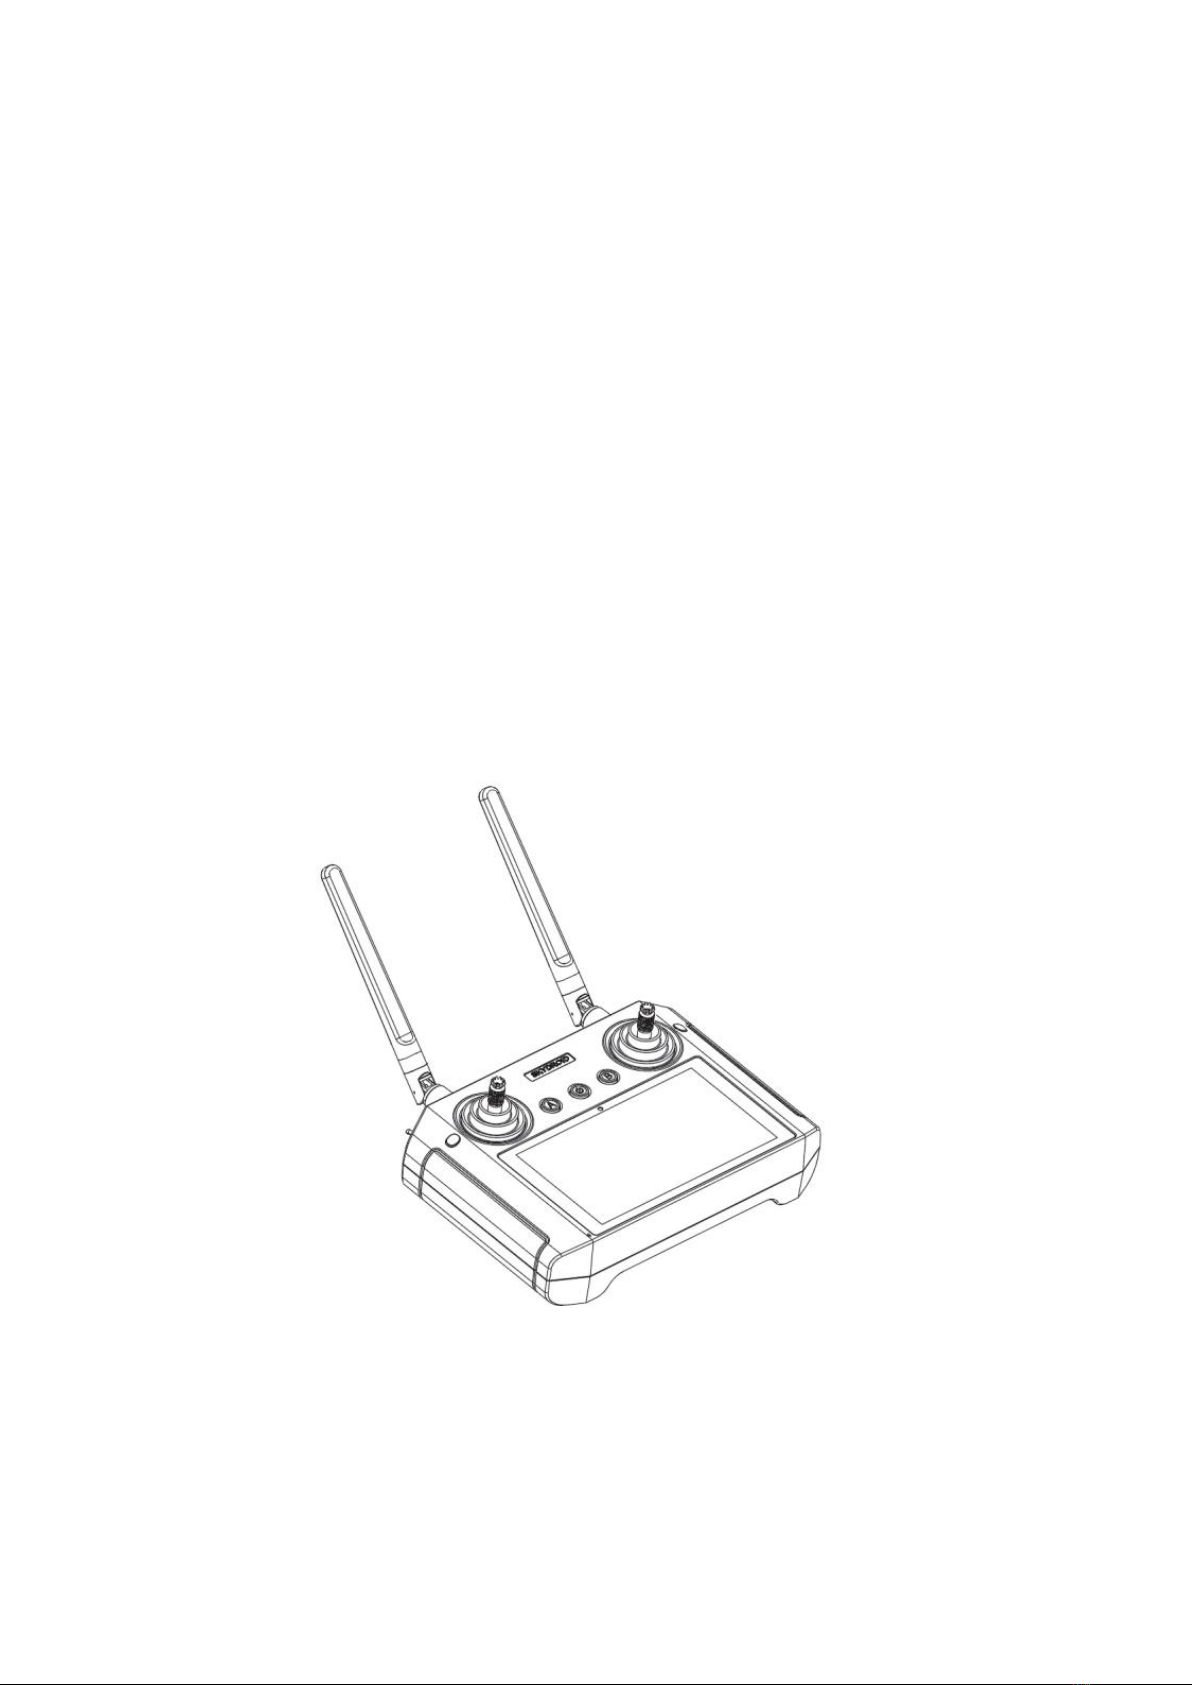
2. Please check the stick mode in the radio. Enter the “H12 Tool”--Stick
Mode--Choose the one you use. The default mode is Mode 2 (Left Hand Throttle)
USA--Mode 2 (Left Hand Throttle)
JPN--Mode 1 (Right Hand Throttle)
Attention Before Flight
1. DO Not fly in adverse weather conditions, such as rain, snowy, foggy and wind
speeds exceeding 33.5mph etc..
2. Select an open areas with no tall buildings to fly the drone
3. DO NOT flying over or near obstacles, crowds, high-voltage lines, trees and etc.
4. DO NOT fly in places with strong electromagnetic environment (such as base
stations or transmission towers) to avoid interference of the signal.
5. DO NOT fly in places restricted by relevant laws or regulations
6. Stay away from the rotating motors and propeller
Procedure to Fly
1. Preparation
1.1 Turn on the radio
1.2 Plug the battery to the drone
1.3 The radio will bind with the drone successfully
2. Compass Calibration
2.1 Enter the “Skydroid GSC” APP on the radio. The image from the camera will
appear on the left bottom side of the screen.
2.2 Enter Menu--Drone Settings (enter the password 999)--Compass Cal.--Begin
Calibration
2.3 Rotate the drone to every directions for multiple times
2.4 When you hear “Compass calibration is running”, this indicates you finish the
calibration.
https://www.youtube.com/watch?v=pqubHzTSzMM
3. Re-plug the battery to the drone again
4. Radio will bind with the drone, then please check whether there is satellites in the
Skydroid GSC, flight mode is right or not...
If everything is right, then we can begin to fly.
5. Long press the safety button on the GPS
6. Put the throttle stick to the lowest position, click the “Arm” on the radio, when all
the propellers rotate, you can release the throttle stick and control it.
* We do not suggest use auto-take off.
7. The default flight mode is Altitude hold mode, you can manual control it.
8. In GPS mode, if you do not do any operation on the throttle and rudder sticks, the
drone will hold at that position.
9. Switch to Return to home, the drone will fly to the take off point and land
automatically.
* If the take off place is not plain, we suggest you land manually.
Other Reference Videos:
1. Take Off and Return to Home
https://www.youtube.com/watch?v=vku5UI_N8cc&list=PLznJrCGq3g5Nc2BZpV56nd
KoUwyAj7Os3&index=2
2. Mission Plan/ Route Plan
2.1 https://www.youtube.com/watch?v=QHND7-lj8-4&list=PLznJrCGq3g5Nc2BZpV5
6ndKoUwyAj7Os3&index=4
2.2 https://www.youtube.com/watch?v=pnw99cyqu1I&list=PLznJrCGq3g5Nc2BZpV5
6ndKoUwyAj7Os3&index=5
2.3 https://www.youtube.com/watch?v=39St2uMjx7Q&list=PLznJrCGq3g5Nc2BZpV5
6ndKoUwyAj7Os3&index=6
3. Drop System Control
https://www.youtube.com/watch?v=kCRcKUfHvew&list=PLznJrCGq3g5Nc2BZpV56nd
KoUwyAj7Os3&index=
4. Camera Angle Control
https://www.youtube.com/watch?v=SV6N1GV3nXo&list=PLznJrCGq3g5Nc2BZpV56n
dKoUwyAj7Os3&index=13
FAQS
1. Does the ARRIS M900 has None fly zones?
We did not set any “none fly zones” in the flight controller. But we do not suggest
you to fly it in restricted areas.
2. Does the ARRIS M900 has GEO Fencing
We did not enable the GEO Fencing function on the ARRIS M900. If needed,
customer can set it according to your own needs.
3. How to turn on the LED on the 3in1 Camera?
Click the “Image/Video display” window, You could see a light icon on the right side,
click it, the LED will be on/off.
4. Radio could not bind with the drone
If you did not upgrade/downgrade the firmware of the radio and receiver, you can
short-circuit the Key mode and GND channel on the receiver, and then click the
matching to rebind it again.
5. What is the password for the radio?
The password is “999”.
6. Error “Pre-arm: Hardware safety switch”
This means you did not turn on the safety switch on the GPS. Long press it will turn
on it.
7. How to set the flight height of the drone for return?
Enter Menu--”General Settings”-”RTL--ALT”--Input the height--Save.

Other Arris Drone manuals

Arris G20 User manual

Arris

Arris G20 User manual

Arris X-Speed 250B Programming manual

Arris

Arris X-Speed 250B Programming manual

Arris X180 Programming manual

Arris

Arris X180 Programming manual

Arris RC 250 User manual

Arris

Arris RC 250 User manual

Popular Drone manuals by other brands

Autel Robotics Dragonfish Pro user manual

Autel Robotics

Autel Robotics Dragonfish Pro user manual

dji AGRAS T30 quick start guide

dji

dji AGRAS T30 quick start guide

KiwiQuards Drone Racing Starter Kit instruction manual

KiwiQuards

KiwiQuards Drone Racing Starter Kit instruction manual

REVELL HEXATRON user manual

REVELL

REVELL HEXATRON user manual

leptron Precision RDASS Flight manual

leptron

leptron Precision RDASS Flight manual

Amewi AMX51 Manual instruction

Amewi

Amewi AMX51 Manual instruction

SYMA LOG1628-R2 user manual

SYMA

SYMA LOG1628-R2 user manual

AEE TOPUK AP9 quick start guide

AEE

AEE TOPUK AP9 quick start guide

HELSEL DRONEPANG user manual

HELSEL

HELSEL DRONEPANG user manual

Contixo F19 instruction manual

Contixo

Contixo F19 instruction manual

YUNEEC H920 PLUS user manual

YUNEEC

YUNEEC H920 PLUS user manual

Walkera Runner 250 quick start guide

Walkera

Walkera Runner 250 quick start guide

Lucid Technologies C1 troubleshooting guide

Lucid Technologies

Lucid Technologies C1 troubleshooting guide

dji MINI 4 PRO user manual

dji

dji MINI 4 PRO user manual

Propel RC TILT Instruction booklet

Propel RC

Propel RC TILT Instruction booklet

Skydio 2 Operator's manual

Skydio

Skydio 2 Operator's manual

ProFlight PFBD303 user manual

ProFlight

ProFlight PFBD303 user manual

Alpha SPY DRONE instruction manual

Alpha

Alpha SPY DRONE instruction manual

manuals.online logo
manuals.online logoBrands
  • About & Mission
  • Contact us
  • Privacy Policy
  • Terms and Conditions

Copyright 2025 Manuals.Online. All Rights Reserved.