Kitchener 23245 User manual

Page 1 of 7
STAINLESS STEEL DEEP FRYER
OWNER’S MANUAL
ITEM# 23245

Page 2 of 7
Thank you very much for choosing a Kitchener™ product! For future reference, please
complete the owner’s record below:
Model: _______________ Purchase Date: _______________
Save the receipt, warranty and these instructions. It is important that you read the entire
manual to become familiar with this product before you begin using it.
This machine is designed for certain applications only. The distributor strongly recommends
this machine is not modified and/or used for any application other than that for which it was
designed. If you have any questions relative to a particular application, DO NOT use the
machine until you have first contacted the distributor to determine if it can or should be
performed on the product.
For technical questions and replacement parts, please call 1-800-222-5381.
Technical Specifications
Power Supply:
110 Volts AC, 60 Hz
Power:
1500 Watts
Oil Tank Capacity:
3.17 quarts (3L)
Overall Dimensions:
16 1/2in. x 10 in. x 9in.
POLARIZED PLUG
To reduce the risk of electric shock, this plug is intended to fit into a polarized outlet only in
one direction. If the plug does not fit fully into the outlet, reverse the plug. If it still does not fit,
contact a qualified electrician. Do not attempt to modify the plug in any way.
KNOW YOUR DEEP FRYER
1. Timer Control Knob –Turn the knob clockwise to ON position (after you set a desired
temperature). Rotate the knob to your desired temperature and set the timer to the proper
time as indicated in the particular recipe you are using. When the time you selected is
reached, all the indicators will turn off automatically.
2. Temperature Control Knob – Adjusts the thermostat to your desired temperature.
Please refer to the required temperature in the particular recipe you are using.
3. Indicator Light - Green light indicates that the power is on. Red light indicates the deep
fryer is heated and the set temperature has been reached. Note: You may need to
preheat the fryer for 10-15 minutes before frying foods.
4. Oil Tank – Is removable. Constructed of enameled and easy to clean.
5. Body – Constructed of stainless steel and easy to clean.
6. Basket Handle – Easily attaches to wire basket to lower food into the fryer and to also lift
out cooked food.
7. Basket – Can be hung on the edge of the deep fryer for food preparation before lowering
into the oil.
8. Control Box Assembly and Heating Element – These pieces are attached to each
other. When lifting out the control box, the heating element will come out also.

Page 3 of 7
PARTS & FEATURES
IMPORTANT SAFEGUARDS
When using electrical appliances, basic safety precautions should always be followed,
including the following:
Read all instructions before operating.
1. Do not touch hot surfaces. Use handles or knobs.
2. Remove all packaging plastics and other materials from unit before operating.
3. Wash all removable accessories before using for the first time.
4. To protect against electrical shock, do not immerse cord, plug or appliance itself in water
or other liquids.
5. Close supervision is necessary when appliance is used by or near children.
6. Unplug from outlet when not in use and before cleaning. Allow fryer to cool before putting
on or taking off parts.
Body Foot
Handle
Basket
Lid
Body
Body Handle
Heating Element
Timer Control Knob
Temperature
Control Knob
Oil Tank
Power Indicator
Temperature
Indicator

Page 4 of 7
7. Do not operate any appliance with a damaged cord or plug or after the appliance
malfunctions or has been damaged in any manner. Return the appliance to the nearest
authorized service facility for examination, repair or adjustment.
8. Do not use outdoors.
9. Do not let cord hang over edge of table or counter or touch hot surfaces.
10.Do not place on or near a hot gas or electric burner, or in a heated oven.
11.Always attach plug to appliance first, then plug cord into wall outlet. To disconnect, turn
any control to OFF position, then remove plug from wall outlet.
12.Oversized foods or metal utensils must not be inserted in the appliance as they may cause
a fire or risk of electrical shock.
13.A fire may occur if the appliance is covered or touching flammable material including
curtains, draperies, walls and the like when in operation.
14.Do not clean with metal scouring pads. Pieces can break off the pad and touch electrical
parts, involving a risk of electrical shock.
15.Extreme caution should be exercised when using containers constructed of other material
other than metal or glass.
16.Do not store any materials other than manufacturer's recommended accessories in this
unit when not in use.
17.Do not place any of the following materials in the unit: Paper, cardboard, plastic and the
like.
PREPARING YOUR FRYER
BEFORE USING FOR THE FIRST TIME:
Remove all printed documents and any other packaging materials.
Pull out all removable parts and wash gently with hot water.
Do not immerse the power cord and Control Box Assembly and Heating Element of the
deep fryer into any liquids.
Dry all parts thoroughly before assembling.
Do not operate the fryer without the proper amount of oil in the oil tank.
The Deep Fryer should always be placed on a flat surface where the power cord is out
of reach of children and away from accidentally tripping over it.
Tips:
When you fry several different kinds of food, always fry the food that uses the lowest
temperature setting first.
Do not mix different types of oil for frying.
Frying already pre-cooked foods may take less time to fry than completely raw food.
Replace the oil after each 10-15 uses; or earlier if the oil becomes brown and thick.
OPERATING INSTRUCTIONS
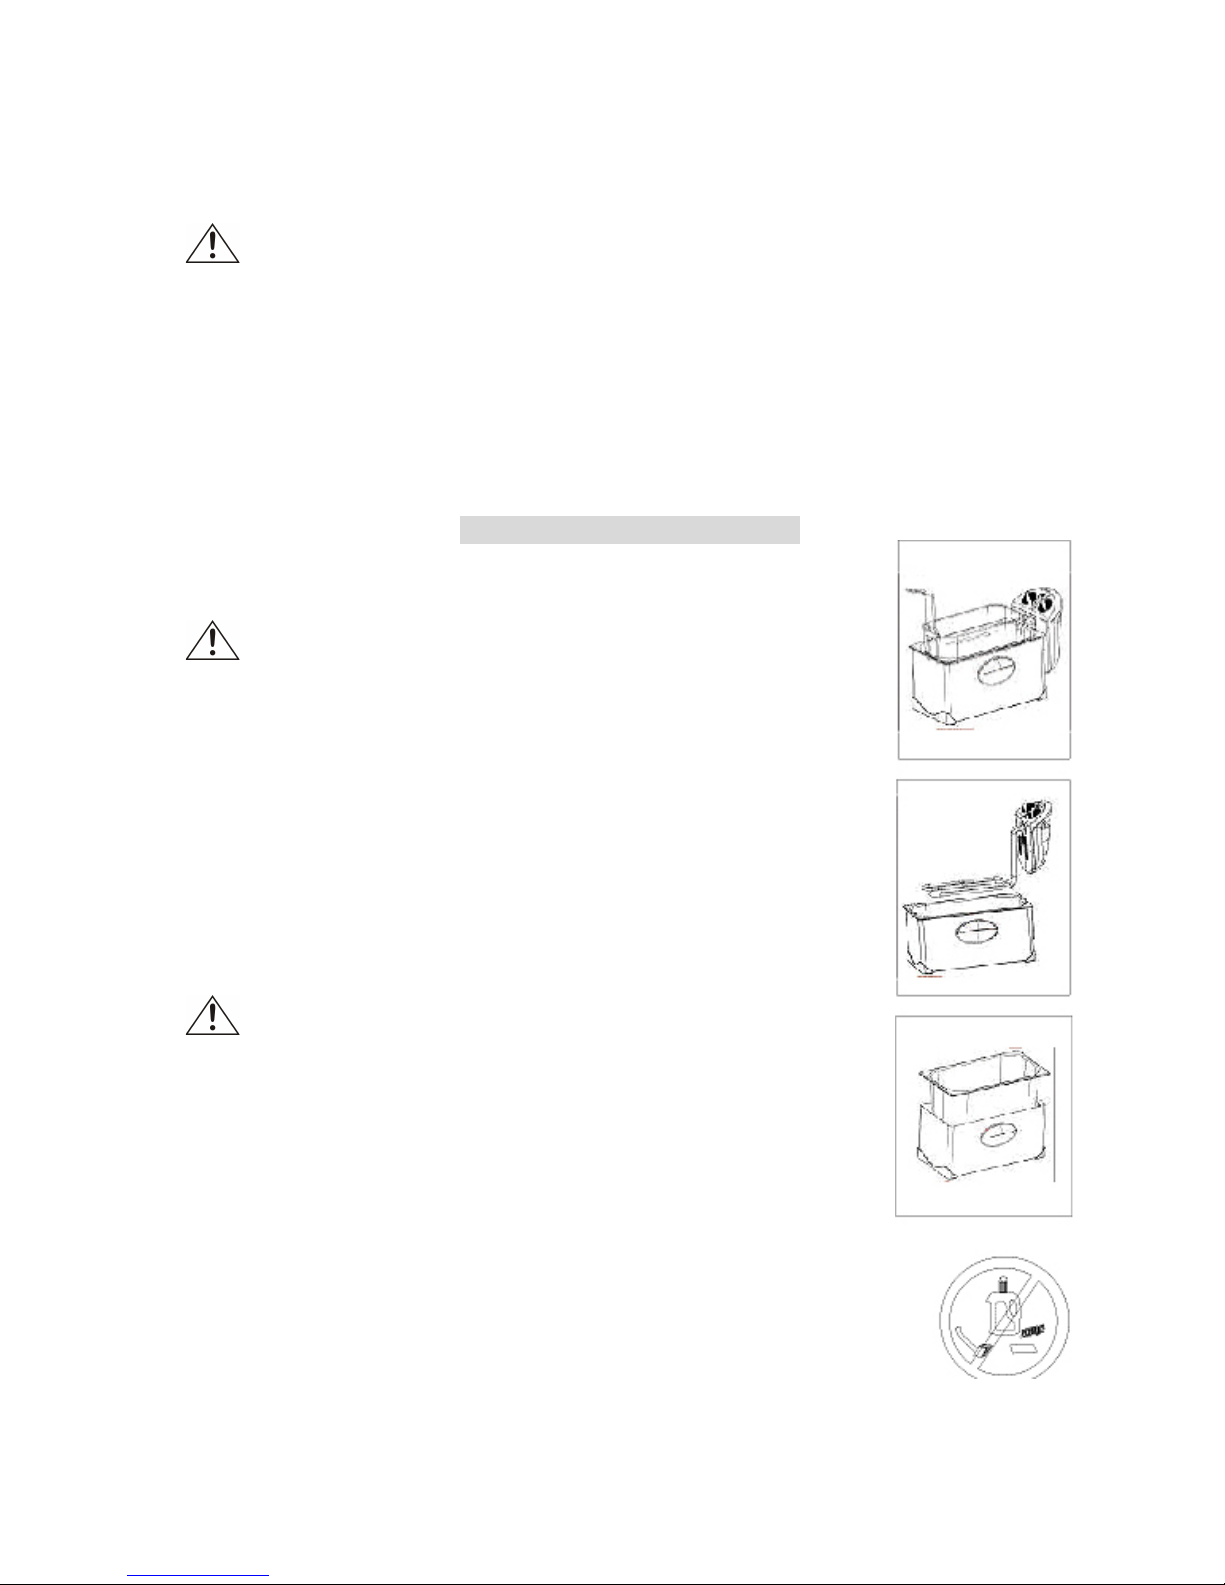
Make sure the Deep Fryer is UNPLUGGED.
Remove the frying basket and attach the handle to the clip.
Use only good quality frying oil such as peanut oil, vegetable oil, pure corn oil,
sunflower oil, canola oil, or light olive oil.
Fill oil in the oil tank approximately between the MIN marking and the MAX marking.

Page 5 of 7
Do not fill over the MAX marking or lower than the MIN marking.
Make sure the temperature control knob and the timer knob are set to the OFF position.
PLUG the power cord into an outlet when in use.
Move the Timer knob to ON position or to the desired time.
Adjust the temperature control knob to the desired temperature setting according to the
particular recipe you are using.
While the oil is preheating, prepare the food that is going to be fried.
When placing the food into the basket, make sure it is as dry as possible. Do not add
water, ice or wet food, it may cause HOT OIL SPLATTER.
When frying Frozen food, clear off any ice particles and thaw food thoroughly.
Do not overfill the basket.
When the temperature has been reached, the indicator light turns off.
Set the Timer Knob to desired time.
Lower basket of food into hot oil and cover fryer lid.
WARNING: DO NOT TOUCH THE CONTROL KNOBS WHEN THE FOOD IS
FRYING. HOT STEAM MAY BE ESCAPING AND CAUSE BODILY HARM.
Timer will sound when desired cooking time has been reached. The unit will shut off when
the Timer reaches the OFF position. Remove food after 60 seconds before food starts
soaking up too much oil.
If the Timer is set to the STAY ON setting, the fryer will remain ON and at the set
temperature. It will not automatically shut off.
During the frying process, the oil temperature may drop when adding new food to be fried,
the indicator will show red light, and if the desired temperature reached, the red light turns
off automatically.
FRYING GUIDE
The frying times given in the chart are only a guide and should be adjusted accordingly to the
quantity of food being fried.
FOOD
Temp. °F
Weight
(ounces)
Estimated Time
Shrimp
265°
9
3-5 minutes
Onion
285°
5.3
3-4 minutes
Mushrooms
285°
10.6
6-8 minutes
Fish Fillet
300°
9
5-6 minutes
Fish Fillet in batter
300°
14.1
6-8 minutes
Fish Cakes or Balls
300°
14.1
6-8 minutes
Sliced Meat
340°
14.1
7-10 minutes
Steak
340°
14.1
7-10 minutes
Chicken Strips
360°
17.6
7-10 minutes
French Fries (1st time)
375°
17.6
6-10 minutes
French Fries (2nd time)
375°
9
3-5 minutes
*French Fries being fried a 2nd time will be lighter and crispier.
AFTER THE FOOD IS FRIED:

Page 6 of 7
1. Make sure to turn the temperature control knob and Timer control knob to the OFF
position and unplug the deep fryer.
2. Once food is done cooking, remove the lid, and hang the basket on the hook and let
excessive oil drip into the oil pot.
WARNING: Removing the lid will release hot steam. Take extreme care
when handling. Keep face and bare skin clear of the steam release.
3. Take out the basket and place the food on paper towels to absorb excess oil.
Do not touch the basket while it is still hot. Always use the handle.
4. Transfer food to a clean dish without the paper towels.
5. Place the basket into the deep fryer.
6. Do not move the deep fryer until it is cooled entirely.
7. Unplug the power cord and store away.
CLEANING THE DEEP FRYER
1. Remove the lid and basket.
WARNING: Before cleaning the deep fryer, make sure
that it is disconnected from the power outlet, make sure the
unit and the oil has completely cooled. Oil retains its
temperature for a long period after use. Do not attempt to
carry or move the deep fryer while the oil is hot.
2. Wait for the fryer to cool, lift out the Control Box Assembly &
Heating element.
3. After removing the oil pot, the fryer can be divided into several
separate assemblies to clean.
4. The oil pot, the body and lid of the deep fryer can immerse into
water to clean.
5. The Control Box & Heating Element should be wiped clean with
absorbent power towels. Then use a damp cloth to clean.
WARNING: Do not immerse the Control Box & Heating
Element into water to clean.
6. Dry thoroughly all parts.
Note: Do not use abrasive scrubbing brushes or chemical
detergent to clean the unit.

Page 7 of 7
DIAGRAM & PARTS LIST
NO
DESCRIPTION
QTY
1
Body
1
2
Oil Tank
1
3
Basket
1
4
Handle
1
5
Control Box
1
6
Lid
1
For technical questions and replacement parts, please call 1-800-222-5381.
WARRANTY
One-year limited warranty
Distributed by
Northern Tool + Equipment Co., Inc.
Burnsville, MN 55306
NorthernTool.com
Made in China
1
2
3
6
5
4
Table of contents
Other Kitchener Fryer manuals
Popular Fryer manuals by other brands

Hamilton Beach
Hamilton Beach Sure-Crisp 31390 manual

Kalorik
Kalorik MAXX AFO 47631 SS manual

Tower Hobbies
Tower Hobbies XpressPro Combo T17076 user manual

Lotus
Lotus FT D-64ET X Series Instructions for installation and use

Broaster
Broaster 2400 Series Service manual

Nordcap
Nordcap ZANUSSI 2B5LT EF7 / 2B5LT user manual