CAUTION
• DO NOT IMMERSE IN WATER OR ANY OTHER LIQUID.
• DO NOT USE ABRASIVE CLEANERS ON ANY PART OF THIS APPLIANCE.
• DO NOT USE HARD BRUSHES, SCRATCH PADS, PETROL, ALCOHOL OR ANY ORGANIC CLEANERS.
CLEANING
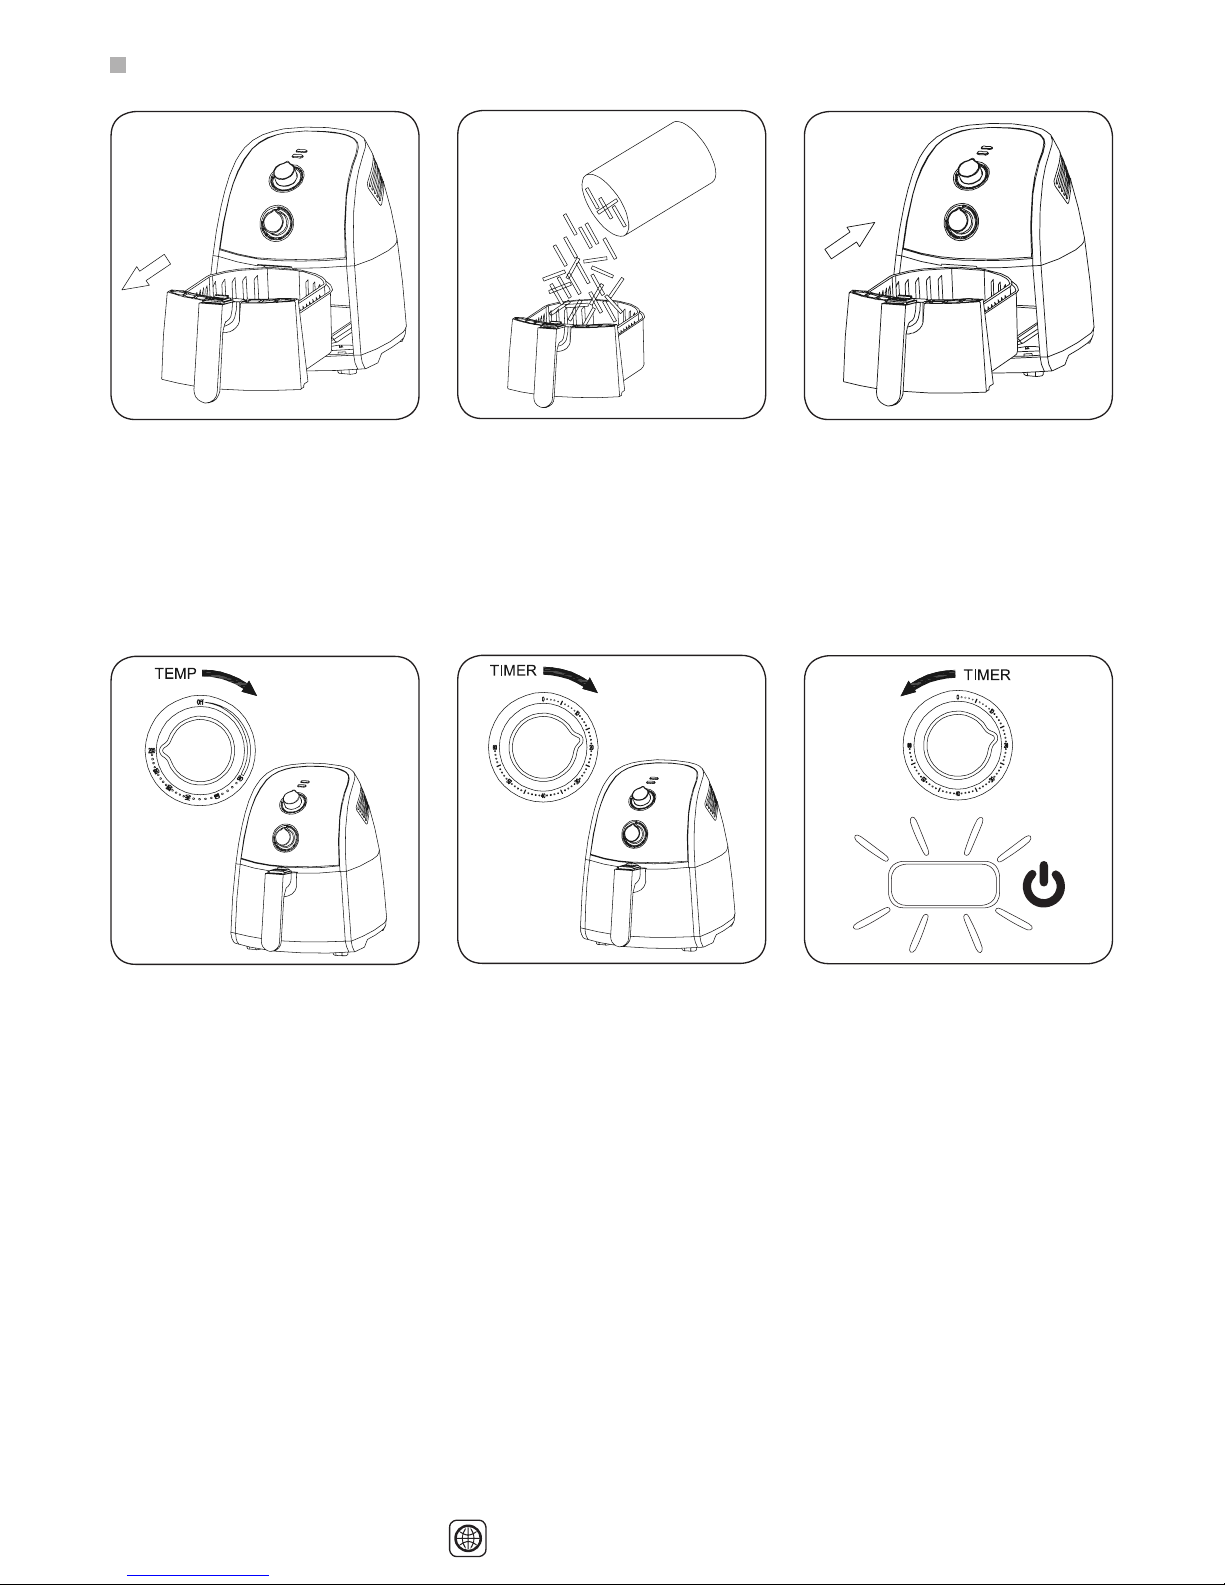
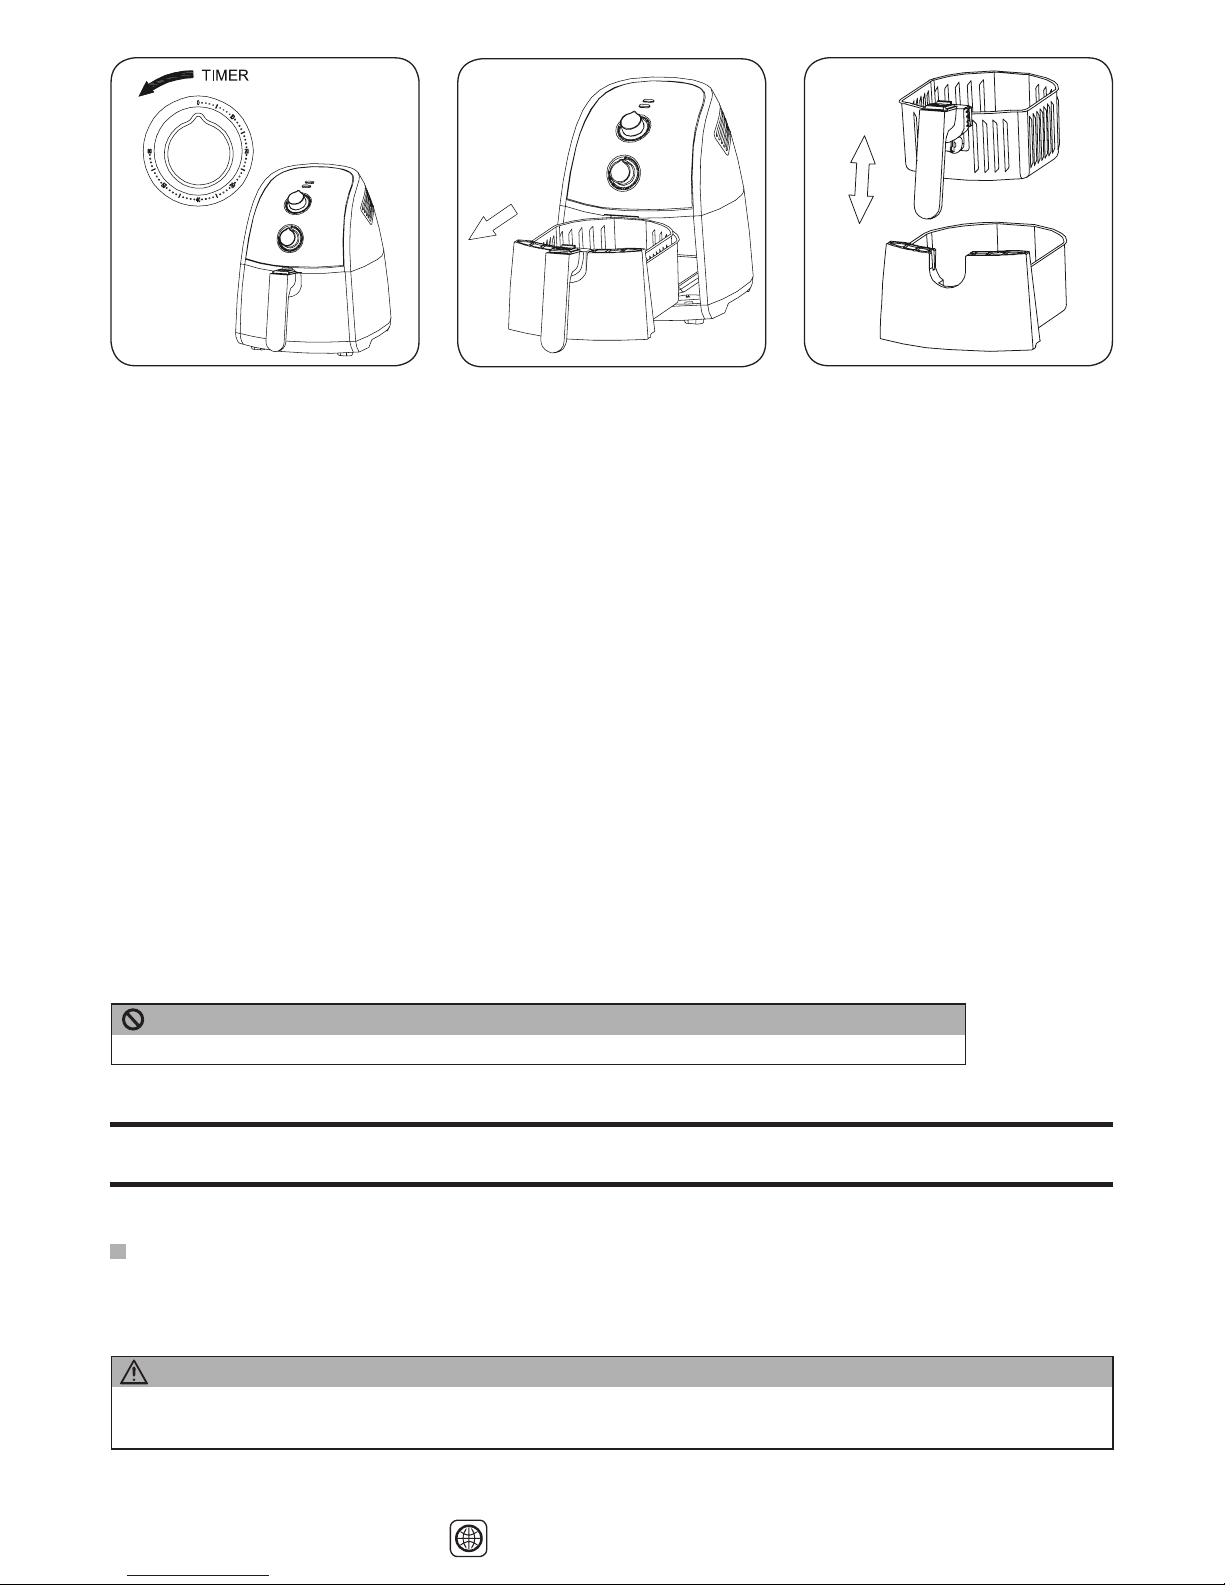
Remove the power cord from the mains supply and allow the appliance to cool down completely before
attempting to clean. Remove and separate the pan and the basket from the main hub of the airofryer™ and
clean the pan, basket and the inside of the airofryer™ using warm soapy water and a non abrasive cleaner.
TROUBLESHOOTING
Note: The basket is dishwasher-safe. Do not attempt to use any other components from the airofryer™ with
a dishwasher. The exterior surface of the appliance should be cleaned with a damp cloth only.
PROBLEM POSSIBLE CAUSE SOLUTION
The airofryer™ will not
operate.
The power cord is not
plugged in to a mains supply.
Plug the power cord into a suitable
220-240v~50Hz mains supply.
The timer has not been set. Turn the timer clockwise to operate the
airofryer™.
The pan has not been
inserted into the main hub of
the airofryer™ correctly.
Insert the pan into the main hub of the
airofryer™, ensuring that it clicks securely
into place.
The over-heat protection is
operational.
Use a slim, pointed object to press the
RESET button on the base of the airofryer™.
Food isn’t cooking
thoroughly.
The portion of food within the
basket is too large.
Insert smaller portions into the basket.
Smaller portions will cook more evenly and
effectively.
The set temperature is too
low.
Ensure that the temperature control dial is
set to the correct temperature required for
the food you are trying to cook. It may be
benecial to preheat the airofryer™ before
cooking.
The cooking time has not
been set to a sufcient length
of time.
Turn the timer clockwise to increase the
length of time required for a more thorough
cook.
Food within the pan hasn’t
been shaken mid way
through the cooking cycle.
Some foods require the user to shake the
food within the pan mid way through a cook
cycle, to re-distribute the food evenly around
the pan. Remove the pan and the basket
from the main hub of the airofryer™ and
carefully shake the pan before inserting it
back into the airofryer™.
Fried Snacks are not
crispy when cooking has
nished.
Some types of snacks a
meant to be cooked in a
traditional deep fryer.
Lightly brush a small amount of cooking onto
the food for a crispier result.